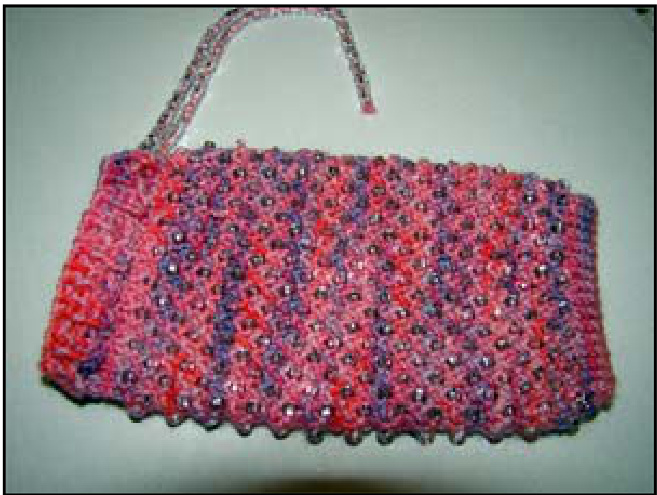
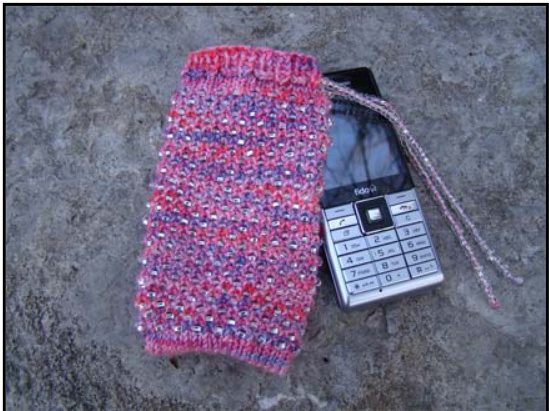
Beaded and Lined Cell Phone Cozy
Quick and easy cell phone cozy that is knit in the round from the bottom up. It can be knit on two circular needles, or one long circular needle (magic loop method). Use beads and lining of your choice. Cast on fewer or more stitches to customize the fit. Stitches must be divisible by two.
Size:
To fit a cell phone 4.3in x 2.4in x 0.6in (11cm x 6cm x 1.5cm).
Abbreviations:
CO = cast on K = knit P = purl PM = place a marker sts = stitches Y/O = yarn over K2tog = knit two together BO =bind off SB = slip bead (move a bead towards the right knitting needle tip. Hold it in place with your thumb or finger, and purl the stitch. Make certain that the bead is on the right side of the knitting)
Materials:
Koigu KPPPM (100% Merino Wool) 15g (or any other fingering weight yarn) One 40in (100cm) 2.5mm circular needle, or two 24in (60cm) circular needles StitchMarker Czech Pony Crystal Beads - Size 6 - 40g (about 600) Sewing Needle & thread 2.5mm Crochet Hook Fabric for lining - 8in x 5.5in (20cm x 14cm)
Stringing Beads
Thread about 600 beads onto your working yarn - thread a thin sewing needle with cotton and tie the two ends together. Then slip the working end of the yarn through the cotton loop and pull about 12ins (30cm) through. Now push the needle through the center of each bead and slide it down the yarn until all beads are used up. Now slide all the beads in batches about 3 or 4 yards (3 or 4 meters) from the working end of the yarn. Remove the sewing needle and we're ready to begin.
Directions
CO 38 sts using Judy's Magic Cast On. If you are unfamiliar with this method of casting on, there's a great YouTube video by Cat Bordhi at: http://www.youtube.com/watch?v=IhBISoAhhQY Rows 1-5: Knit (stockinette stitch). Row 6: \*K1, SB and P1\* repeat for the round. Row 7: Knit. Row 8: \*SB and P1, K1\* repeat for the round. Row 9: Knit. Rows 6 - 9 form the pattern. Every even row is a beaded row. Every odd row is a knit row. Repeat rows 6 to 9 until desired length (about 51-53 rows). (f you increase the number of rows, you may need more beads). The cozy is now finished off without beads as follows: Next 4 rows: K every stitch. Next row: (eyelet round) \*K2tog, Y/O\* around. Next3 rows: Rib (K1, P1) around. BO in rib.
Beaded Cord
The cord requires 1o0 beads. To make the cord, tie a knot in the end of the working yarn. Trim the yarn to within 1/4in (6mm) of the knot. Slide 50 beads towards the knot. Tie another knot right up close to the last bead. Using the 2.5mm crochet hook, crochet a single chain that is 32 sts long. The first stitch is a little tricky - make a loop over the crochet hook and pull the yarn through, thus making the first stitch. After single chaining 32 sts, spread open that last crochet loop so that you can thread the beaded end through it to tie a knot. Now slip the remaining 50 beads up to that knot, and tie the last knot right up close to the last bead. Trim the yarn to within 1/4in (6mm) of the last bead.
Lining
The use of a sewing machine will definitely speed up the lining making process, but if you don't have access to one, you can sew it by hand - it's a very small project.
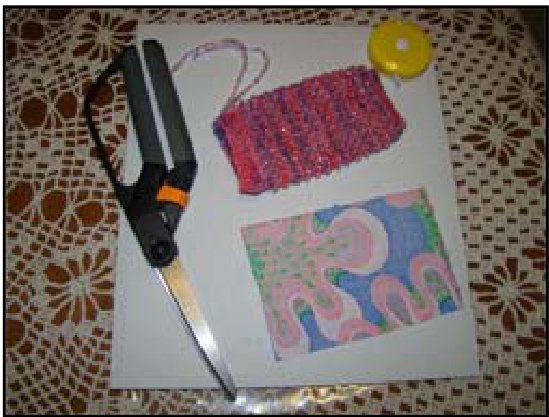
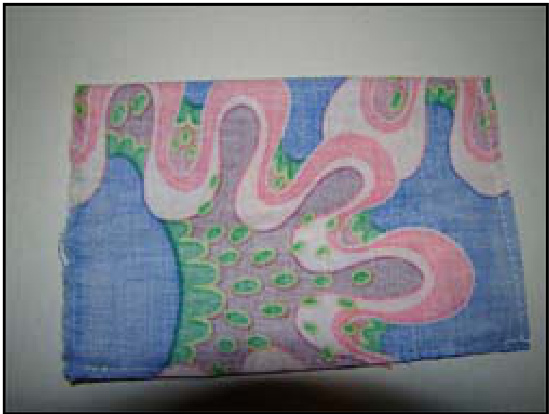
Lay the cozy flat on a table and measure the width and length of it. Add 3cm to both dimensions. Fold your lining fabric in half with the right sides together. Crease the fold with your finger. Now cut the fabric according to your measurements (e.g. my cozy was 10.5cm long and 6.5cm wide, so I added 3cm to both dimensions and cut my fabric 13.5cm x 9.5cm). Now stitch the fabric piece across the bottom and along the open sides - making a pouch. Leave the top open. Trim the seams to 1/4in or 6mm).
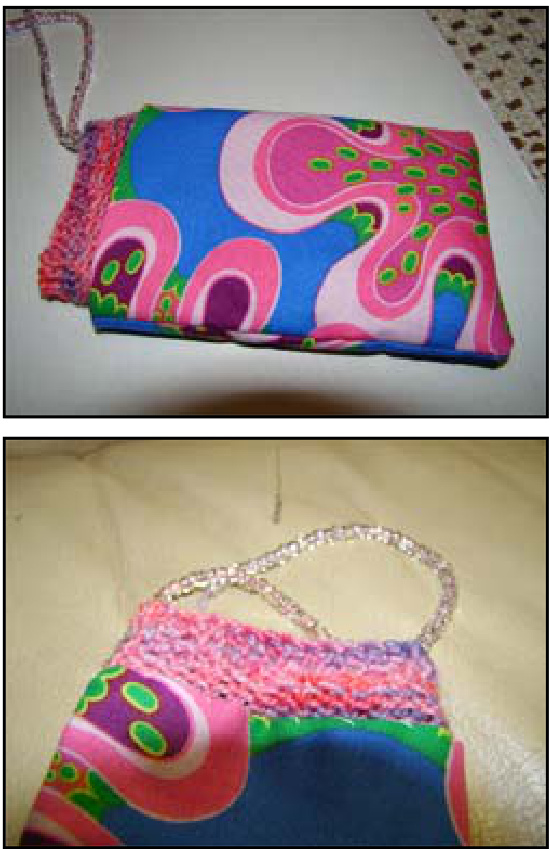
Turn the pouch inside out, so that the seams are on the inside. Slip the beaded cozy into the pouch. The fabric liner should fit with some ease - if it's too big, it'll be hard to stitch it to the cozy - if it's too small, you'll have to make another one. Now fold the raw edges at the top of the pouch to the inside 1/4in (6mm) seam. Crease with fingernail. Using a needle and thread, hand sew the lining to the cozy using tiny stitches. The seam should be just under the eyelet row. Be careful not to make the stitches too tight or too big, otherwise they'll be visible on the right side. Now turn the cell phone cozy with the right side out. Lastly, thread the beaded cord through the eyelets!