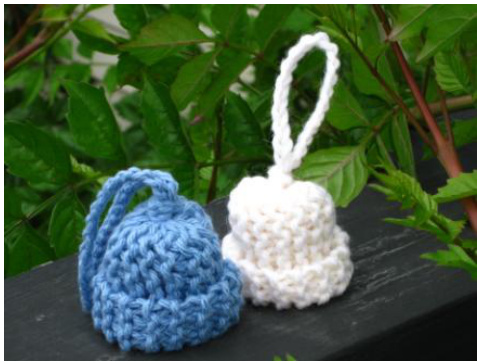
Little Bells - A Beqinner Knit pattern
By Karen Gilbank Supplies: Worsted weight yarn - about 20 meters, 5mm needles, a blunt end sewing needle, and a little jingle bell for each bell.
To Begin:
Cast on 10 stitches. Knit every row until you have 15 ridges. Every ridge is 2 rows of knitting. You will have a total of 30 rows of Knitting. You can keep count here:
1 2 3 4 5 6 7 8 9 10 11 12 13 14 15 16 17 18 19 20 2122 23 242526 27282930
Cast off all stitches, leaving a long tail about 12 inches and break yarn off. Thread yarn tail onto needle and use to sew up the cast on and cast off edges. You will have a tube shape. See Photo 2
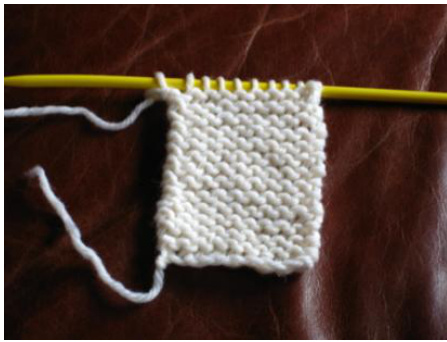
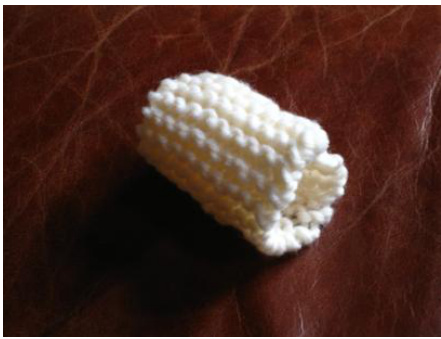
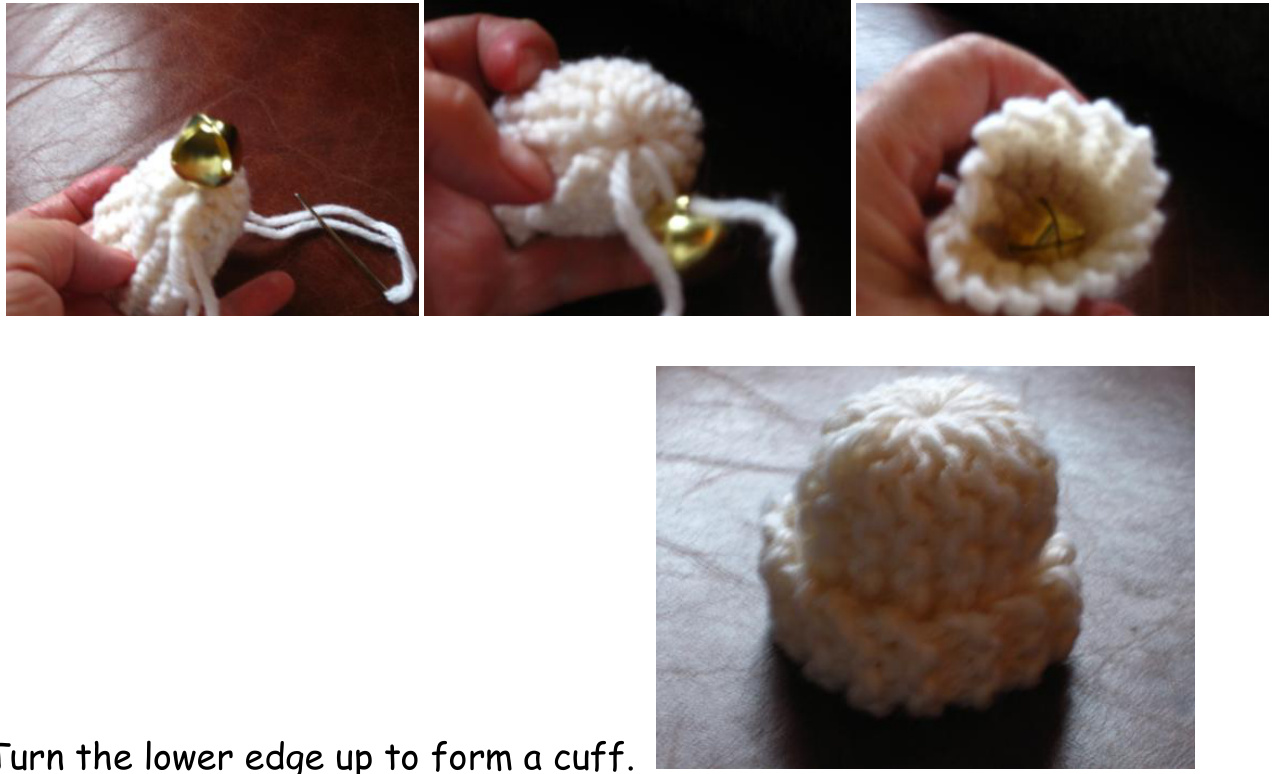
Photo 1 Photo 2 Knot yarn tail, then use same yarn tail to sew up the end of the tube. To do this you simple run the needle through the bumps at one end of the tube and draw the yarn through, and pull up tight. See Photos 3 and 4
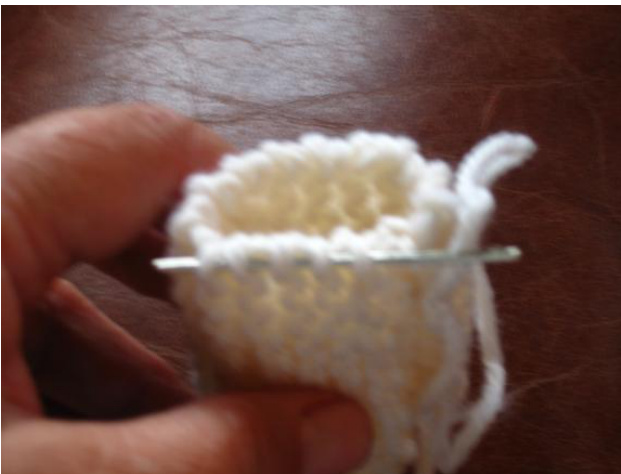
Photo 3
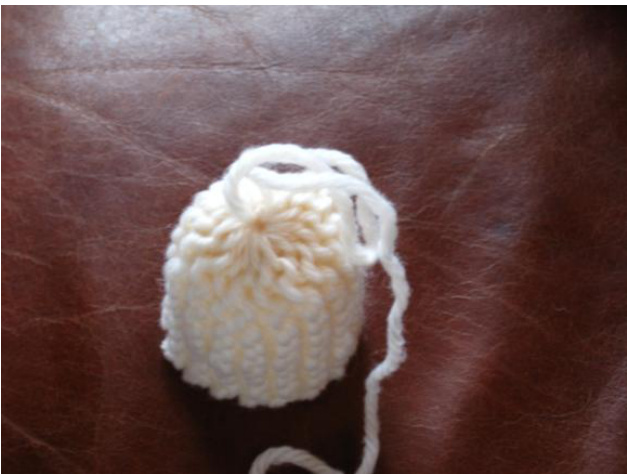
Photo 4 Knot yarn and then use the same yarn tail to sew on the jingle bell. Knot yarn securely, and hide yarn end in side, and cut off this yarn tail. Sew the other yarn tail from the cast on to the side of the bell and cut off the yarn tail. Turn the little bell inside out.
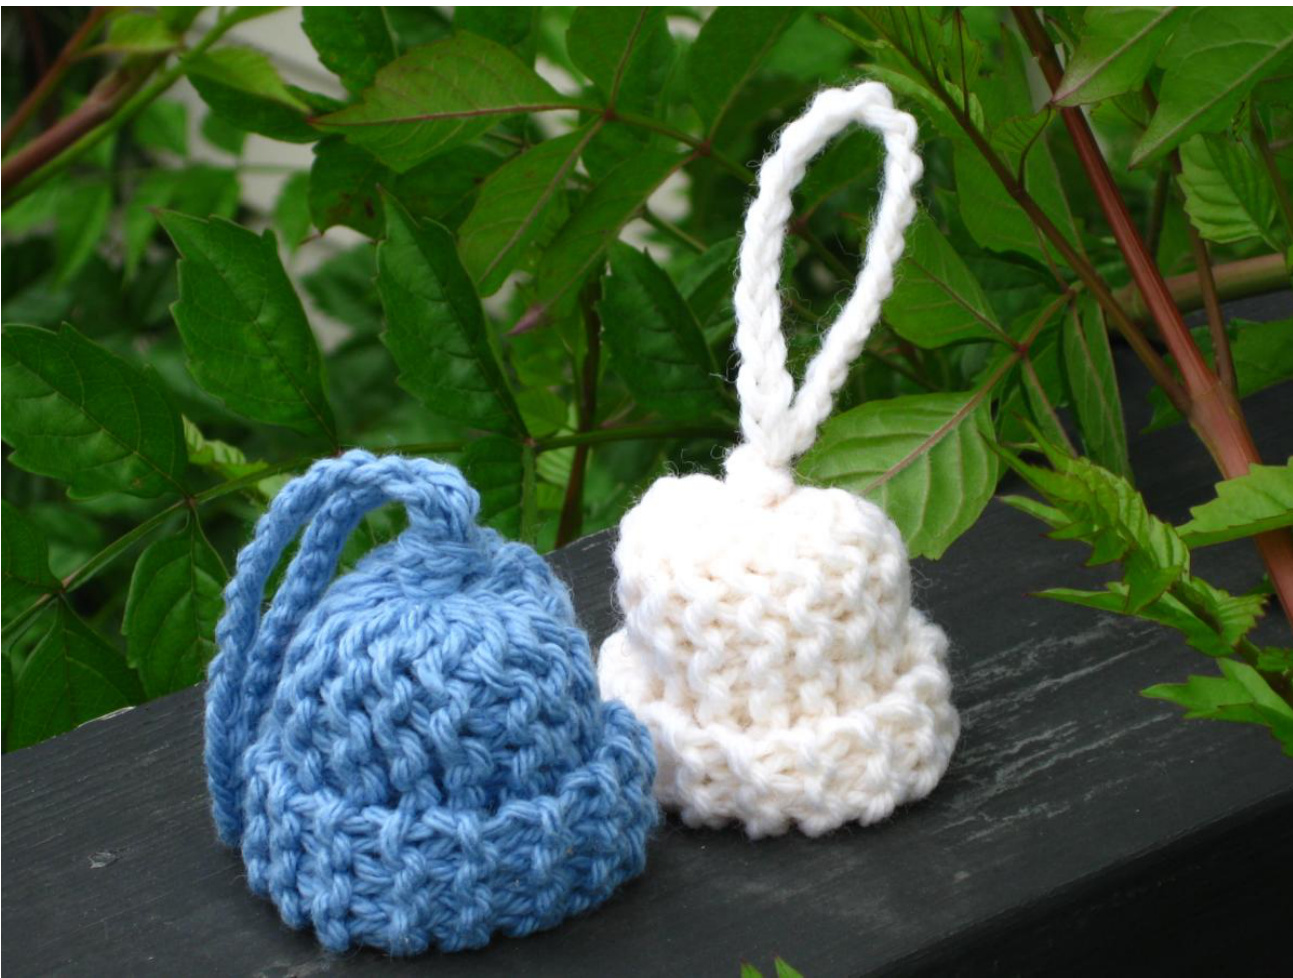
Now you can use ribbon, or make a braid, or crochet a chain to make the bell loop. Make sure you leave long tail ends to sew your loop on to bell. Pull the bell hanger down into the top of the bell and secure and knot to the inside of the bell. Trim ends. Then tie an over hand knot with the hanger, so that the knot lies right on top of the bell. Enjoy ringing your bell, and make more! You can embellish your little bell with ribbon, sequins, buttons, beads, artificial flowers, and leaves. Use them to hang on your tree, make garlands, or attach to your zipper. This pattern has a copyright. You have my permission to make and sell little bells to your heart's content. But please do not publish and sell this pattern, nor distribute it as your own. You are free to copy and distribute this pattern for free, for use in knitting classes and children's groups etc.
Karen Gilbank can be found on Ravelry under Kareyknits


