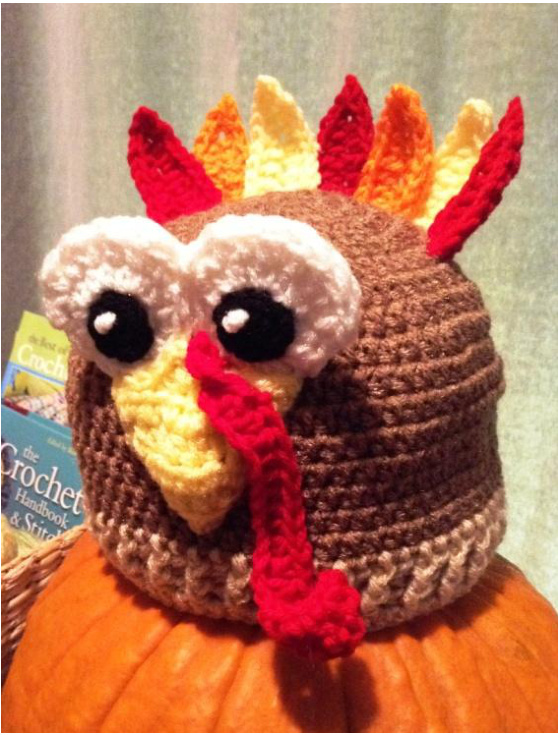
Tomas Turkey Beanie
By Karen Vaughn This is a fun beanie to wear for anyone that loves the Thanksgiving holiday. Yes, there are those that love Turkey Day as much as others love Christmas or Halloween. This hat is made in honor of a friend who is just such a person! I recommend an Advanced Beginner level for making this beanie. You should understand how to add elements after the basic beanie is completed and you should be able to do the Front Post and Back Post Double Crochet. This pattern should be easy for the Advanced Crocheter.
PATTERN
Materials:
· Red Heart yarn in Brown, Tan, Yellow, Red, Orange, Black and White · Size I/5.5MM crochet hook · Scissors Yarn Needle for weaving in ends and making Eye Highlights
Stitches Used (American terminology):
Single Crochet (SC) Half Double Crochet (HDC) Double Crochet (DC) Treble Crochet (TC) Front Post Double Crochet (FPDC) Back Post Double Crochet (BPDC) Slip Stitch (SI St) Magic Circle starting technique (video instructions: http://www.youtube.com/watch?v=WLuSVyKvoUg) Size: Adult. Use a larger hook to make the hat larger or conversely, a smaller hook for a smaller size.
BEANIE
: “Join, Chain 2 and turn"at the end of each Row unless otherwise stated WithBrown Row 1. Chain 2, 8 hdc in second ch from hook. Row 2. 2 hdc in each stitch around. Row 3. \*Hdc in first stitch, 2 hdc in next stitch; rep from \* around. Row 4. \*Hdc in first 2 stitches, 2 hdc in next stitch; rep from \* around. Row 5. \* Hdc in first 3 stitches, 2 hdc in next stitch; rep from \* around. Row 6. \*Hdc in first 4 stitches, 2 hdc in next stitch; rep from \* around. Row 7. \*Hdc in first 5 stitches, 2 hdc in next stitch; rep from \* around. Row 8. \*Hdc in first 6 stitches, 2 hdc in next stitch; rep from \* around. Row 9. Hdc in ea stitch around. Row 10-16. Rep row 9. WithTan Row 17. HDC in each stitch around. Ch 3 and turn. (The next two rows use FP and BPDC stitches. For the Front and Back post Double Crochet stitches, you need an EVEN number of stitches to work with.) Row 18. FPDC in next stitch, BPDC in next; repeat around. Join to top of first DC. Ch 3 and turn. Row 19. Repeat Row 18, except Ch 2 and turn. Row 20. HDC in each stitch around. Join. Tie off and weave in ends. Beanie is finished!
FACE
Eyes: Make 4 (Use 2 now and the last 2 at the \*) WithWhite Row 1. Magic Circle, 8 HDC in circle. Draw tight and secure. Join. Ch 2 and turn. Row 2. 2 HDC in each stitch around. Join. Ch 2 and turn. Row 3. Hdc in first stitch, 2 hdc in next stitch; Repeat 3 times for a total of 9 stitches. Sl St in next stitch. Tie off. Pupils: Make 2 (You can use large black buttons if you prefer) WithBlack Magic Circle, 8 HDC in circle. Join. Draw tight and secure. Tie off Attach Black pupil to White Eye. Using approximately 12" of white, make the highlights on the pupils. Weave in to hide tails.
Beak
WithYellow Row 1. Chain 3, 2 HDC in second chain from hook. Ch 2 and turn. Row 2. 2 HDC in first stitch, HDC in next, 2 HDC in last stitch. Ch 2 and turn. Row 3. 2 HDC in first stitch, HDC in next 3 stitches, 2 HDC in last stitch. Ch 2 and turn. Row 4. 2 HDC in first stitch, HDC in next 5 stitches, 2 HDC in last stitch. Ch 2 and turn. Row 5. HDC in each stitch across. Ch 1 and turn. Row 6. SI St in next 2 stitches, SC in next stitch, HDC in next stitch, DC in next stitch, HDC in next stitch, SC in next stitch, Sl St in last 2 stitches. Tie off. Using the DC stitch in Row 6 as a marking point, attach the eyes to the beak. (See Image 1) Place it so that the top of the DC stitch is between the eyes. Attach beak to the beanie with the bottom point of the beak resting on the top of Row 16 of the hat. Again, using the DC stitch in Row 6 of the beak as a marking point, stitch the beak so that there is a small hump that rests between the eyes. (See Image 2) Here you can decide to continue attaching the eyes flat to the beanie or you can leave the eyes loose and make the face stand out like a 3-D image. \*To make the eyes stand; use the remaining 2 white parts of the eyes and sew them to the back of the eyes already attached. There will be 4 or 5 stitches that need to be attached to the beanie itself instead of to the back of the already existing eye. (See Images 3 - 4) WithRed Ch25 HDC in second ch from hook. DC in next stitch. TC in next 4 stitches, DC in next stitch, HDC across remaining stitches. Tie off. Attach Waddle to the beak between the eyes as shown in enclosed images Tail Feathers (Make 5 - 9: this beanie uses 7) Using Red, Yellow and Orange (or any color combination of your choice) Chain9 Row 1. SI St in second ch from hook, SC in next stitch, HDC in next 2 stitches, DC in next 4 stitches. Ch 1. Sl St across the side of last DC made to the beginning ch stitch. (See Image 4) Row 2. Working on the opposite side of the ch; Ch 3, DC in same and in next 3 stitches, HDC in next 2 stitches, SC in next stitch, Sl St in next stitch, ch 1. Tie off. Attach tail feathers on the back side of the beanie between Rows 5 and 6. Overlapping as shown in Image 6 will allow for additional dimension on the back of the beanie. Weave in ALL ends and secure. Now you're the proud owner of one fantastic turkey! Thank you for choosing my pattern! I own this pattern in its entirety and you DO NOT have permission to reproduce this pattern in whole or in part on any website, blog or internet avenue. You DO NOT have permission to print this pattern for resale or free distribution in whole or in part in any format. My permission is granted ONLYfor SELLING of and PERSONAL USE of the COMPLETED WORKS from this pattern. Please include a link to my Facebook page if you sell the completed itemonline. You can find more FREE patterns on my blog HERE. You can also follow me on Twitter and Instagram. Peace and blessings, \~\~Karen\~\~
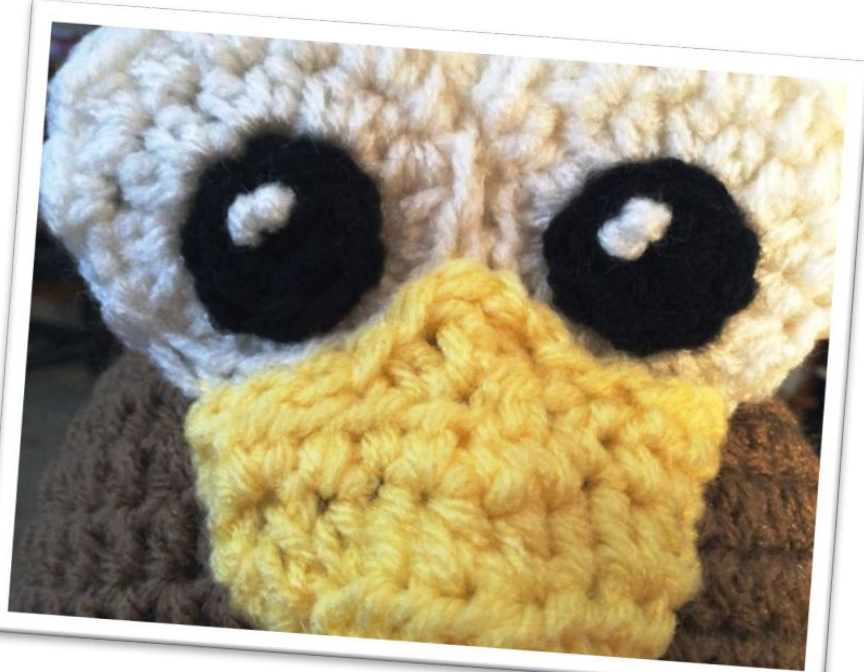
Image 1: Placement of Eyes to Beak
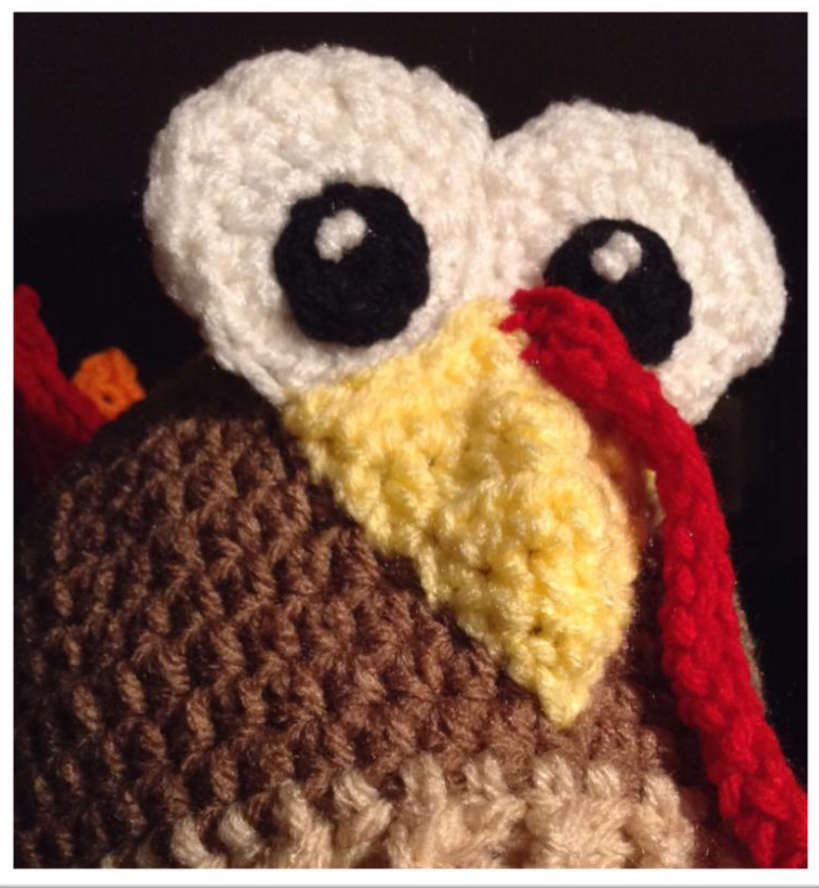
Image 2: Hump in the Beak after attaching to beanie
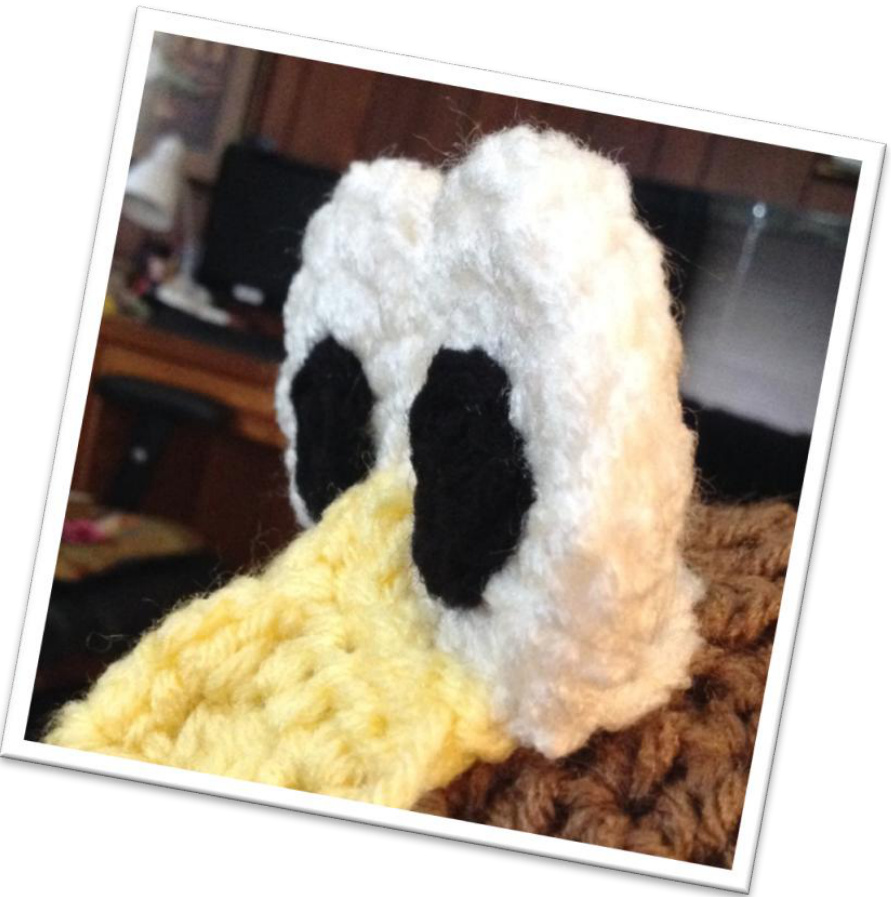
Image 3: Eyes standing
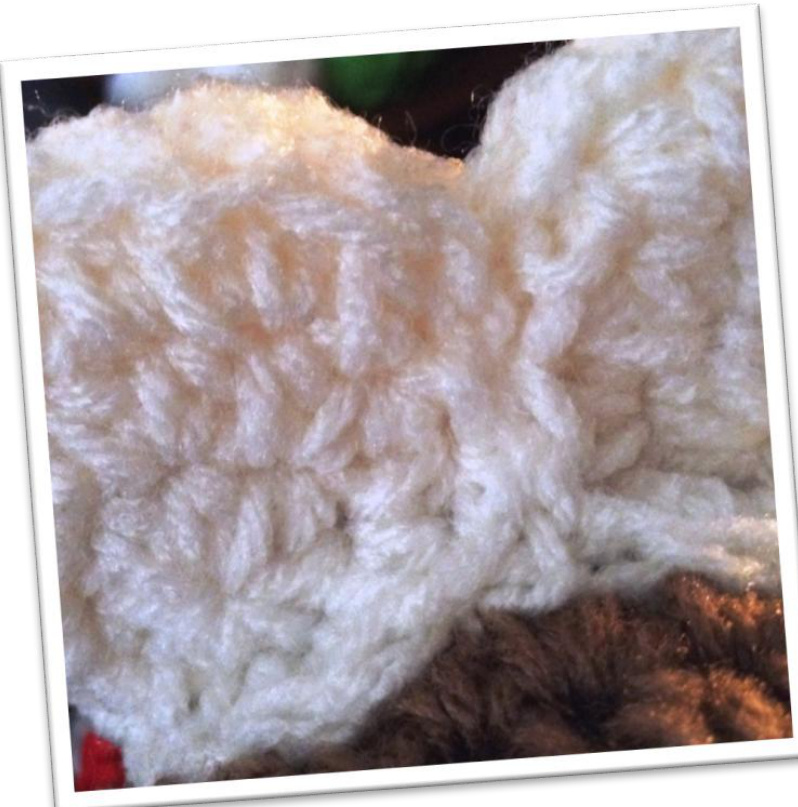
Image 4: Back of eyes secured to beanie
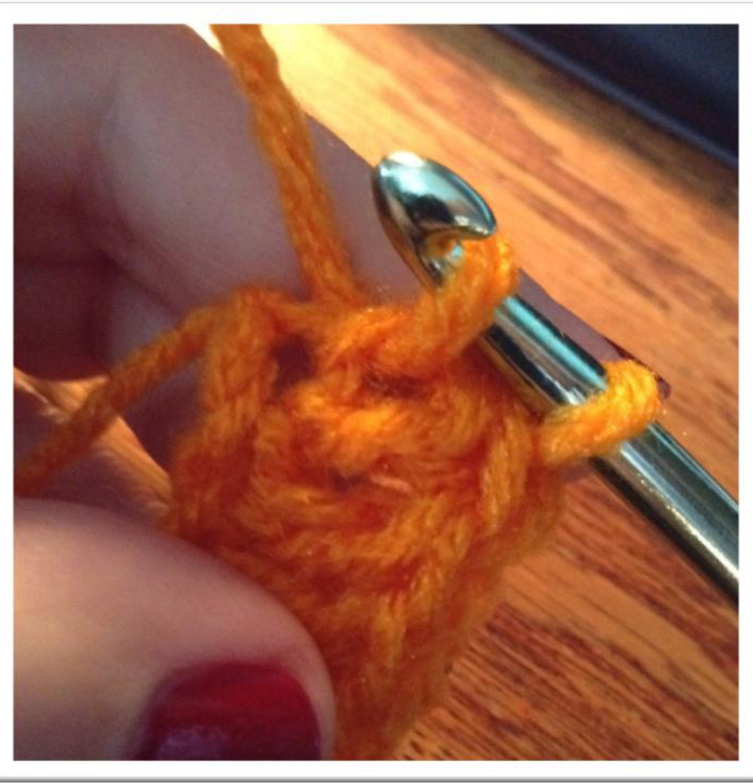
Image 5: Slip Stitching across the side of a Double Crochet
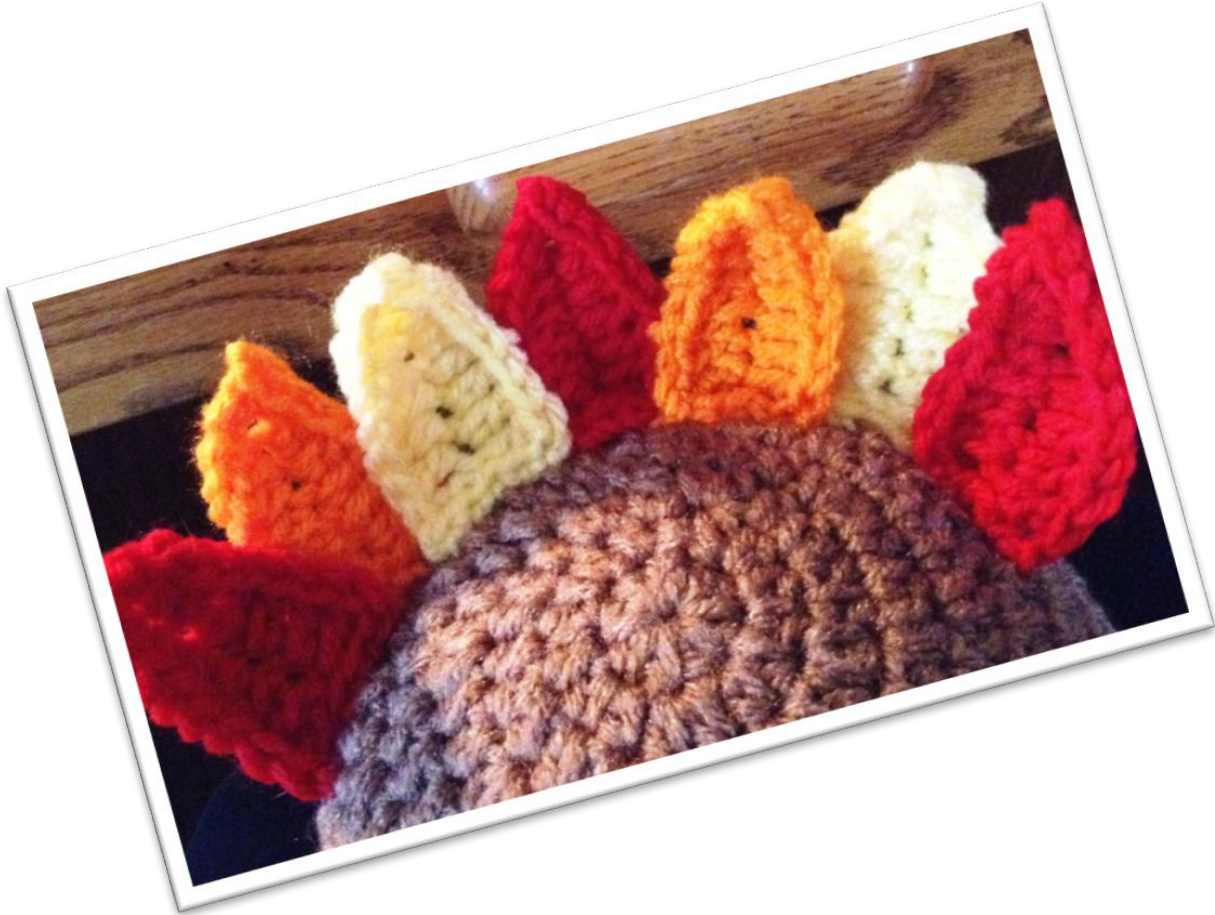
Image 6: Overlapping Tail Feathers attached to back of beanie


