Pianissimo Keyboard Socks
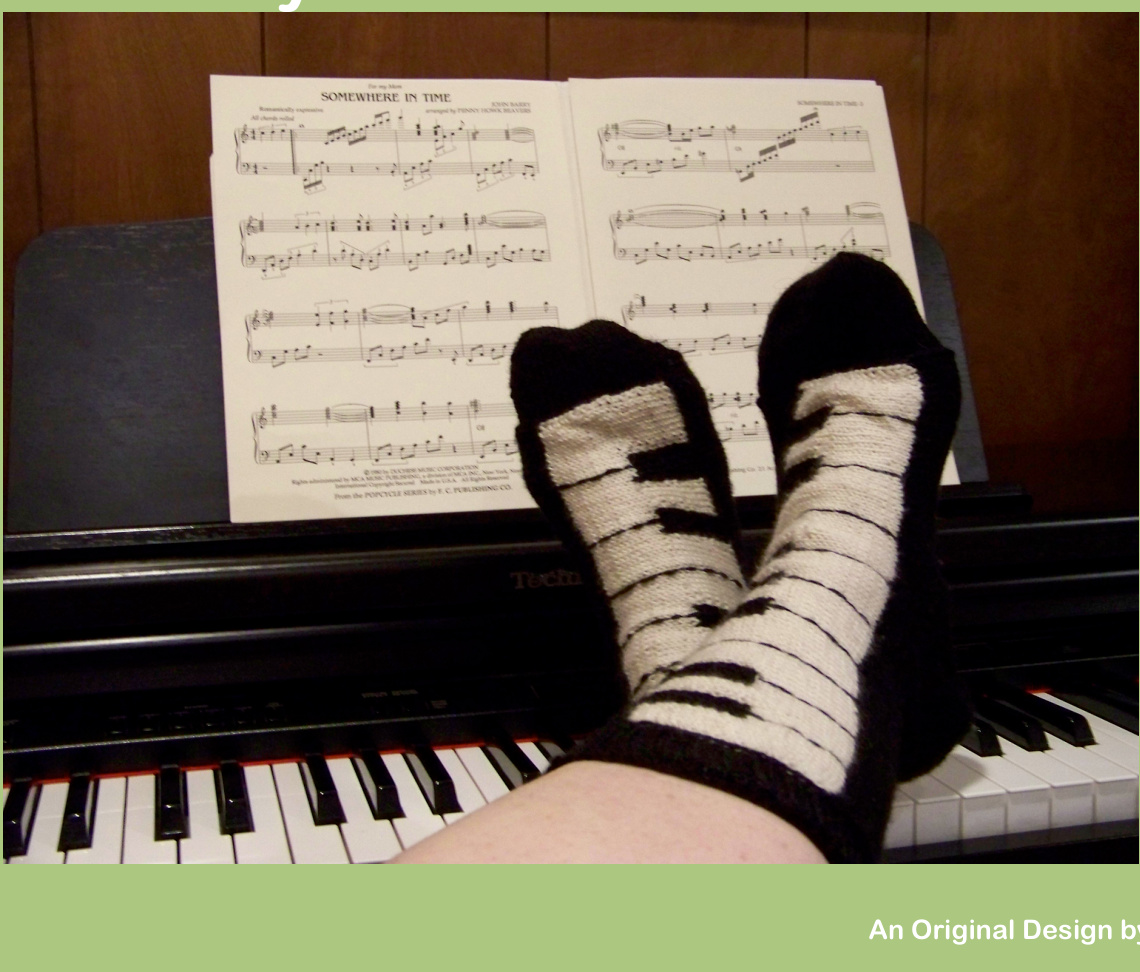
Socks shown in Cascade Yarns Heritage Silk
A Sideways Knitted Sock for the Music Enthusias1
Acknowledgements:
Based on Alice Bell's Bakerloo sideways sock idea Finished size: About 14" long from toe to calf
Materials:
! Us #1/#2.25mm needles and dpns (or size according to your gauge swatch) ! 520 yards fingering weight yarn (Black) ! 320 yards fingering weight yarn (Ecru or White) ! Waste yarn for provisional cast on (preferably slick or cotton) ! Crochet hook for provisional cast on ! Stitch markers if desired
Gauge:
7 sts = 1" in stockinette stitch using Us #1/2.25mm needle.
Technical Notes:
These socks are knitted flat with either stranded or intarsia knitting for the keyboard, kitchener stitched into a tube. The toe, cuff and afterthought heel added last. Knitting is started on the black key side of the keyboard with 8sts of white for each key x 10 white keys. Both socks can be made identically, then one of them reversed so that the keyboards are mirror images of each other. Remember: since this sock is knitted sideways, the side-to-side stretch is about half that of a regular sock. The amount of slouch is your choice.
Directions:
· Measure the calf circumference, length of foot, and height you wish to make the sock · CO 82sts in Black with a Provisional cast on. · Knit 4 rows stockinette stitch in Black
Keyboard Pattern
You may either use Fair-lsle or Intarsia knitting for the keyboard. lf you use Fair-lsle, make sure you carry the strand for no more than 2 stitches in the back and stretch the sock sideways to prevent tightness. I prefer to use Intarsia to prevent black yarns from showing behind the white, even though that involves carrying 17 mini-skeins behind the sock for I2 rows. Key: Black = B White = W \* slip first stitch of each row for easier pick-up \*\* Knit on RS, Purl on WS for all stitches · Rows I-12 : \*SLI(B), \*\*K or P 6(VW), 4(B), 4(WV), 4(B), 12(VWV), 4(B), 4(VV), 4(B), 4(V), 4(B), 12(W), 4(B), 4(W), 4(B), 6(W), I(B) · Row 13-26: SLI(B), K or P 80(WV), I(B) · Row 27-30: SL1(B), K or P 8l(B)
Sole
Sole is knitted in 2 parts, divided for the heel. \* slip first stitch of each row for easier pick-up \*\* Knit on RS, Purl on WS for all stitches · Measure your foot from bottom of toes to start of foot ball(ex: mine was 5" for a 8 I/2" foot) · Work just those stitches (ex: 35 sts for 5" sole length@ 7sts/inch) in Stockinette in Black for another 4 I/2". When done, try sock on your foot at this point. Match Provisional cast-on with current edge and make sure the two edges fit comfortably around your foot width without stretching or slouching. The edges will be on the side/top of your foot for comfort. Add or delete rows as needed to fit your foot. · Put these stitches on a long needle or stitch holder for future kitchenering (if that is not a word, it should be). · Work rest of stitches (about 56sts for 8" back of heel to start of cuff@7sts/inch) in Stocki nette in Black for same number of rows as sole section. (ex: 4 I/2"). · Add these stitches to the long needle with the other ones. · Count your stitches on the long needle and make sure you have the exact same number as the provisional cast on. (ex: 82sts). · Remove provisional cast-on thread and put on a second needle. Kitchener stitch the new edge with the provisional cast on edge. d have a lovely tube that fits comfortably around your foot and cal
Cuff
· Pick up allslipped stitches around edge for cuff and add I'"' of KIPl ribbing. (You may add more if you wish). · Bind offlosely. (Hint:fel fre to use the super-stretchy bind off method in which you YO before every K.)
Toe
· Pick up all slipped stitches around edge for toe and divide by 3 needles, 50% on needle for bottom of foot, 25% each x 2 for top of your foot. (You can use only 2 needles, but the stitches get very tight while working them) · Work the following toe decrease pattern for a squared-off toe, or use a method of your own preference. · Knit in the round for I". · Start I' of toe decreases as follows: - bottom needle: Kl, SSK, knit to 3 sts from end, K2tog, KI - top needle #I: KI, SSK, knit to end. - top needle #2: Knit to 3 sts from end, K2tog, Kl · Decrease until there are I0sts on top and l0 on bottom. · Kitchener stitch the top and bottom together.
Heel
· Pick up all slipped stitches around divided edge for the heel and divide by 3 needles, 50% on needle for bottom of foot, 25% each x 2 for back of heel. (You can use only 2 needles, but the stitches get very tight while working them) · Work an Afterthought heel as follows: (or use one of your own preference). Row I and every other row: - bottom needle: KI, SSK, knit to 3 sts from end, K2tog, KI - top needle #I: KI, SSK, knit to end. - top needle #2: Knit to 3 sts from end, K2tog, KI Row 2 and every other row: - Knit ll stitches (if you have gaps on the 2 edges of the heel, you can pick them up now so there will be no holes of the sides of the heels, but make sure you decrease those stitches at the same time.) · Work these two rows until only I2 sts are left. · Divide stitches onto 2 needles, top and bottom. · Kitchener stitch the toe closed.
Finishing
· With a double strand of black and an embroidery needle,add single lines of stitches to divide keys as follows: - on all black keys, make the line right between the 2nd and 3rd stitch of the four. - on the I2 white stitches, make the line between the 6th and 7th stitch. Copyright 20ll, Lori Torrance.All rights reserved. This material may be used by individuals for personal use only. It can be distributed to and shared with others as long as it remains fully intact, including this copyright notice. It may not be sold or used on a web page or in a compilation or archive without written permission from the author. But, feel free to use it to produce items for sale or donate to charity. Get rich, be happy.


