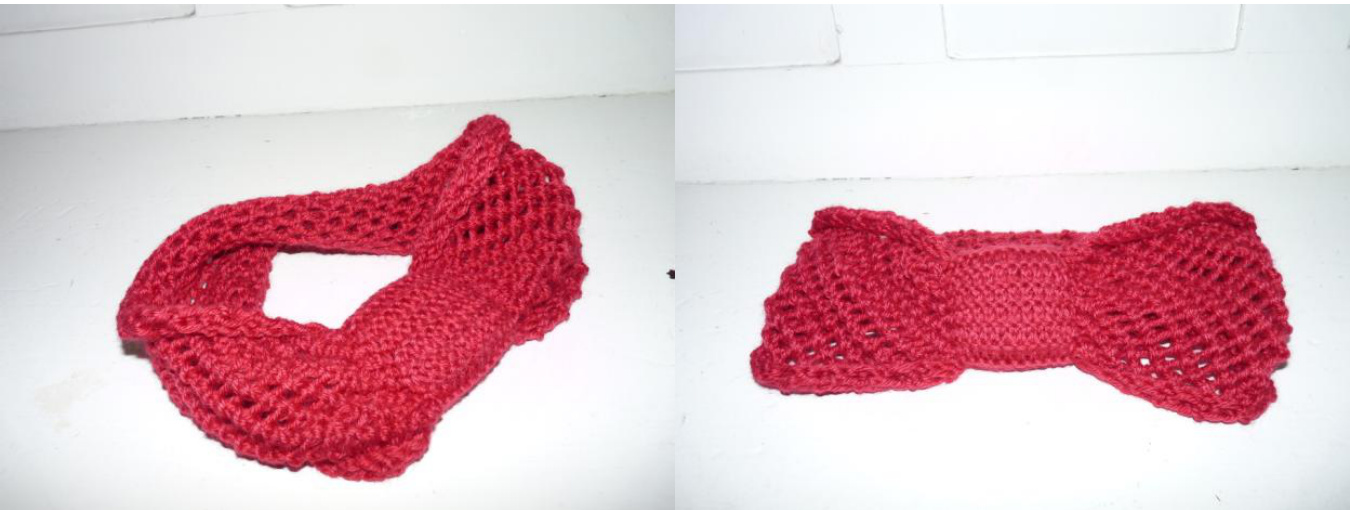
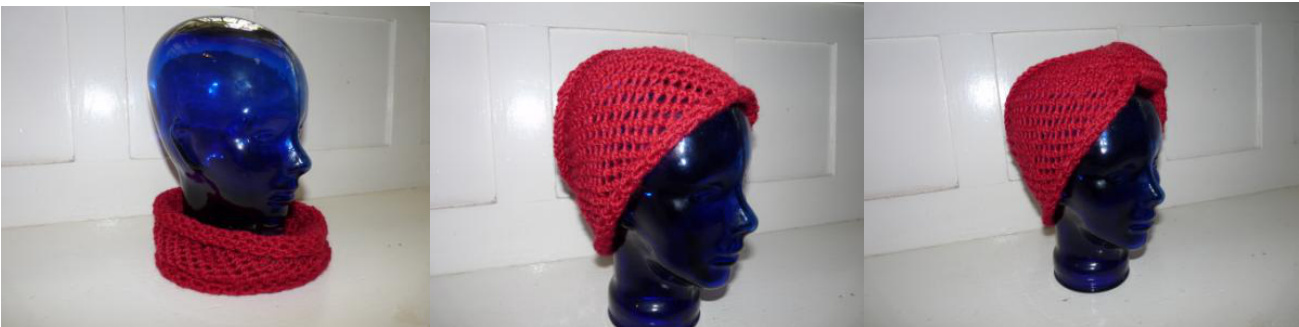
"Bamboozled" A Cowl / Headwrap / Hairband By Adriana ("kaaktus" on Ravelry)
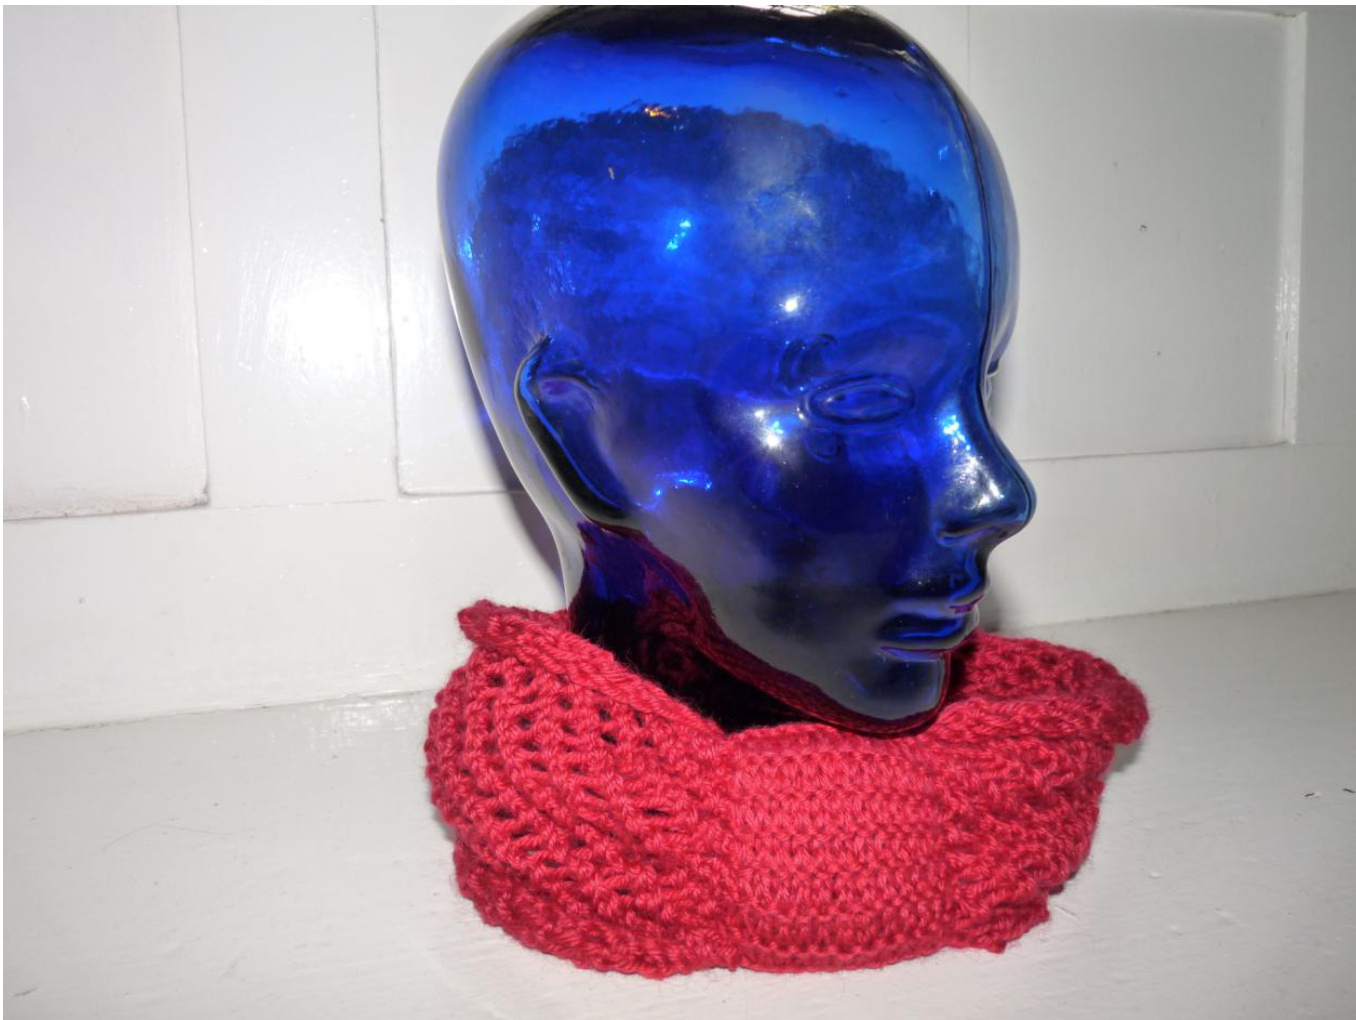
The first time I ever felt bamboo yarn was at the Arts Centre Markets in Melbourne. It was a skein of handspun heaven from Ixchel (a.k.a. Charly or "ixchelbunny" on Ravelry). I made a cowl / headwrap / hairband from that skein way back when and it has been one of my most oft used accessories! Great to keep warm in winter, wick away sweat in summer or just to play "peekaboo" with the kids whilst waiting for a darn train to show up in Sydney ...! This design is a nod to the original "Bamboozled". It's a simple lace stitch, knit in the round. It's deliberately loose around the head (let's face it, no one likes "hat hair") but easy to customise if you prefer a more snug fit. Hope you like it.
REQUIREMENTS
Bamboo Ewe Stitch Nation by Debbie Stoller, 1 skein (162m/100gms) (or approximately 100m of any aranweight yarn) 5.00mm circular needles Stitch marker and yarn needle
GAUGE
12 sts and 24 rows to a 10cm square in the Basic Pattern.
ABBREVIATIONS
BO = Bind off CO = Cast on GS = Garter stitch K = Knit K2tog = Knit 2 stitches together YF = Yarn forward
MAIN BODY
CO 69 sts, place marker and join to work in the round.
BASIC PATTERN
Row 2 \*(YF, K2tog)\*, repeat from \* to \* to last st, K1. Row 3: K to end. Row 4: K1, \*(YF, K2tog)\*, repeat from \* to \* to end. Repeat the Basic Pattern a total of 12 times (i.e. 48 rows). BO all stitches.
CINCHER
CO 12 sts. Working back and forth on needles, GS 30 rows. BO all stitches.
ASSEMBLY
Using either the CO or BO "tail", thread your yarn needle and take a loose running stich to the other end (i.e. to the position of the unused BO or CO "tail", as the case may be). Pull up the thread to slightly gather your work. Position the garter stich cincher across and around the gathered area and join. You may find that you prefer to overlap the cincher and gather the fabric more tightly. Play with the positioning and gathering until you are happy. Stitch the cincher into position when you are satisfied.Voila!