Komi-lnspired Mittens
designed by Ellen Wixted
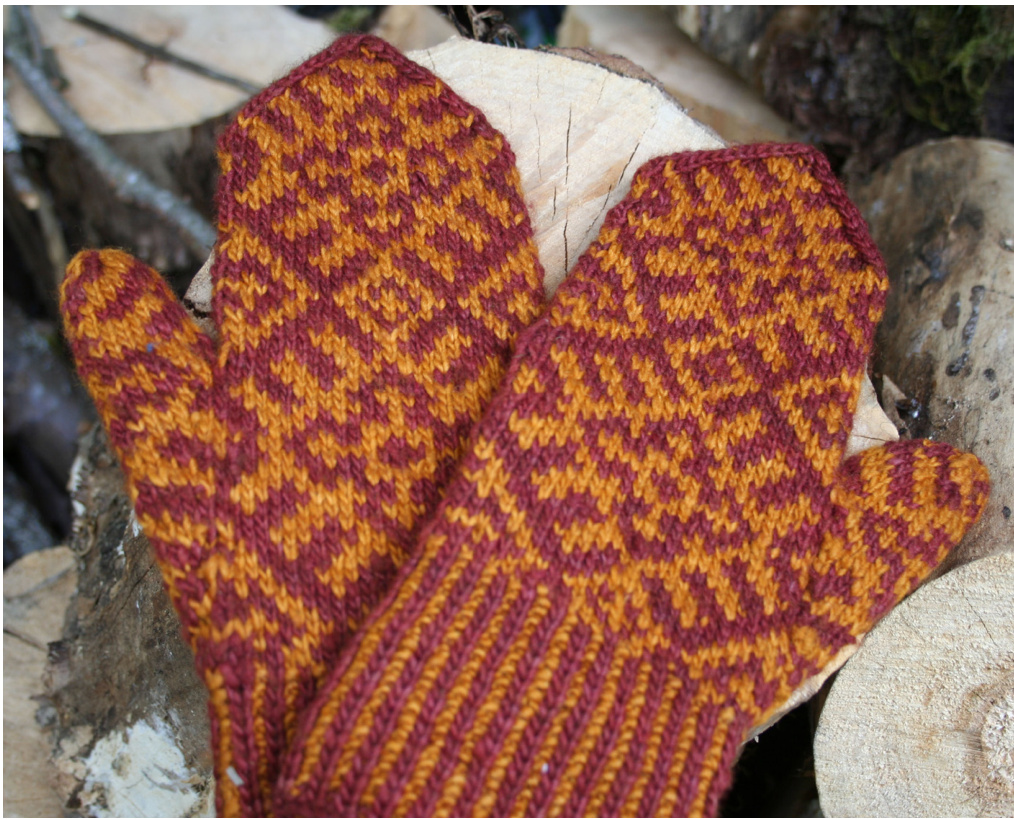
Finished circumfrence is 8 inches; my hands are large and these fit perfectly. Needles and Notions Set of 5 double pointed size 3 US needles, tapestry needle for weaving in ends, scrap yarn for holding thumb stitches. Yarn two skeins of Manos Del Uruguay Manos Silk Blend; I used a lovely gold an a brownish red. You'll have a little bit left over, maybe enough for baby mittens.
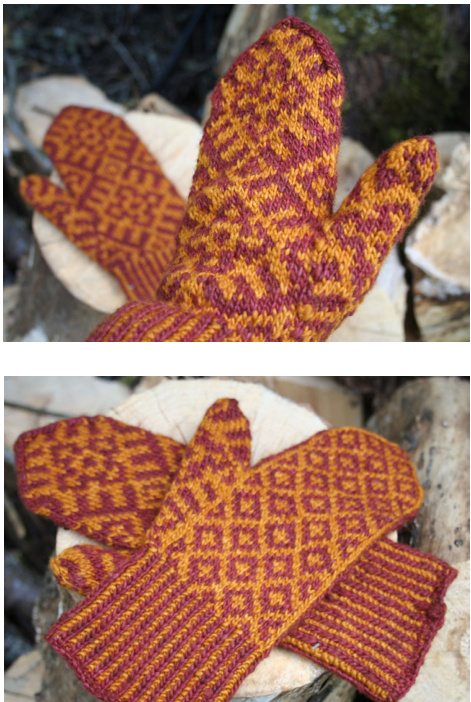
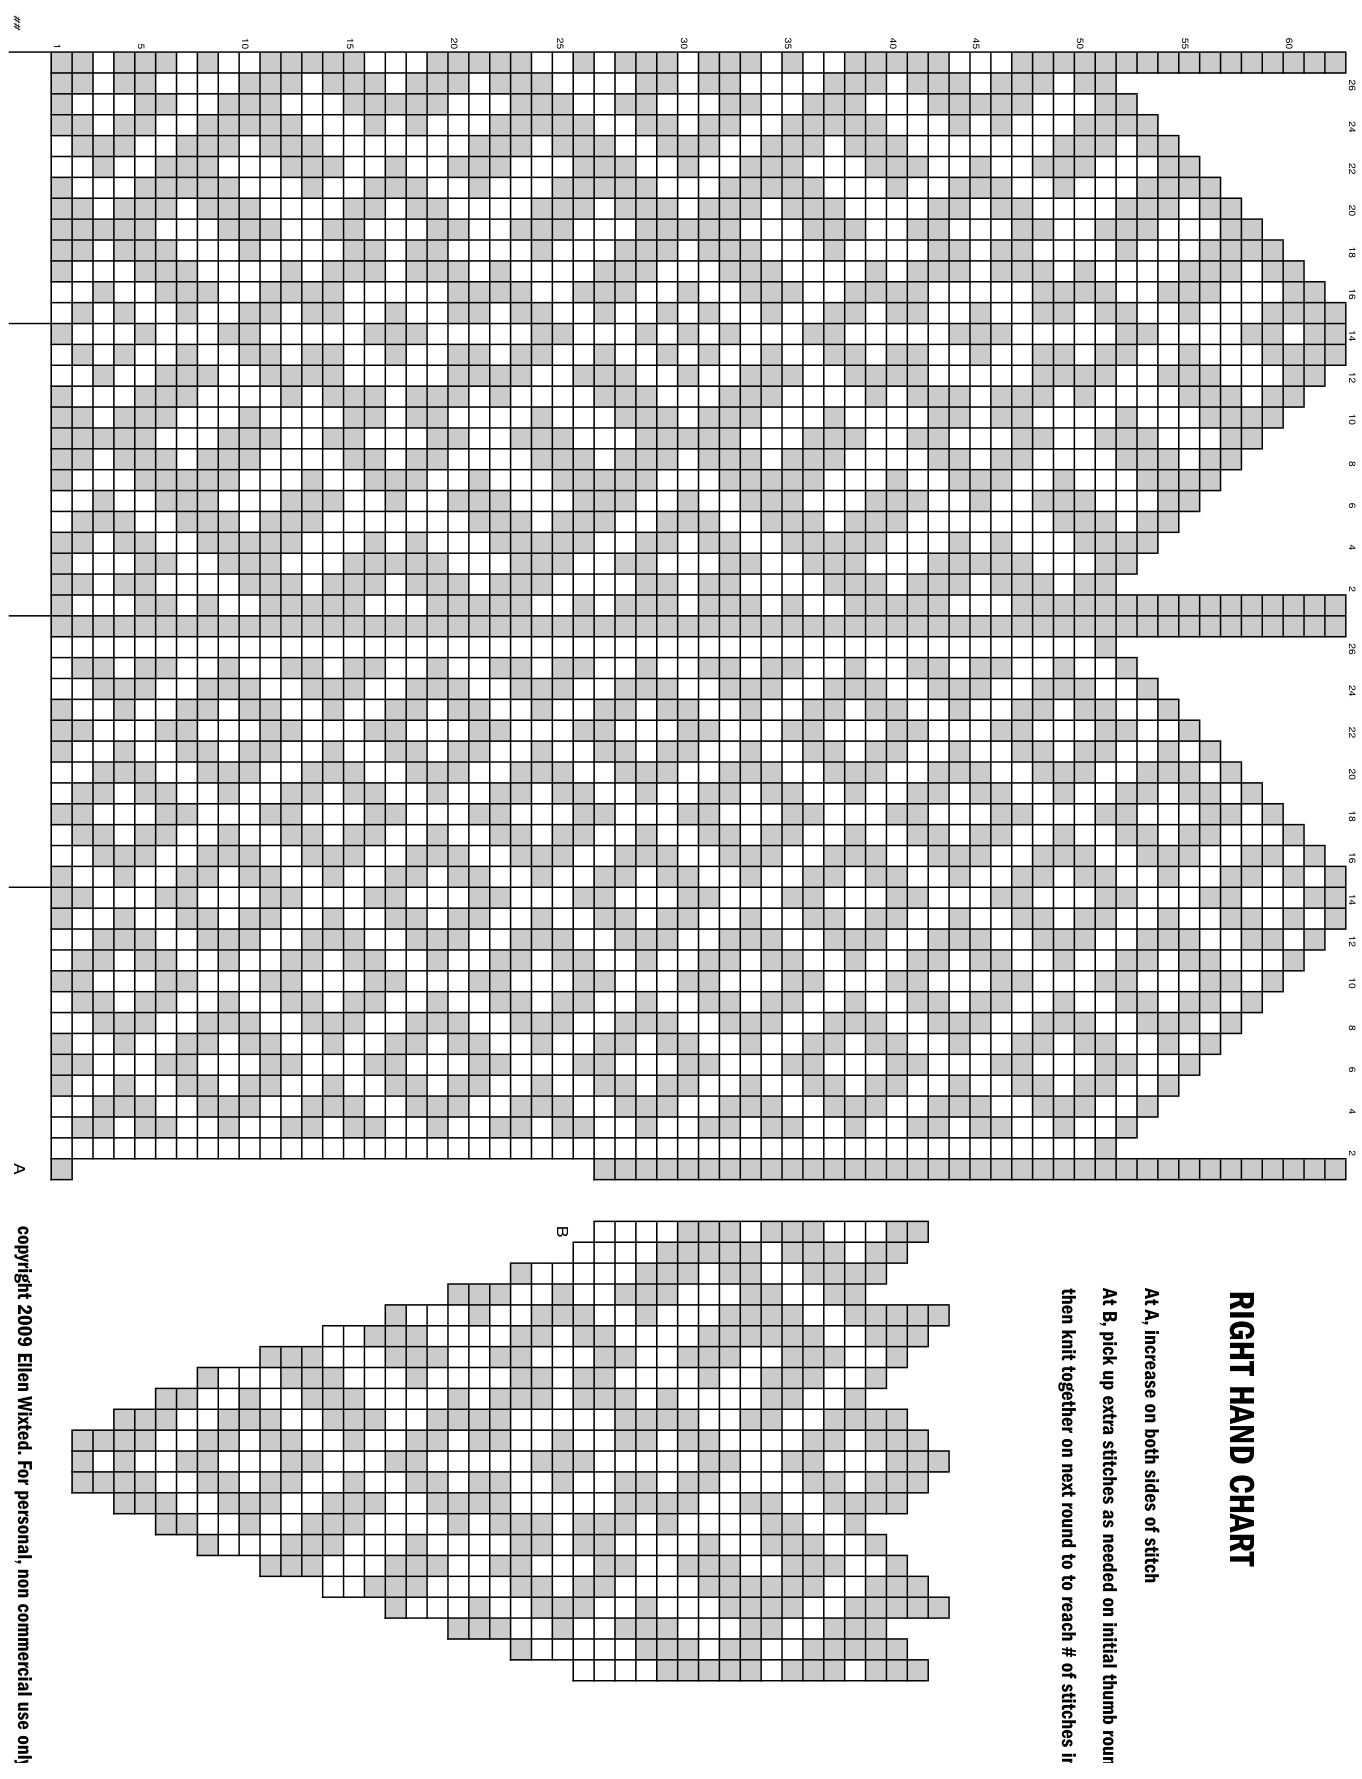
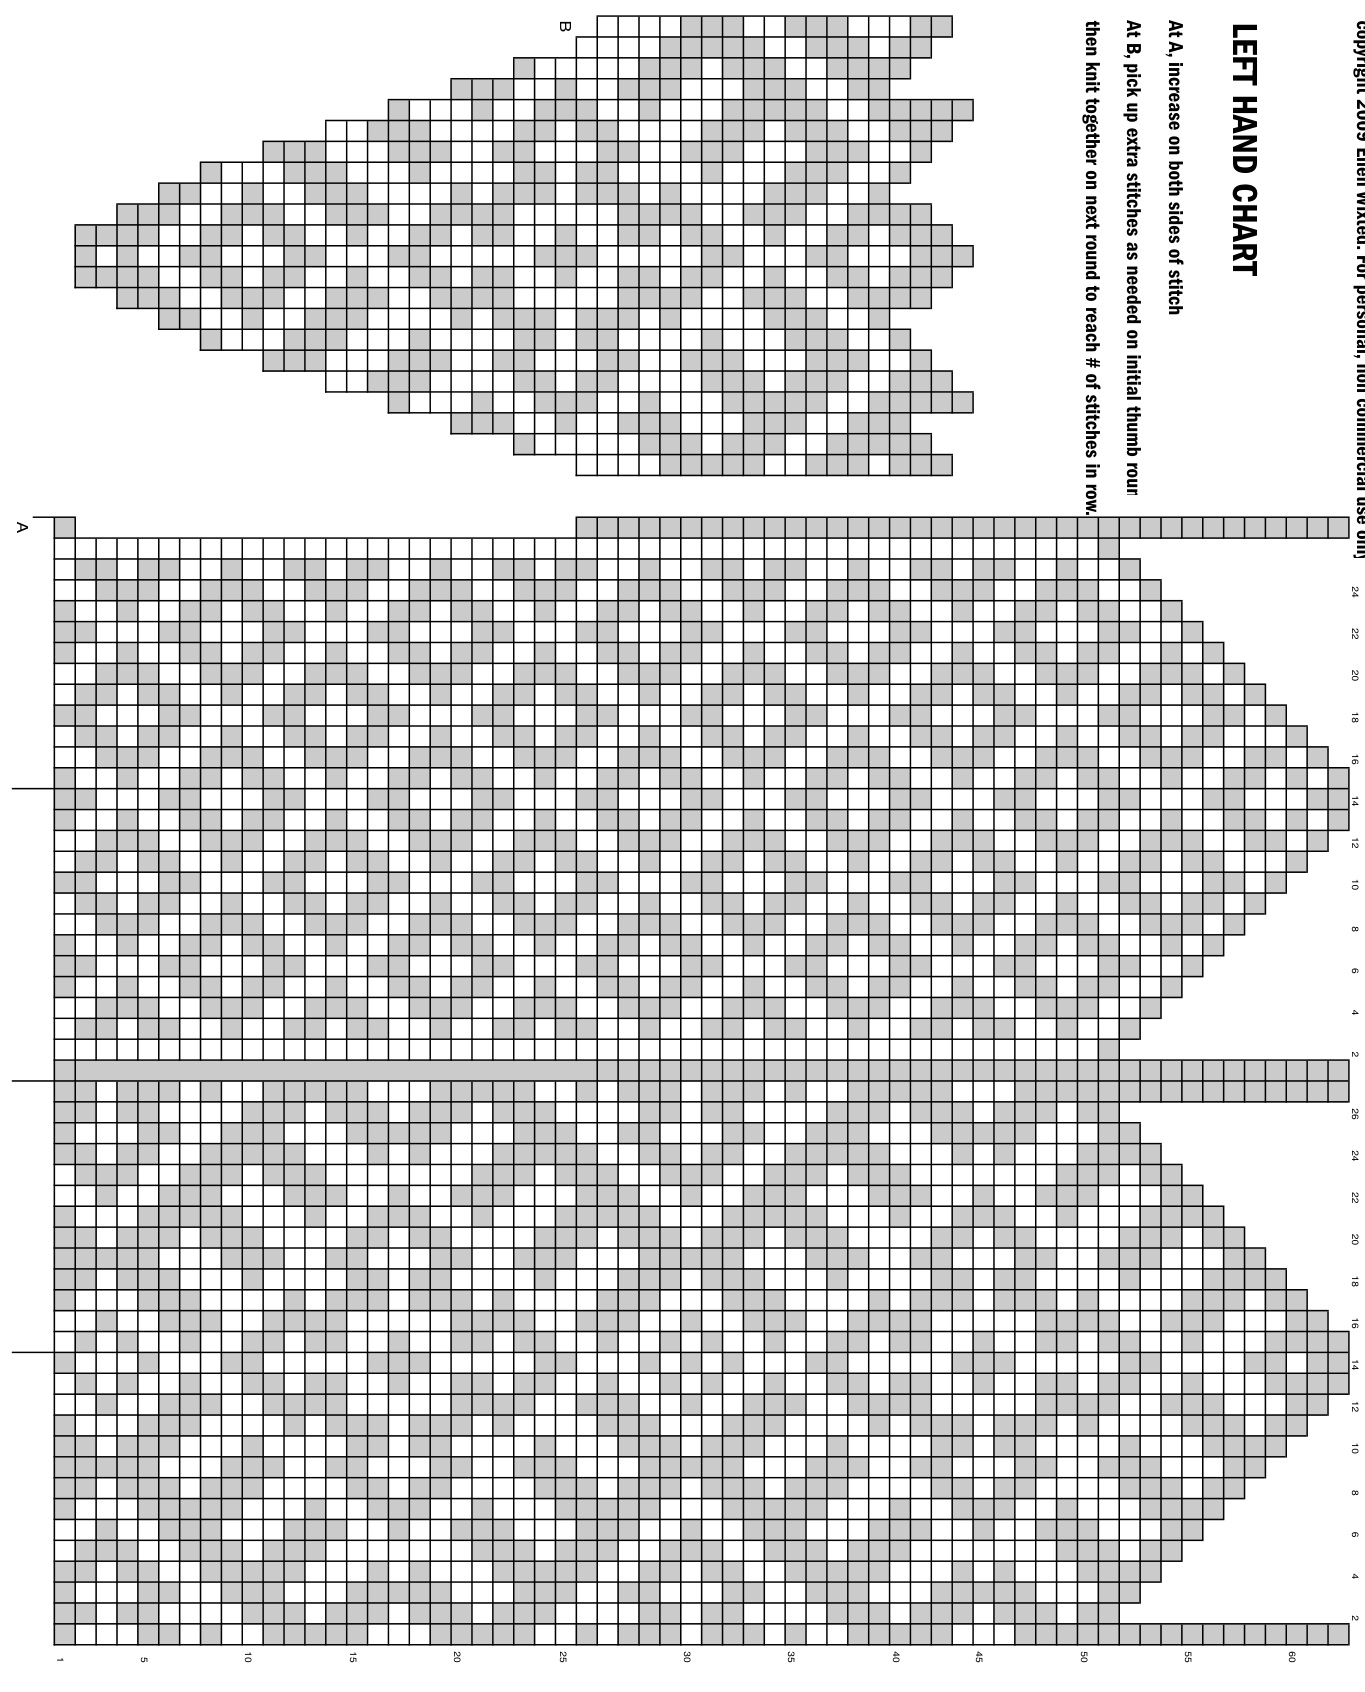
ThesewereinspiredbyCharlene Schurch's book about traditional knitting byRussia'sKomipeopleMostlyMittens anddesignsonRavelrybyTuuliaSalmela andHeatherDesserud. How to make them Cast on 54 stitches, and work 21 rows in alternating color rib (knit main color, purl contrast color). Then begin following charts n following pages.Some notes: I organize the stitches onto 4 needles using the lines at the bottom of the chart to make it easier to follow the pattern (but I knit the ribbing on three so it there's less needle switching). On row 1 of chart, increase into both sides of stitch at A to begin thumb gusset; follow chart for thumb until you reach row 26. At row 26, move thumb stitches onto scrap yran, increase one stitch in main color as indicated, and continue following chart. Begin descreasing for mitten top as indicated on chart at row 52. For each side, knit one, decrease one (by slipping stitches two and three onto right needle as though you were knitting them, then knitting into the reverse of both sticthes), then continue across until there are three sticthes left; at the left edge of each side, knit two together, then knit one. Do this for each side until the pattern is complete, then use Kitchener stitch to weave ends together (l tuck the contrast color yarn inside when I complete the last Stitch). Pick up the thumb stitches, as well as a couple extra as needed from the mitten base. Start following pattern for the thumb, knitting together the extra stitches you picked up on the next row (this gives the thumb a little more ease and prevents gaps). I winged the decreases on the top of the thumb, so the pattern gets a little lame there. Follow your instincts, as I think the thumd will be too long if knitted to the chart. I start decreasing for thumb top about halfway up my thumbnail, or a little later if you want it looser. Sew in the loose ends and enjoy. With this yarn, no need to wash or block!