Anastasia Amulet Bag
S. Debra Santaniello Copyright 2001
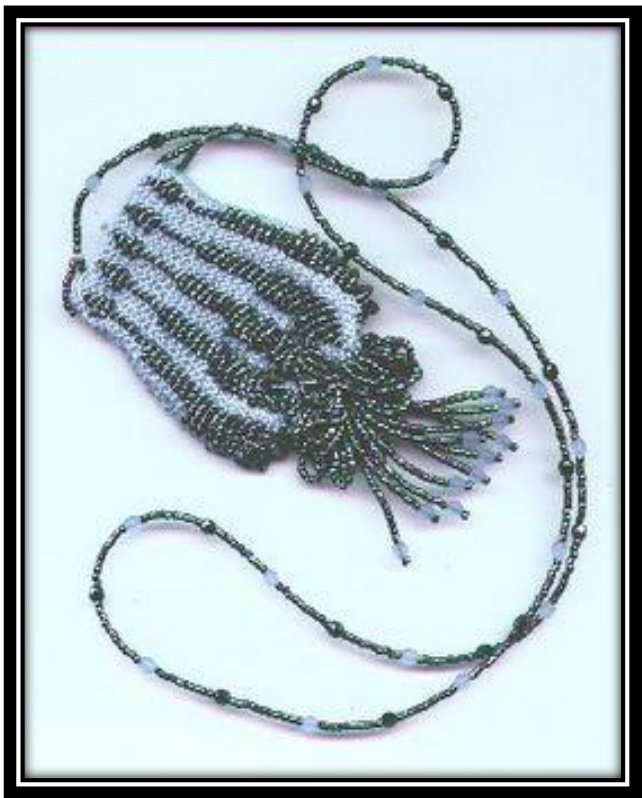
This pattern was designed in 2001 and tested by a bead knitters group, extensively. Unfortunately it hasn't been made since and there is not a better picture of it. The original is in Nigeria with a dear friend. When I initially designed this pattern I was more in a beading frame of mind than a knitting one and wrote it leaning toward people who bead; I hope along with the notes and diagrams that this will be clearer to all who venture here.
Materials:
■ One Hank 3-Cut 11/o beads or Czech 11/o seed beads One Ball #8 Pearl Cotton (DMC Tm or AnchorTM) ■ Size #0000 Steel Double Pointed Knitting Needles ■ Accent Beads for Necklace and Fringe $24^{\prime\prime}{-}32^{\prime\prime}$ Length of .014 Soft-Flex WirerM or similar stinging material for necklace (the length of the necklace is a personal option) and two crimp beads for securing necklace to bag. Nymorm Beading Thread or similar material and a Size 12 Beading needle
Note:
Transferring Beads: Carefully remove one full strand of beads from the hank and tape down one end of the temporary stringing thread to a smooth surface, with scotch tape. (It may be recommended to work over a dinner plate or serving platter that has a recessed face. The temporary sting can be taped directly onto the plate and the plate can be on top of a tablecloth or some other rough surface - like a towel. The method behind this: in case the beads decide to take flight on you, you will not be chasing them into the next decade.) Take the other end of the thread and tie a slip knot forming a loop and then thread the pearl cotton through the loop. (See Figure 1) Fold the pearl cotton over and carefully slide the beads from the temporary thread onto the pearl cotton. Should you have a bead that will not slide over the loop take a pair of needle nose pliers and crush the bead, being careful not to cut the temporary thread and averting your eyes as you crush to avoid getting glass in them. When you have finished transferring the first thread; carefully remove the next string of beads from the hank, taping it down to surface. Cut the previous thread leaving a 6" tail, tie the second thread to the first, with a square knot and continue transferring. If possible continue to keep the original thread/loop until all desired beads have been transferred, cutting off the knot and retying the new thread each time.

Transfer 4-8 strands of beads to the pearl cotton. 8 strands of beads will complete the entire bag (and then some) but if you feel more comfortable with less beads feel free to transfer 4 strands. When you run out of beads, cut thread at the end of a row, transfer the final amount of beads tie a square knot at the edge of work and continue knitting. Should you develop a knot in your thread during knitting use the same procedure, cut the thread at edge of work and then tie a square knot, continue knitting.
Anastasia Amulet Bag
Knit Two Identical Pieces: Cast on 18 Stitches (It is easier to knit the first row if you cast on over 2 or 3 #0000 needles and then carefully remove the extra needles. This method will give you ease in your cast on stitches.) Rows 1-4: K18 Rows 5-6: (K3, slide 1 bead, 5 times), K 3. Rows 7-8: (K3, slide 2 beads, 5 times), K 3. Rows 9-12: (K3, slide 3 beads, 5 times), K 3. Rows 13-24: (K3, slide 1 bead, 5 times), K 3. Rows 25-40: (K3, slide 3 beads, 5 times), K 3. Rows 41-52: (K3, slide 5 beads, 5 times), K 3. Rows 53-58: (K3, slide 7 beads, 5 times), K 3. Rows 59-60: (K3, slide 3 beads, 5 times), K 3. Rows 61-62: (K3, slide 1 bead, 5 times), K 3. Row 63: (K2Tog; 2 times), K 10, (K2Tog: 2 times) -14 Stitches remaining Row 64: K2Tog, K10, K2Tog - 12 Stitches remaining Row 65: (K3, slide 12 beads, 3 times), K 3. Row 66: K12 Row 67: (K3, slide 12 beads, 3 times), K 3. Row 68: K 12 Row 69: (K3, slide 16 beads, 3 times), K 3. Row 70: K 12 Row 71: (K3, slide 16 beads, 3 times), K 3. Row 72: K 12 Row 73: (K3, slide 20 beads, 3 times), K 3. Row 74: (K2Tog, 6 times) -6 Stitches remaining Row 75: Bind Off Sew both pieces together with #8 Pearl Cotton. Sting necklace with 3-Cut /seed beads and attach it at the seams of the purse. (See note below)
Fringe:
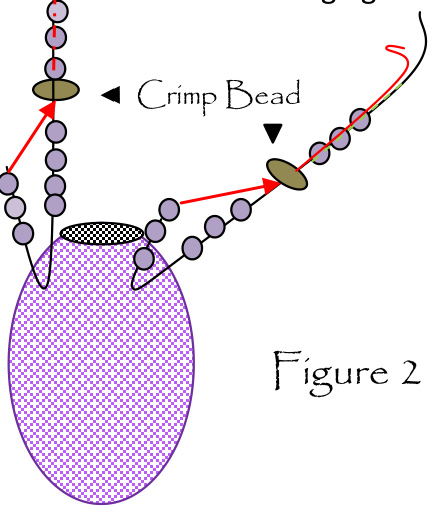
Take a one yard piece of Size "B" Nymom or similar beading thread and thread a Size 12 beading needle, doubling the thread and knotting it twice. Insert needle through the plain knitting at the bottom of the finished bag. Before pulling the thread through catch the thread loop with the needle and pull tight to secure. Repeat this technique twice. Thread 20 3-Cut/seed beads onto thread; add one accent bead and one more 3-Cut /seed bead. Thread needle back through the larger bead and the previously strung 20 3-Cut /seed beads. One fringe string has been completed. Again, thread needle through plain knitting and secure by going through the thread loop. Make another fringe. Continue in this manner until 12 fringes have been made. If you run out of thread, secure the working thread and begin again, using the preliminary process above. If you are using Soft-Flex Wirem or similar material you will need to use crimp beads to secure the wires. When I was making these little purses I would use the smaller beads and accent beads to the last 3-4 inches of wire, then place the crimp bead and add $1^{\prime\prime}$ of just the smaller beads. Then I would loop the wire through the knitted fabric and add another inch of just smaller beads; finally re-inserting the Soft-Flex WirerM back through the crimp bead and strung beads, before crimping (closing) down the crimp bead. This would make a continuous finish without raw wires hanging out. See Figure 2.
All Rights Reserved. Copyright 2001 S. Debra Santaniello This pattern may be reproduced solely for personal use and not for resale. Anastasia Amulet Bag may not be made for resale.


