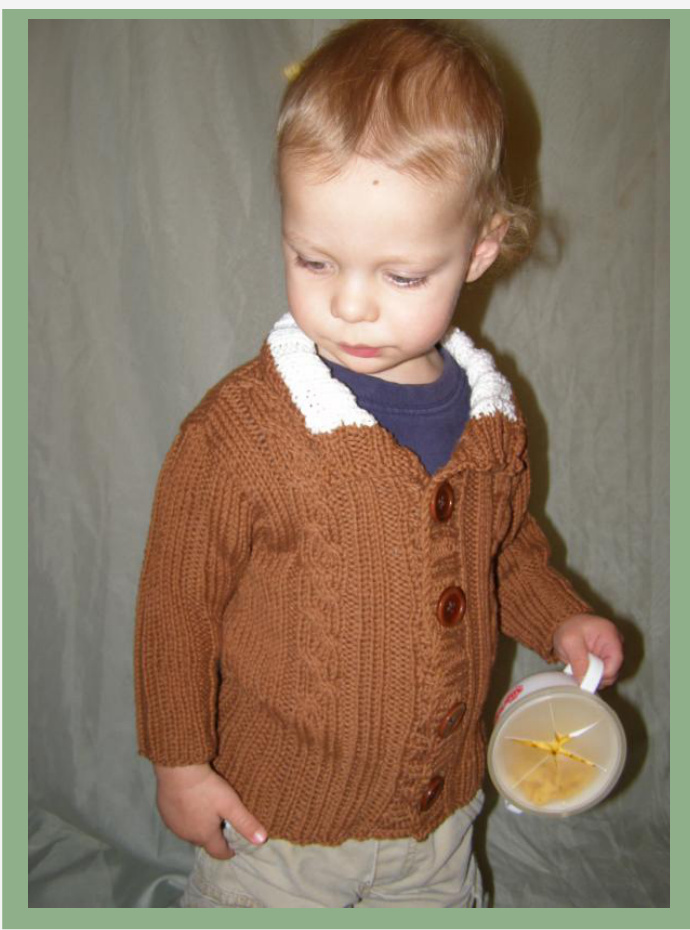
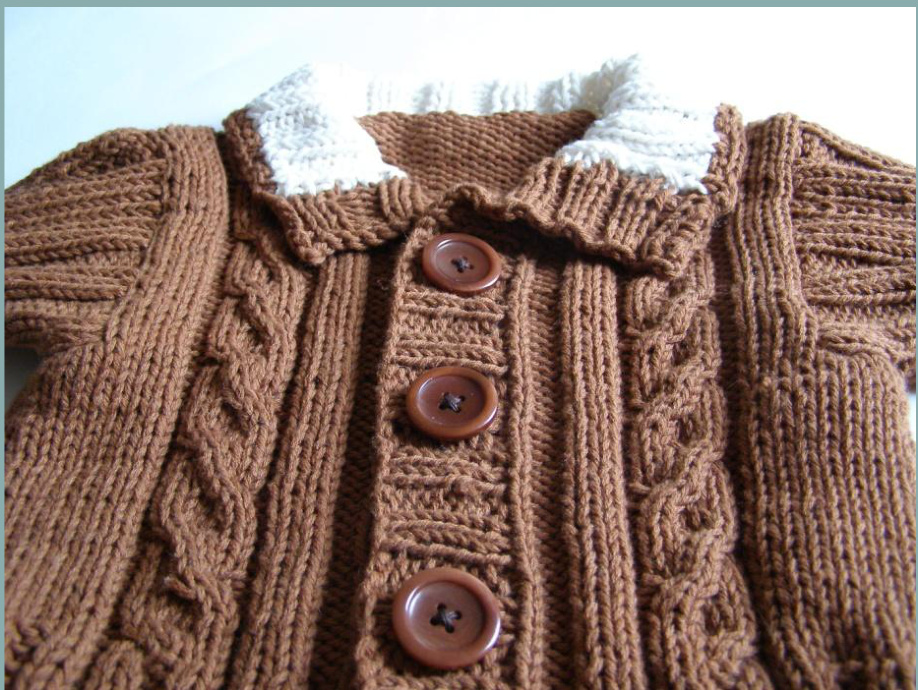
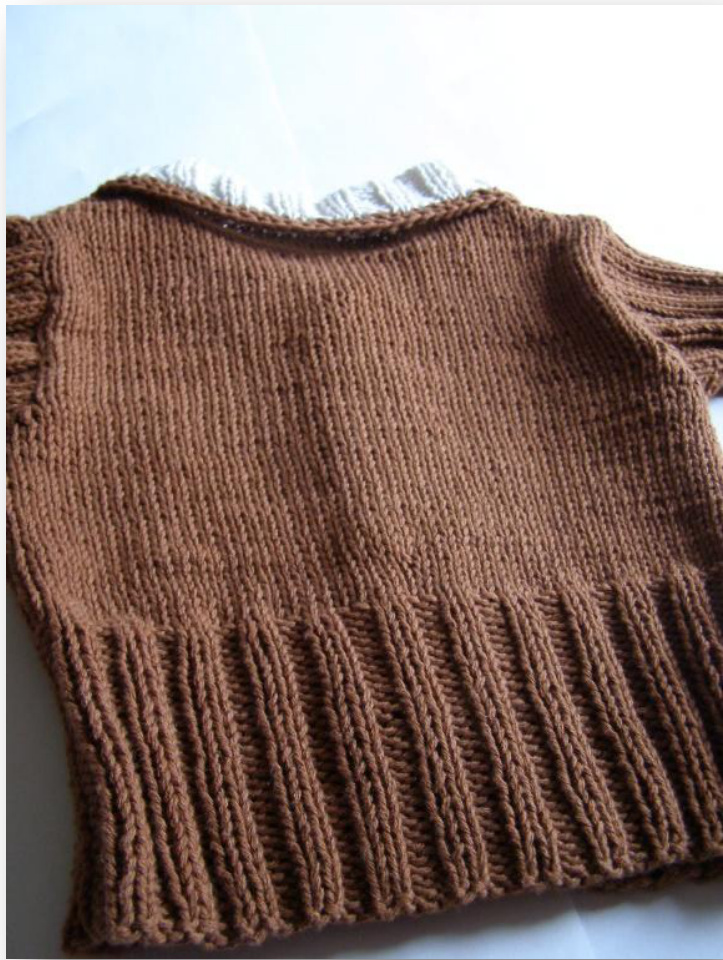
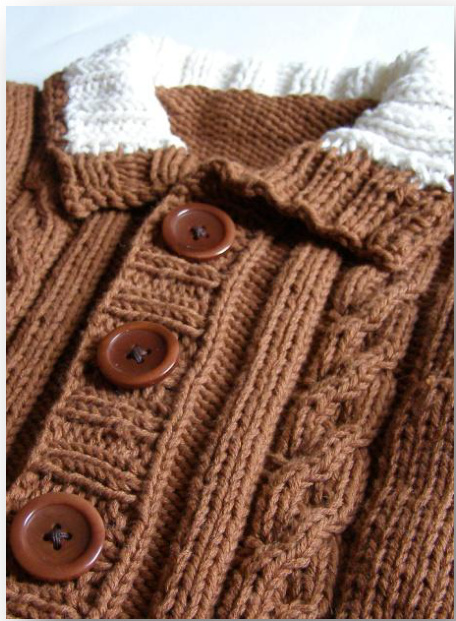
That Metzbower Girl Designs This handsome litle cardigan was inspired by the pullover worn by Ron Weasley in “Harry Potter and the Deathly Hallows, Part 1". It will be an excellent addition to any young man's wardrobe, with its eye-catching cables and chunky buttons. Made of worsted weight yarn, this sweater will knit up quickly, and is sure to charm your young wearer! Sizes 18-24mo( 2/4, 6/8, 10, 12) Finished chest measurements 22(24, 28, 30, 32) in/56(61, 71, 76, 81) cm You will need: worsted weight MC 350(490, 600 720, 860)yards/320(448, 550, 660, 786)meters CC 100yds/91 meters Needles: Size 9 US (5.5 mm) or size to achieve gauge Gauge: 20st x 28rows over 4in/10cm square using stockinette stitch Cable needle Waste yarn or stitch holder 4 to 6 - 1 in/25mm Buttons, depending upon your preference Tapestry needle \*PATTERN NOTES: Unless specified, the type of increase or decrease stitch is whatever yogu prefer. Some options for increases are Kifb or MiL/MiR. The most common type of decrease stitch is K2tog. Feel free to use whichever you would choose. \* BACK: Using long tail method, CO 54(60, 70, 74, 80) sts in MC. Work in K2, P2 rib for 4 in/10 cm, ending with a WS row. Continue knitting in stockinette, increasing one stitch on the first row for sizes 6-18 m0 and 6-8 yr. 55(60, 70, 75, 80) sts. Work in stockinette until back measures 8(8.5, 9.5, 10.5, 11.5) in/20(22, 24, 27, 29) cm, ending with aWSrow.\* \*Please feelfree to lengthen or shorten your sweater as needed in this portion. Be sure to make the front pieces the same length in this area! Beginning next 2 rows, BO 5 sts. 45(50, 60, 65, 70) sts remaining. Continue working until back measures 13.5(14.5, 16, 17.5, 19) in/34(37, 41, 45, 48) cm from CO edge, ending with a WS row. Beginning next 2 rows, B0 6(7,9,9,10)sts. Next 2 rows, B0 6(7, 8, 9, 10)sts.
LEFT FRONT:
Using long tail method, C0 28(30, 34, 38, 40)sts. Repeat rows 1 and 2 until you have 4 in of ribbing: Row 1: P0 (2, 2, 2, 0), {(K2, P2)5, 5, 6, 7, 8times), K3, P3, K2 Row 2: P2,K3,P3,{(K2,P2)5,5,6,7,8 times}, K 0(2,2,2,0) End with WS row. Begin Cables: Row 1: (RS) K10 (12, 16, 20, 22), P2, K6, P2, K3, P3, K2 Row 2: (WS) P2, K3, P3, K2, P6, K2, P10 (12, 16, 20, 22) Row 3: K10 (12, 16, 20, 22), P2, c4b, K2, P2, K3, P3, K2 Row 4: as row 2 Row 5: K10 (12, 16, 20, 22), P2, K2, c4b, P2, K3, P3, K2 Row 6: as row 2 Repeat rows 3-6 until work measures 8(8.5, 9.5, 10.5, 11.5) in /20(22, 24, 27, 29) cm, ending with a WS row. Beginning next row, B0 5 sts. 23(25, 29, 33, 35)sts remaining
aping and Shoulder Shaping WORKED AT THE SAME TIME
Continue working in pattern. When front side measures 11.5(12.5, 14, 15, 16.5) in/29(32, 36, 38, 42) cm from CO edge, end with a RS row. (Maintain st pattern throughout all decreases). Next row, (WS) BO 3(4, 5, 6, 8) sts. Dec 1 st at neck edge every row for 4 rows. Dec 1 st at neck edge every other row for two rows. At the same time, when left front measures 13.5(14.5, 16, 17.5, 19) in/34(37, 41, 45, 48) cm from cast on row AND ending with a WS row, begin shoulder shaping. The next row (RS), BO 7(7, 9, 10,10) sts. Next row, work in pattern. Next row, BO remaining 7(8, 9, 11, 11) sts.
RIGHT FRONT:
Using long tail method, C0 28(30, 34, 38, 40)sts. Repeat rows 1 and 2 until you have 4 in of ribing: Row 1: K2,P3,K3,{(P2,K2)5,5,6,7,8 times}, P 0(2,2,2,0) Row 2: K0 (2, 2, 2, 0), (P2, K2)5, 5, 6, 7, 8times), P3, K3, P2 End with WS row. Begin Cables: Row 1: (RS) K2, P3, K3, P2, K6, P2, K10 (12, 16, 20, 22)
Row 2: (WS) P10 (12, 16, 20, 22), K2, P6, K2, P3, K3, P2 Row 3: K2, P3, K3, P2, K2, c4b, P2, K10 (12, 16, 20, 22) Row 4: as row 2 Row 5: K2, P3, K3, P2, c4b, K2, P2, K10 (12, 16, 20, 22) Row 6: as row 2 Repeat rows 3-6 until work measures 8(8.5, 9.5, 10.5, 11.5) in /20(22, 24, 27, 29) cm, ending with a RS row. Beginning next row, BO 5 sts. 23(25, 29, 33, 35)sts remaining
aping and Shoulder Shaping WORKED AT THE SAME TIMF
Continue working in pattern. When front side measures 11.5(12.5, 14, 15, 16.5) in/29(32, 36, 38, 42) cm from CO edge, end with a WS row. (Maintain st pattern throughout all decreases). Next row, (RS) BO 3(4, 5, 6, 8) sts. Dec 1 st at neck edge every row for 4 rows. Dec 1 st at neck edge every other row for 2 rows. At the same time, when right front measures 13.5(14.5, 16, 17.5, 19) in/34(37, 41, 45, 48) cm from cast on row AND ending with a RS row, begin shoulder shaping. The next row (WS), BO 7(7, 9,10, 10) sts. Next row, work in pattern. Next row, BO remaining 7(8, 9, 11, 11) sts.
SLEEVES:
Pattern for sleeves: Row 1: K0(0,0,0,1),P0(0,0,1,3),K0(0,2,3,3),P0(2,3,3,3) {K3, P1, K1, P1, K3, P3, K1, P1, K3, P1, K1, P3, K3, P1, K1, P1, K3} P0,(2,3,3,3),K0(0,2,3,3), P0(0,0,1,3), K0(0,0,0,1) Row 2: P0(0,0,0,1),K0(0,0,1,3),P0(0,2,3,3),K0(2,3,3,3) {P3, K1, P1, K1, P3, K3, P1, K1, P3, K1, P1, K3, P3, K1, P1, K1, P3} K0,(2,3,3,3),P0(0,2,3,3), K0(0,0,1,3), P0(0,0,0,1) CO 31(35, 41, 45, 51) stitches Vork 2(2.5, 3, 3.5, 4) in/5(6, 8, 9, 10)cm of ribbing in pattern for a turned cuf. Continue working in pattern, increasing 1 st each end every 1/2(1/2, 3/4, 3/4, 1) in/1(1, 2, 2, 3)cm 13 times, incorporating new sts into K3, P3 ribbing for edge. 57(61, 67, 71, 77) stitches. When sleeve measures 10.5(13, 14.5, 16, 17.5) in/27(33, 37, 41, 45)cm, work for at least 1 inch more. BO all stitches.
Block All Pieces
Sew shoulder seams. Sew sleeve to sweater body. Sew underside of sleeve together, and sew side seam of sweater body.
COLLAR:
With WS facing, and with CC, pick up and knit sts evenly around neck, including neck sts on holder. Try to end up with a multiple of 4 plus 2. This will allow you to work in the K2, P2 ribbing easily. For size 18-24 mo, I ended up with 54. Work in K2, P2 ribbing for 2-4 in/5-10 cm, depending on your preference. Next row: With RS of sweater body facing you, change to main color and purl one row. Resume the K2, P2 ribbing for 2 more rows, then BO all stitches. If you wish to have the look of double knitting, do not bind off, but rather keep knitting in the rib pattern until collar is twice as long. Fold under and sew live sts to neck of sweater body.
BUTTONBAND:
Pick up and knit down collar edge (through both layers if you folded the collar) and sweater edge of right front, ending up with a multiple of 4 sts +2. Work in K2, P2 ribbing for 2-3 in/5-8 cm, depending upon your preference for your sweater size. BO all stitches. Repeat for left edge, but only work 4 rows of ribbing. Mark on right side of sweater where you would like buttons placed. On corresponding left side, mark where buttonholes will go. On next row, \*work in K2, P2 rib until you come to a marker for buttonhole. BO 2 sts\* Work from \* to \* until row is complete. Next row: work in pattern. When you come to the bound off sts, YO, and continue working in pattern. Next row: Work in pattern but Kifb in each YO stitch from previous row. You should now be back to your original number of stitches picked up. Work ribbed button band until it measures the same as the right side button band. BO. Sew on buttons Weave in ends.
Knitting Abbreviations:
BO bind off C4B- cable 4 back Slip next 2sts onto cable needle , hold them at back of work, knit next 2sts from left hand needle, then knit sts from cable needle C4F- cable 4 front Slip next 2sts onto cable needle, hold them at front of work, knit next 2sts from left hand needle, then knit sts from cable needle CC contrasting color cm centimeter(s) CO cast on cn cable needle in inch(es) K knit Kifb knit into the front and the back of the same stitch MC main color mm millimeter P purl RS right side st(s) stitch(es) WS wrong side YO yarn over \* repeat instructions following or between asterisk as indicated [ ] repeat instructions inside brackets as indicated A description of the long tail method cast on can be found here http://www.knittinghelp.com/videos/cast-on 2011 That Metzbower Girl Designs. Pattern is intended for personal use only. Other uses are strictly prohibited. All rights reserved


