SmoothFox's Cool Smiley Face 7' x 7 Square
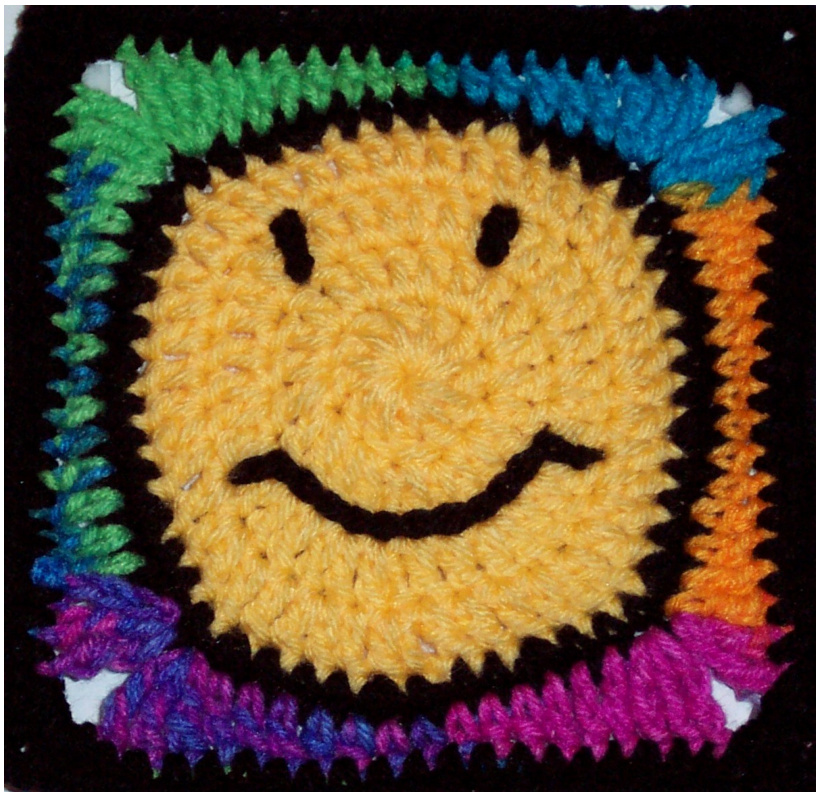
Created by Donna Mason-Svara aka SmoothFox @2009 Version 1.0 The above picture and original idea for the smiley face is courtesy of Loren G. aka Twisted1 from Ravelry. She took my Peace Out pattern and changed a few things and wow... came up with the Smiley Face above. She did an awesome job and I think it's just the cutest square. Working with her notes I got down to business creating the pattern for everyone to enjoy!
Above picture created by SmoothFox
Red Heart Super Saver Medium Worsted 4 ply Color A: Bright Yellow Color B: Black Color D: Turqua Red Heart Strata Color C: Pogo OR Red Heart Ltd. Kids Multi - Color C: Bikini Hook Size: H 5.00 MM Size: 7"' x 7"\* Skill level: Advanced beginner Special Stitches: Tambouring also known as slip stitch surface crochet: The tambouring method used for the smiley face is quite simple. Here is a link to a tutorial http://www.geocities.com/mwillsondesigns/SlipStitch/slipstitch.html 1. Hold the yarn you'll be using in the back of the piece. Insert hook in given sp between stitches. 2. Yarn over and draw loop through to the front side. (Be sure to leave about a 6" tail on the back to weave in later) 3. Insert hook in next space. 4. Draw this new loop through the loop that is already on the hook-just like working a slip stitch. 5. When you are ready to finish off, cut the yarn in back leaving a 6" tail to weave in. Then, pull the tail on up to the front. Now, insert hook from back to front and pull the tail to the back (wrong) side of your work. Weave in ends. If you want a .pdf copy of this pattern or if you make this item - please click on this link and add your own pictures as a project on Ravelry. Just click on the crochet hook with the words "Hook It'’ if this is a crochet pattern or if it is a knit pattern click on the words “Cast On" near the top right side and this will add your item as a project. Then you can add the pictures when you have completed your project. http://www.ravelry.com/patterns/library/free-smoothfoxs-cool-smiley-face-7-x-7
INSTRUCTIONS:
Using color A, ch 4 and join to make a ring or use the Magic Adjustable Ring (see www.crochetpatterncentral.com under tutorials). Round 1: Ch 3, (counts as first dc here and throughout) 11 dc's in ring; join with slip st in top of beg ch-3. (12 dc) Round 2: Ch 3, dc in same st, 2 dc in each dc around; join with slip st in top of beg ch-3. (24 dc) Round 3: Ch 3, 2 dc in next st, \*dc in next st, 2 dc in next st; rep from \* around; join with slip st in top of beg ch-3. (36 dc) Round 4: Ch 3, dc in next st, 2 dc in next st, \*dc in next 2 sts, 2 dc in next st; rep from \* around; join with slip st in top of beg ch-3. Finish off. (48 dc) Round 5: Join color B with a slip st in any st, ch 1, sc in same st, sc in next 2 sts, 2 sc in next st, \*sc in next 3 sts, 2 sc in the next st; rep from \* around; join with slip st in beg sc. Finish off. (60sc) Round 6: Join color C in any st with a slip st, ch 4, 2 tr in same st, ch 2, \*3 tr in next st, corner made, dc in next 3 sts, hdc in next 2 sts, sc in next 3 sts, hdc in next 2 sts, dc in next 3 sts, \*\* 3 tr in next st, ch 2,\* repeat from \* to \* 2 times and from \* to \*\* once; join with slip st in top of beg ch-4. Finish off. (24 tr, 24 dc, 16 hdc, 12 sc)
NOTE:TWODIFFERENT BORDERS TOCHOOSEFROM
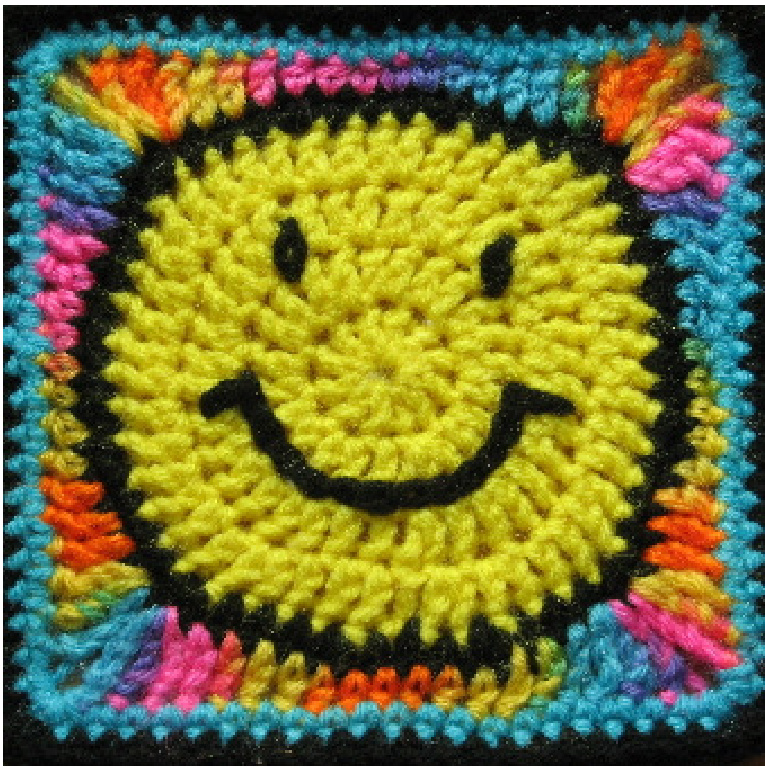
R 1 AS SHOWNIN TWISTED1'S PICTURE ON PAGE ONE
TWISTED1'S BORDER ROUND 7: Join color D with a slip st in any corner, ch 1, 3 sc in corner sp, \*sc in each st to next corner, \*\* 3 sc in corner sp; repeat from \* to \* 2 times and from \* to \*\* once; join with slip st in beg sc. Finish off. (98 sc) TWISTED1'S BORDER ROUND 8: Join color B with a slip st in any st, ch 1, sc in each st around square; join with slip st in beg sc. Finish off. (98 sc) CONTINUE TO ROUND 8
OPTIONAL BORDER NUMBER 2 IN TOP PICTURE ON PAGE ONE:
Round 7: Join any color B with a slip st in any corner, ch 2, (2 hdc, ch 2, 3 hdc), \*hdc in next 19 sts, \*\* (3 hdc, ch 2, 3 hdc) in corner;\* repeat from \* to \* 2 times and from \* to \*\* once; join with slip st in top of beg ch-3. Finish off. (100 hdc)
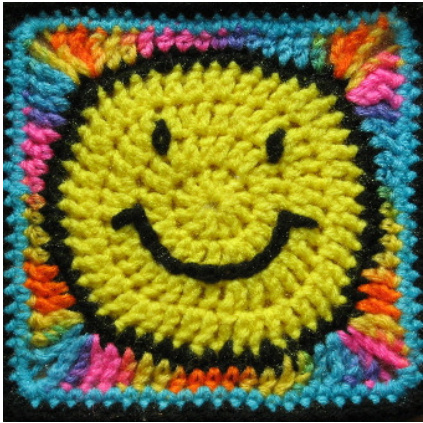
SMILEYFACE TAMBOURING:
Hold square with right side facing you. Using the picture below as a reference and following the special instructions for tambouring, place the smiley face on the circle. 1. Hold the yarn you'll be using in the back of the piece. Insert hook in given sp between stitches. 2. Yarn over and draw loop through to the front side. (Be sure to leave about a 6" tail on the back to weave in later) 3. Insert hook in next space. 4. Draw this new loop through the loop that is already on the hook-just like working a slip Stitch. 5. When you are ready to finish off, cut the yarn in back leaving a 6" tail to weave in. Then, pull the tail on up to the front. Now, insert hook from back to front and pull the tail to the bac (wrong) side of your work. Weave in ends.
Created by Donna Mason-Svara aka SmoothFoxLover@yahoo.com @2009 This pattern has not been tested. Please notify me of any pattern corrections. I will answer any and all questions you may have with the instructions. Do not plagiarize this pattern. All patterns are my original designs. Please do not re-sell my patterns or give them away for free or post my patterns on the internet. You may sell items you make from my patterns at craft fairs, fund raisers or custom orders for friends and family but please do not sell finished items on the internet without my written permission. Do not claim designs as your own. This pattern is copyrighted by me and I give my permission for you to post pictures of items made from my pattern on your website if you will post a link back to my ETSY store if the pattern is for sale. If the pattern is free, please direct people to my blog. Be sure to list the name SmoothFox as the designer.


