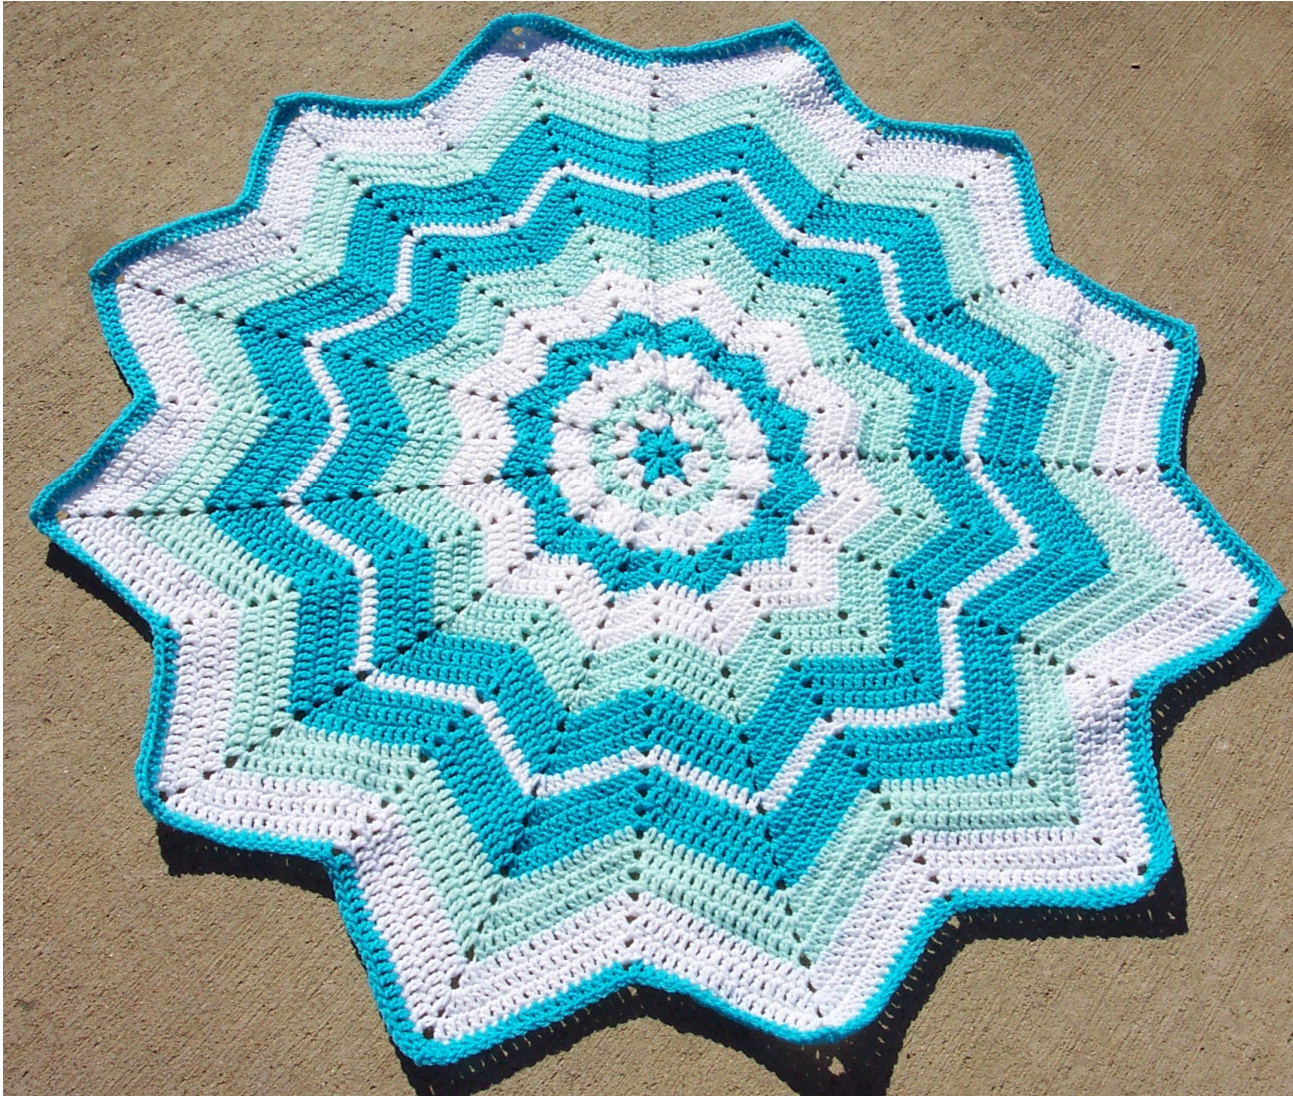
SmoothFox's Beginner's Round Ripple 12 Points
Created by Donna Mason-Svara aka SmoothFox Copyright 2009 Version 4.0
Red Heart Super Saver 4 ply Worsted Weight Color A - Turqua (1 skein, 7 oz, 364 yards) Lion Brand Vanna's Choice Color B - White(1 skein, 7 oz, 364 yards) Red Heart Super Saver 4 ply Worsted Weight Color C - Light Teal (1 skein, 7 oz, 364 yards) Skill level - Advanced Beginner Size I - 8 - 5.50 MM Yarn Needle My Ravelry Store: http://www.ravelry.com/stores/smoothfox-crochet designs My Etsy Store: http://SmoothFox.etsy.com My Knit & Crochet merchandise: http://zazzle.com/smoothfox\* My Blog: http://smoothfoxlover.blogspot.com/
AVAILABLE NOW THROUGH THE LINKBELOW:
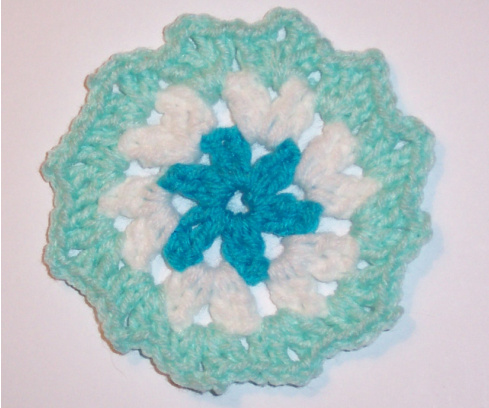
Ravelry http://www.ravelry.com/stores/smoothfox-crochet-designs IFYOUCROCHETTHISBLANKET-PLEASECLICKONTHISLINKANDADDYOUROWN PICTURESASAPROJECTONRAVELRY. http://www.ravelry.com/patterns/library/free-smoothfoxs-beginners-roundrippleJUST CLICK ONTHE CROCHET HOOK NEAR THETOP RIGHT SIDE ANDTHIS WILLADDYOUR BLANKET ASA PROJECT.THENYOU CAN ADDTHE PICTURESWHEN YOUHAVECOMPLETEDYOURSQUARE. Note: Color changes are an individual's preferences. I only list the changes in color in this pattern up to round 6. After round 6, I don't tell you where I changed colors. Use your own discretion and preferences, just enjoy playing around with different color combinations. INSTRUCTIONS: Using color A, ch 4, join with a slip st to form a ring or use the Magic Adjustable Ring tutorial Round 1: Ch 3, dc in ring, ch 2, \*(2 dc, ch 2) repeat from \* 4 more times in ring; join with slip st in top of beg ch-3. Finish Off. (12 dc) Round 2: Using color B join with slip st in any ch-2 sp, ch 3, (dc, ch 2, 2 dc) in same sp, ch 1, \*(shell, ch 1) in ch-2 sp, repeat from \* around; join with slip st in top of beg ch-3. Finish off. (24 dc)

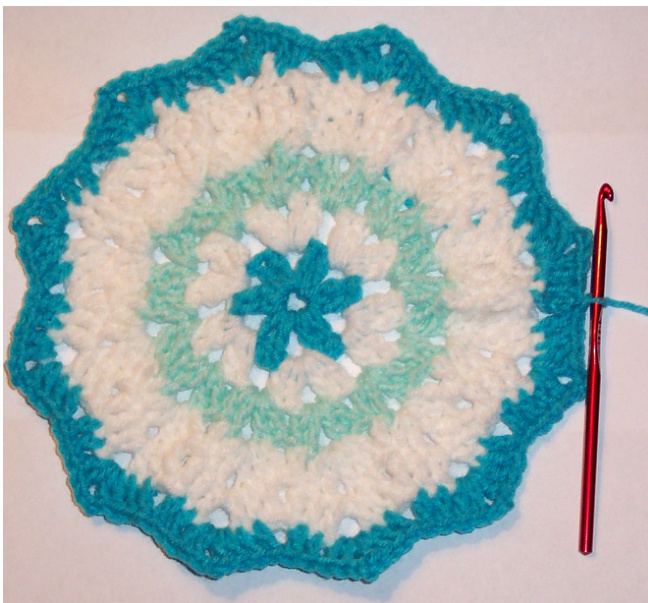
Round 3: Using color C join with a slip st in any ch-2 sp, ch 3, (dc, ch 2, 2 dc) in same ch-2 sp, \*(shell in next ch-2 sp) repeat from \* around; join with slip st in top of beg ch-3. Finish off. (48 dc)
Round 4: Using color B join with a slip st in 2"d dc of any shell, ch 3, shell in ch-2 sp, dc in next st, sk next 2 sts, \* dc in next st, shell in ch-2 sp, dc in next st, sk next 2 sts, repeat from \* around; join with slip st in top of beg ch3. (72 dc)
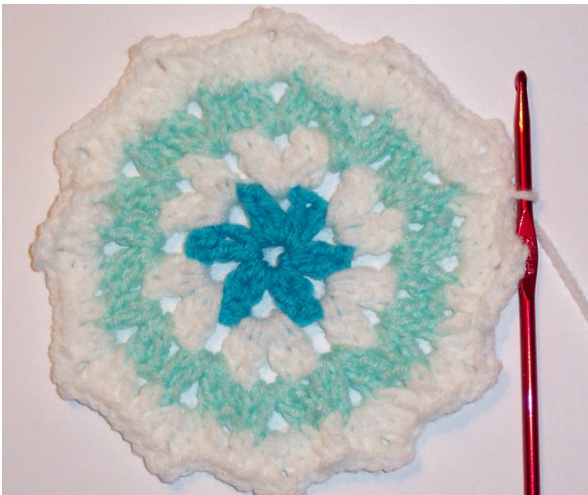
Round 5: Slip st into next st, ch 3, dc in next st, \*V-st in next ch-2 sp, dc in next 2 sts, skip next 2 sts, dc in next 2 sts, repeat from \* around, sk last 2 sts; join with slip st in top of beg ch-3. Finish off. (72 dc) NOTE: In this and all rounds you wish to change yarn colors, join new color with a slip stitch ONE stitch to the left of the slip stitch you just completed which joined the last round together and then you finished off. UPDATE: As you start a new color of yarn, work the round in back loops throughout the round. After this initial yarn color change, work the rounds using both loops until you change yarn colors again. Round 6: Using color A join with a slip st ONE stitch to the left of the slip st that you just completed when you joined the last round together, working in back loops throughout the round, Ch 3, dc in BL of next st, \*shell in next ch-2 space, dc in BL of next 2 sts, sk 2 sts, dc in BL of next 2 sts, repeat from \* around, sk last 2 sts; join with slip st in top of beg ch-3. (96 dc)
Round 7: Slip st into next st, ch 3, dc in next 2 sts, \*shell in next ch-2 sp, dc in next 3 sts, skip 2 sts, dc in next 3 sts, repeat from \* around, sk last 2 sts; join with slip st in top of beg ch-3. (120 dc) Round 8: Slip st into next st, ch 3, dc in the next 3 sts, \*V-st in next ch-2 sp, dc in next 4 sts, sk 2 sts, dc in next 4 sts, repeat from \* around, sk last 2 sts; join with slip st in top of beg ch-3. (120 dc) Round 9: Slip st into next st, ch 3, dc in next 3 sts, \*shell in next ch-2 sp, dc in next 4 sts, sk 2 sts, dc in next 4 sts, repeat from \* around, sk last 2 sts; join with slip st in top of beg ch-3. (144 dc) Round 10: Slip st into next st, ch 3, dc in next 4 sts, \*shell in next ch-2 sp, dc in next 5 sts, sk 2 sts, dc in next 5 sts, repeat from \* around, sk last 2 sts; join with slip st in top of beg ch-3. (168 dc) Pattern continues repeating rounds as pattern established always working 1 round with V-st, and 2 rounds with a shell. Continue repeating rounds 8, 9 and then 10. This will allow your blanket to lay smoother and not increase so quickly. The number of DC will increase on each round as you work stitches in the ch-2 spaces.

Createdby Donna Mason-Svara aka SmoothFoxLover@ yahoo.com @2009 This pattern has been tested. Please notify me of any pattern corrections. I will answer any and all questions you may have with the instructions. Do not plagiarize this pattern. All patterns are my original designs. Please do not re-sell my patterns or give them away for free or post my patterns on the Internet. You may sell items you make from my patterns at craft fairs, fund raisers or custom orders for friends and family but please do not sell finished items on the internet without my written permission. Do not claim designs as yourown. This pattern is copyrighted by me and I give my permission for you to post pictures of items made from my pattern on your website if you will post a link back to my ETSY store if the pattern is for sale. If the pattern is free, please direct people to my blog. Be sure to list the name SmoothFox as the designer.


