MONSTER KEYHOLE SCARF

Basic Construction: This scarfis begins at the tail of the monster and ends at the head. An opening is made for the keyhole/mouth by skipping a stitch for several rows. Spikes are crocheted along the sides of the rows that make up the body. Buttons are used for the eyes and felt is sewn on for the teeth.
Materials:
-1/5.5mmhook -G/4.0mmhook - Worsted weight yarn in Color A and Color B - Buttons for eyes (safety eyes work well instead if you have a way to shorten the pegs) - Piece of white felt for the teeth - Yarn needle (pointed is best but not required)
Gauge:
5 rows of 7 HDC = 2" x 2" (Achieved with worsted weight yarn and 5.5mm hook)
Measurements:
28" (from head to tail) x 3.5" (at the widest point)
Abbreviations (US terms)
CH: chain SL ST: slip stitch HDC: half double crochet HDC2TOG: half double crochet two together DC: double crochet TR: triple crochet DTR: double triple crochet BUuY (Use Color A and 5.5mm hook) (Note: Turn at the end of each row; CH 2 counts as first HDC; I personally prefer to do a faux HDC instead of a CH 2, reasons wh instructions forthis method are at the end of this document; the numberin parentheses at the end of each row indicates the nu of stitches in that row; Grab 2 stitch markers or small scraps of yarn to mark several rows to help you when you add the spikes.) CH 3 Row 1: HDC in third chain from hook (2) Rows 2-5: CH 2, HDC 1 (2) Row 6: CH 2, HDC in same, HDC in next (3) Rows 7-9: CH 2, HDC in next 2 (3) Row 10: CH 2, HDC in same, HDC in next 2 (4) Rows 11-15: CH 2, HDC in next 3 (4)Mark Row 12 Row 16: CH 2, HDC in same, HDC in next 3 (5) Row 17: CH 2, HDC in same, HDC in next 4 (6) Row 18: CH 2, HDC in next 5 (6) Row 19: CH 2, HDC in same, HDC in next 5 (7) Row 20: CH 2, HDC in same, HDC in next 6 (8) Rows 21-24: CH 2, HDC in next 7 (8) Row 25: CH 2, HDC in same, HDC in next 7 (9) Row 26: CH 2, HDC in same, HDC in next 8 (10) Rows 27-55: CH 2, HDC in next 9 (10) Mark Row 36 Row 56: CH 2, HDC in next 5, SL ST in next 2, CH 2, HDC in next 2 (9 HDC, 1 SL ST) Row 57A: CH 2, HDC in next 2, leave remaining stitches unworked (3) Row 58A: CH 2, HDC in next 2 (3) Row 59A (will also complete Row 56B): CH 2, HDC in next 2, CH 1, SL ST down side, SL ST in SL ST in Row 56, SL ST i next HDC in Row 56, CH 2, HDC in next 5 (Row 59: 3 HDC, 1 CH, several slip stitches / Row 56B: 1 SL ST, 6 HDC) Rows 57B-59B: CH 2, HDC in next 5 (6) Row 60: CH 2, HDC in next 5, CH 1, SL ST in CH 1 of Row 59A, HDC 3 (9 HDC, 1 CH) Row 61: HDC2TOG, HDC, HDC in space, HDC in next 4, HDC2TOG (8) Row 62: HDC2TOG, HDC in next 4, HDC2TOG (6) Row 63: HDC2TOG, HDC in next 2, HDC2TOG (4), fasten off SPIKES (Use Color B and 4.0mm hook) Join yarn to the top of scarf's "tail" end (the side opposite the keyhole) with a SL ST, CH 2, DC, SC all in the same stitch SC across up to Row 11 (1-2 SC per row, I usually end up with about 15 SC) In Row 12 (SC, CH 2, SC) in same stitch up to Row 35 In Row 36 (SC, HDC, CH 2, HDC, SC) in same stitch up to Row 55 In Row 56 (HDC, DC, TR, DC, HDC) in same stitch In Row 57, 1 SC In Row 58 (DC, TR, DTR, TR, DC) in same stitch In Row 59, 1 SC In Row 60 (HDC, DC, TR, DC, HDC) in same stitch In Row 61 (SC, HDC, DC, HDC, SC) in same stitch In Row 62 (SC, CH 2, SC) in same stitch, fasten off Cut an appropriate sized piece of felt for the teeth (About 2" wide and %" tall). With your yarn and sharp yarn needle (to pierce the felt), use a running stitch to sew the teeth on to the back of the scarf. If your yarn needle is blunt, carefully use a tool (small hole punch, scissors, knife, etc.) to pierce holes into the felt, then weave your yarn through. Sew on the eyes and you're done!
Special thanks to:
My wonderful testers who gave me excellent feedback and suggestions to improve this pattern! Also thanks to my inspiration for this design: Maria and her knit Monster Scarves on Etsy, please show her some love and visit her shop at morrgan.etsy.com and her blog at morrganscreatures.blogspot.com
Mrs_c1126@yaho0.com
facebook.com/TotallyStitching etsy.com/shop/TotallyStitching ravelry.com/stores/totally-stitching pinterest.com/TotalStitching/
@ Copyright Melissa Campbel
Please do not copy or claim this pattern as your own, I work hard on my patterns and making them available to fellow crafters like you. You are free to sell projects made from this pattern, I would greatly appreciate it if would you provide a link back to this pattern or to my Etsy shop (etsy.com/shop/TotallyStitching). Much appreciated and enjoy!
Faux Half Double Crochet
(This can be done in place of a turning CH 2) I prefer to use faux crochet stitches instead of turning chains for most of my projects because later in your work it's easier to insert your hook into them. Also, I find that the appearance of the faux stitches look more consistent with the rest of your stitches than a turning chain.If you decide to do turning CH 2s for this pattern, just keep in mind that counting the short beginning rows, as well as inserting your hook into them when making the spikes, will be a bit more difficult but still doable.
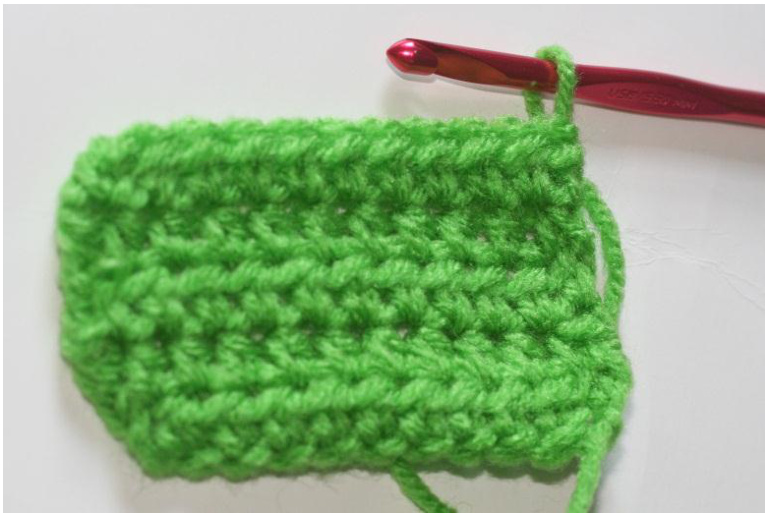
0 1: Turn your work and pull up a loop that is the approximate height of a HDC stitc Step 2: Place your finger on the loop to hold it in place.

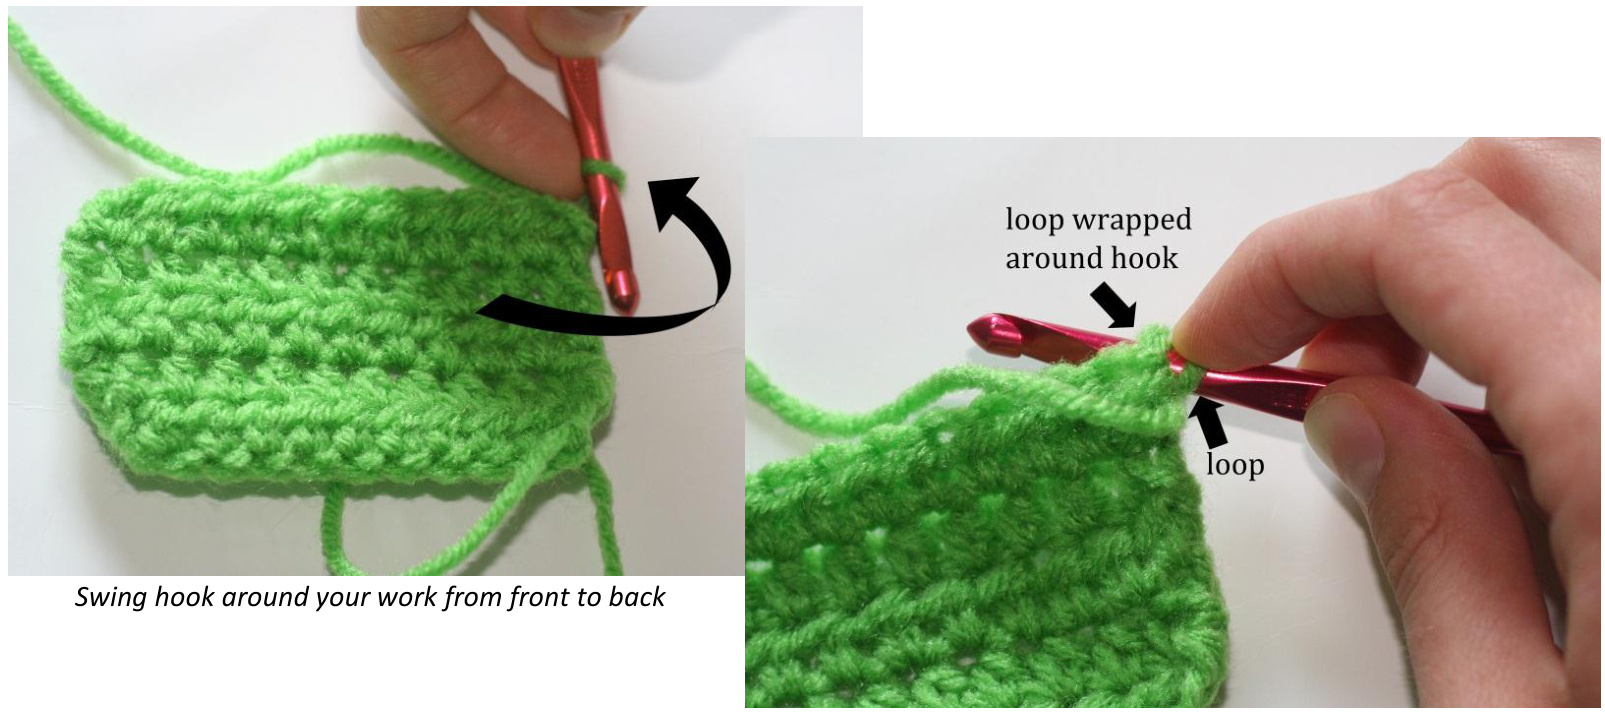
Step 3: Keeping your finger on the loop, turn your hook toward you then behind your work. It should almost look like you have two loops on the hook
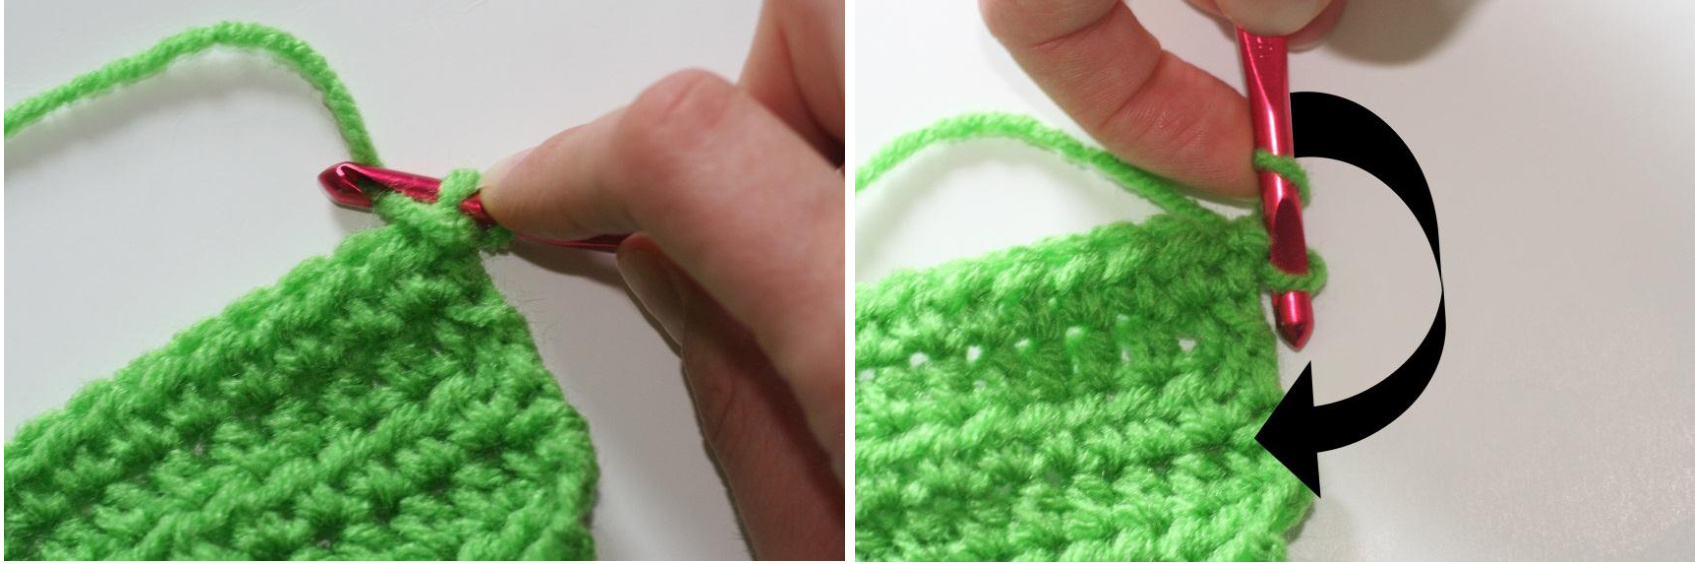
Step 4: Hook the yarn and swing it back around to the front of your work, still keeping your finger in place. Keep your finger on the loop, swing hook around from back to front
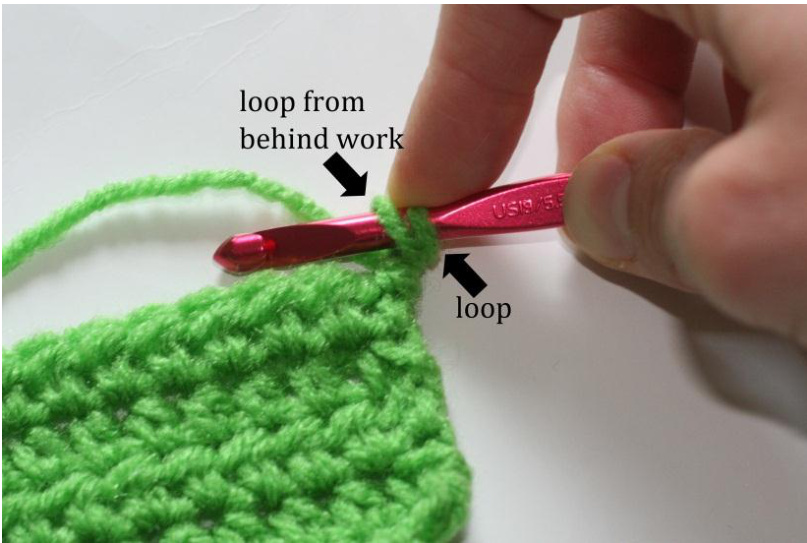
It should look like you have two loops on your hook Step 5: Insert hook in the first stitch, yarn over and pullthrough. You should have 3 loops on your hook. You may now remove your finger from holding the yarn in place.
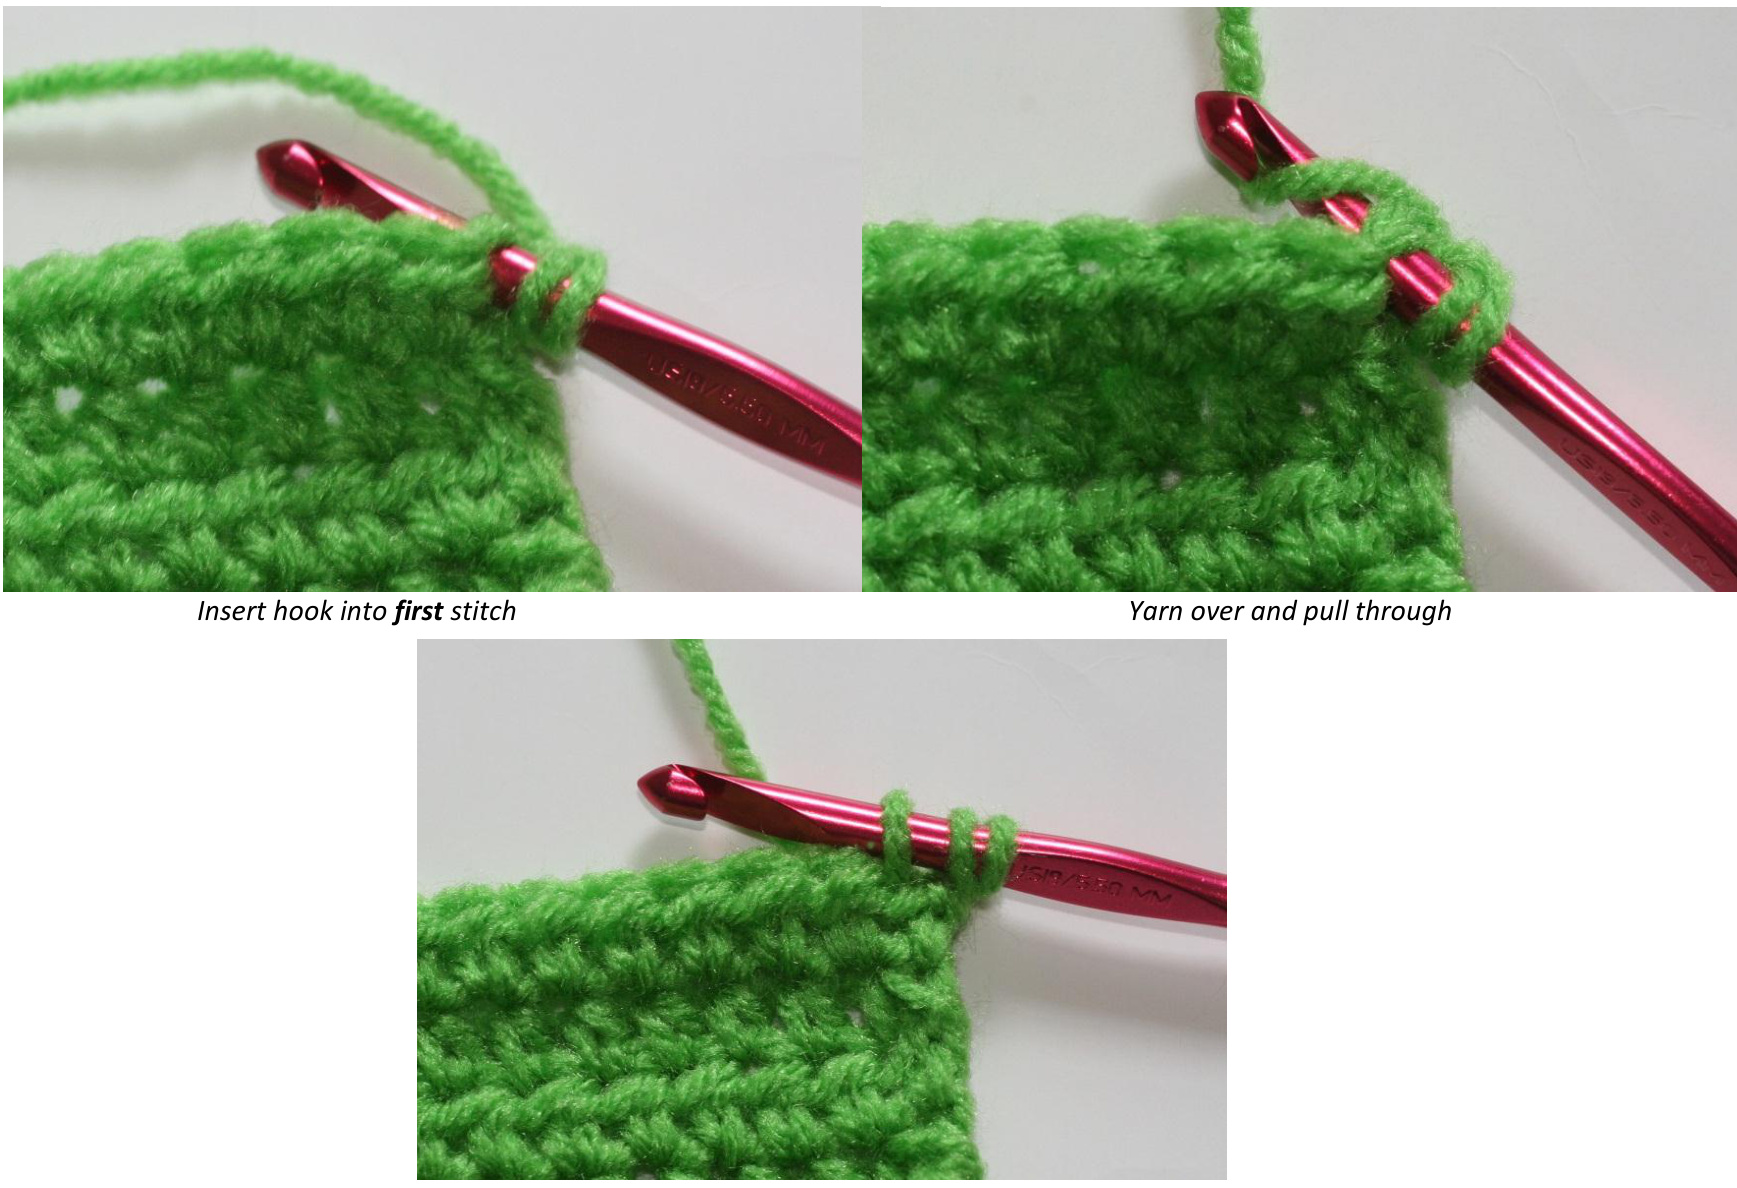
You should have 3 loops on hook. Release your finger from original loop
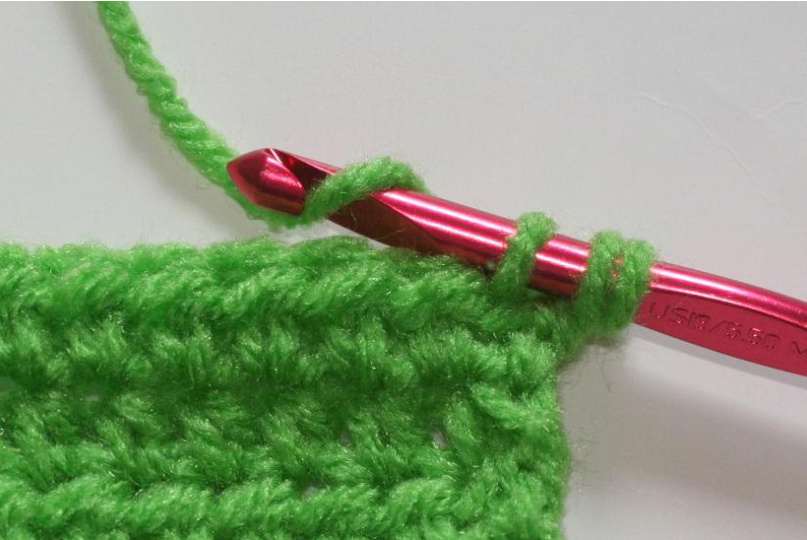
Step 6: Yarn over and draw yarn through all 3 loops on the hook.
Draw through all 3 loops to complete the Faux HDC Continue with your work beginning in the next stitch.
If you still have trouble figuring out this stitch let me know, I can record and upload a video to demonstrate. Mrs_c1126@yaho0.com


