ELSAINSPIREDHAIRHAT
Pattern by: Angela Marconi Follow me on Instagram @Angelattiyarn
You may use this pattern but always refer back to @Angelattiyarn and please use the hashtag #Angelatti for any posted photos. Do not repost the pattern or photos contained within as your own. Any questions comments or corrections can be directed to Angelattiyarn@gmail.com Materials: This pattern uses a size H crochet hook (mm) and \~150 gram of worsted weight yarn. Please note, in order to have no ends sticking out of the braid, you will need additional yarn to complete the hair. This yarn will be trimmed from the hat once the hair is styled so budget for additional weight. H hook Embroidery needle \~170 g of worsted weight yarn G hook Fiber fill (small amount) Rubber band I have made the hat with Vanna's Choice in lamb 2 skeins I have also used Loops and Threads Impeccable Big in Aran. One skein (369 g) made two hats with some yarn left over. These two shades are light buttery cream colors. I have also seen Elsa inspired hair made white---so chose your preference. Abbreviations: ch - chain sC - single crochet sts - stitches hdc - half double crochet sc2tog - single crochet two stitches together slst - slip stitch The hat consists of 3 parts. 1) The foundation for the hat, which is a typical beanie. 2) The bump-it, which takes the place of the full bangs in the front and 3) The hair which is attached at the base of the beanie and wrapped over the bump-it. 1)The Beanie I have included a beanie pattern that I wrote, but you can also use your favorite beanie pattern. My pattern is a 8 count hdc progression. The rows are joined and you don't count the ch1 as a stitch. This willfit a child, but can easily fit a teen by adding additional rows. Because this is “hair" you want the beanie to fit above the ears (not over them) so test the fit if you can because you may need to stop short. · Using a magic circle make 8 hdc (or ch 3, make 8hdc in 3rd chain from hook). Slst into first hdc. (8 sts) · Ch1. 2hdc in each hdc around. Slst into first hdc. (16 sts) · Ch1. \*1hdc in first st. 2hdc in next st.\* Repeat \* around. Slst into first hdc. (24 sts) · Ch1. \*1hdc in first two sts. 2hdc in next st.\* Repeat \* around. Slst into first hdc. (32 sts) · Ch1. \*1hdc in first three sts. 2hdc in next st.\* Repeat \* around. Slst into first hdc. (40 sts) · Ch1. \*1hdc in first four sts. 2hdc in next st.\* Repeat \* around. Slst into first hdc. (48 sts) · Ch1. \*1hdc in first five sts. 2hdc in next st.\* Repeat \* around. Slst into first hdc. (56 sts) · Ch1. 1 hdc around. (56 sts) · Ch1. \*1hdc in first thirteen sts. 2hdc in next st.\* Repeat \* around. Slst into first hdc. (60 sts) · Ch1. \*1hdc in first fourteen sts. 2hdc in next st.\* Repeat \* around. Slst into first hdc. (64sts) Repeat the last row until the hat is the desired size. I used 17 rows total.
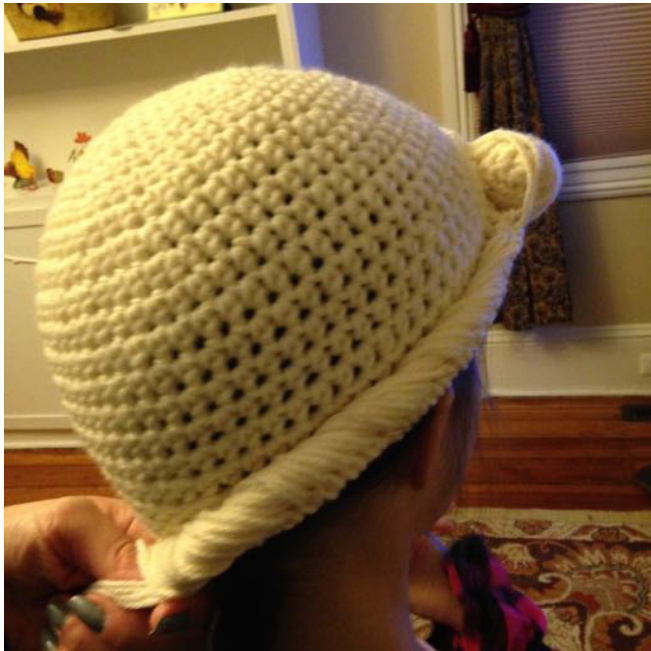
2) The Bump-it
I call it a bump-it because that's what it was called when I was in high school, it's just a small crocheted tube that's stuffed with fiber fill. It will give a lift in the front, similar to a pompadour. This is how we simulate Elsa's full bangs
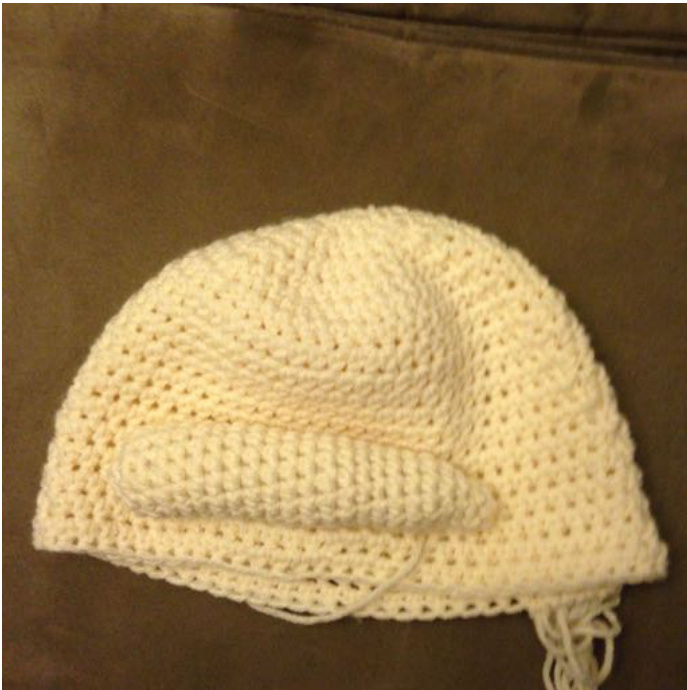
The bump-it is made without joining rows. It is a hollow tube with one flat end and one tapered end. Mark the end of the row so that you can keep track of where you are. Using the G hook, make a magic circle with 6 sc (or Ch 2 and sc6 times in the second chain from the hook). (6 sts) 2Sc in each st around. (12 sts) Sc around through back loop only. 1sc in each. (12 sts) Continue around making one sc in each sc until the bump-it measures approximately 5.5 inches. Then you will start the tapered reduction. \*Sc in first st. sc2tog.\* Repeat \* around. (8 sts) Sc around. (8 sts) Stuff with fiber fill. Sc2tog around. (4 sts) Sew closed and leave a long tail for sewing bump-it to the beanie. Sew to the front of the hat with tapered side near ear a few rows back from the hat edge.
3) The Hair
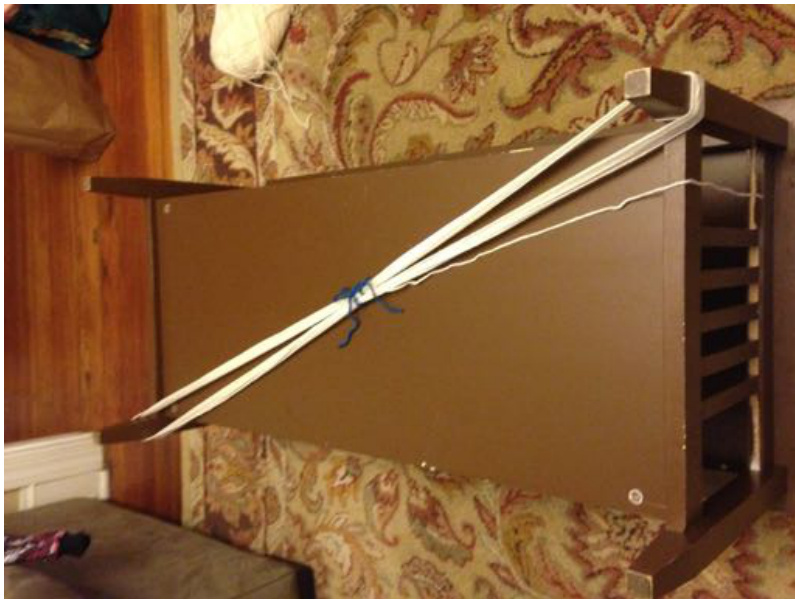
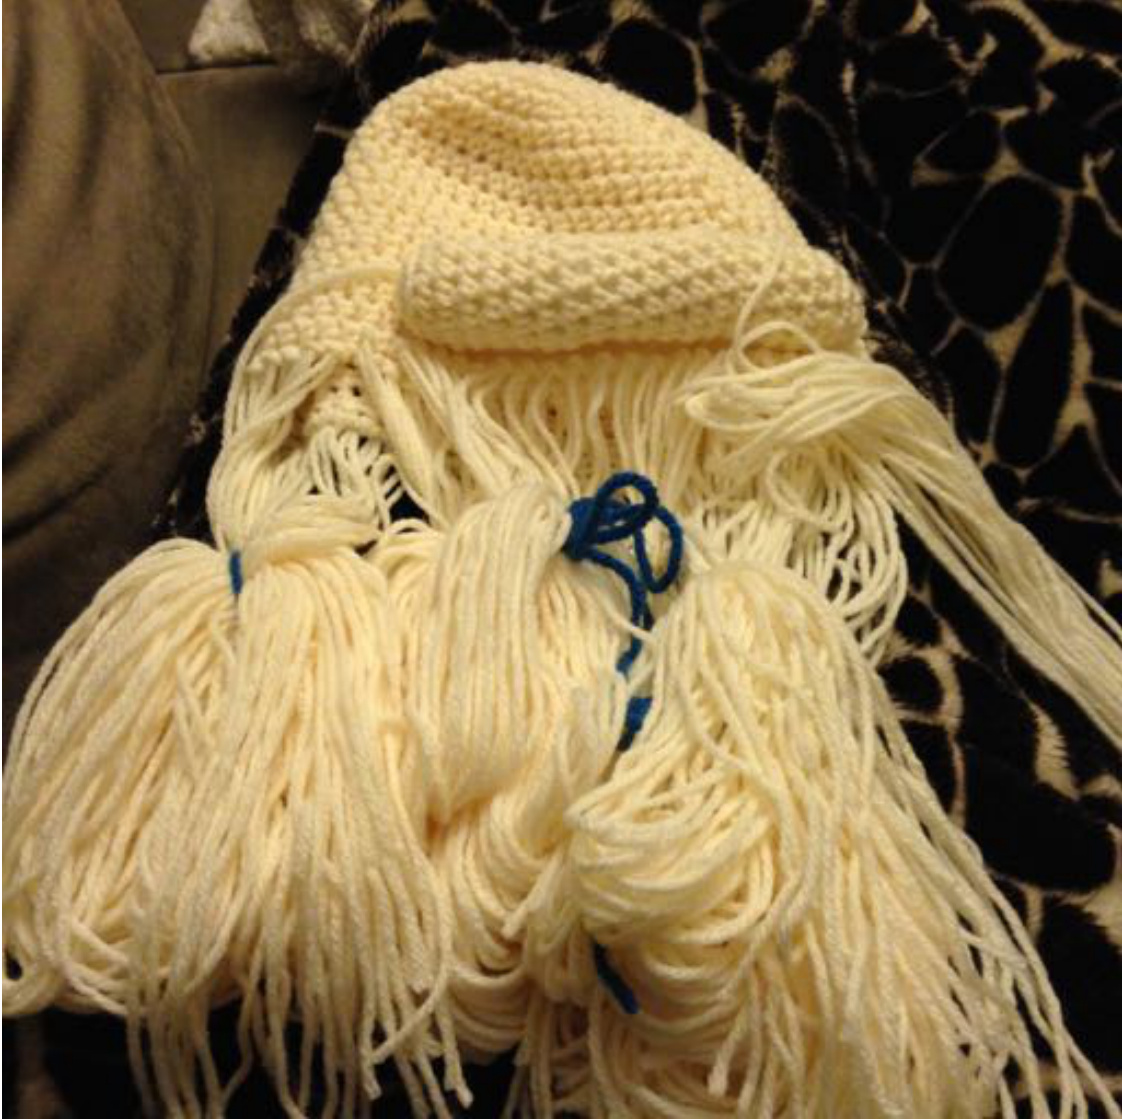
Cut \~8' length sections of yarn. I did this by flipping my coffee table over and wrapping yarn around the legs (see below). This is much faster than measuring each strand. The table legs were \~3.75' apart so I wrapped the yarn around 15 times and then cut through the yarn on oneend. You will need enough pieces to put one length through each stitch around the hat (mine has 64 stitches) plus an extra row the length of the bump it (\~20 extra lengths). Hair in the back can be shorter but you need to make sure that they are all long enough for the braid. If they are too short the braid won't look as good.
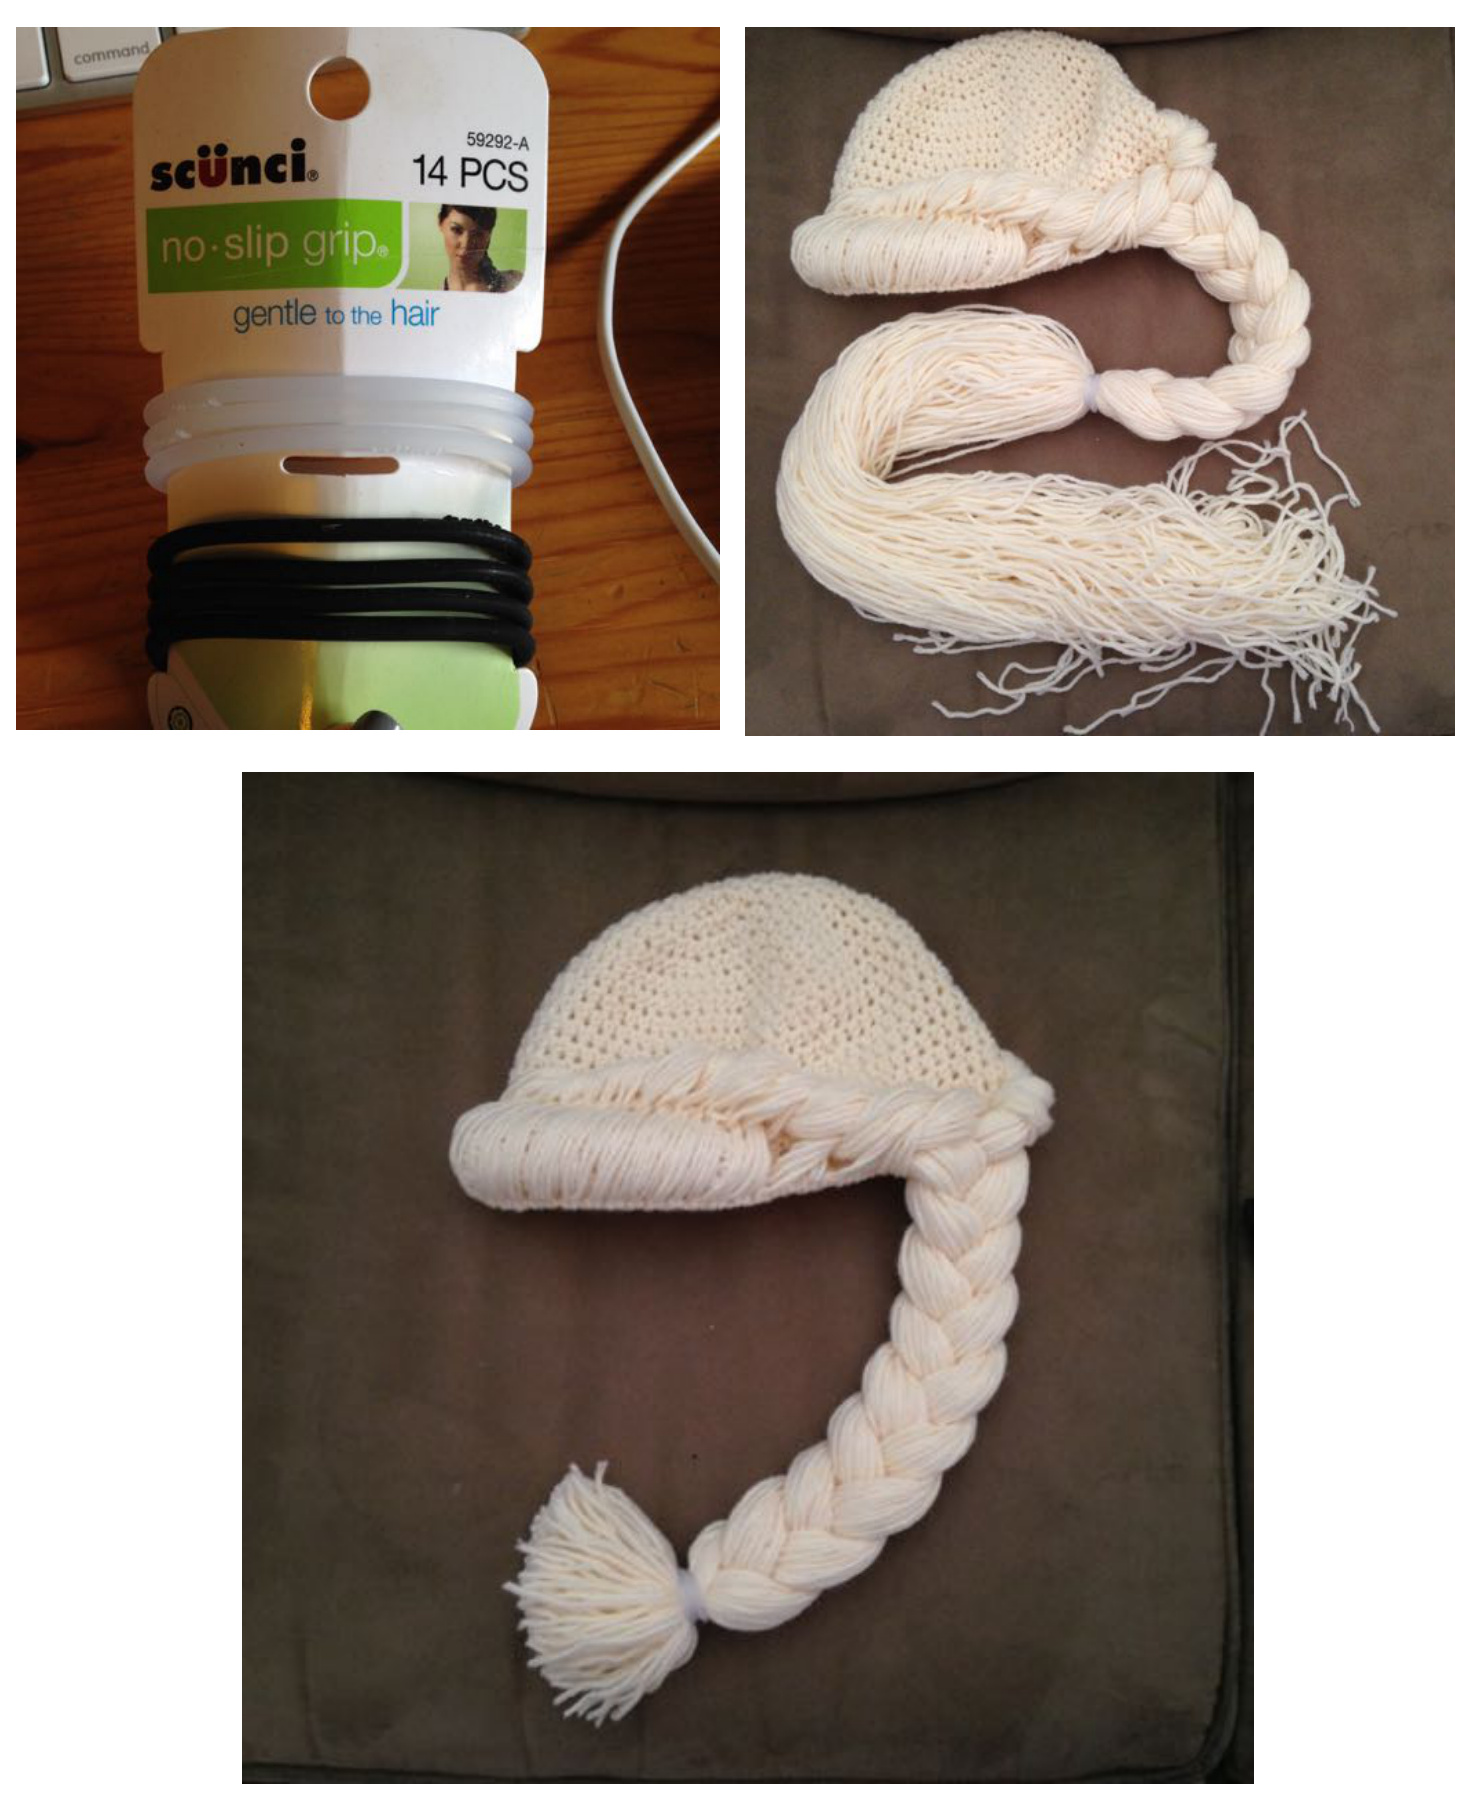
Hook the hair in by folding the length in half. Pull the fold through the stitch pulling from the outside to the inside, then pull the length of hair through the loop and tighten.
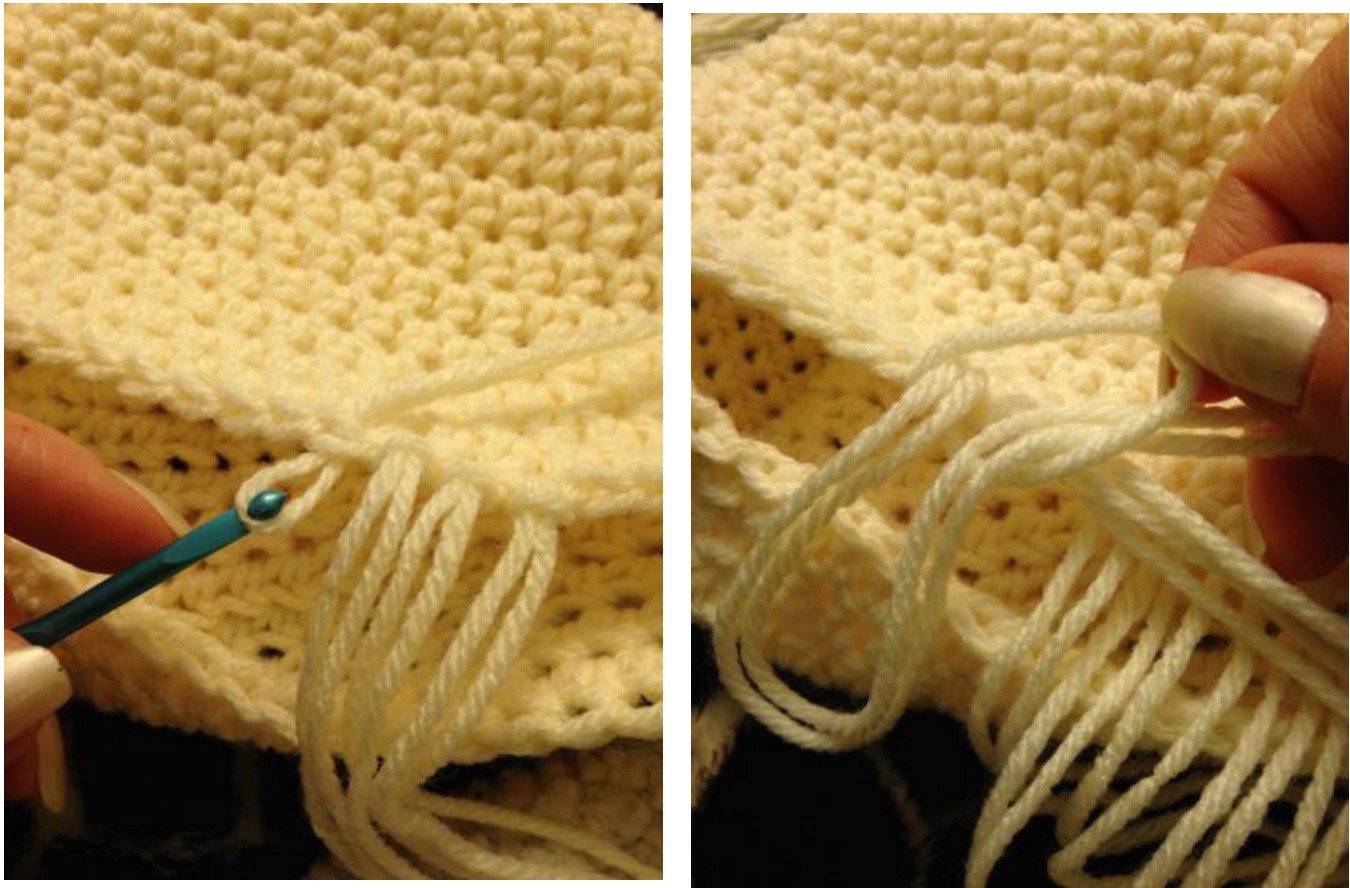
Tie up the hair as you go to avoid knots.
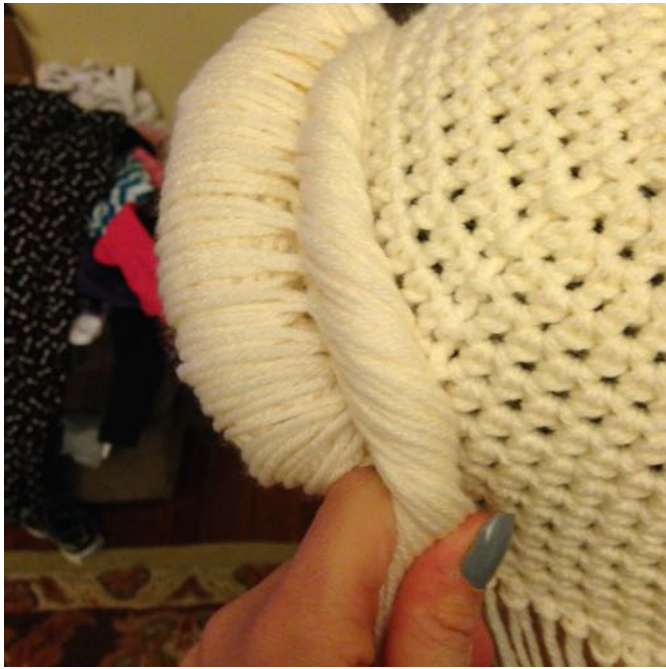
Along the bump-it, thread in a second row of strands 1 row in.
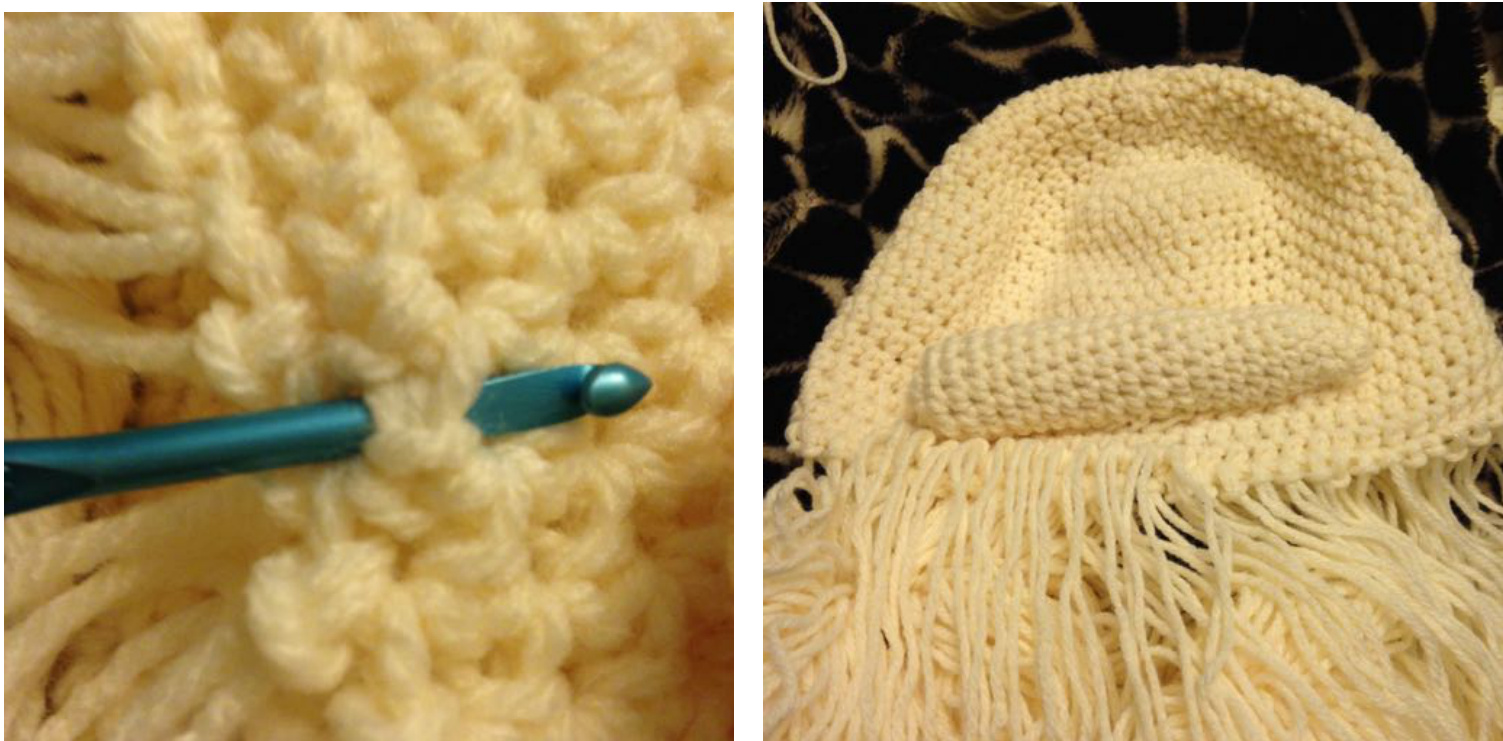
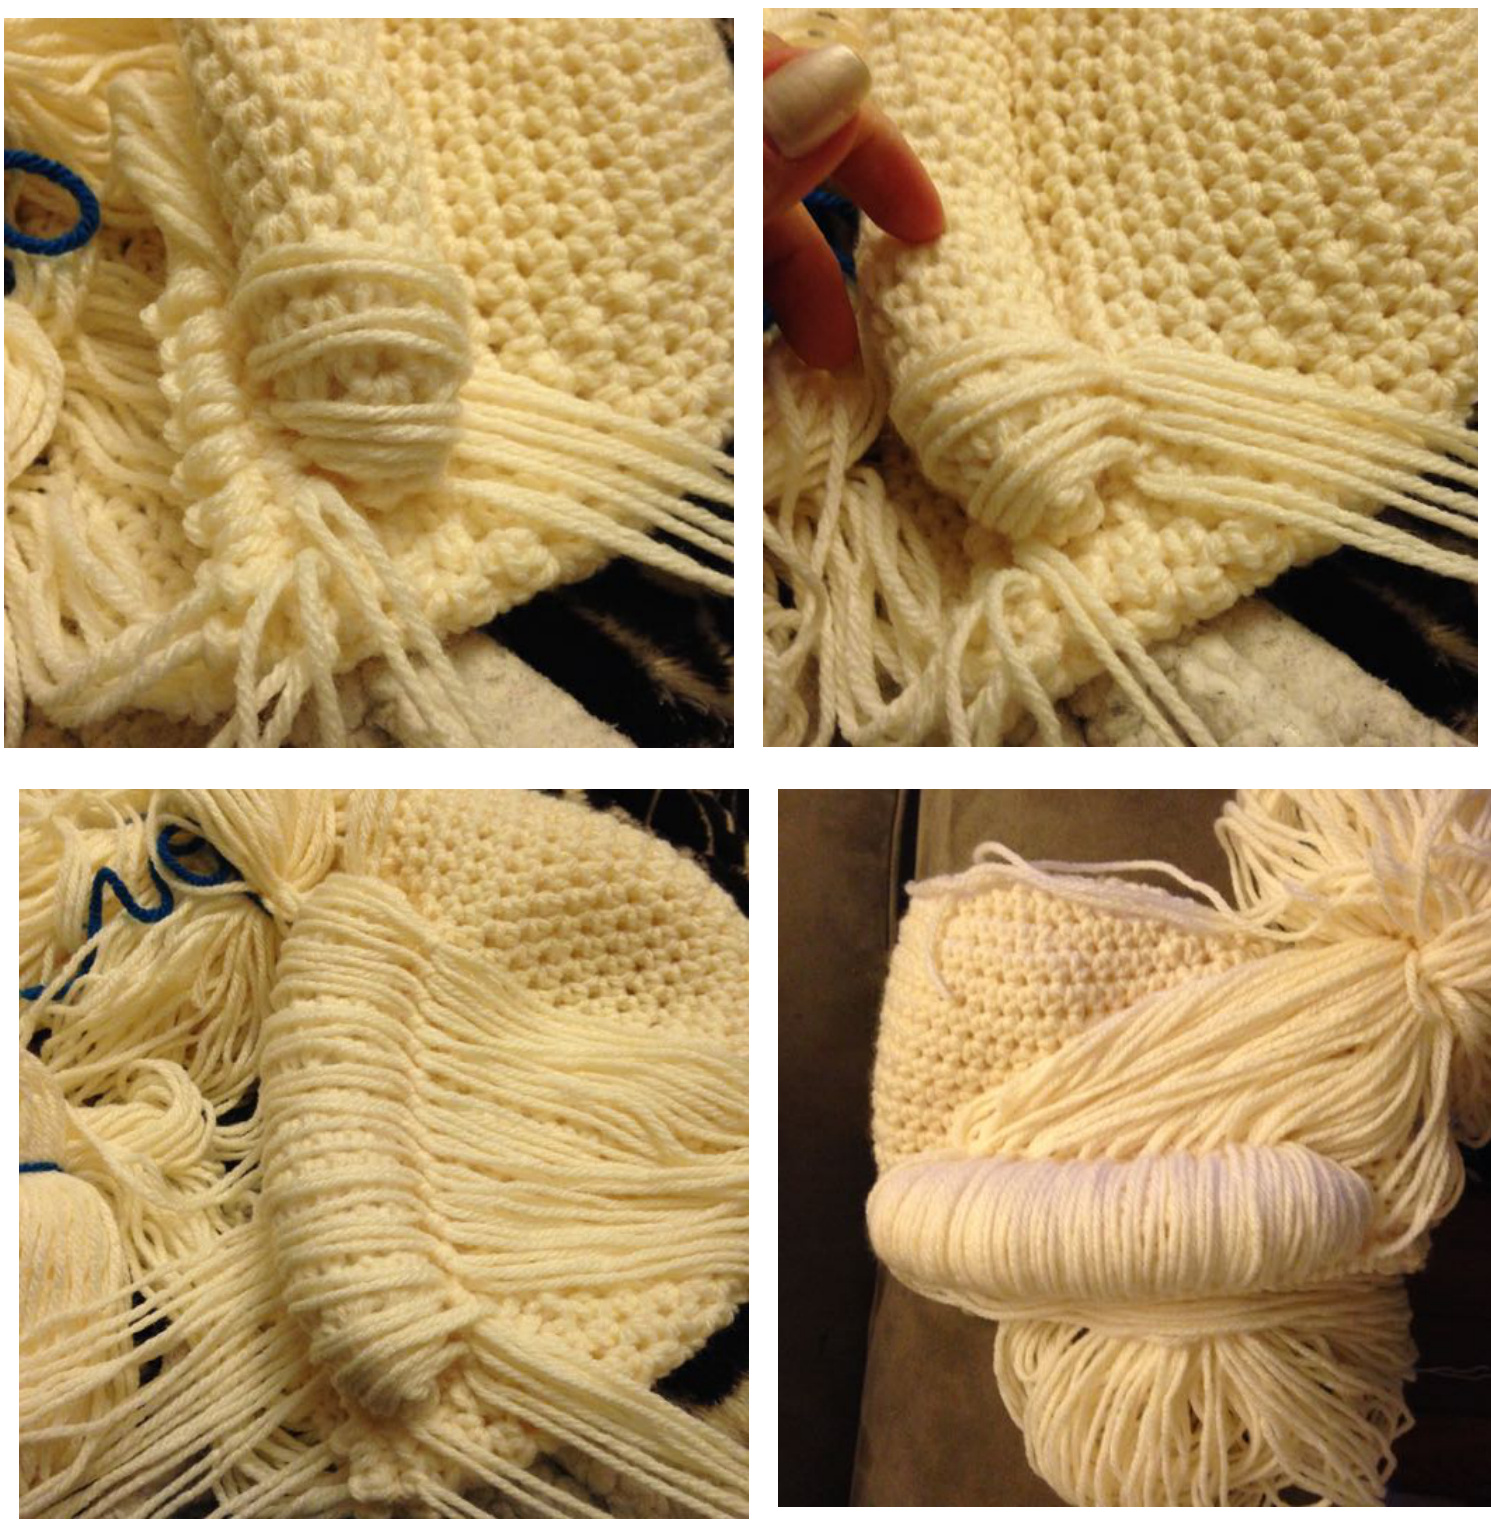
The two rows of hair along the bump it, need to be wrapped over the bump-it and threaded through the stitches behind it. This covers the bump-it and secures the strands. Start with the inside row first and then work with the outside row.
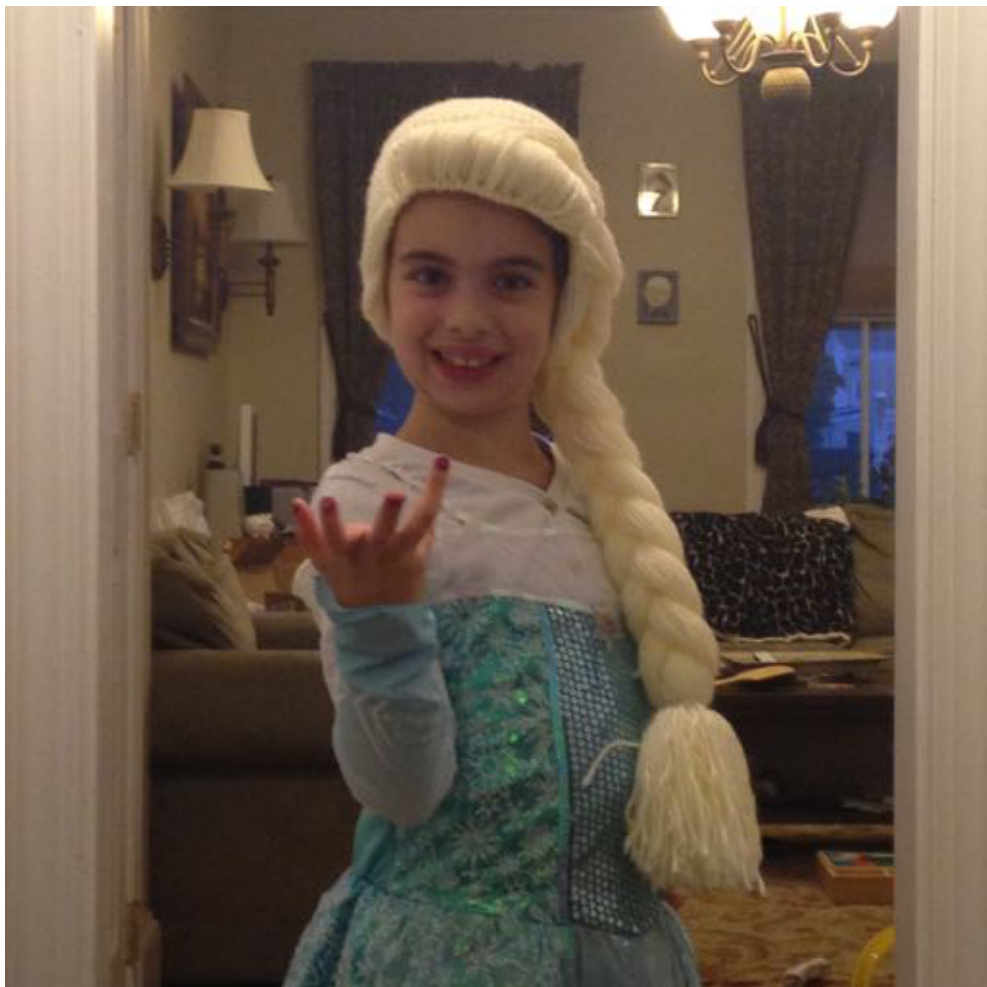
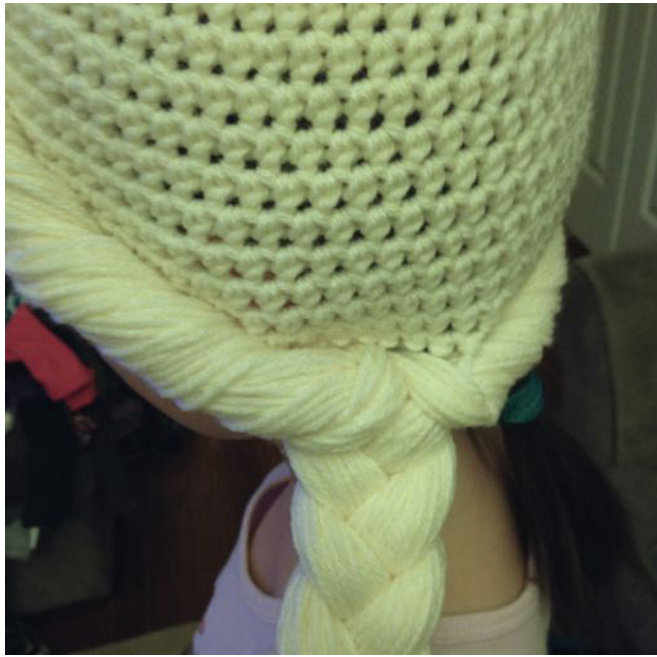
To style, the hair is parted on the right side with a side braid that drapes over the left shoulder. You will need a model in order to style the hair properly. Begin on the right side, twisting the hair toward the head. Move around toward the back of the head continuing to twist, incorporating new strands as you go. When you get to about the left side nape of the neck secure with a clip.
For the left side of the hair, start the right side at the bump it. You have already wrapped over and secured the hair on the inside of the bump it. Begin wrapping toward the head (just like the right side) incorporating new strands as you go. Make sure that the hair is not tangled as you go. Continue until you have almost met the hair from the right side (approximately 4 hair pieces left). Divide into three parts to begin the braid. Pull tightly as you start the braid. Braid as long as you like then secure with a rubber band.
I have used scunci no slip grip clear rubber bands. They are strong and stick nicely to the yarn, but are very subtle so you hardly notice them. Trim the excess hair.