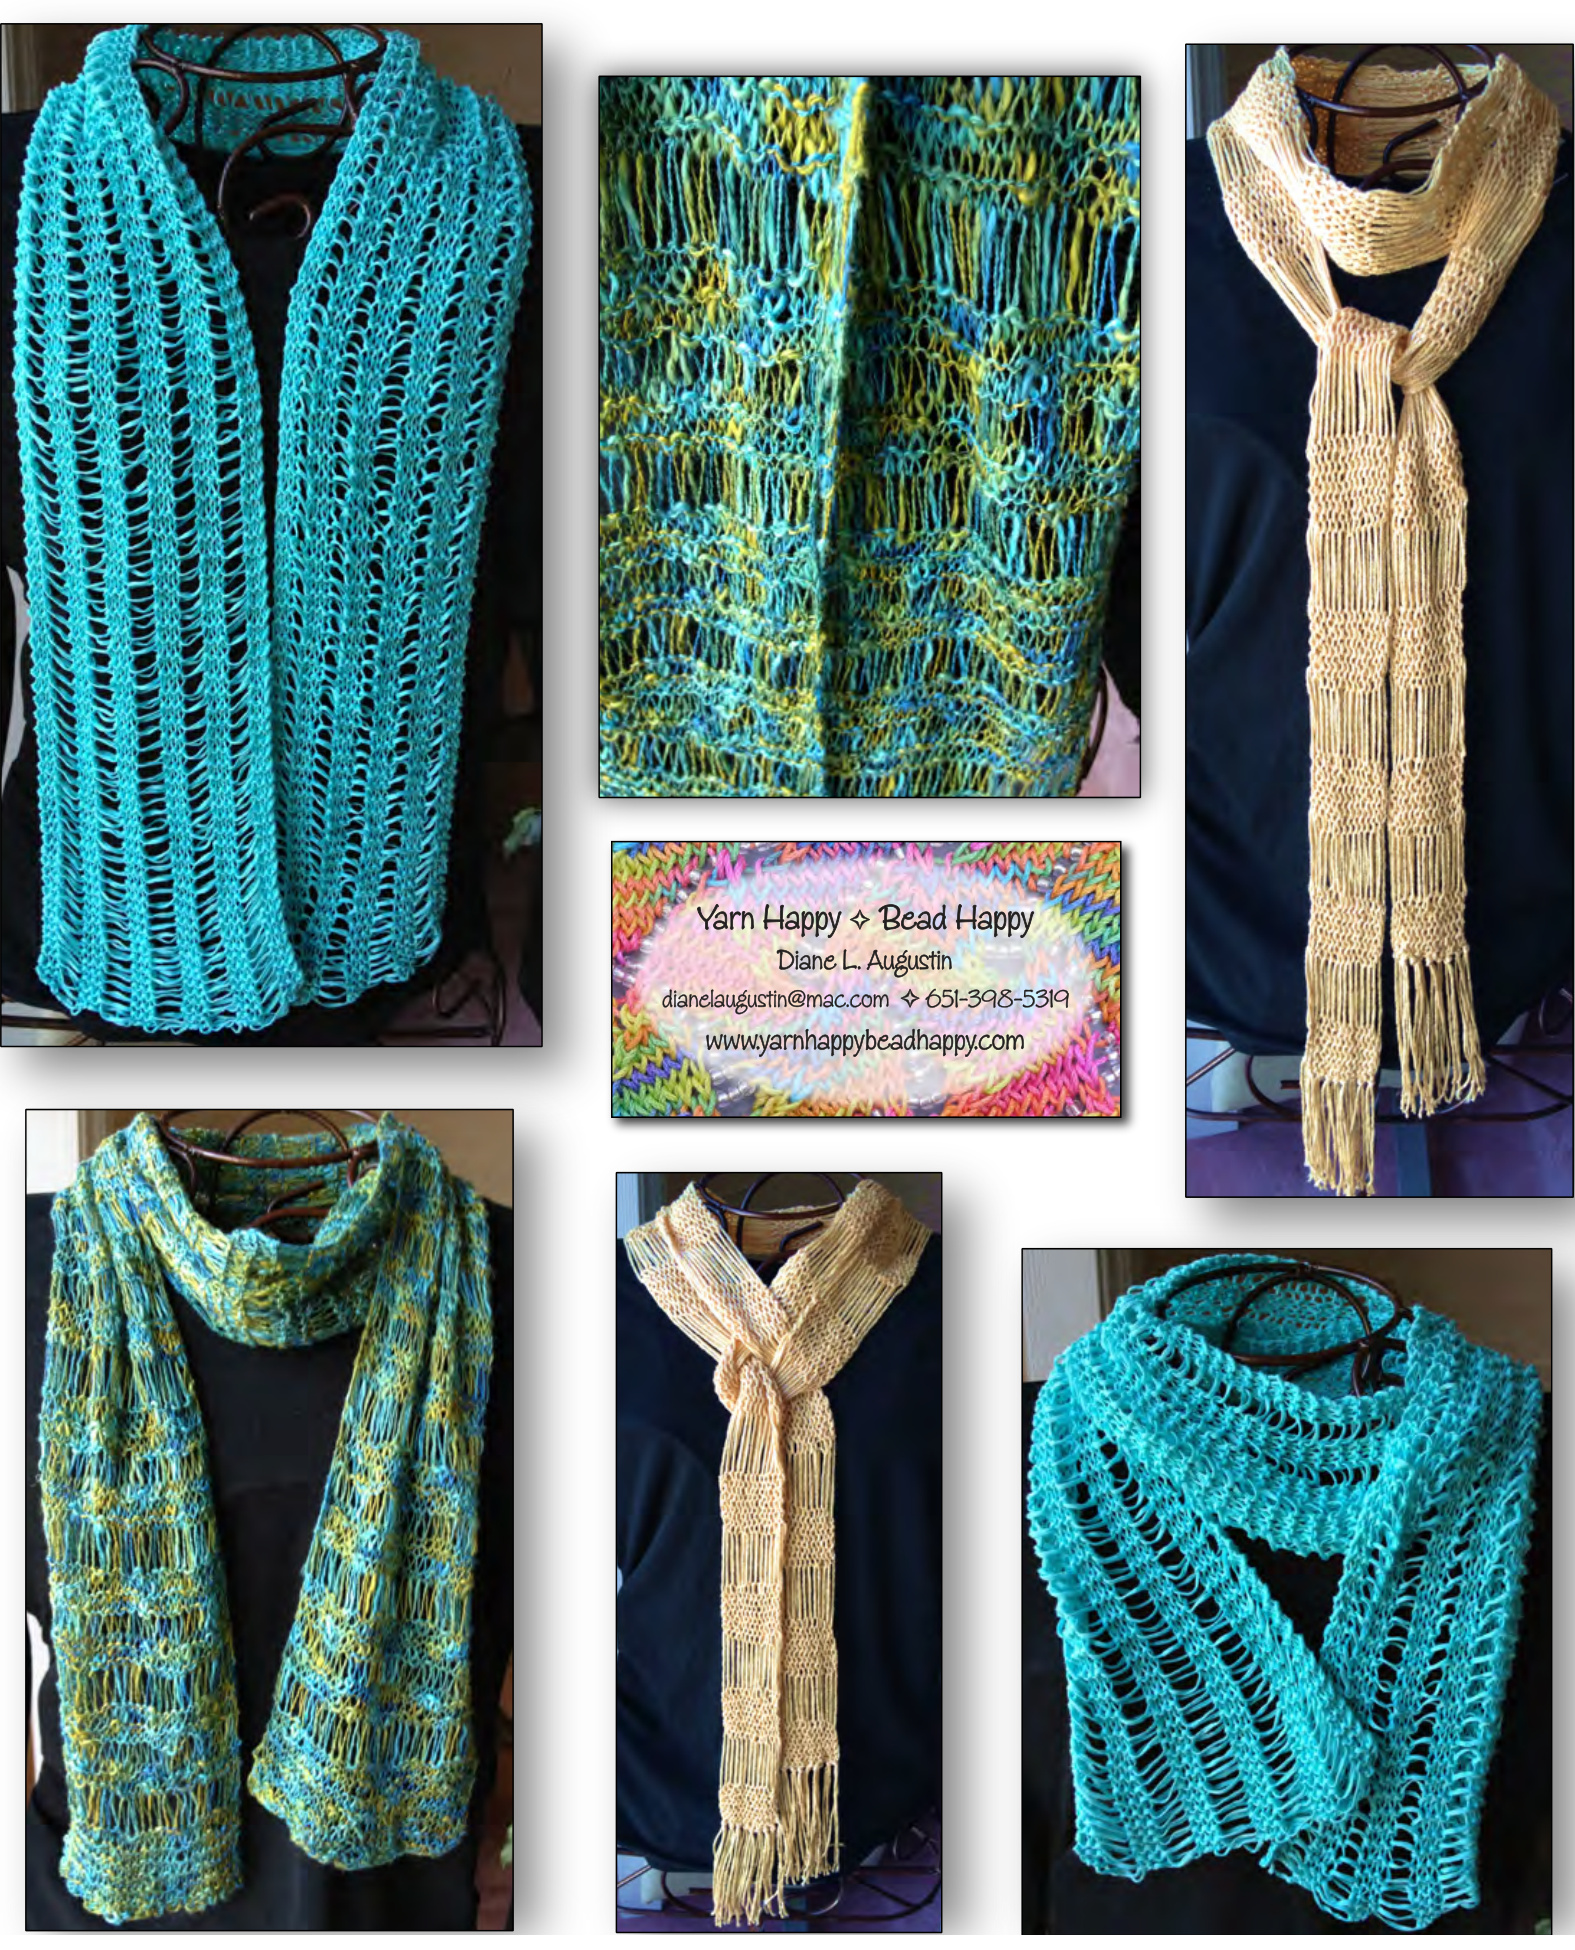
Dropped Stitches on Purpose Three wam weathr knittingprojectsusing drpstchtchniqu. Designed and knit by Diane L. Augustin
Dropped Stitches on Purpose Project #1
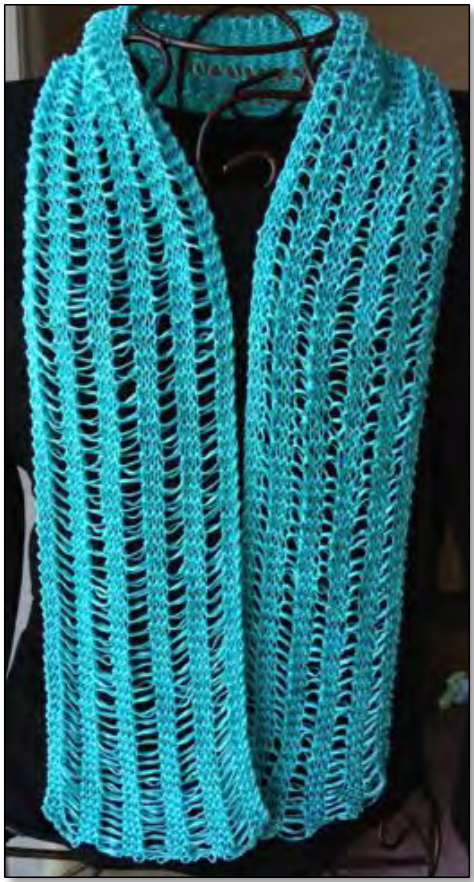
Are you a knitter in thewinter and a gardenerin the summer?Areyour busy summer days filled with wonderful things to do? When you're all done with your day and you're relaxing in the fabulous summer evenings, do you think about knitting? Why not try knitting a cool cotton yarn intosomethingfabulous? Here's a really fun project for you. It's a completely reversible scarf that is knit, and then stitches are dropped at the bind off and run down the fabric. That's it. It's so easy! It's CooL and comfortable in your hands and a perfect project for social knitting. You won't even get messed up if you have that second glass of wine! You may not thinkyou'll everwear a scarfor shawl in thesummertime,however, remember those two-cool air-conditioned spaces in office buildings and stores or the occasional chilly evening breeze after you've spent many hours in the sun. You need a little something to toss around your neck or lightly drape over your shoulders. This patternisperfectforthosetimes.Thefinishedsizeofthescarfis6"widex5o"long.You may also make a wider version of the scarf or transform it into a shawl by increasing the amount of cast on stitches and adding moreyarn. Materials: 1 ball (176 yards) of SMC Select, Belisia, 100% cotton yarn. (2 balls for the second size and three balls for the third size shawl or wrap.) Size 10 knitting needles. 5 locking stitch markers. Yarn needle. Note: This pattern works particularly well with tape yarns. Also experiment with other cotton, bamboo, hemp and linen blends. Construction:
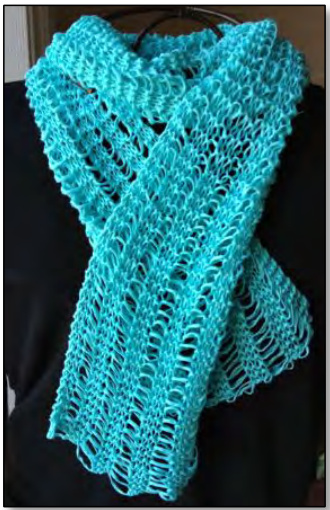
The Scarf is knit in garter stitch from the bottom up. The fun continues when you bind off and release stitches on the last row. Allow released stitches to "run" down the length of the scarf. You will have to work them with your fingers all the way down the fabric. Directions: Using the long tail cast on method, cast on 23 stitches. (43 stitches for a 12" wide scarf OR 68 stitches for a 24" wide wrap orshawl). Knit all rows. Yep, plain old garter stitch. Reserve enough yarn for the bind off. Calculate approximately one inch per stitch for the bind off row.
Bind off:
The bind off requires that the entire ball of yarn pass through the loop after each set of stitches is bound off You are securing three stitches and knitting two live stitches across the row.
\*Bind off two stitches in the normal way as follows: K2, pass the last first over the last stitch knit, K1, pass the first stitch over the last stitch knit. Make the stitch on your right needle a big loop and pass the entire ball of working yarn through it. Pulltight to secure, just as would the final stitch in a project. Knit the next stitch and place it on a locking stitch marker\* Repeat from\* across the row until the last three stitches. Bind off the final two stitches, securing the last stitch. Remove the locking stitch markers from your live stitches and let them run. In the case of the scarf pattern, it was a total of 5 live stitches. You will need to unravel them down the length of the scarf. Weave in tails. Enjoy! Thank you for your purchase. Please free to contact me with any questions. dianelaugustin@mac.com Designed and knit by Diane L. Augustin. Copyright 2013. All Rights Reserved. www.yarnhappybeadhappy.com www.yarnhappybeadhappy.etsy.com http://www.ravelry.com/designers/diane-l-augustin
Dropped Stitches on Purpose Project #2
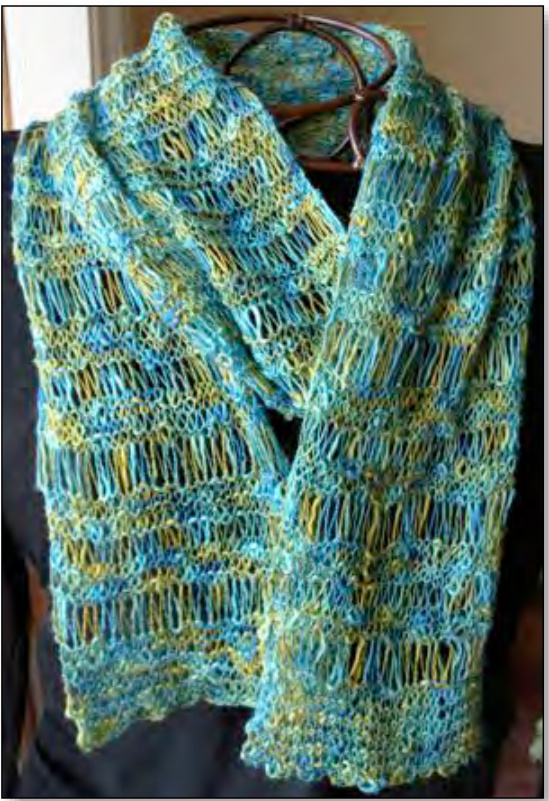
Araucania, Lontue, is a distinctive cotton/linen blend, which will captivate you as you knit this easy, breezy, lightweight drop stitch scarf. The scarf is 5 1/2" x 80" long, which allows you to wear it any number of ways. It is knit flat from end-to-end. Convert the scarf into a lovely wrap by adding a second or third skein of yarn and increasing the number of stitches cast on. It's a perfect project to knit and wear in the warmer months or to block the chill of too-cool air-conditioned spaces. It's quick and easy and perfect for knitters of any skilllevel. Materials: 1 skein (249 yards) of Araucania, Lontue (50% Cotton, 50% Linen). Size 8 knitting needles, in any comfortable length. Yarn needle. Note: For a wrap that will be approximately 11"wide, cast on 66 stitches. For a wrap that will be approximately 17" wide, cast on 100 stitches. Directions: Using the long tail cast on method, cast on 33 stitches with both needles held together. (This will create a flexible cast on edge.) Holding your stitches on, carefully pull one needle out of the cast on stitches. Rows 1-11: Knit.
Begin the Drop Stitch Sequence:
Row 12: Drop Stitch Set up Row: \*K1, Y0 2x (wrap the yarn over your needle twice)\*, repeat from\*, end with a K1. Row 13: Drop Stitch Release Row: \*K1, release the yarn overs (just let them go off your needle)\*, repeat from\*, end with a K1. Rows 14-16:Knit. After every section, gently tug on the work to "set" the drop stitches and pull your stitches into position. Row 17: Drop Stitch Set up Row: \*K1, Y0 1x (wrap the yarn over your needle once)\*, repeat from\*, end with a K1. Row 18: Drop Stitch Release Row: \*K1, release the yarn over (just let it go off your needle)\*, repeat from\*, end with a K1. Rows 19-21:Knit. Repeat the Drop Stitch Sequence of Rows 12-21, 4 times. Repeat the Drop Stitch Sequence of Rows 17-21, 27 times. Repeat the Drop Stitch Sequence of Rows 12-21, 4 times. Repeat the Drop Stitch Sequence of Rows 12-16, 1 time. Knit 11 rows.
Bind off loosely using this method matching the tension of the cast on.
K2, \*Slip both stitches back to the left needle, Knit them TOG through the back, K1, repeat from \* Weave in ends. Blocking: Soak the scarf or wrap for 15 minutes in lukewarm water with a few drops of non-rinsing wool wash mixed in. Gently liftit out of the water and squeeze out the excess water. Rollit in a towel and blot out the excess water. Arrange the project on a dry towel and straighten. Allow it to dry flat. Enjoy!

Dropped Stitches on Purpose Project #3
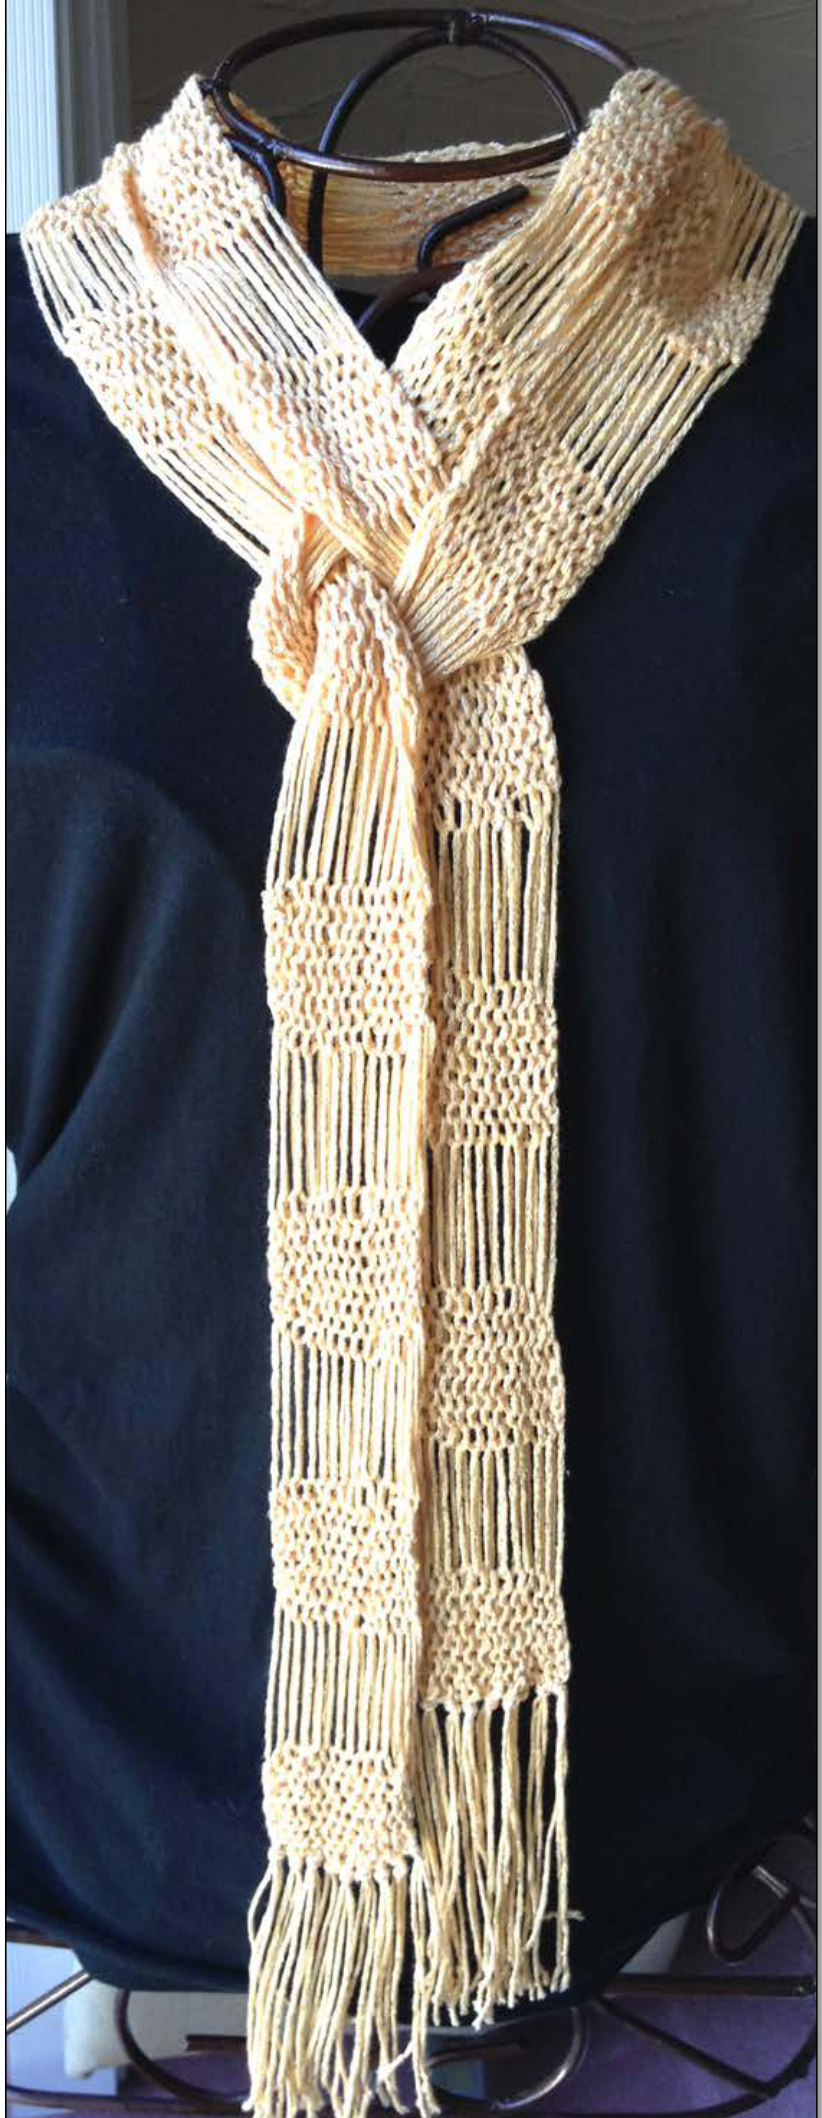
This skinny scarf version is perfect for those times when you need a little pizazz foryour outfit. The finished size of the scarf is 2 1/2" wide x 94" long, giving you many fashion options.Create a wider version ofthescarf and transform it into a wrap or shawl by increasing the amount of yarn and following thesameconstruction. Knit in the round,it's CooL and comfortable inyour hands and a perfect project for social knitting, movie watching knitting or knitting while listening to a recorded book. Try this pattern with any of the warm weather yarns.
Materials:
1 ball (176 yards) of SMC Select, Reflect, 52% rayon/48% cotton yarn. Size 9 knitting needles. (I prefer 24" length.) Locking stitch markers. Yarn needle. Sharp scissors.
Construction:
The Scarfis knit in the round. Stitches are bound off and released in sections on the last row. Allow released stitches to "run" down the width of the scarf. Open them up row by row with your fingers or the tip of the needle. Seven stitches on each side of the marker are released and then cut to create the fringe. Yes, I said cut. Don't be scared, it will be fun! Increase the width to make a wrap or shawl, by adding more yarn and following the same construction method. For example, adding a second ball of yarn will double the width, and so on. If using more yarn, be sure to add it at the marker.
Directions:
It is very important to use the long tail cast on method. Holding both needle tips together, Cast on 180 stitches. Carefully pull out one needle tip and distribute the stitches evenly around the cable and onto the other needle tip. Place marker, being careful not to twist the stitches, and join in the round. Round 1: Knit. Round 2: Purl. Repeat Rounds 1 & 2 for 22 rounds Round 23: Knit.
Bind off:
All the fun happens here! The bind off requires that the entire ball of yarn pass through the last stitch on the right needle after each bound off section of stitches. Bind off all stitches very loosely. The bind off tension should try to match the cast ontensionascloselyaspossible. For half of the fringe: Knit 7 stitches and place them on a locking stitch marker. Bind off 4 stitches (securing 5 stitches) as follows: \*K2, pass the first stitch over the last stitch knit, K1, pass the first stitch over the last stitch knit, K1, pass the first stitch over the last stitch knit, K1, pass the first stitch over the last stitch knit. Make the stitch on your right needle a big loop and pass the entire ball of yarn through it. Pull tight to secure, just as would the final stitch in a project. Knit the next 2 stitches and place them on a locking stitch marker. \* Repeat from\* across the row until the last twelve stitches. Bind off the final 4 stitches (securing 5 stitches) as above. Pass the ball of yarn through the last loop, securingthe last stitch. For half of the fringe: Knit 7 stitches and place them on a locking stitch marker. Releasing the live stitches: Remove the locking stitch markers from the live stitches unravel them down the width of the scarf. Open them up row by row with your fingers or the tip of the needle. Fringe: The 14 stitches unraveled stitches will be cut down the center, making fringe. Lay the scarf flat on the table and measure the length of the 14 stitches we dropped for fringe. Divide the amount in half, straighten it out and using SHARP scissors, cut down the center, creating fringe for both ends of the scarf. Separate the fringe into groups of three strands each and tie an overhand knot at the top of each, near the base of the stitches. Tie an overhand knot at the bottom of each piece of fringe to prevent the yarn strand from unraveling.
Blocking:
Soak the scarf for 15 minutes in lukewarm water with a few drops of non-rinsing wool wash mixed in. Gently lift it out of the water and squeeze out the excess water. Roll it in a towel and blot out the excess water. Arrange the project on a dry towel and straighten, paying extra attention to the dropped stitch sections. Allow it to dry flat.