Interlocked
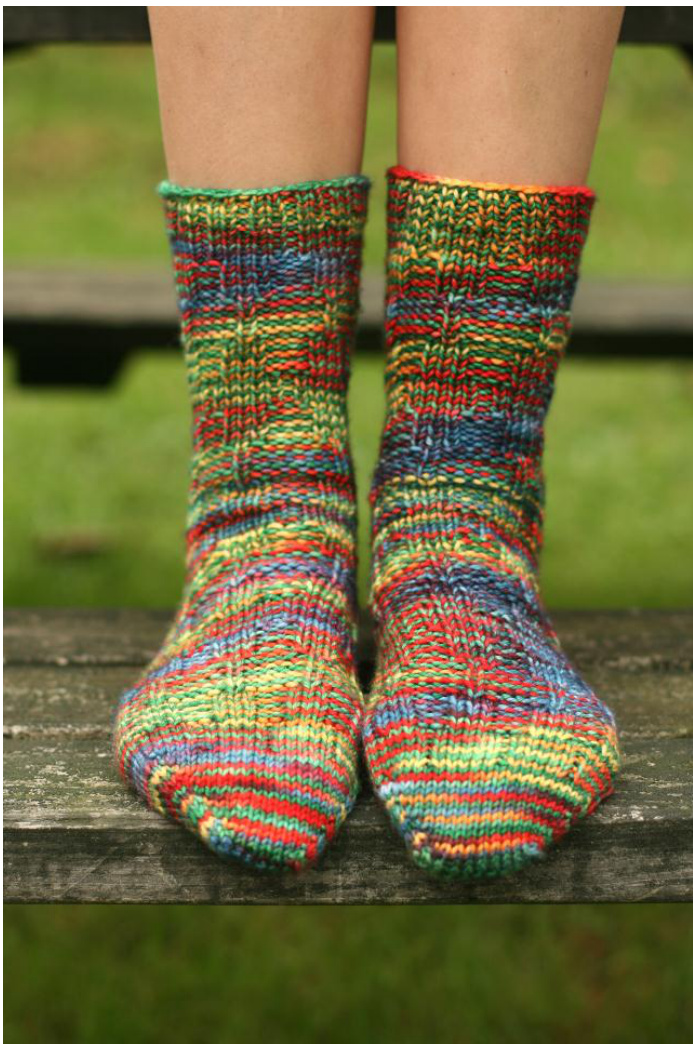
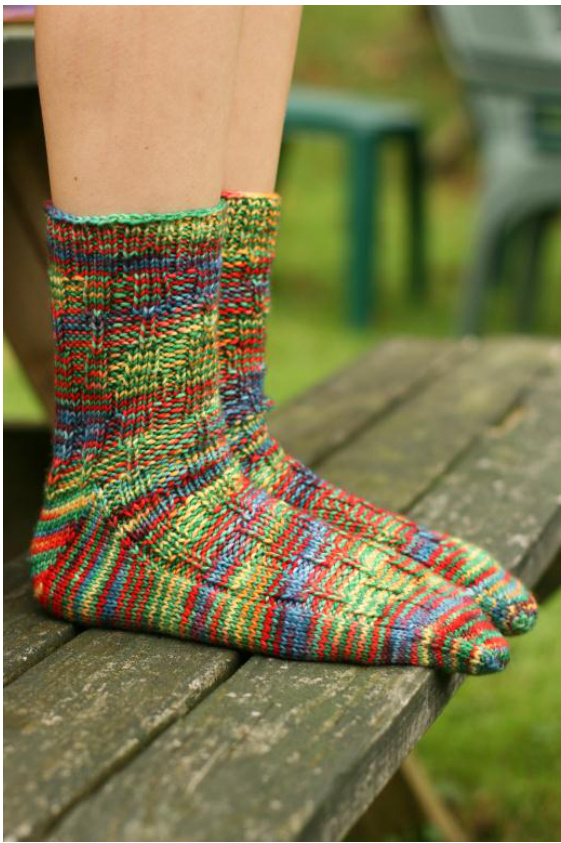
Interlocked is a textured sock pattern with an easyto-read chart of knits and purls. This texture pattern is great for variegated sock yarns, as it is subtle and doesn't compete with the colors in the yarn, but it creates an equally appealing design on solid and semi-solid yarns as well. The pattern was originally written for DK weight yarn, but it has also been tested using sport weight. If you choose to knit with sport instead of DK, pay attention to the sizing notes throughout the pattern.
Size:
This pattern is written in one size, which is worked over 49 stitches. When worked in DK weight yarn, it will result in a heavy weight sock (more like a house sock or boot sock rather than one you would wear with regular shoes). It will accommodate an average sized woman's foot -8 1/2"circumference around the ball of the foot; 12" circumference measured around the heel and ankle.Worked in sport weight yarn, the sock will result in a snugger fit, better suited for wearing inside regular shoes.
Note that the stitch pattern used in this sock is rather stretchy, much like a ribbed pattern. If you begin knitting your sock and it seems narrow, I'd suggest knitting a few inches past the toe and then trying it on. You may find that the stretch of the pattern accommodates your foot size more than it would appear to. If, however, it feels too tight, you can rip back to the toe stitches, add the necessary increase rounds as described and continue on. Consider the process a swatch-in-progress. Interlocked. Rev. 2/12. Pattern and images @ Lisa M. Beamer, 2011. This pattern, its images and products made from the use of this pattern are intended for personal use only and may not be distributed for income-generating purposes without prior written consent from the designer. Contact Lisa at fibernymph@ gmail.com.
Materials:
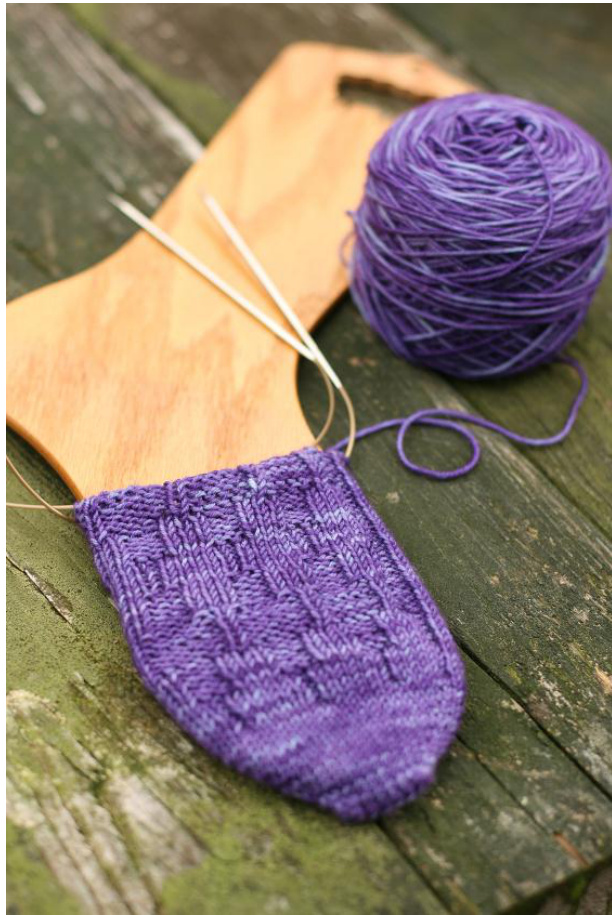
365 yards DK or sport weight yarn. (This is generous yardage. The multicolored pair shown used just over 230 yards of Gypsyknits DK Merino Superwash. The purple sock-in-progress is being knit with Fibernymph Dye Works Happy Camper, a superwash Merino sport weight.) For DK: 1 US3/3.25mm 32" circular needle. For sport: 1 US2/2.75mm or US2.5/3.00mm 32" circular needle. (See pattern notes below for information on knitting using a method other than magic loop.) Tapestryneedle
Gauge:
Approximately 5.5 stitches per inch in stockinette, unstretched (Dk) Approximately 6.5 stitches per inch in stockinette, unstretched (sport weight)
Abbreviations:
K -Knit P-Purl KFB - Knit front and back SSK - Slip, slip, knit P2tog - Purl two together K2tog - Knit two together
Pattern notes:
This pattern is written toe up for working in either Magic Loop or on two circular needles. Needles will be referred to as Needle 1 and Needle 2. If you prefer working on DPNs, I suggest using four, dividing up the Needle 1 stitches over two DPNs and the Needle 2 stitches over the other two DPNs. Note, however, that throughout the pattern, I will only be referring to Needle 1 and Needle 2, which for DPN users will really meanNeedles 1/2 and Needles 3/4. Note that many rounds in this pattern begin with purl stitches. Be sure to snug up your yarn tightly after your first purl stitch at the beginning of a round in order to avoid laddering. Some people prefer to shift stitches around in order to eliminate the necessity of beginning a round with a purl stitch. This is fine, but as the number of purl stitches at the beginning of rounds changes throughout the pattern, be sure to place a stitch marker at the true beginning of the round so that you do not lose track of it. Also, I recommend casting on using Judy Becker's Magic Cast On (more commonly referred to as Judy's Magic Cast On). If you have never done this before, you will find an excellent demonstration video by Cat Bordhi on YouTube at http://www.youtube.com/watch?v=lhBlSoAhhQY.
Directions:
Cast On
Using your preferred toe-up cast on method -- I recommend Judy's Magic Cast On (JMC) -- cast on 15 stitches. When using JMC, your first stitch is on the back needle, which will technically be Needle 2. The front needle will be Needle 1. Work your cast on stitches until there are 7 on each needle, and then finish by adding an eighth stitch to Needle 2 only. When you turn your needles to begin knitting your first toe round, you will begin knitting the 7 stitches on Needle 1. If you are using a cast on other than JMC, simply be sure to divide your stitches in a way that will allow you to begin working the 7 stitch side first.
Toe
Round 1: Knit across both needles. B, knit to last two stitches, KFB, K1. Do this across both needles to complete Round Repeat Rounds 1 and 2 until you have 23 stitches on Needle 1 and 24 stitches on Needle 2. Work Round 1 once more. Sizing Note: If you have decided to make your sock larger, now is the place in the pattern where you will add stitches. Stitches must be added in increments of 12 for each size increase - six additional stitches to the sole, six additional stitches to the instep. To do one size increase, work Rounds 1 and 2 three more times at this point. You will end with 29 stitches on Needle 1 and 30 stitches onNeedle2. One size increase (12 additional stitches) should accommodate a large woman's foot or an average-sized man's foot. For a large man's foot, you might try two size increases. Keep in mind your total of additional stitches so you can add them to the stitch totals throughout the remainder of the pattern. I've inserted a caret symbol (^) throughout the pattern whenever 1 mention stitch totals to remind you to add any stitches for increases you've made. Work Round 2 on Needle 1 only, to end with 25 stitches (49 stitches^ total). Knit straight across Needle 2 to complete the round (do not do increases on Needle 2).
Foot:
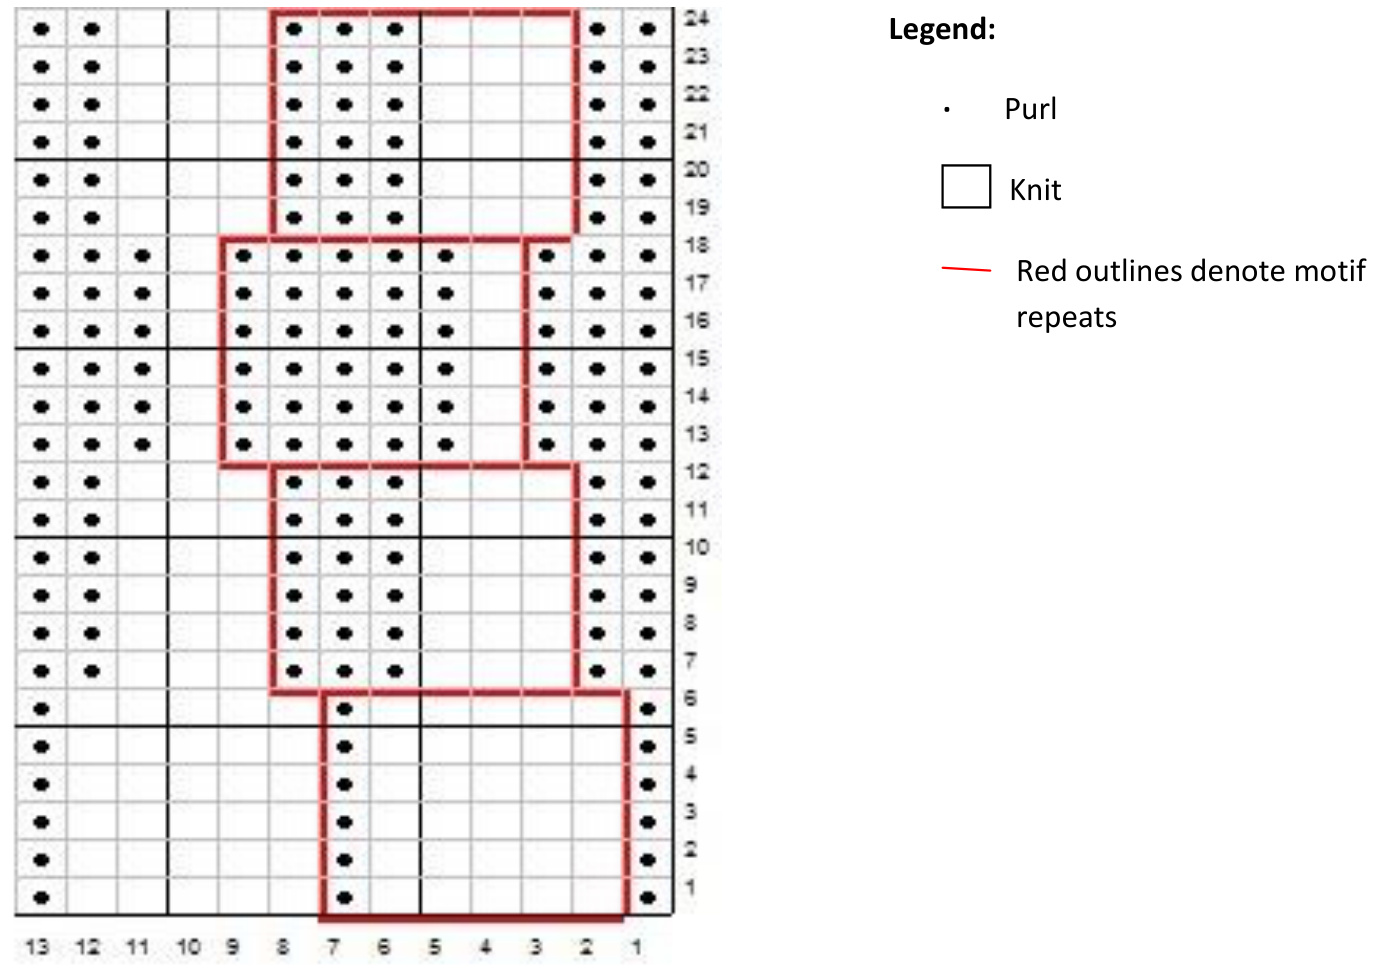
Needle 1 will now be your instep stitches, Needle 2 will be your sole stitches. Needle 2 will be worked in knit stitch for the duration of the foot. The following instructions (also charted) are for the stitches on Needle 1 only. (Note that if you added stitches for a size increase, this will increase the number of times you work the pattern stitches in each round. Specifically, for every size increase you do - 12 stitches - you will do one additional pattern repeat on the instep and six additional knit stitches on the sole.) Round 1: P1, \*[K5, P1] repeat from\* three times more. Rounds 2-6: Repeat Round 1. Round 7: P2, \*[K3, P3] repeat from \* twice more, K3, P2. Rounds 8-12: Repeat Round 7. Round 13: P3, \*[K1, P5] repeat from \* twice more, K1, P3. Rounds 14-18: Repeat Round 13. Rounds 19-24: Repeat Rounds 7-12. Continue working instep as established, starting back at Round 1 after completing Round 24. When foot measures 2 to 2 1/2" shorter than your desired foot length (or, when trying on the sock-inprogress, the point at which your instep meets your ankle when you flex your foot up and down), begin adding heel gusset increases to the stitches on Needle 2 (sole stitches) as follows: Increase Round 1: KFB, knit to last two stitches, KFB, K1. Increase Round2: Knit all stitches. As you work around your sock, repeat these two increase rounds on Needle 2, continuing to work in pattern as established on Needle 1, until the sock reaches your desired foot length, ending with Needle 1. (l recommend making note of which pattern round you stopped on so you can pick back up in the right place after the heel turn, and also so you can begin your heel turn in the same place on your second Sock.) Interlocked. Rev. 2/12. Pattern and images @ Lisa M. Beamer, 2011. This pattern, its images and products made from the use of this pattern are intended for personal use only and may not be distributed for income-generating purposes without prior written consent from the designer. Contact Lisa at fibernymph@gmail.com.
Turning the Heel
At this point, you will ONLY be working on the stitches on Needle 2. You should have an even number of stitches on Needle 2. Count and divide in half to find center of the stitches. Work the heel turn rows as follows, slipping all slipped stitches as if to purl: Row 1 (RS): Knit across to the center of Needle 2. Knit two more stitches. SSK. K1. Turn work. Row 2 (WS): Slip first stitch. P5, P2tog, P1. Turn work. Row 3 (RS): Slip first stitch. K6, SSK, K1. Turn work. Row 4 (WS): Slip first stitch. P7, P2tog, P1. Turn work. Continue in this manner, always working your SSKs and P2togs (in their respective rows) with the stitch right before the gap and right after the gap, until you have decreased back down to the original 24 stitches^, ending on a RS row. (The "gap" I refer to is the wider spot between the last stitch knit on RS rounds or purled on wS rounds and the unworked stitches, or the place where you stopped and turned yourwork.) You will now recommence working on both needles to begin the cuff.
Cuff
First cuff round: Work stitches on Needle 1 in pattern as established. On Needle 2, K2tog, knit to end of needle. (23 stitches^ on Needle 2) Second cuff round: Work stitches on Needle 1 in pattern as established. When you come to Needle 2, continue the pattern as established on Needle 1. Do not start the pattern/chart row over at the beginning of Needle 2, just work around onto Needle 2 in a continuous manner as follows: If you are working Rounds 1 - 6, you will work the stitches on Needle 2 as follows: \*[K5, P1] repeat from \* to last 5 stitches, K5. If you are working Rounds 7-12 or 19-24, you will work the stitches on Needle 2 as follows: P1, \*[K3, P3] repeat from \* to last 4 stitches, K3, P1. If you are working Rounds 13-18, you will work the stitches on Needle 2 as follows: P2, \*[K1, P5] repeat from \* to last 3 stitches, K1, P2. Interlocked. Rev. 2/12. Pattern and images @ Lisa M. Beamer, 2011. This pattern, its images and products made from the use of this pattern are intended for personal use only and may not be distributed for income-generating purposes without prior written consent from the designer. Contact Lisa at fibernymph@ gmail.com. Continue working your cuff rounds in this established pattern until your cuff is 1" shy of the desired length, ending with Needle 2.
Ribbing
Work six rounds of P1, K2 ribbing. If you have not shifted your stitches, this should work out so that the first P1 lines up over the P1 of the first pattern section, and the second P1 you do will then line up over the K1 stitches of the third pattern section. Bind off loosely in pattern. Weave in ends.
Interlocked Chart

Lisa Beamer is an unrepentant fiberholic who knits and spins into the wee hours of the morning on a regular basis. She is the owner of Fibernymph Dye Works, which can be found at http://fibernymph.etsy.com. She is also the host of the weekly knitting videocast, 90% Knitting, which can be downloaded through iTunes or can be found at te FDw blog: http://fibernymph.com. 6 Interlocked. Rev. 2/12. Pattern and images @ Lisa M. Beamer, 2011. This pattern, its images and products made from the use of this pattern are intended for personal use only and may not be distributed for income-generating purposes without prior written consent from the designer. Contact Lisa at fibernymph@gmail.com.


