Crochet Cupcake
by Heather Hosford @2011
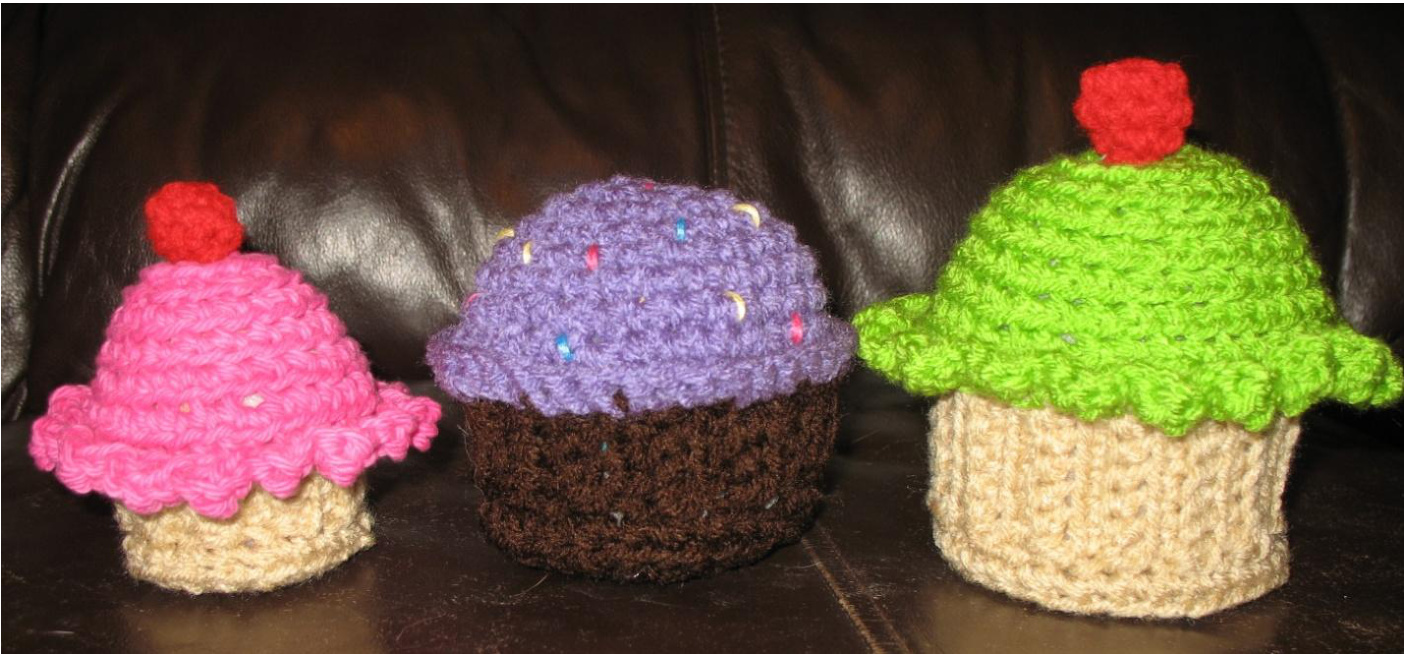
If you have any questions about this pattern, please contact me at thismomcrafts@gmail.com Please do not copy, sale or redistribute the pattern without my consent. You may sell the item made from this pattern, but please use your own photos. SiZQ: Small, Medium, Large Skill LQV&l: Easy/Moderate GaUg&: not important US size H/8 (5.0mm) hook Worsted weight yarn in cupcake base and frosting color Red for Cherry Embroidery floss or yarn for "sprinkles" Cardboard (to make a pincushion) Tapestry needle HOt&: Medium cupcake is about the size of a regular real cupcake If making a cupcake with sprinkles sew them on before attaching top of cupcake to base
Terminology:
Sc = single crochet BLO = work into back loop only ss = slip stitch FLO = front loop only dc = double crochet WS = wrong side hdc = half double crochet RS = right side
Instructions:
Small Cupcake
Base
Worked in a continuous round Rnd 1) magic loop, make 6 sc. (or chain 2 and sc 6 times into first chain) Rnd 2) 2sc in each st (12) Rnd 3) [2sc, sc] repeat to end (18) Rnd 4) sc in each st (18) Rnd 5) sc in each st through BLO (18) Chain 4 sc in 2nd ch from hook and next 2 (3) Row 1) ss into next st of base, turn so Ws is facing you, skip the slip stitches , sc into front loops only of next 3 st (3 sts) Row 2) ch1, turn so RS is facing you, sc in back loop only of next 3 sts, ss into next st of round 5 on base. (3 sts)
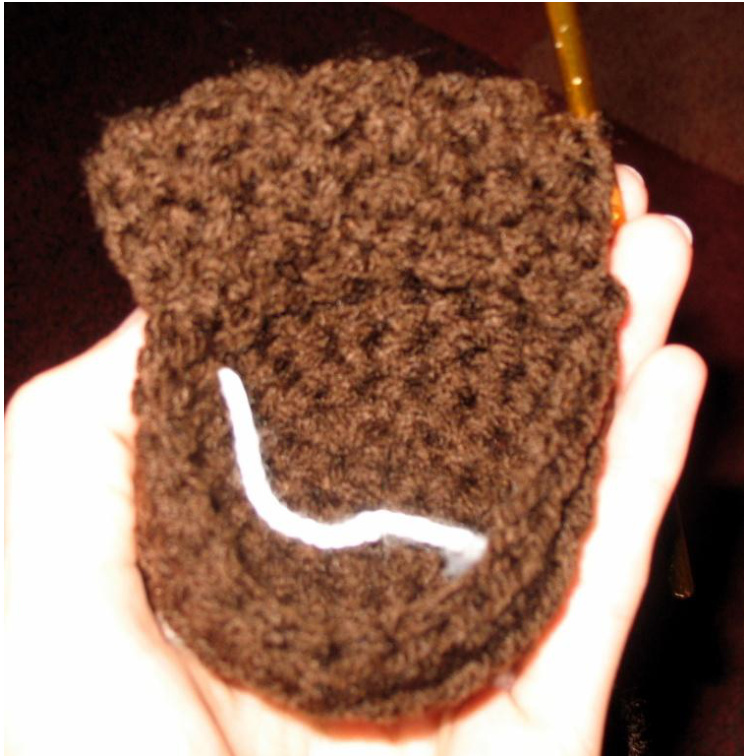
www.facebook.com/ThisMomCrafts or http://www.etsy.com/shop/ThisMomCrafts Repeat Rows 1 and 2 until end of round (make sure you are ss 2 st, one at the end of row 2 and then another one in the beginning of row 1, otherwise you will end up with too many rows) Turn inside out with WS facing you ss each 3 st through inner loops only, so the outer loops form a ridge on the right side. Fasten off and weave in ends.
Top
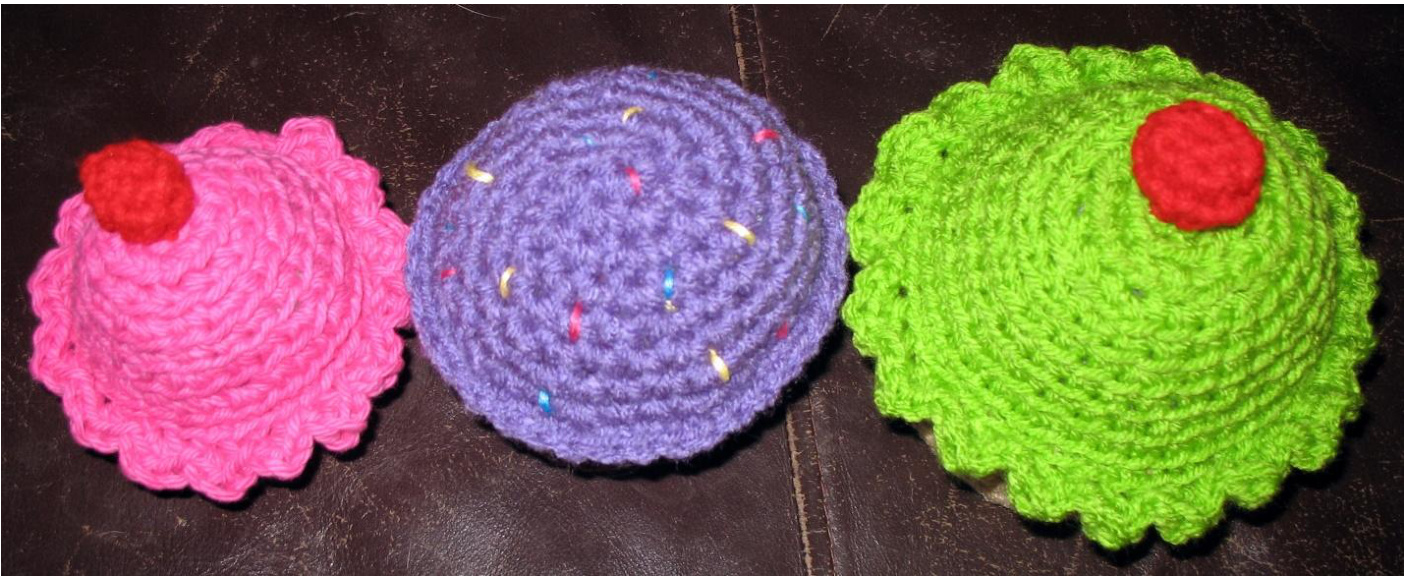
(Work in BLO to form a ridge in the "frosting", green and pink in picture. SC in both loops for a smooth look like the purple cupcake) Worked in a continuous round, place stitch marker or piece of yarn to mark beginning of round Rnd 1) magic loop, make 6 sc (or chain 2 and sc 6 times into first chain) 2) 2 sc in each st, BLO (12) 3) sc in each, BLO (12) 4) [2sc, sc] BLO, repeat to end (18) 5) sc in each, BLO (18) 6) [sc, sc, 2sc] BLO repeat to end (24) 7) [2sc, sc, sc, sc] BLO, repeat to end (30) 8) Attach top to sides on this round by working one sc through each BLO of round 7 and top edge of base at the same time. If making a pin cushion insert a circle of cardboard into the bottom of the base. Sc % of the way around then stuff and continue to end, ss and fasten off. Optional ruffle around edge: Sc, hdc, sc in next st. Ss in next st Repeat around cupcake. Cherry: Magic loop, sc 3 (or chain 2 and sc 3 times into first chain) Sc 6 (6) Sc 2 together 3 times (3) Finish off
Medium Cupcake
Base
Worked in a continuous round Rnd 1) magic loop, make 6 sc. (or chain 2 and sc 6 times into first chain) Rnd 2) 2sc in each st (12) Rnd 3) [2sc, sc] repeat to end (18) Rnd 4) [sc, sc, 2sc] repeat to end (24) Rnd 5) sc in each st (24) Rnd 6) sc in each st through BLO (24) Chain 5 sc in 2nd ch from hook and next 3 (4) Row 1) ss into next st of base, turn so Ws is facing you, skip the slip stitches , sc into front loops only of next 4 st (4 sts) Row 2) ch1, turn so RS is facing you, sc in back loop only of next 4 sts, ss into next st of round 6 on base. (4 sts) Repeat Rows 1 and 2 until end of round (make sure you are ss 2 st, one at the end of row 2 and then another one in the beginning of row 1, otherwise you will end up with too many rows) Turn inside out with WS facing you ss each 4 st through inner loops only, so the outer loops form a ridge on the right side. Fasten off and weave in ends.
Top
(Work in BLO to form a ridge in the "frosting", green and pink in picture. SC in both loops for a smooth look like the purple cupcake) Worked in a continuous round, place stitch marker or piece of yarn to mark beginning of round Rnd 1) magic loop, make 6 sc (or chain 2 and sc 6 times into first chain) 2) 2 sc in each st, BLO (12) 3) [2sc, sc] BLO, repeat to end (18) 4) sc in each, BLO (18) 5) [sc, sc, 2sc] BLO repeat to end (24) 6) sc in each, BLO (24) 7) [2sc, sc, sc, sc] BLO, repeat to end (30) 8) [sc, sc, 2sc, sc, sc] BLO, repeat to end (36) 9) Attach top to sides on this round by working one sc through each BLO of round 8 and top edge of base at the same time. If making a pin cushion insert a circle of cardboard into the bottom of the base. Sc % of the way around then stuff and continue to end, ss and fasten off. Optional ruffle around edge: Sc, hdc, sc in next st. Ss in next st Repeat around cupcake. Cherry: Magic loop, sc 3 (or chain 2 and sc 3 times into first chain) 2 sc in each (6) Sc 6 (6) Sc 2 together 3 times (3) Finish off
Large Cupcake
Base
Worked in a continuous round Rnd 1) magic loop, make 6 sc. (or chain 2 and sc 6 times into first chain) Rnd 2) 2sc in each st (12) Rnd 3) [2sc, sc] repeat to end (18) Rnd 4) [sc, sc, 2sc] repeat to end (24) Rnd 5) [2sc, sc, sc, sc] repeat to end (30) Rnd 6) sc in each st (30) Rnd 7) sc in each st through BLO (30) Chain 6 sc in 2nd ch from hook and next 4 (5) Row 1) ss into next st of base, turn so Ws is facing you, skip the slip stitches , sc into front loops only of next 5 st (5 sts) Row 2) ch1, turn so RS is facing you, sc in back loop only of next 5 sts, ss into next st of round 7 on base.(5 sts) Repeat Rows 1 and 2 until end of round (make sure you are ss 2 st, one at the end of row 2 and then another one in the beginning of row 1, otherwise you will end up with too many rows) Turn inside out with WS facing you ss each 5 st through inner loops only, so the outer loops form a ridge on the right side. Fasten off and weave in ends.
Top
(Work in BLO to form a ridge in the "frosting", green and pink in picture. SC in both loops for a smooth look like the purple cupcake) Worked in a continuous round, place stitch marker or piece of yarn to mark beginning of round Rnd 1) magic loop, make 6 sc (or chain 2 and sc 6 times into first chain) 2) 2 sc in each st, BLO (12) 3) [2sc, sc] BLO, repeat to end (18) 4) [sc, sc, 2sc] BLO, repeat to end (24) 5) sc in each, BLO (24) 6) [2sc, sc, sc, sc] BLO, repeat to end (30) 7) sc in each, BLO (30) 8) [sc, sc, 2sc, sc, sc] BLO, repeat to end (36) 9) [sc in next 5, 2sc] BLO, repeat to end (42) 10) Attach top to sides on this round by working one sc through each BLO of round 9 and top edge of base at the same time. If making a pin cushion insert a circle of cardboard into the bottom of the base. Sc % of the way around then stuff and continue to end, ss and fasten off. Optional ruffle around edge: In next st (ss, sc, dc) in next st (dc, sc) Repeat around cupcake, ss and fasten off Cherry: Magic loop, sc 4 (or chain 2 and sc 4 times into first chain) 2 sc in each (8) Sc 8 (8) Sc 2 together 3 times (4) Finish off
Finishing:
Attach cherry to top Optional accgssories: Cardboard round for inside base to make a pincushion


