Photos: Nicole Ratliff Model: Kyla
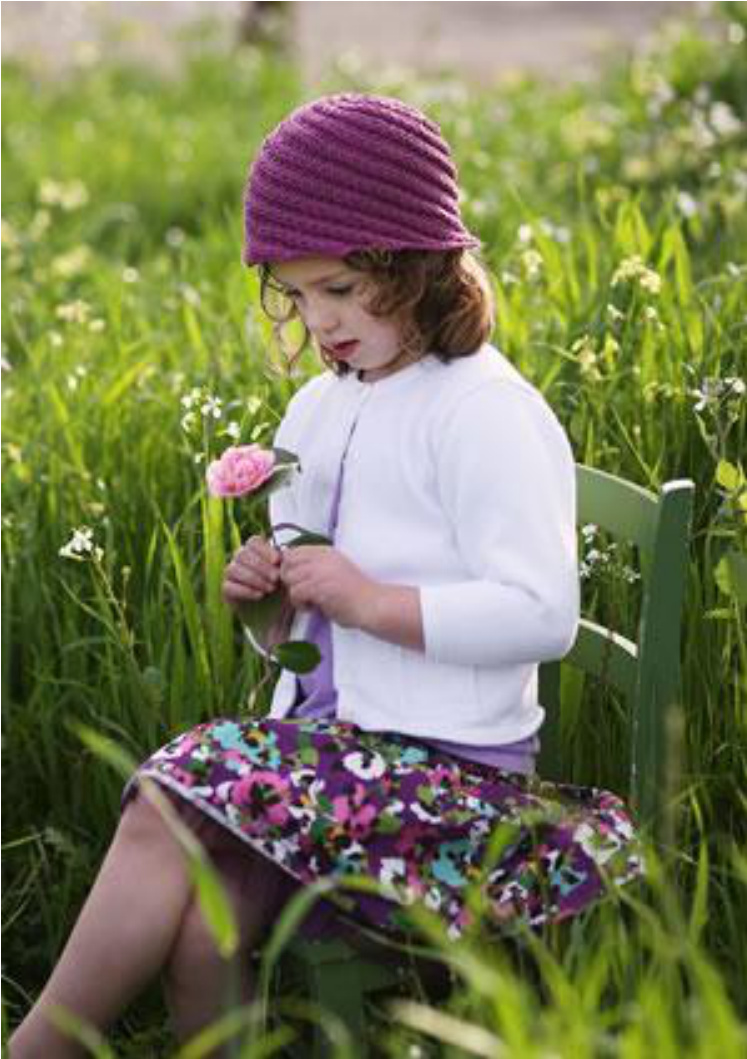
How Precious
By Talitha Kuomi My youngest child loves to wear things on her head. This includes but is not limited to: sand buckets, bowls, the kind of stuffed animal that has Velcro hands that cling, colanders, boxes - you get the idea. One day she took my electric guitar cord (which was wound into a circle and secured with a gripper) and plopped that upon her noggin. My first reaction was "Take that thing off of your head", but I held my tongue just long enough to see how nicely the wrapped rings of the cord draped around in descending circles and the seed of an idea that has become “How Precious’ was planted. Then I said, "Please, don't put that on your head Sunshine Girl'. Honest, I did. Sizes 6m (12-18m, 2T-3T,4T-5T) Shown in 2T-3T
Finished Measurements
Hat Circumference: 17[18.5, 20, 21.5] inches Note: To keep ‘How Precious′ looking like a cloche when worn, you want the child's head measurement to be equal to or less than the circumference of the hat.
Materials
rns Corntastic [100% corn; 105 yards/96 meters per 1.75 ounce/50 gram hank
6501 Amethyst; 1(2, 2, 2) skeins
Recommended needle sizes
US #6/4 mm double pointed needles US #6/4 mm 20 inch circular needle (for sizes 6 months and 12-18 months only) US #6/4 mm 22 inch circular needle (for sizes 2T-3T and 4T-5T only)
Notions
Tapestry needle for weaving in ends.
Gauge
22 sts and 24 rows = 4 inches square in St st
Pattern Notes
This hat will not be blocked before wearing. All the shaping that you see in the photos is worked into the stitches. Therefore, if the size cloche that you are knitting looks too small as you are knitting it, it probably is. At the end of each round for almost the entire hat, you move your stitch marker over by two stitches. This keeps the I-cords going diagonally up properly to the very top. This moving of the stitch marker is clearly marked in the directions for each row.
Skills Required
Knit, knitting in the round, knitting on dpns, slipping sts, k2tog, k2tog through back loops knitting in the front and back of the same stitch.
INSTRUCTIONS
Brim
Cast on 130[142, 154, 166] sts. Place marker and join to knit in the round. Rnds 1-3: \* Kfb, k1, k2togtbl, slip 3 sts from the right needle to the left needle, kfb, k1, k2togtbl, k7; repeat from \* around ending last repeat with k5 instead of k7, remove marker, k2, place marker. Rnd 4: \* Kfb, k1, k2togtbl, slip 3 sts from the right needle to the left needle, kfb, k1, k2togtbl, k2tog, k5; repeat from \* around ending last repeat with k3 instead of k5, remove marker, k2, place marker: 119[130, 141, 152] sts. Rnds 5-6: \* Kfb, k1, k2togtbl, slip 3 sts from the right needle to the left needle, kfb, k1, k2togtbl, k6; repeat from \* around ending last repeat with k4 instead of k6, remove marker, k2, place marker. Rnd 7: \* Kfb, k1, k2togtbl, slip 3 sts from the right needle to the left needle, kfb, k1, k2togtbl, k2tog, k4, repeat from \* around ending last repeat with k2 instead of k4, remove marker, k2, place marker: 108[118, 128, 138] sts. Rnd 8: Kfb, k1, k2togtbl, slip 3 sts from the right needle to the left needle, kfb, k1, k2togtbl, k5; repeat from \* around ending last repeat with k3 instead of k5, remove marker, k2, place marker.
Body of the cloche
Repeat Rnd 8 until hat measures 2.5(3.5, 4.5, 5.5) inches from one of the tips (that have now been created by the I-cords at the cast on edge) to the live stitches on your needles.
Decreasing at the crown
Rnd 1: \* Kfb, k1, k2togtbl, slip 3 sts from the right needle to the left needle, kfb, k1, k2togtbl, k2tog, k3; repeat from \* around ending last repeat, end with k1 instead of k3, remove marker, k2, place marker: 97[106, 115, 124] sts.

Rnd 2: \* Kfb, k1, k2togtbl, slip 3 sts from the right needle to the left needle, kfb, k1, k2togtbl, k4; repeat from \* around ending last repeat with k2 instead of k4, remove marker, k2, place marker. Rnd 3: \* Kfb, k1, k2togtbl, slip 3 sts from the right needle to the left needle kfb, k1, k2togtbl, k2tog, k2; repeat from \* around ending last repeat with k2tog instead of (k2tog, k2), remove marker, k2, place marker: 86[94, 102, 110] sts. Rnd 4: \* Kfb, k1, k2togtbl, slip 3 sts from the right needle to the left needle, kfb, k1, k2togtbl, k3; repeat from \* around ending last repeat with k1 instead of k3, remove marker, k2, place marker. Rnd 5: \* Kfb, k1, k2togtbl, slip 3 sts from the right needle to the left needle, kfb, k1, k2togtbl, k2tog, k1; repeat from \* around to last 6 sts, kfb, k1, k2togtbl, slip 3 sts from the right needle to the left needle, kfb, k1, k2togtbl, slip 1 st to the right needle and remove marker, slip the same st back to the left needle, k2tog, k1, place marker: 75[82, 89, 96] sts. Rnd 6: \* Kfb, k1, k2togtbl, slip 3 sts from the right needle to the left needle, kfb, k1, k2togtbl, k2; repeat from \* around ending last repeat with k2togtbl instead of k2, remove marker, k2, place marker. Rnd 7: \* Kfb, k1, k2togtbl, slip 3 sts from the right needle to the left needle, kfb, k1, k2togtbl, k2tog; repeat from \* around to last 5 sts, kfb, k1, k2togtbl, slip 3 sts from the right needle to the left needle, kfb, k1, k2togtbl, remove marker, k2tog, place marker: 64[70, 76, 82] sts. Rnd 8: \* Kfb, k1, k2togtbl, slip 3 sts from the right needle to the left needle, kfb, k1, k2togtbl k1; repeat from \* around to last 4 sts, kfb, k1, k2togtbl, remove marker, slip 3 sts from right needle to left needle, kfb, k1, k2togtbl, k1, place marker. Note: There are 11[12, 13, 14] diagonal I-cords in one round. For rounds 9 and 10, you will be decreasing one stitch from every other I-cord. This is not as smoothly repetitive as the other rounds. Quiet and perhaps a refill of whatever was in your now empty cup are helpful.
Sizes 6 months and 2T-3T only
Rnd 9: \* Kfb, k1, k2togtbl, slip 3 sts from the right needle to the left needle, kfb, k1, k2togtbl, k1, kfb, k1, k2togtbl, k2tog; repeat from \* around to last 4 sts, kfb, k1, k2togtbl, remove marker, k2tog, place marker: 58 sts for size 6 months, 69 sts for size 2T-3T. Rnd 10: \* Kfb, k1, k2togtbl, k1, kfb, k1, k2togtbl, k2tog; repeat from \* around to last 14 sts, kfb, k1, k2togtbl. (k1, kfb, k2togtbl) twice: 54 sts for size 6 months, 64 sts for size 2T-3T.
Sizes 12-18 months and 4T-5T
Rnd 9: \* Kfb, k1, k2togtbl, slip 3 sts from the right needle to the left needle, kfb, k1, k2togtbl, k1, kfb, k1, k2togtbl, k2tog; repeat from \* around to last 10 sts, kfb, k1, k2togtbl, slip 3 sts from the right needle to the left needle, kfb, k1, k2togtbl, k1, kfb, k1, k2togtbl, remove marker, k2tog, place marker: 64 sts for size 12-18 months, 75 sts for size 4T-5T. Rnd 10: \* Kfb, k1, k2togtbl, k1, kfb, k1, k2togtbl, k2tog; repeat from \* around to last 9 sts, kfb, k1, k2togtbl, k1, kfb, k1, k2togtbl, slip marker: 59 sts for size 12-18 months, 69 sts for size 4T5T.
All Sizes
Rnd 11: K1, \* kfb, k1, k2togtbl, k1; repeat from \* around to last 3 sts, slip 3 sts from the left needle to right needle, remove marker and slip the same 3 sts back to the left needle, kfb, k1, k2togtbl, place marker.

Rnd 12: \* Ssktbl, k1, k2togtbl; repeat from \* around to last 4 sts, slip 4 sts from left needle to right needle, remove marker and slip the same 4 sts back to the left needle, ssktbl, k1, k2togtbl, place marker: 32[35, 38, 41] sts. Rnd 13: (K1, k2togtbl) around to last 2 sts, slip 2 sts from left needle to right needle, remove marker and slip the same 2 sts back to the left needle, k1, k2togtbl, place marker: 21[23, 25, 27] Ssts. Rnd 14: (K2togtbl) around to last st, k1, remove marker.
FINISHING
Cut yarn leaving a 12 inch tail. Thread yarn through the remaining live stitches on your dpns. Push through to the inside of the hat and pull snug. Tie off and weave in ends. Wear with a happy smile.

In Talitha's living room, there is an old marble topped cabinet that once belonged to her Grandma. The top drawer holds (among other things) 4 harmonicas, 6 kazoos, 5 plastic recorders and a tin whistle. Her children form ^marching bands’ that run through the kitchen, into the hallway and then back again into the living room. If you can imagine this music mixed liberally with the happy, enthusiastic feet of at least three children, then you can imagine the soundtrack of Talitha's days and the backdrop to nearly all of her patterns. She can be found at www.TalithaKuomi.com. Pattern & images ? 2009 Talitha Kuomi. Feel free to contact Talitha at talithakuomi@ live.com.


