Materials: $1~50\mathrm{g}$ skein of fingering weight yarn $4{-}5\;2\mathrm{mm}$ DPN's Stitch markers Tapestry needle Measuring tape or ruler Gauge: Check yarn for gauge, usually about 8 stitches to the inch. Row gauge does not matter, knitting t length. Notes: This pattern is best worked with a fingering weight yarn, though I suppose you could modify it to a DK or sport weight yarn as long as you adjusted the stitch count. I usually use Magic Loop, but I find it cumbersome once the thumb gusset stitches increase to have so many stitches on one needle, and such a small amount on the second. If you choose to use Magic Loop, make sure you place a stitch marker between what should be “needle 1” and “needle 2." I do give set up instructions for both DPN's and Magic Loop to make the process easier. Instructions: CO 56 stitches, divide evenly, and join for working in the round, being careful not to twist the stitches. Work in a K2, P2 rib for 1.5 inches. Then, K12, K2tog, knit to end. 55 stitches total. Set-Up: Magic Loop: Needle 1: 25 stitches Needle 2: remaining 30 stitches, markers will be placed when working the thumb gusset. DPN's: Needle 1: 25 stitches Needle 2: 10 stitches Needle 3: 20 stitches. Continue in stockinette for 1 more inch, total length from cast-on should be 2.5 inches. K across needle 1. On needle 2 (for Magic Loop users, use the place marker (PM) instruction, for DPN users, ignore) K4, PM, (m1, k1) twice, PM, K4, PM. On needle 3 (Magic Loop, this will be the remaining 20 stitches on needle 2) knit across. Work three rounds of stockinette. then: Knit across needle 1. On needle 2 K4, SM, m1, knit to marker (or edge for DPN users), m1, K4. On needle 3, knit across. Continue in this pattern, knitting 3 rounds in stockinette, then following the increase instructions for a total of 5 times to make 16 gusset stitches. Then, knit 1 round and work the increase round twice to get a total of 20 gusset stitches, then knit 1 more round.
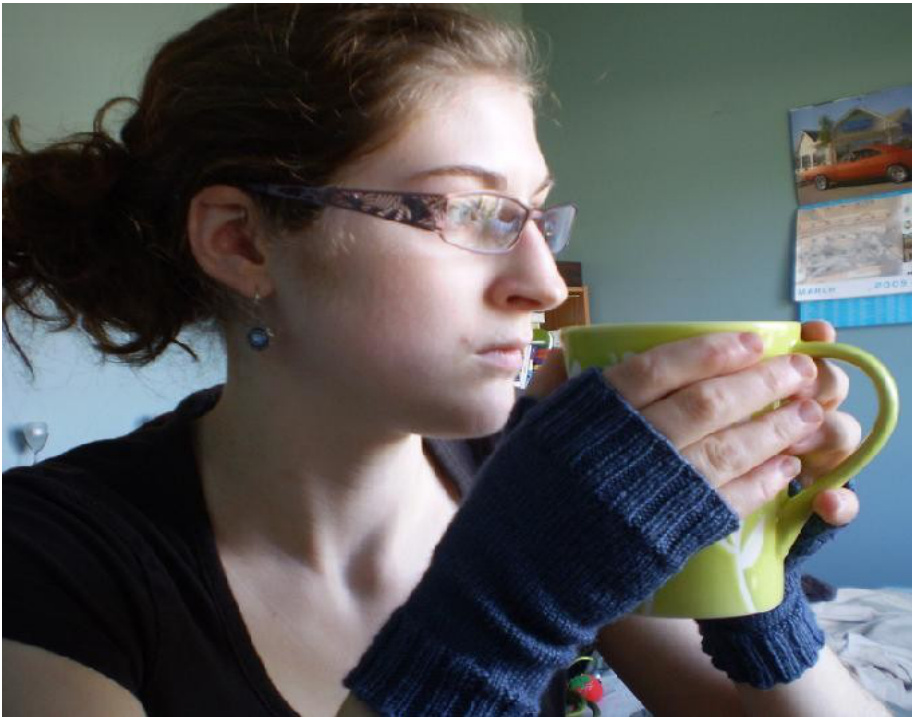
Fingerless Fingers:
Now, knit across needle 1 and on needle 2, K3, increase fbf (knit into front of the stitch, then into the back of the same stitch, then into the front of the stitch again), and threading a tapestry needle with waste yarn, thread it through the next 20 stitches to be worked later, then increase fbf in the next stitch, K3, and knit across needle 3. There should now be 12 stitches on needle 2, for a total of 57 stitches. Knit three more rounds even, on the third round decrease 1 stitch on needle 2, close to the edge, then work in K2, P2 ribbing for 1.25 inches, and bind off loosely.
Thumb:
For Magic Loop users, divide the 20 stitches thus: 10 stitches on each needle with the tips facing towards the top-inside of the glove. The top of the hole should be at the needle tips. Pick up 4 more stitches and distribute them evenly over the two needles. 12 on each side, and knit 2 rows. Switch to K2, P2 ribbing for .75 inches and bind off loosely. If there is a slight hole, then leave a long tail and when weaving in the ends from the thumb, sew up discreetly. Weave in remaining ends. For DPN users: distribute stitches thus: 8 stitches on the first two needles, 4 on the third, then pick up the four stitches at the top of the thumb gusset hole, and knit 2 rows. Follow pattern for Magic Loop, ribbing for .75 inches and binding off loosely. Weave in thumb ends first, closing any holes discreetly, then weave in remaining ends. \*Note: Some fingerless glove patterns will give you the option to do a left and a right glove. I did not do that for these gloves because the pattern is simple enough that you can just pop the gloves onto either hand. However, if you do want to work a left and a right, when doing the second glove, reverse the stitch counts on needles 2 and 3. The palm stitches will now be on needle 2, and the thumb gusset stitches on needle 3.


