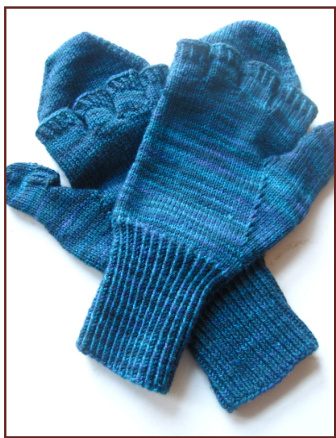
Podster Gloves
A convertible mitt/glove pattern by Glenna C
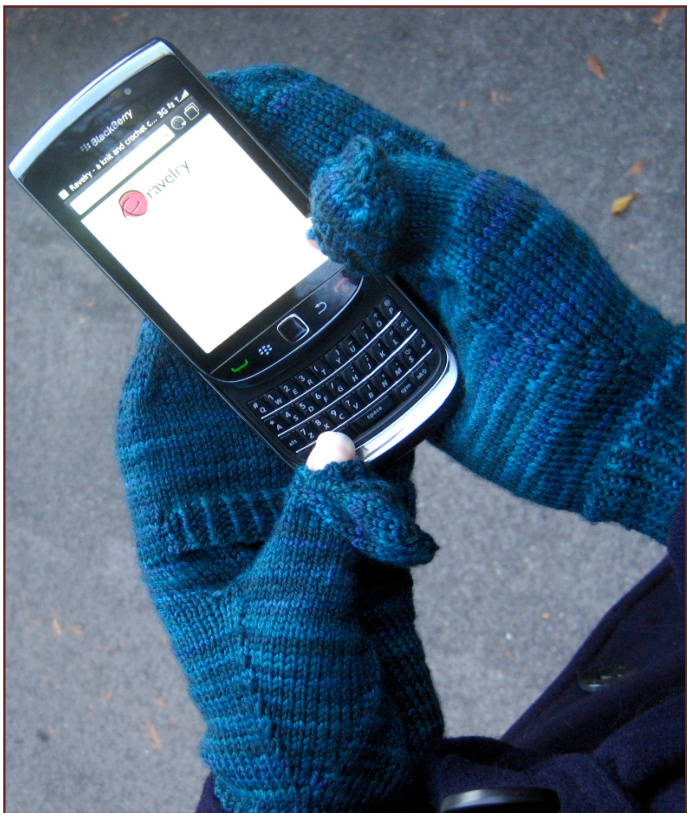
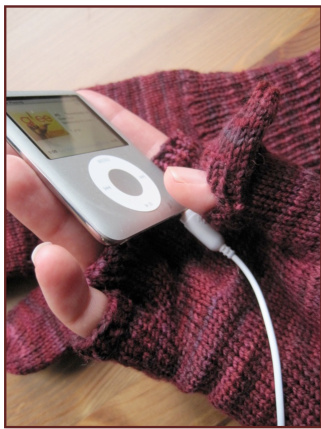
Hello, People of the Pod. Do your hands get cold in the fall and winter? Do you like to take your digital music player with you wherever you go? Do you get tired of having to rip your entire mitten off of your hands in order to dial your iPod controls, thus exposing your delicate bare hand to the elements? Worry no more, my knitting-capable friends. This convertible mitten/glove pattern is here for you. Be sure to note suggested modifications at the end, including the simple addition of a podster thumb, to allow easy access to your music player controls without removing your whole glove.
MATERIALS
Fingering weight yarn or “sock" gerfapweigx325(250) y yarn, 0f approx. 325(350) yds. 。 Samples shown in: Dream in Color Smooshy [1o0% superwash merino; 450 yards per 4 oz skein], 1 skein (shown in In Vino Veritas') 4 OZz skeMerif skein (shown Tanis Fiber Arts Purple Label hmere sock; [70% erwash Merino Wool/20% cashmere/10% nylon; 365m/400 mere/10% nyloh;i365m yds per 115g/4 0z skein], 1 skein (shown in “Teal) pwn inT'ea 2.5mm needles OR needle size required to obtain pattern gauge (in double-pointed needles or long circular(s), depending on preferred method of working in the round.) Tapestry needle Stitch holder or waste yarn Stitch markers
SIZING
S(L) To fit hand circumference 6.5- 7.25 ins (7.5-8 ins) around; Roughly equivalent to Women's Small(Women's Large/Men's Small). GAUGE 32 sts and 44 rows over 4 inches, in stockinette stitch on 2.5mm needles (OR needle size required to obtain pattern gauge.)
SKILLS
To execute this pattern, knitters will be required to:
Work in the round Work knit and purl sts Work increases (m1) and decreases (ssk, k2tog, p2tog) Pick up sts (for working fingers and thumb)
PATTERN
Where instructions are required for the 2 different sizes, these appear with brackets indicating the second size: Small (Large).
Left Glove
CO 5o(56) sts. Join to work in the round, dividing sts evenly across needles. PM to mark beginning of round. First round: Kitbl, p1. Repeat to end of round. Repeat this round, continuing to work in ribbing until work measures 3.5 ins from beg, or until work measures desired length of cuff.
Hand
Next round: K all sts, increasing 2(4) sts evenly across the round. 52(6o) sts rem. Work 1(3) rounds even, knitting all sts. Work next five rounds as follows, establishing thumb gusset: Round 1: K1, pm, k to last st, pm, k1. Round 2: K1, m1, sl m, k to last st, sl m, m1, k1. Round 3: Work even, working all sts as they appear. Round 4(increase round): K1, m1, k1, sl m, k to last 3 sts, sl m, k1, m1, k1. Work next 2 rounds even, working all sts as they appear. Continue in this manner, working the increase round every 3rd round another 3 times, then every 4th round 3(4) times. Work another 2 rounds even. 18(2o) knit sts rem between the two markers. (For best results, try on mitt at this point to judge if your thumb gusset has reached a comfortable length.) Work next round even, working all sts as they appear, up to the second marker only. Remove marker and then sl rem 9(1o) sts in the round and the first 9(1o) sts from the beg of the round onto a stitch holder or waste yarn. (These 2o(22) sts will be held for the thumb and then worked later.) Your working yarn is now at the end of the round. Turn work. CO 4 new sts. Turn work. Join to work in round once again. (You now have 4 new sts CO over the gap for the thumb). Round now starts in the middle of these 4 sts. PM to note new beginning of round. [54(62) sts rem] Next round: K all sts. TAT- ..1-..--±1.-../-\ Next round: work next 27(31) sts, then, slip the 27(31) sts just worked onto a length of waste yarn, then slip them back onto the smaller needles. (IF DESIRED, work this step with a larger needle, then slip the sts back onto the normal needle size, to loosen the sts. This step identifies the sts you will need to pick up later to work the Mitten Top. Ideally this line will sit at or just below the knuckles.) Work another 5(6) rounds even, ending 9(1o) sts before end of round. (At this point it is a good idea to try the glove on to check for fit and length before beginning fingers.) Fingers and Thumb IstFinger Place all sts except the last 8(1o) sts of the round and first 8(1o) sts of the round on waste yarn or stitch holder. (The 16(2o) working sts will be used to work the finger. Sts held on waste yarn will be picked up gradually to work the remaining three fingers.) Arrange the 16(2o) sts evenly across needles for working in the round. K 16(2o), then turn, CO 3 new sts, turn again and join to complete the round. (19(23) sts for 1st Finger). Knit 7(8) rounds even. (Note on picking up sts for fingers: To avoid gaps at the base of fingers, pick up 1-3 MORE sts than indicated, then immediately decrease these sts on the Ist or 2nd round of the finger.) Next round: K1tbl, p1, to last 3 sts. kitbl, p2tog. Work 3 more rounds in kitbl, p1 ribbing. BO all sts in rib. 2ndFinger Pick up 6(7) sts (from those held on waste yarn) from front of hand, CO 3 new sts, pick up 6(7) sts (from those held on waste yarn on other end) from back of hand, pick up 3 new sts at base of 1st finger. 18(20) sts for 2nd Finger. Knit 7(8) rounds even. Next round: Kitbl, p1 to end. Work 3 more rounds in ribbing. BO all sts in rib. 3rd Finger Work as for 2nd Finger. 4thFinger/PinkyFinger Pick up remaining 12(14) sts held on waste yarn. Pick up 3 new sts at base of 3rd finger. (15(17) sts for 4th Finger). Knit 7(8) rounds even. Next round: Kitbl, p1, to last 3 sts, kitbl, p2tog. Work 3 more rounds in ribbing. BO all sts in rib.
Thumb
Pick up 18(2o) sts held on waste yarn, then pick up 6 new sts at cast-on edge of thumb gap. 24(26) sts total for thumb. Beg of round is in the middle of the 6 new sts - PM to note beg of round. Work first 4 rounds as follows: Round 1: K all sts. Round 2: K2, k2tog, k to last 4 sts, ssk, k2. Round 3: k all sts. Round 4: k2, k2tog, k to last 4 sts, ssk, k2. 20(24) sts for thumb. Continue to knit all sts, working until thumb measures % ins less than desired length.
(Modification for ‘podster' thumb included at end ofpattern.)
First Fingertip decrease round: K1, k2tog; repeat to end of round. Next round: Knit all sts. Second Fingertip decrease round: k2tog; repeat to end of round. Cut yarn; with tapestry needle, thread all remaining sts onto needle and draw closed. Sew shut. (At this point I recommend pausing to weave in all ends accumulated thus far, before proceeding. It makes life easier.Also,chocolate is delicious.)
Mitten Top
On new needle, CO 27(31) sts. K1, p1 to last st, k1. Continue by knitting the 27(31) sts marked with waste yarn on back of hand, join to work in the round. 54(62) sts total for Mitten Top. Round begins at side. Next round: Continue to work first 27(31) sts in rib, k all rem sts. Repeat this round 4 more times. Next round: K all sts. Continue to k all sts on all rounds, until Mitten Top measures 2.25(2.5) ins from beg, OR until Mitten Top measures 1.25(1.75) ins less than desired length. Decrease round: K1, ssk, K to 3 sts before marker, k2tog, k1. Slip marker. K1, ssk, K to 3 sts before marker, k2tog, k1. Next round: K all sts. Repeat these last 2 rounds a total of 8(1o) times; 22 sts rem. Use kitchener stitch to graft rem sts closed, or BO all sts and graft closed according to preference.
Right Glove
Worked similarly to the Left Glove, except that, on the Right Glove the first half of the sts in the round are worked for the palm of the hand, whereas for the Left Glove the first half of the sts in the round were worked for the back of the hand.)
Cuff
Work according to instructions for Left Glove.
Hand
Work according to instructions for Left Glove, through the increases and CO of new sts for Thumb, being sure to PM for new beg of round in middle of new CO sts, and ending with the instructions to: Next round: K all sts. Work another 7(9) rounds even. Continue with next round as follows: Knit first 27(31) sts in round. With one of the larger-sized needles, work rem 28(31) sts. Slip the 28(31) sts just worked onto a length of waste yarn, then slip them back onto the smaller needles. (This identifies the sts you will need to pick up later to work the Mitten Top.) Work another 5(6) rounds even, ending 8(1o) sts before end of round. Continue by working Fingers, Thumb, and Mitten Top according to instructions given for Left Glove. Weave in all remaining ends.
SUGGESTED MODIFICATIONS
Podster Thumb Work Thumb as directed, up to decrease rounds. After Round 4, continue as follows: Round 5: K all sts, stopping 5 sts before end of round. Redistribute sts and marker so round now begins here. Round 6-8: Knit all sts. Round 9: Work k1, p1 ribbing over next 10 sts, then k to end of round. Rounds 10-13: Work as for round 9. Round 14: BO next 1o sts, K to end of round. Set aside. On a separate needle, CO 1o sts. Work flat in Kitbl, p1 ribbing for 6 rows. Round 15: Join this new piece to work in the round, over gap created by BO sts. Work in the round for 3 more rounds, or until thumb length measures % ins less than desired length. Work final fingertip decreases as indicted above for normal thumb. Sew edge of joined sts flat, so that the ribbed edge covers the ribbing on inside of thumb.
Plain Mittens
To work the entire piece as a regular mitten, omit fingers, continue after separation of Thumb sts by knitting all rows even, until 1.25(1.75) ins less than desired length. Then, work Mitten Top decreases as noted.
Plain Gloves
To work regular gloves instead of convertible fliptop gloves, omit instructions for holding sts on waste yarn across back of hand. After fingers are begun, continue each by knitting all sts on each round, until each finger measures % ins less than desired finished length. Complete by working Fingertip Decreases consistent with instructions for thumb. (Some modification may be required to fit stitch count of each finger). Omit Mitten Top.
Glossary
Beg = beginning BO = bind off CO = cast on K2tog = knit two sts together (decrease) M1 = make one (increase) P2tog = purl two sts together (decrease) PM = place marker Rem = remaining Ssk = slip, slip, knit (decrease) Sts = stitches


