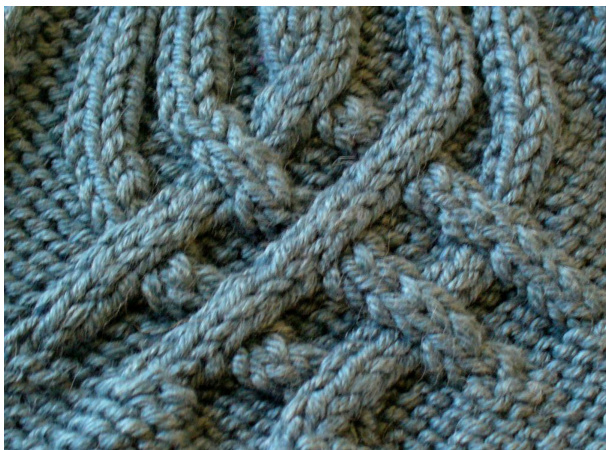
Celtic Knot Scarf
Designed by Tamara Moots
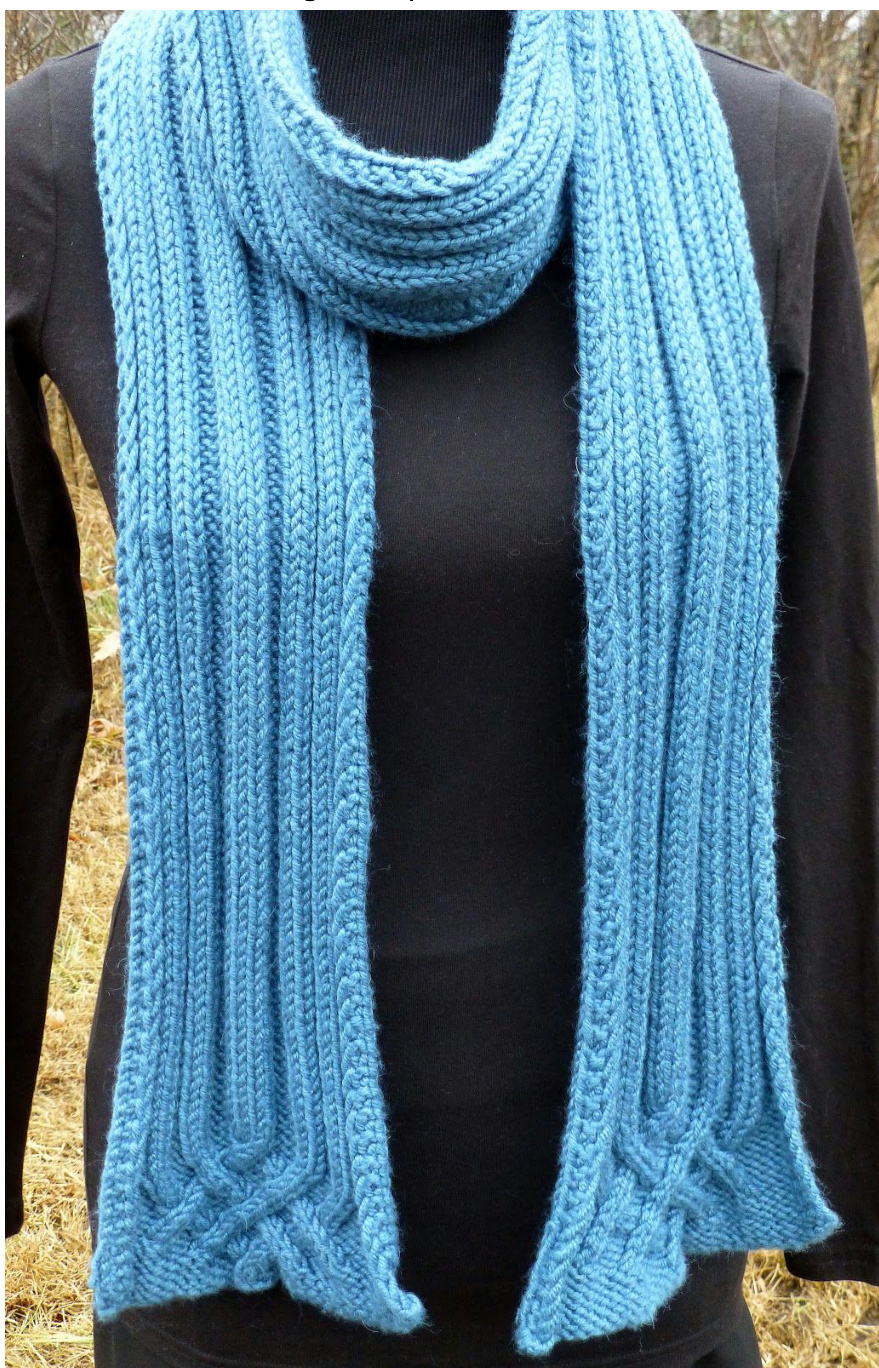
Bulky yarn, plenty of easy knits and purls repeats in the middle to connect the Celtic knots at each end. The Celtic Knot begins on one end with a 19 row knot and then the knot is carried across the entire scarf by knitting the knits and purling the purls until the knot is finished by the reverse of the 19 row knot. Originally published in 2011. I know a lot more now in 2016 than I did back then. So I've edited and updated the pattern. I also charted the cables. Still free. Happy knitting! Size: Approximately 7" (18 cm) wide by 75 " (190 cm) long or your desired length Suggested yarn: 300-400 yards bulky weight. Sample is knit in Uruguay Chunky to 82" long and used 280 g or most of six 50 g balls. Gauge: 12 st = 4" in St st Needles: US size 10.5 (6.5 mm) (or size necessary to obtain gauge) Charted Directions: page 4
Abbreviations
cn: cable needle; k: knit; p: purl; pm: place marker; Rs: right side; sm: slip marker; st(s): stitch(es); S1 (wyf): Slip one stitch as if to purl (with yarn in front); Ws: wrong side; 2/2 RC: place 2 st on cn, hold in back, k2, k2 from cn; 2/2 RPC: place 2 st on cn, hold in back, k2, p2 from cn; 2/1 RPC: place 1 st on cn, hold in back, k2, p1 from cn; 2/2 LC: place 2 st on cn, hold in front, k2, k2 from cn; 2/2 LPC: place 2 st on cn, hold in front, p2, k2 from cn; 2/1 LPc: place 2 st on cn, hold in front, p1, k2 from cn.
PATTERN
Cast on 34 sts. The fun starts right away with the knot beginning on the next row! Stitches between the [ ] are the actual knot. (Note: The scarf maintains a slight 2-stitch garter border with slipped stitch edges as follows -- Slip one stitch as if to purl (with yarn in front), k1 at the beginning and k2 at the end of every row regardless of whether it is a RS or WS row.) (Note: Consider using different colored highlighters to color code the RC,RPC,LC,LPC abbreviations each time they appear in the written pattern.This provides excellent visual cues to help keep track of the pattern.) Row 1 (RS): Sl1 (wyf), K1, pm, [p30 ], pm, k2. Row 2 (Ws): Sl1 (wyf), K1, sm, [k13, p4, k13], sm, k2. Row 3 (RS): Sl1 (wyf), K1, sm, [p13, 2/2 RC, p13], sm, k2. Row 4 (Ws): Sl1 (wyf), K1, sm, [k13, p4, k13 ], sm, k2. Row 5 (RS): Sl1 (wyf), K1, sm, [p7, 2/2 LPC, 2/2 RPC, 2/2 LPC, 2/2 RPC, p7], sm, k2. Row 6 (Ws): Sl1 (wyf), K1, sm, [k9, p4, k4, p4, k9], sm, k2. Row 7 (Rs): Sl1 (wyf), K1, sm, [p3, 2/1 LPC, p3, 2/2 LC, p4, 2/2 RC, p3, 2/1 RPC, p3], sm, k2. Row 8 (Ws): Sl1 (wyf), K1, sm, [k4, p2, k3, p4, k4, p4, k3, p2, k4], sm, k2. Row 9 (RS): Sl1 (wyf), K1, sm, [p4, 2/1 LPC, 2/2 RPC, 2/2 LPC, 2/2 RPC, 2/2 LPC, 2/1 RPC, p4], sm, k2. Row 10 (Ws): Sl1 (wyf), K1, sm, [k5, p4, k4, p4, k4, p4, k5], sm, k2. Row 11 (RS): Sl1 (wyf), K1, sm, [p5, 2/2 LC, p4, 2/2 RC, p4, 2/2 RC, p5], sm, k2. Row 12 (Ws): Sl1 (wyf), K1, sm, [k5, p4, k4, p4, k4, p4, k5], sm, k2. Row 13 (RS): Sl1 (wyf), K1, sm [p4, 2/1 RPC, 2/2 LPC, 2/2 RPC, 2/2 LPC, 2/2 RPC, 2/1 LPC, p4], sm, k2. Row 14 (WS): Sl1 (wyf), K1, sm, [k4, p2, k3, p4, k4, p4, k3, p2, k4], sm, k2. Row 15 (RS): Sl1 (wyf), K1, sm, [p3, 2/1 RPC, p3, 2/2 RC, p4, 2/2 LC, p3, 2/1 LPC, p3], sm, k2. Row 16 (Ws): Sl1 (wyf), K1, sm, [k3, p2, k4, p4, k4, p4, k4, p2, k3], sm, k2. Row 17 (RS): Sl1 (wyf), K1, sm, [p3, k2, p2, 2/2 RPC, 2/2 LPC, 2/2 RPC, 2/2 LPC, p2, k2, p3], sm, k2. Row 18 (Ws): Sl1 (wyf), K1, sm, [k3, p2, k2, p2, k4, p4, k4, p2, k2, p2, k3], sm, k2. Row 19 (RS): Sl1 (wyf), K1, sm, [p3, k2, p2, k2, p4, 2/2 RC, p4, k2, p2, k2, p3], sm, k2.
Now you've reached the mindless portion of the scarf where you will knit the knits and purl the purls until the scarf is about 4 inches short of the desired finished length. Make sure to end on a WS row. Or if you prefer --alternate between rows 20 and 21 until the scarf is about 4 inches short of the desired finished length. Make sure you finish with awsrow. Row 20 (WS): Sl1 (wyf), K1, sm, [k3, p2, k2, p2, k4, p4, k4, p2, k2, p2, k3], sm, k2. Row 21 (RS): Sl1 (wyf), K1, sm, [p3, k2, p2, k2, p4, k4, p4, k2, p2, k2, p3], sm, k2. Row 22 (RS): Sl1 (wyf), K1, sm, [p3, k2, p2, k2, p4, 2/2 RC, p4, k2, p2, k2, p3], sm, k2. Row 23 (WS): Sl1 (wyf), K1, sm, [k3, p2, k2, p2, k4, p4, k4, p2, k2, p2, k3], sm, k2. Row 24 (RS): Sl1 (wyf), K1, sm, [p3, k2, p2, 2/2 LPC, 2/2 RPC, 2/2 LPC, 2/2 RPC, p2, k2, p3], sm, k2. Row 25 (WS): Sl1 (wyf), K1, sm, [k3, p2, k4, p4, k4, p4, k4, p2, k3], sm, k2. Row 26 (RS): SI1 (wyf), K1, sm, [p3, 2/1 LPC, p3, 2/2 LC, p4, 2/2 RC, p3, 2/1 RPC, p3], sm, k2. Row 27 (WS): Sl1 (wyf), K1, sm, [k4, p2, k3, p4, k4, p4, k3, p2, k4], sm, k2. Row 28 (RS): Sl1 (wyf), K1, sm, [p4, 2/1 LPC, 2/2 RPC, 2/2 LPC, 2/2 RPC, 2/2 LPC, 2/1 RPC, p4], sm, k2. Row 29 (wS): Sl1 (wyf), K1, sm, [k5, p4, k4, p4, k4, p4, k5], sm, k2. Row 30 (RS): Sl1 (wyf), K1, sm, [p5, 2/2 RC, p4, 2/2 RC, p4, 2/2 LC, p5], sm, k2. Row 31 (wS): Sl1 (wyf), K1, sm, [k5, p4, k4, p4, k4, p4, k5], sm, k2. Row 32 (RS): Sl1 (wyf), K1, sm, [p4, 2/1 RPC, 2/2 LPC, 2/2 RPC, 2/2 LPC, 2/2 RPC, 2/1 LPC, p4], sm, k2. Row 33 (WS): Sl1 (wyf), K1, sm, [k4, p2, k3, p4, k4, p4, k3, p2, k4], sm, k2. Row 34 (RS): Sl1 (wyf), K1, sm, [p3, 2/1 RPC, p3, 2/2 RC, p4, 2/2 LC, p3, 2/1 LPC, p3], sm, k2. Row 35 (ws): Sl1 (wyf), K1, sm, [k9, p4, k4, p4, k9], sm, k2. Row 36 (RS): Sl1 (wyf), K1, sm, [p7, 2/2 RPC, 2/2 LPC, 2/2 RPC, 2/2 LPC, p7], sm, k2. Row 37 (WS): Sl1 (wyf), K1, sm, [k13, p4, k13], sm, k2. Row 38 (RS): SI1 (wyf), K1, sm, [p13, 2/2 RC, p13], sm, k2. Row 39 (ws): Sl1 (wyf), K1, sm, [k13, p4, k13], sm, k2. Row 40 (RS): Sl1 (wyf), K1, sm, [p30], sm, k2.
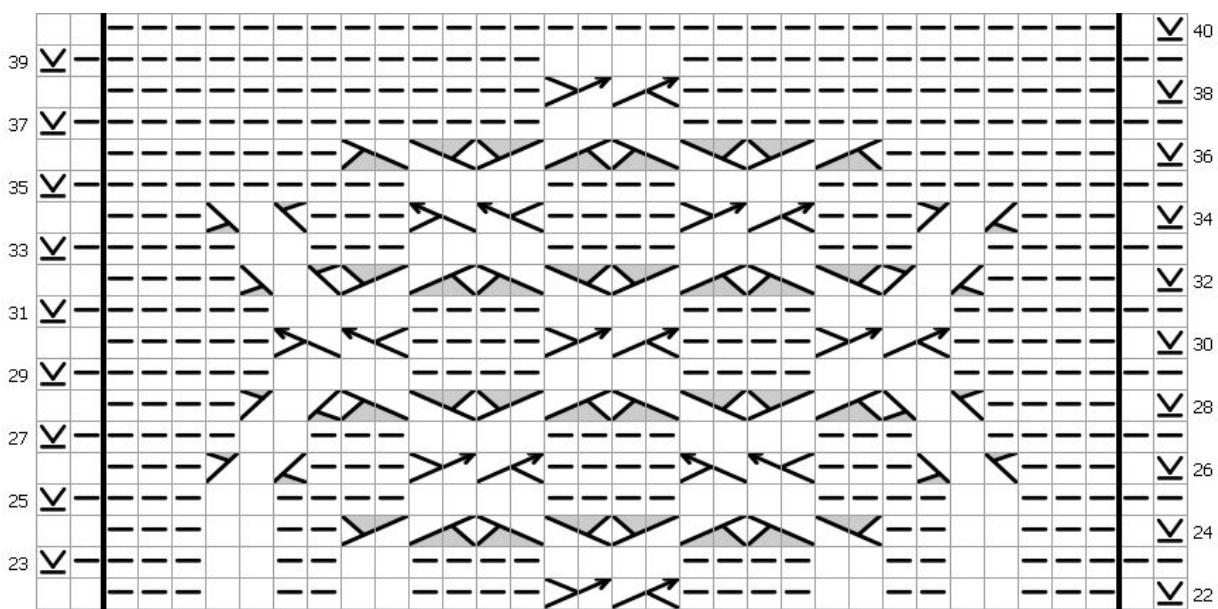
CHARTED DIRECTIONS
Cast on 34 sts. The fun starts right away with the knot beginning on the next row!
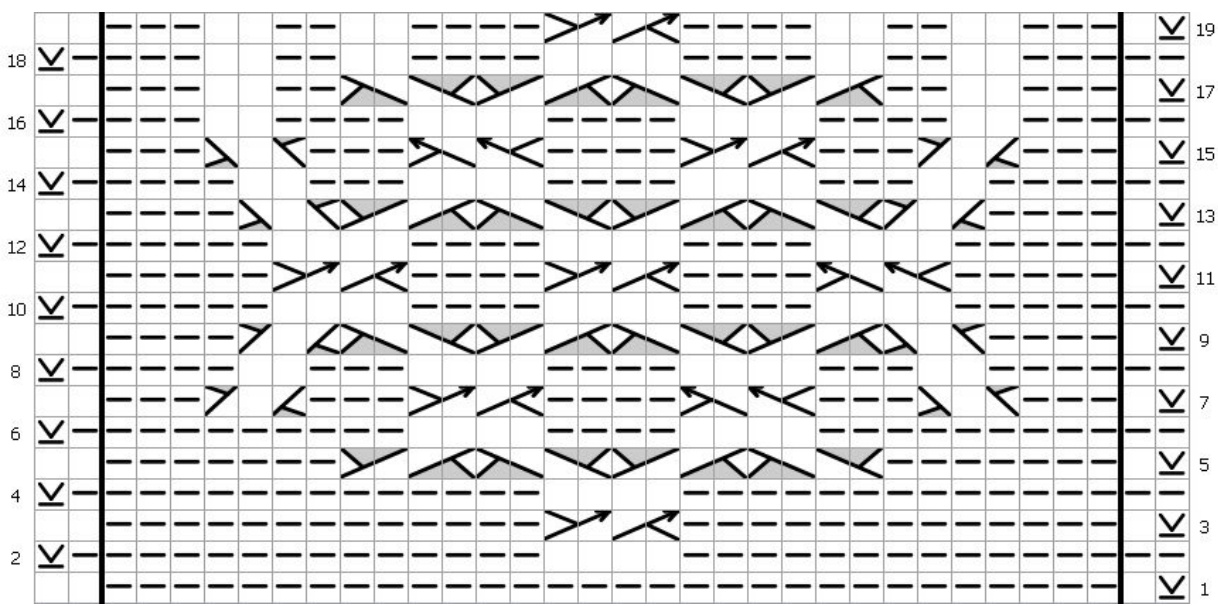
Now you've reached the mindless portion of the scarf where you will knit the knits and purl the purls until the scarf is about 4 inches short of the desired finished length. Make sure to end on a WS row. (Or if you prefer -- alternate between rows 20 and 21 until the scarf is about 4 inches short of the desired finished length.) Rows 1 to 19 Rows 22 to 40
| Key | ||
| 2/1 LPC 21lpc (RS)Sl 2 to cn,hold to front,p;k2from cn | 2/2RPC 22rpc | (RS)Sl 2 to cn,hold to back, k2;p2 from cn |
| (WS)Sl1 to front, p2,k1,from cn 2/1RPC 21rpc | (WS) Sl 2 to cn, hold to front, p2;k2 from cn | |
| (RS) Sl 1 to cn, hold to back, k2; p1 from cn (WS)Sl2 to back,k1,p2,from cn 2/2LC | (RS)Knit (WS) Purl | k |
| 22lc (RS)Sl 2 to cn,hold to front,k2;k2 from cn (WS) Sl 2 to cn, hold to back, k2; k2 from cn | (RS)Purl (WS) Knit | Purl |
| 2/2 LPC | SlipWith YarnIn Front | |
| 22lpc (RS) Sl 2 to cn,hold to front, p2;k2 from cn | slip wyif | (RS) Slip stitch as if to purl, holding yarn in the front |
| (WS) Sl2 to cn, hold to back, k2; p2 from cn | (wS)yarn in back | |
| 2/2RC | ||
| 22rc | ||
| (RS) Sl 2 to cn,hold to back, k2; k2 from cn (WS)Sl2 to front,p2,p2from CN | ||
Cast off. Weave in ends. Wet and block to desired length and width.


