quick ehic scarf
Copyright De-De Heeter 2010
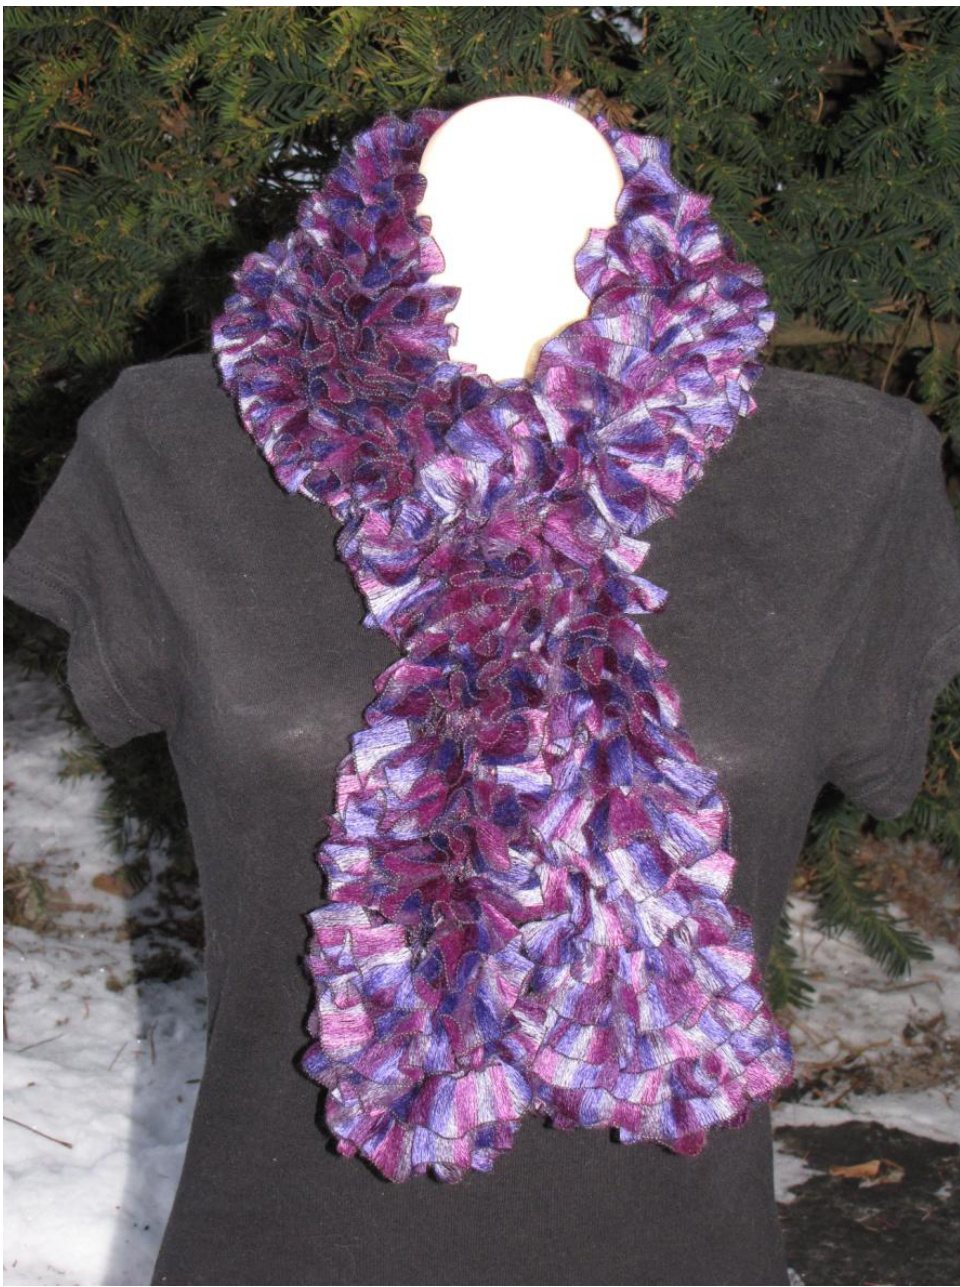
This kicky, chic scarf is as close as it comes to instant gratification in knitting, and everyone will be amazed that it's knitted. I find I can complete one in 2-3 hours without any problem. Approximate size: 3" wide x 66" long. Requirements: 1 ball of Katia Rizos yarn and knitting needles in a comfortable style and size for you. Gauge is meaningless. I found a size 9, 16" circular to be just right for me, and my test knitter preferred working with size 5 straights, so use whatever you have and like - straights or circulars in a size comfortable for your hands. You will also need a sewing-up needle. Katia Rizos is a novelty yarn, and using it requires a few techniques not needed when working with traditional yarn. Also, I'm noticing an odor on the yarn when it's fresh out of the package, but this dissipates with a little bit of time. Yarn management - Rizos is sold in a skein. Before you can use it, you need to transfer it to a more manageable presentation. The easiest way I've found is as follows: Open the skein carefully and put it on a swift, over a chair or open drawer, etc. Carefully remove and save the
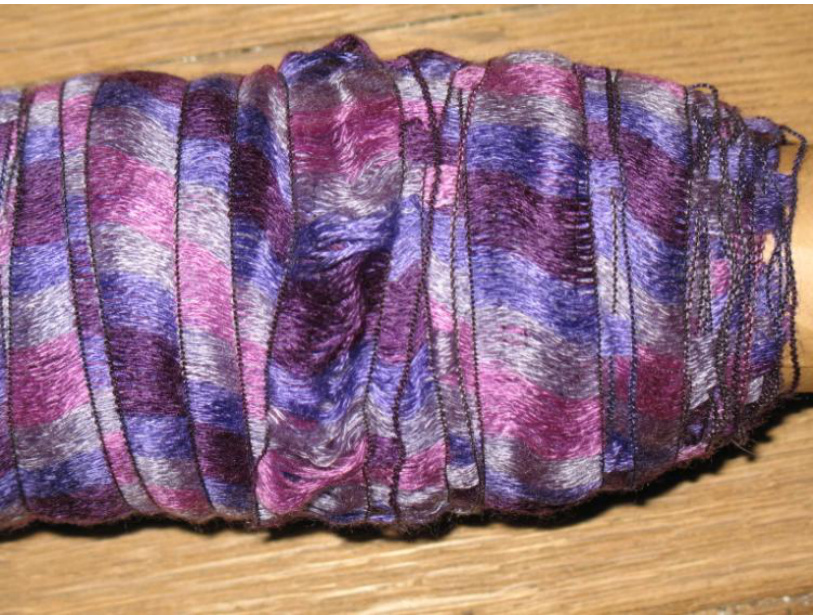
threads that have been used to tie the skein. You will want them for finishing. Using a paper towel core or similar item as a foundation, load the Rizos smoothly, taking care to have no twists in it. Taking the time to do this carefully will pay off when you are knitting! Once the yarn is wound onto the tube, you can use it as it is, or you can make things even easier by placing the tube on a paper towel holder to allow an even feed.
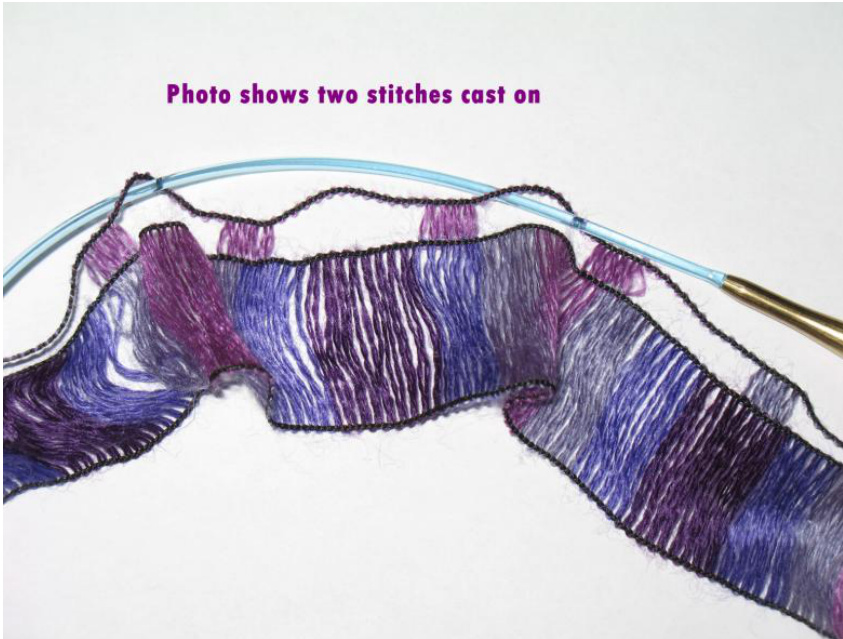
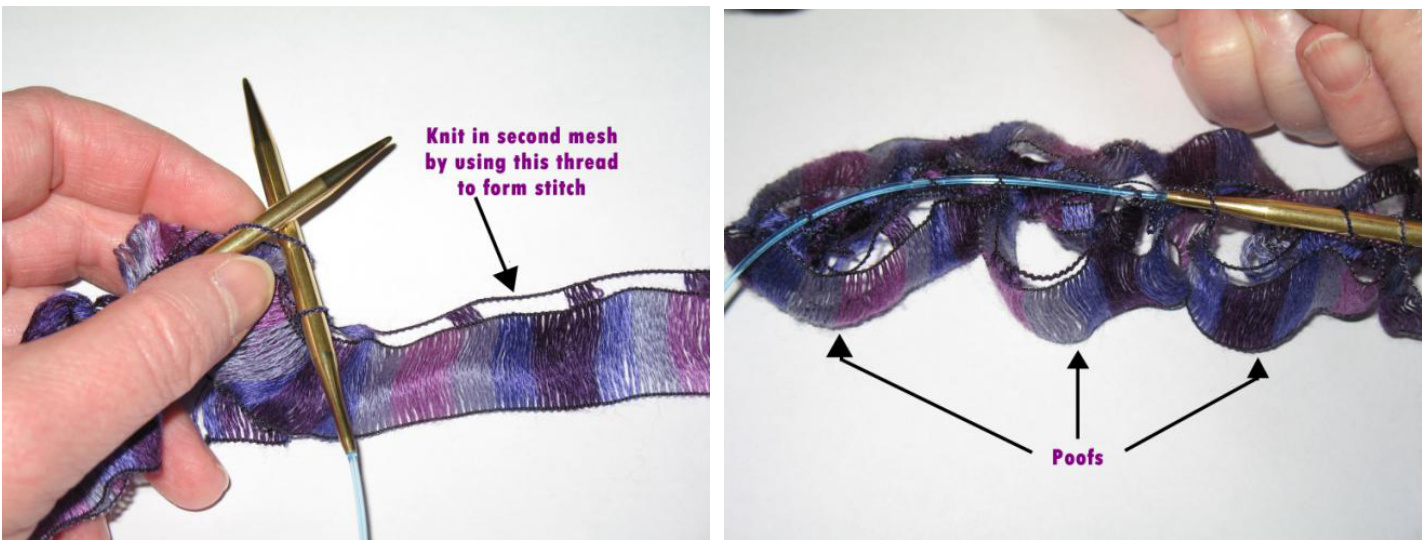
Casting on - Casting on with Rizos could not be easier! Looking at the yarn, you will see that there is a solid ribbon with a single row rectangular mesh along one edge. You will be doing all your knitting with the thread running along the top of this mesh. To cast on, insert your needle down through the first rectangular hole, then up through the third hole, down through the fifth, etc., until you have a total of 7 stitches on your needle. Knitting the first row - The entire scarf is knit in garter stitch. To knit the first row, insert the working needle into the first stitch on your needle.
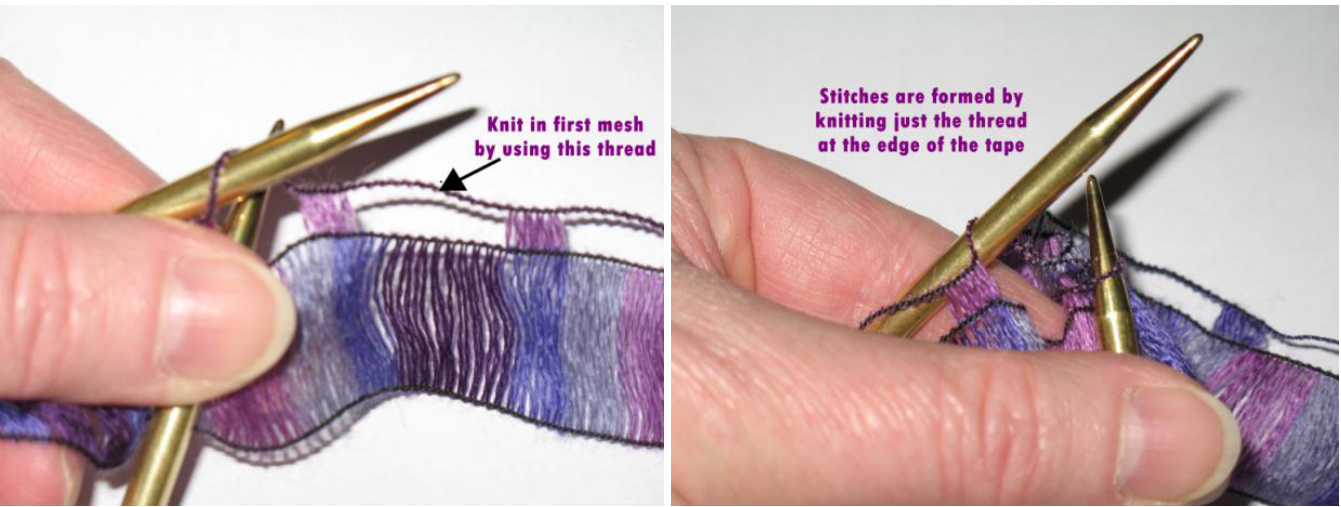
Pick up the top thread of the very next mesh in your supply yarn, and knit it through. One stitch knit. Knit the remaining six stitches of this row in the same manner. Turning your work at the end of a row - Because of the tape structure of the yarn, you need to turn your work with care. You want the yarn to wrap around the edge of the scarf. I do this with the least amount of problems by rotating my needle clockwise as I pass it back to my holding hand. Knitting the second and all following rows - The ruffled pattern is created by varying which hole in the yarn supply mesh is used to form the knit stitches. It won't start looking "right" until you've worked about 10 rows, so be patient and keep knitting! Knit the first stitch of the row into the first mesh, just as you did on the first row. For the second stitch, you will skip the next mesh on the yarn supply and knit into the second mesh. Stitch 3 is into the first mesh, stitch 4 into the second, and so on across the row, ending with stitch 7 being into the first mesh. This forms 3 little poofs where you've skipped a mesh.
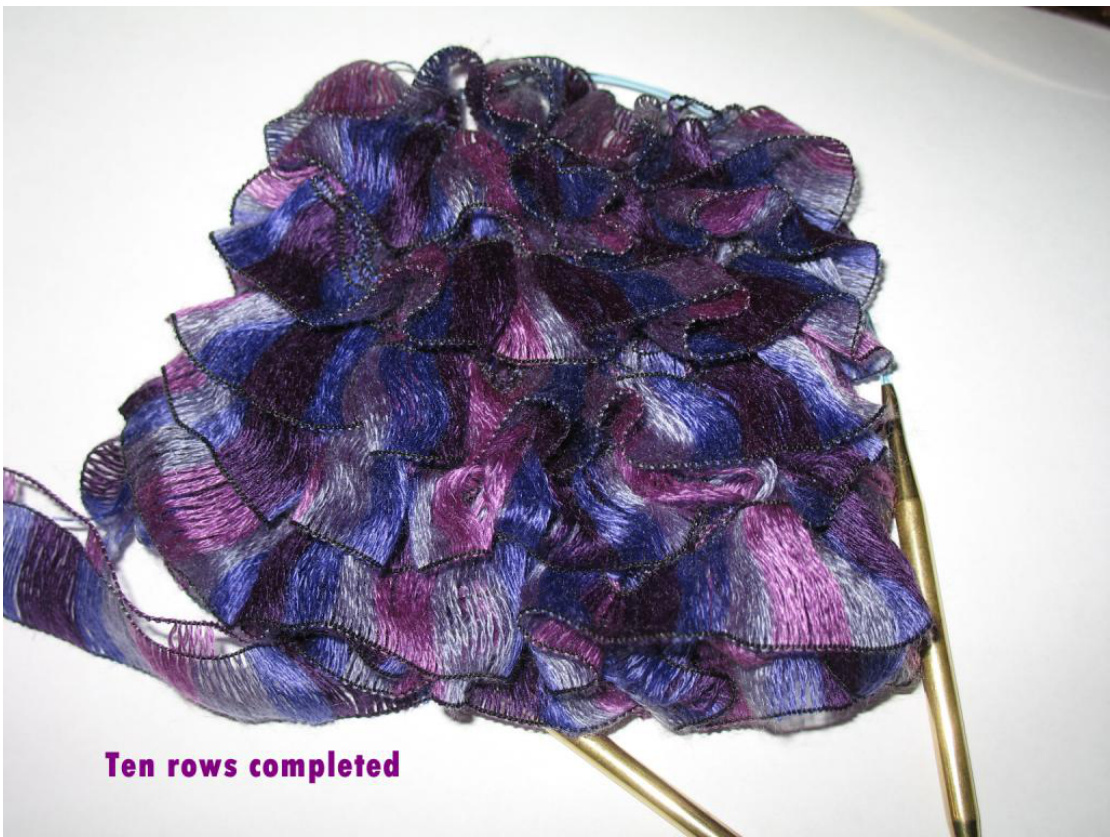
Turn your work and continue in this fashion. You should see that you are knitting in the first mesh on this side where you knit the second on the other, holding the ruffles in place. Knit until your yarn is nearly gone, stopping when you have no fewer than 8 meshes left. Casting off - Knit stitch 1 into the first mesh. Return it to the holding needle. Knit two together using the first mesh of the supply. Return the resulting stitch to the holding needle. Continue across the row until you have one stitch remaining. Put it on a safety pin so it doesn't get away.
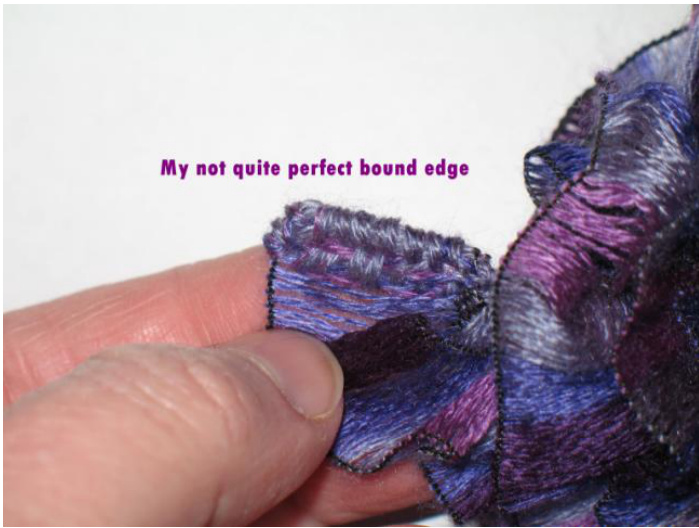
Finishing - Thread a sewing-up needle with a length of the thread that was used to tie the skein. Trim the end of the Rizos to be about % - %" longer than needed. Fold it over twice, and weave back and forth along the length of the tape to secure the raw edge, also sewing through the final cast off stitch to sew it down. Bury ends of thread very securely. Since this is a synthetic, it's a bit slippery, s0 you might want to put a dab of nail polish or Fraycheck on it for extra security, but be careful to avoid creating a sharp spot in the process. Finish the other end in the same fashion. Now, starting at one end of the scarf, grasp the edges and gently stretch the scarf wider. Work your way up the entire length of it. Then grab it in the middle, hold it up and give it a nice shake. This settles and evens the stitching and ruffles. This wears very nicely folded in half with the ends pulled through the loop.


