My Christmas ornament By Thata pang 08
Note : Please do not copy paste this pattern. Use for personal use only
Material : Softy Cotton ( 8 ply yarn) Red and Green colour Softy Cotton ( 6 ply yarn ) White colour Tunisian hook 4.50 mm Crochet Hook 3.00 mm
Work with Red colour ( sorry if I use another colour for instruction to make it clear enough) :
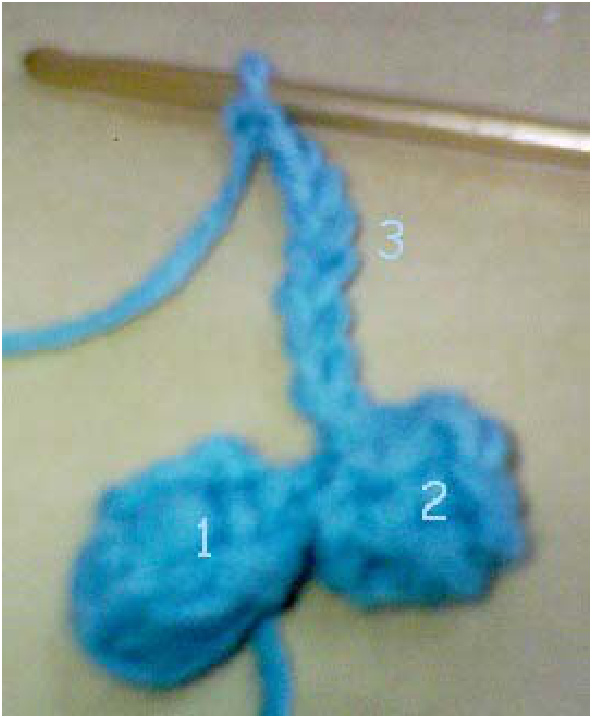
No.1 Start with Ch8 R1:TSS
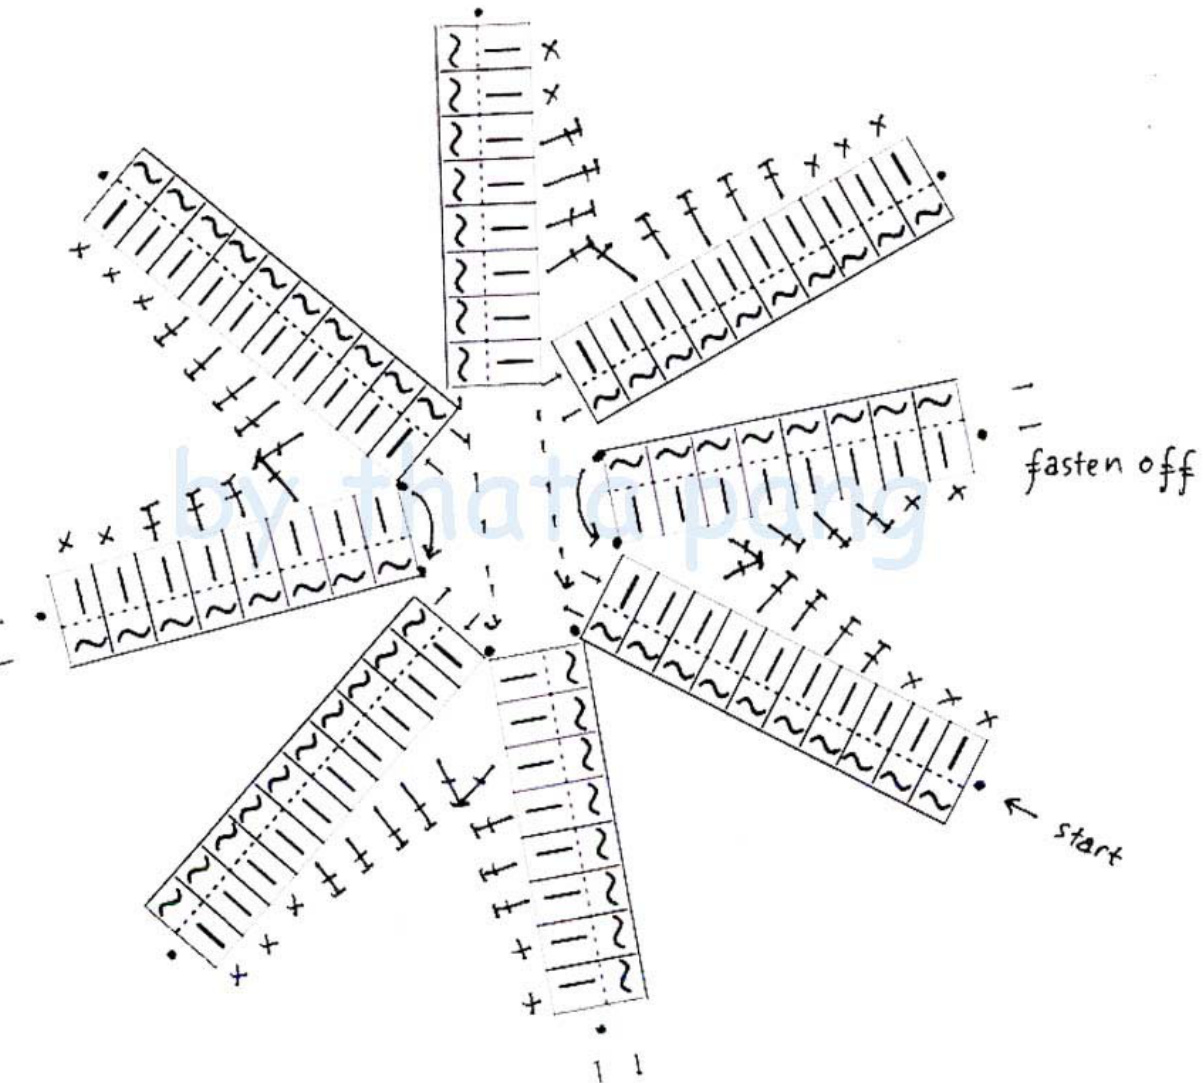
TSS pattern in graph :
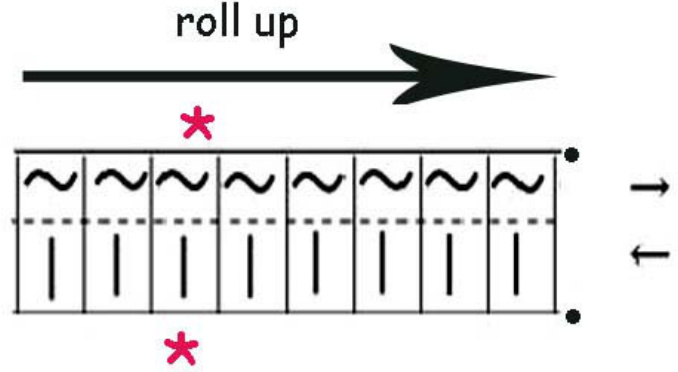
Roll up from right to left ( our first stich )
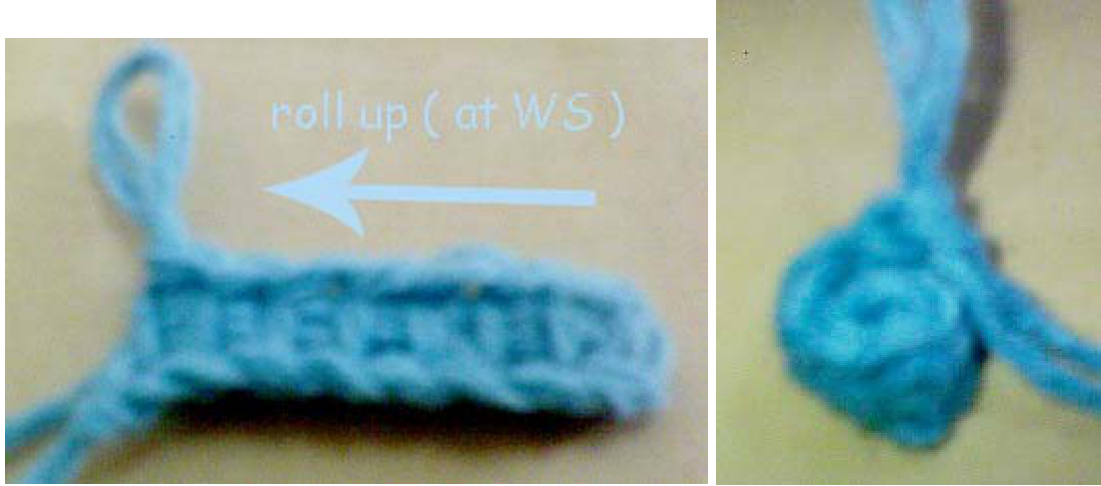
Insert your hook to the stiches no.5 from begin ( mark \* at graph pattern ) Then slip stich. ( We make 2 slip stich for each small ball )
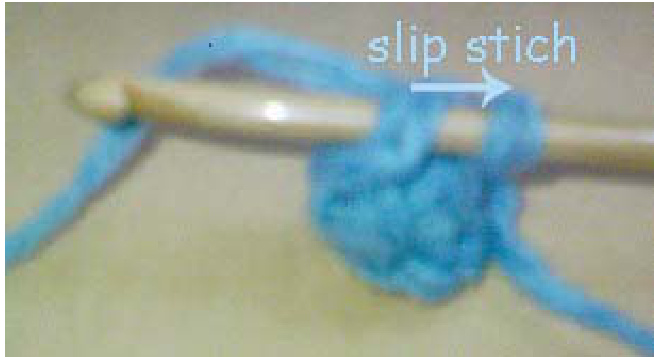
Insert your hook again through the ch1, and ch5 then slip stich again. Finish no.1.
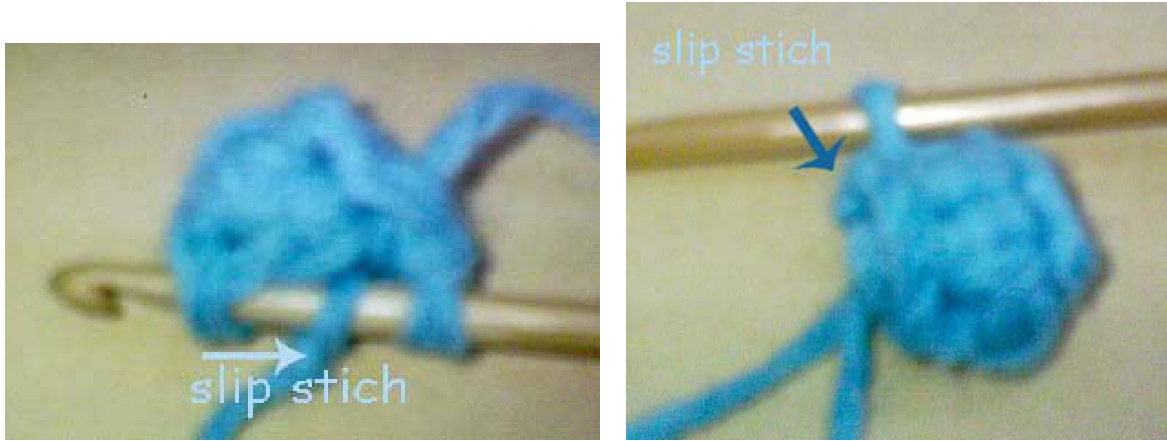
Make no.2 : The instruction is the same with no.1 Start with ch8, then tss, roll up, slip stich 2 times.
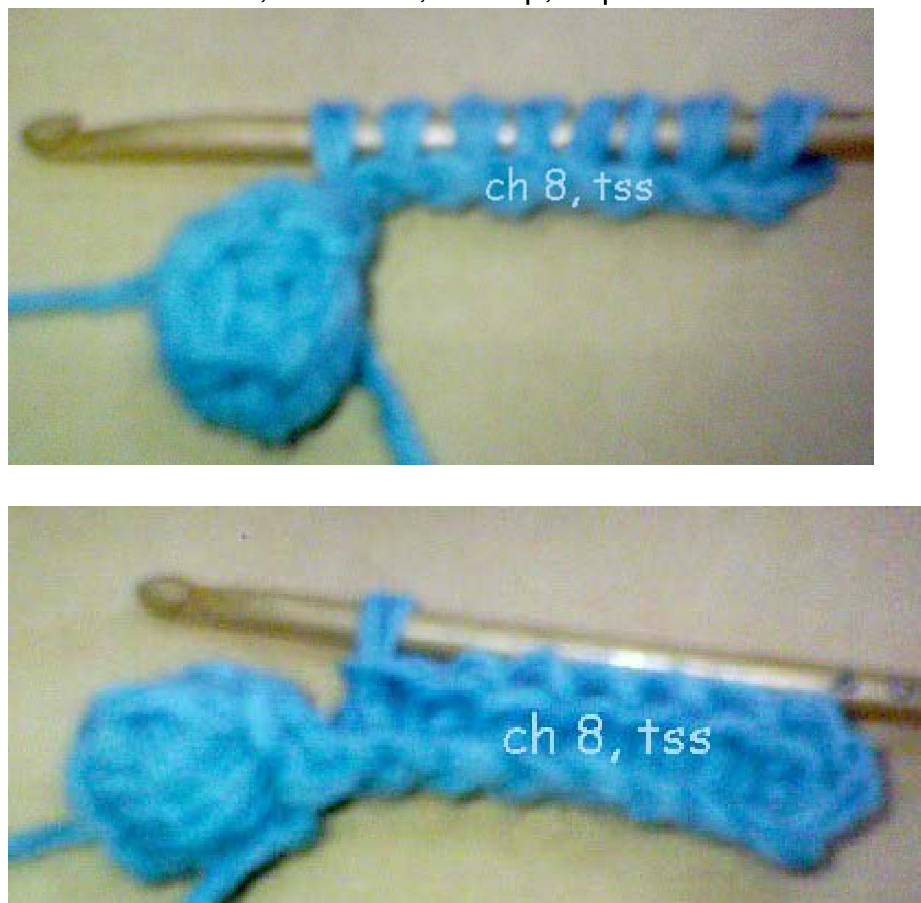
Now you have 2 bubble fruit $\circledast$ . Lets make no.3-8 like instruction no.1. Fasten off after you finish no. 8.
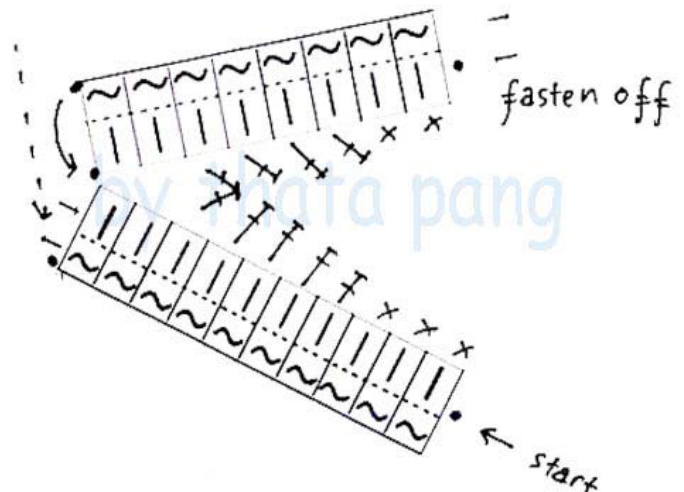
With green yarn (for leaves)- Note : Sorry I use the same colour in this instruction. Leaves make with 2 pattern ( repeat 4 times ) No.1 Long leaf Ch 10, Tss No.2. Short leaf Ch8, Tss This is the chart pattern for leafes :
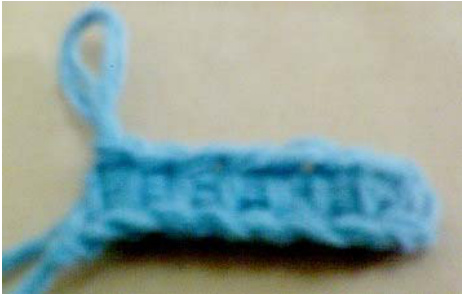
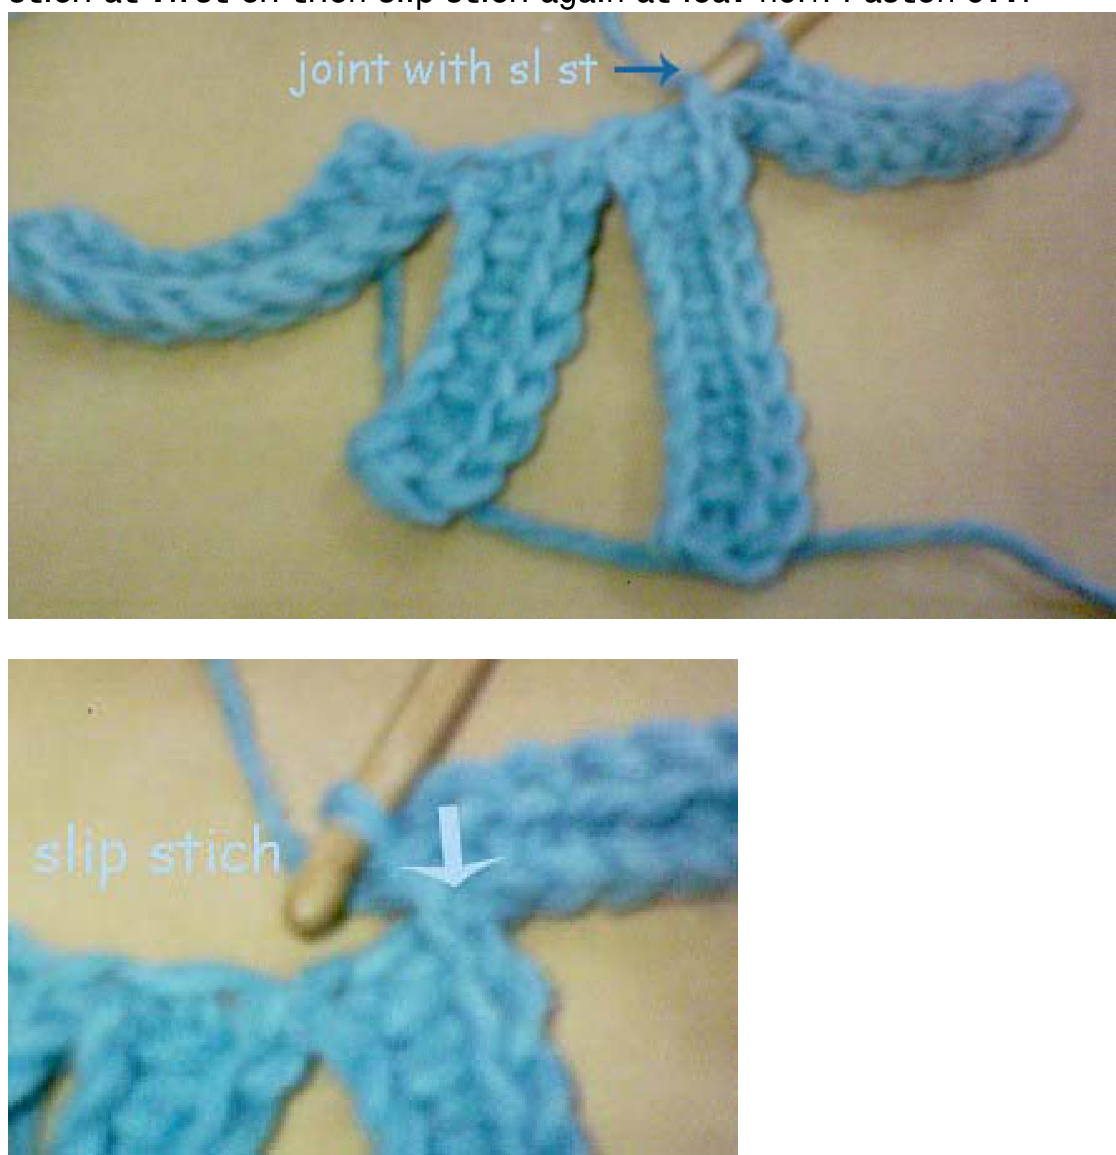
For make it clear for you, please see the picture below : Note : The important thing when you make short leaf at no.4 and 8 ( corner ). You must make a slip stich like this picture. The four leaves is finish. Now you make the other side of leaves ( 4 leaf again) Make leaf no.5 (long leaf). Slip stich at stich between leaf no. 3 and 2. Make leaf no. 6 (short leaf). Slip stich at stich between leaf 2 and 1. Make leaf no. 7 ( long leaf). Slip stich at first stich at leaf no.1 Make leaf no.8 ( short leaf). Do the same with no. 4. After finish it. Slip stich at first ch then slip stich again at leaf no.1. Fasten off.
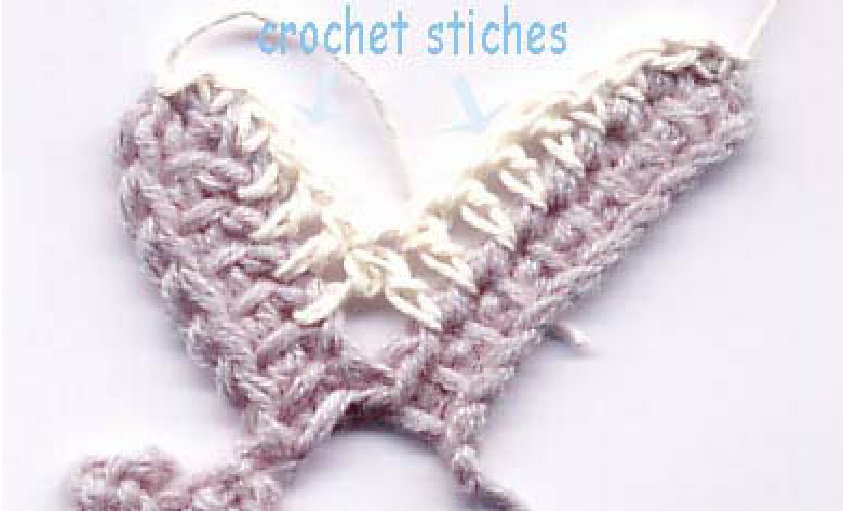
Work with white yarn : You work with sc and dc stich. ( Take your crochet hook this time $\circledast$ 一 Why I choose the different size? Cause I want to make 3D effect in these leaves, not flat. but little curly. Start from long leaf (base/ch) in RS. Sl st, ch, 3 sc, 4 dc, 2 dc tog ( one dc from long leaf, one dc from short leaf after you sk 2 sts from base ), 3 dc, 2 sc, sl st fasten off.