NoelleNoodle's Silk Sarden Jlower Pin
When I was done with the Clapotis I was happily surprised to find I had leftover yarn. For a while there I wasn't even sure I'd have enough yarn to finish! But I ended up using about $5\,1/2$ skeins out of the 6 I'd bought. The half a skein I had wasn't from the same ball because I'd been cutting in and chopping up different skeins to fit the striping pattern. So I had a bunch of small balls of yarn to play with. And a new shawl that needed a pin. What to do? Well, I made a flower pin! When I showed it to a friend she said I had to post the pattern because it was the prettiest knit flower she'd ever seen. I love that kind of flattery don't you? I was a bit intimidated about writing out exactly what I did because, as you'll see, it's a bit weird and very hard to explain. This knit flower is very similar to the one from headhuggers and the flower washcloths in Last Minute Knitted Gifts and I'm sure there are others out there. But I made up a funny little trick for joining the petals of this flower that I hadn't seen before - although now that I'm writing it out, I'm thinking there might be a reason for that. So we'll see if I can explain it properly!
You'll need:
US 6 needles (preferably circulars) US 8 needles (preferably circulars) A set of US 6 or 7 double-pointed needles about 1/4 a skein of Silk Garden or roughly 30 yards of a comparable yarn a small metal stitch holder (the one that looks like a giant safety pin) or a coil-less safety pin a tapestry needle cable needle (optional) seed beads or button, matching needle and thread (optional) Gauge really isn't important here this is a “make it work" (hee! Tim Gunn!) kind of pattern. Just have a smaller needle, a larger needle, and a medium set of double pointed needles
Abbreviations:
CO: Cast-on K: knit kfb: knit into the front and back of the same stitch pfb: purl into the front and back of the same stitch K2tog: knit two stitches together DPN: Double pointed needle
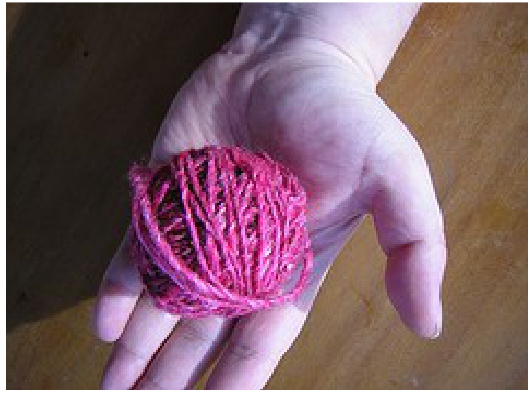
To give you a good idea of how much yarn it takes for this pattern here's a photo of how much yarn I had leftover after finishing the clap. And I still had about 1/4 - 1/2 of this ball left after making the flower. So it really doesn't take much at all.
Making the Petals
Using the US 6s (or whatever your smaller size needle is) and a long tail cast on with at least a 5 inch tail, CO 2 stitches. Row 1: kfb, kfb (4 stitches) Row 2: k1, kfb, kfb, k1 (6 stiches) Row 3: k1, pfb, purl to last 2 stitches, pfb, k1 (8 stitches) Row 4: K1, kfb, knit to the last 2 stitches, kfb, k1 (10) repeat rows 3 and 4 until there are 16 stitches (or the petal is as large as you'd like) Leaving stitches on the needle, cut yarn leaving approx 5 inch tail. Move petal to the end of the straight needle or to the center bottom of the circular needle. Make 2 more petals on size 6 needles (so there are 3 altogether). Make 2 petals in the same way using size 8 needles (or whatever size your larger needle is). Now there are 5 petals altogether. Don't cut the yarn when you finish the last petal. Note: You don't have to make petals different sizes but I think it adds some interesting variation to the flower.
Joining the Petals
(This is where it gets complicated) To prepare, arrange all the petals on their needles so they're facing in the same direction - for example all petals having the “right side” facing away from you. Using 1 DPN, move 12 stitches for one petal from size 6 needle (Petal A). For the last 4 stitches from Petal A: Hold the needle with the size 8 petals (Petal B) with the right side in the same direction as Petal A. Hold Petal B so the right side overlaps the left side of Petal A. Alternate moving last 4 stitches from Petal A onto the DPN with moving the first 4 stitches from a petal (Petal B). Be sure that both petals have the right side facing the same way. So the stitches look be like this on a needle: AAAAAAAABABABABABBBBBBBBBB This makes the petal overlap in a more flowery-looking way. Continue moving stitches from Petal B onto DPN to the last 4 stitches. If you've run out of space on your first DPN , use a new DPN to alternate the last 4 stitches from Petal B with the first 4 stitches from the next Petal A. Again, with the right side facing the same way and the new petal's right side overlapping the old petal's left side.
Change to a new DPN when you've run out of space. Continue moving the stitches in the same way for the next two petals, overlapping with the last 4 stitches with the first four stitches of the next petals. Again, you don't have to use a specific order with the sizes of the petals from the different sized needles. Just be sure to be consistent in how you overlap the petals each time. I just think that using different sized petals adds a more organic feeling to the project. When you've gotten to the last 4 stitches of the last petal..Use the cable needle (or stitch holder) to move the first four stitches from the very first petal. Holding the first petal in front of the last, alternate the last 4 stitches onto the first needle with the first four stitches on the first petal. So basically, you're joining the flower in the round before you even start knitting them together. You really don't need a marker or anything. This isn't an exact pattern because really, you just need to do what you think would look good.
Knitting the center in the round
Using the yarn tail still connected to the yarn ball, start knitting the stitches in the round. Knit 1 complete round. Next Round: $^{*}\mathrm{K}3$ , $\mathrm{K}2\mathrm{tog^{*}}$ , repeat between $\ast_{\mathbf{S}.}$ Next Round: Knit Next Round: $^{*}\mathrm{K}3$ , $\mathrm{K}2\mathrm{tog^{*}}$ , repeat between ${\bf*}_{\bf S}$ Next Round: purl (adds a little texture) Next Round: Knit Next Round: $\ast\mathrm{K}2$ , K2tog\*, repeat between ${\bf*}_{\bf S}$ Continue repeating last two round until you have 6 stitches or so. Cut yarn with 8 inch tail, thread the tapestry needle with the tail, run needle through last 6 stitches and pull to close.
Finishing
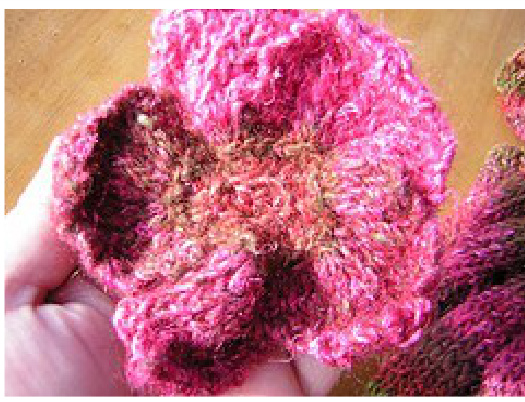
Use remaining tails of yarn and tapestry needle to stabilize the petals in the way you'd like and to whipstitch the flower onto the small stitch holder or safety pin. I didn't block mine or anything but you can if you'd like!
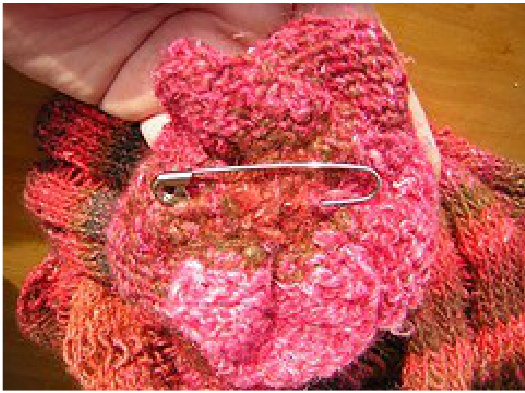
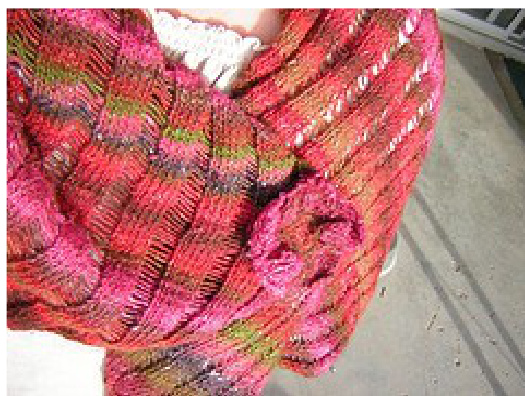
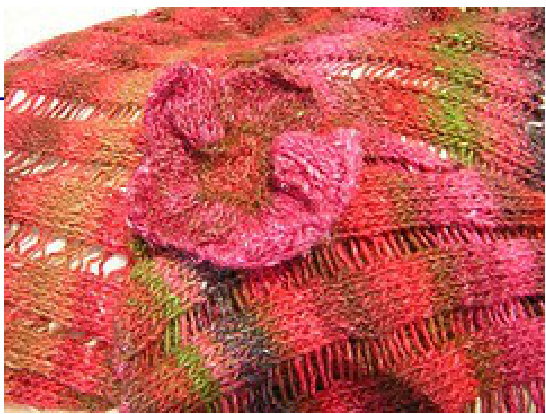
Voila! It's a flower pin!
A few optional variations:
- Use a needle and thread to sew seed beads or a button in the center of the flower. -Alternate the petals so some have the “right side” facing up and other have the “wrong side facing up. - Or make a larger and a smaller version of this flower and sew the small one on top of the other. Ok, hopefully this is fairly to easy to understand Let me know if it's too confusing! At some points I felt like I was typing Esperanto. But I've read it out loud a few times. And it seems to make sense.


