
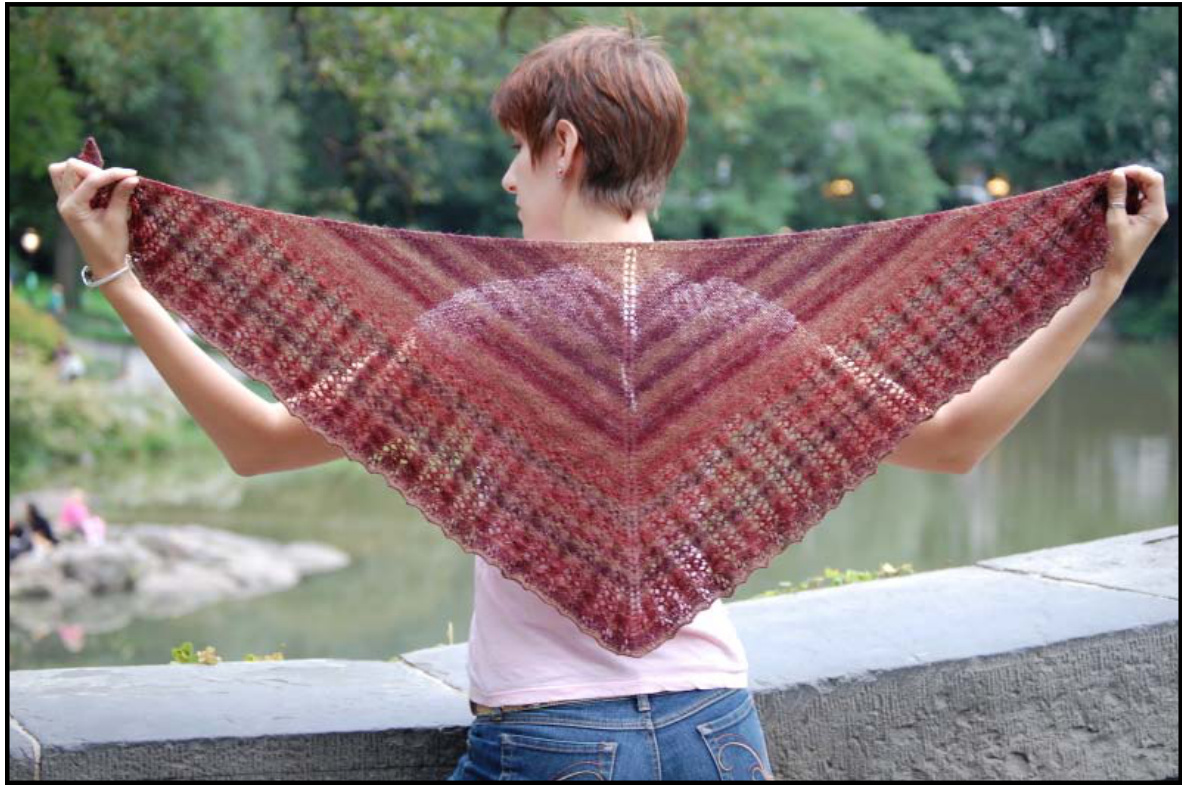
Valeria
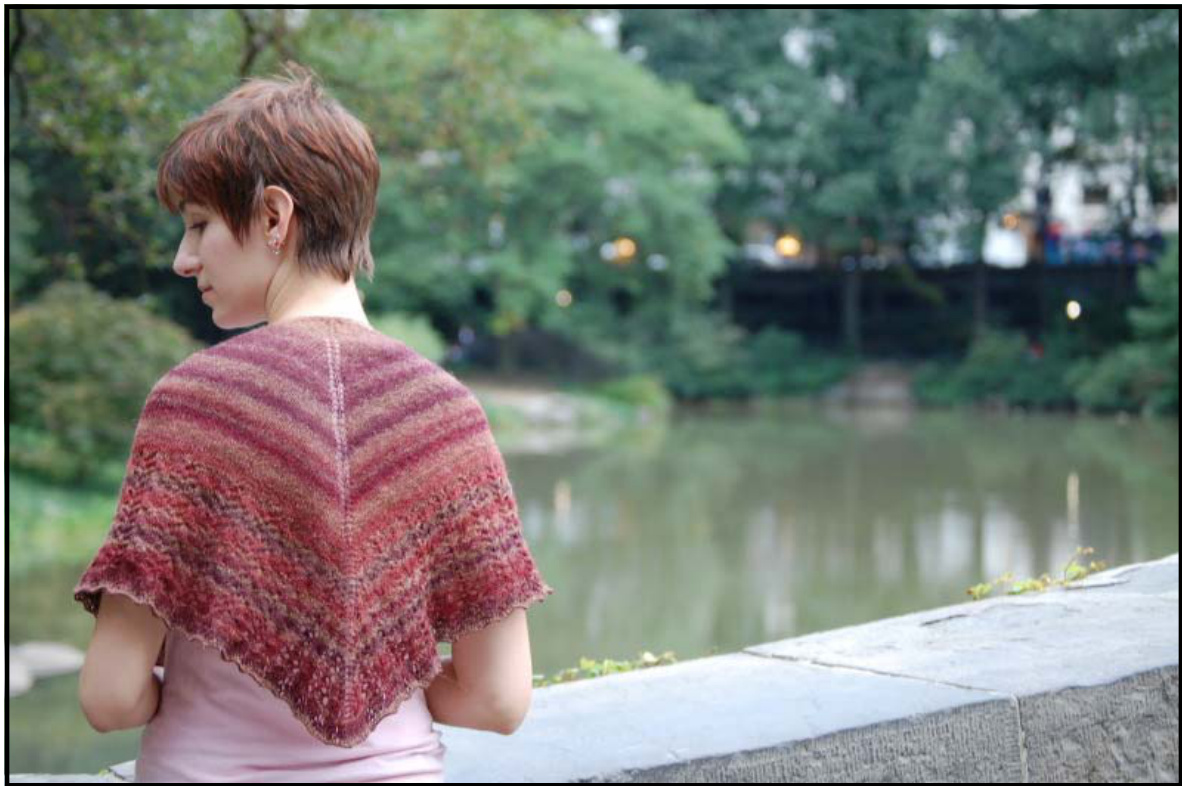
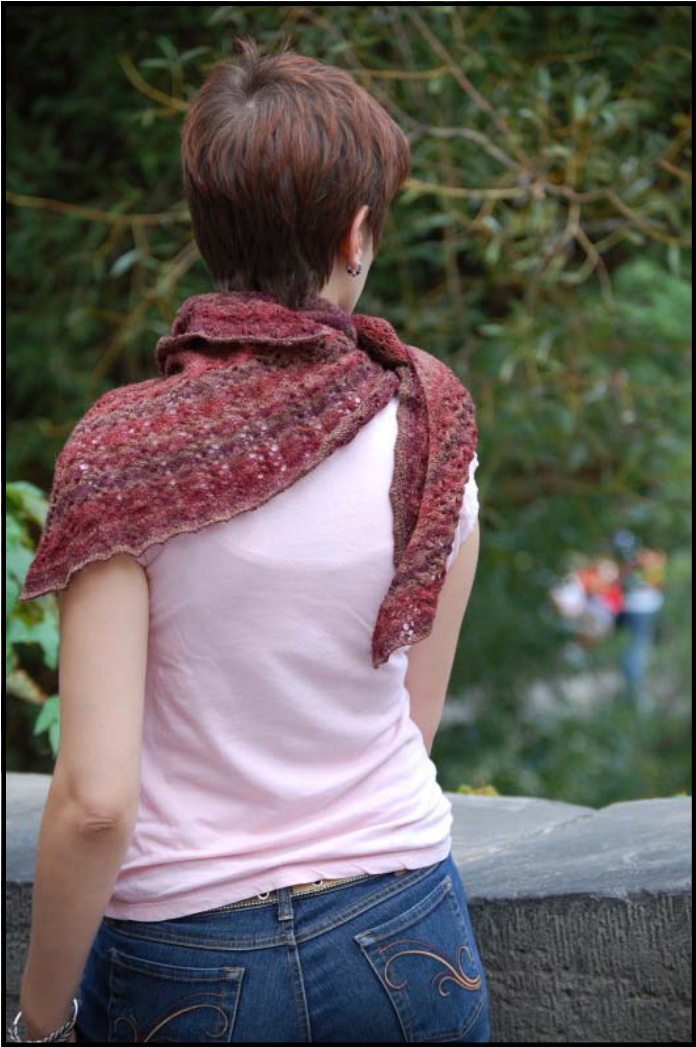
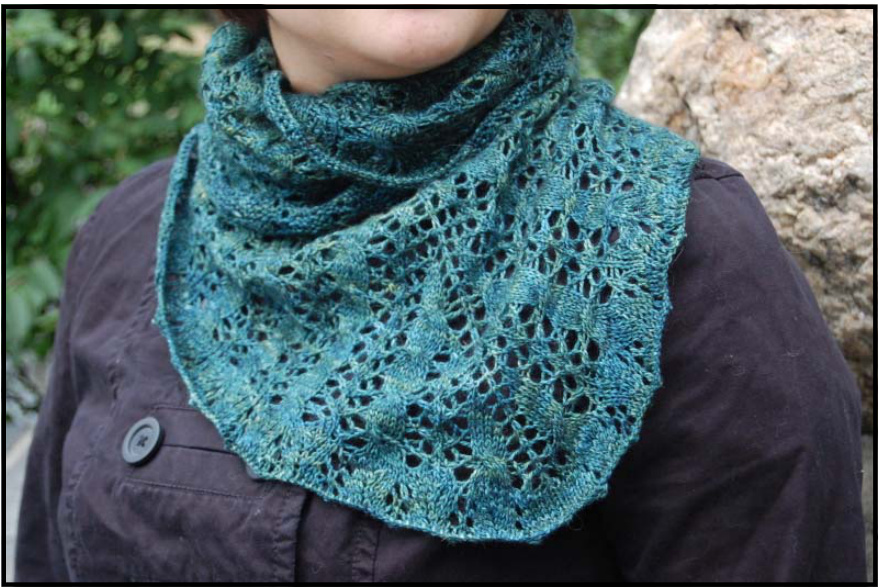
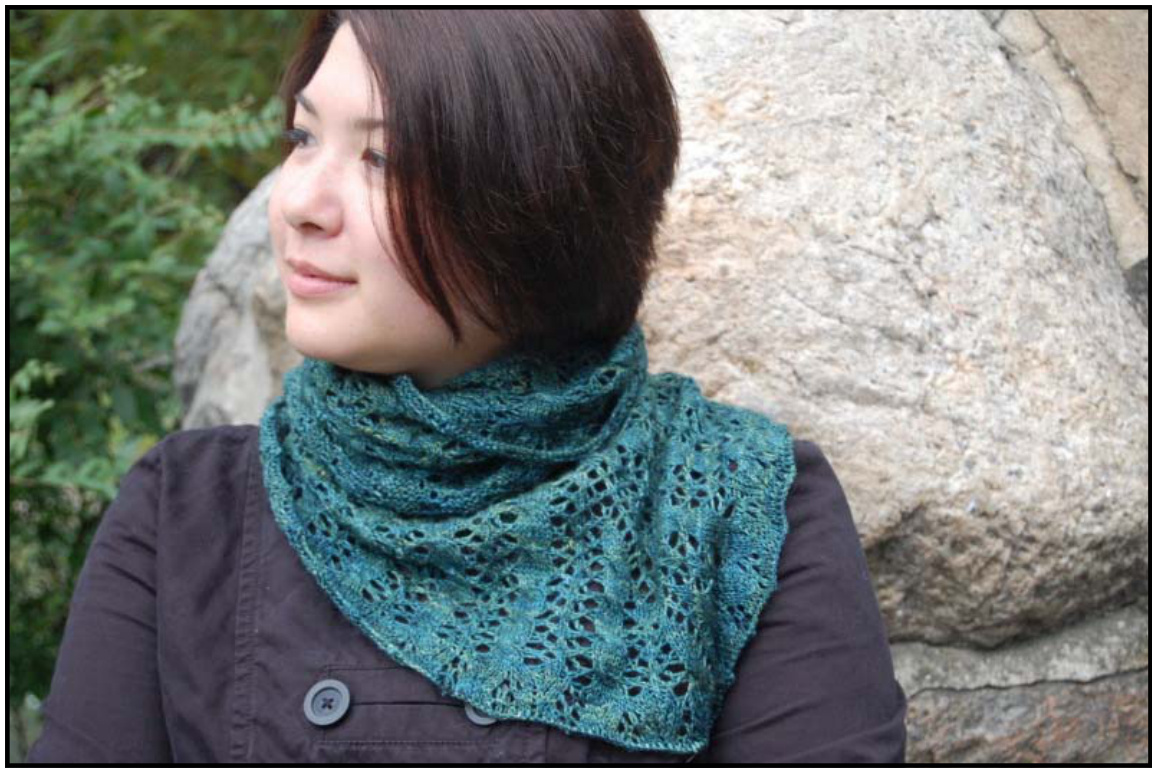
A pattern by Jacie Falkowski My Great Aunt Valeria was a little Polish woman with a great, big personality. A talented seamstress, she made all her own dresses and wore them with heels every day. And she would always have a little something thrown over her shoulders tokeep out the chill. While she wasn't a knitter, I like to think this little shawlette would have suited her perfectly. Designed to complement your handspun, this little lacy cabled pattern with a slightly ruffled edge can be knit out of just four ounces and works with softly striping and transitional yarns as well as solid colors and semi-solids.
Photography by Kris Granatek
Handspun Specifications
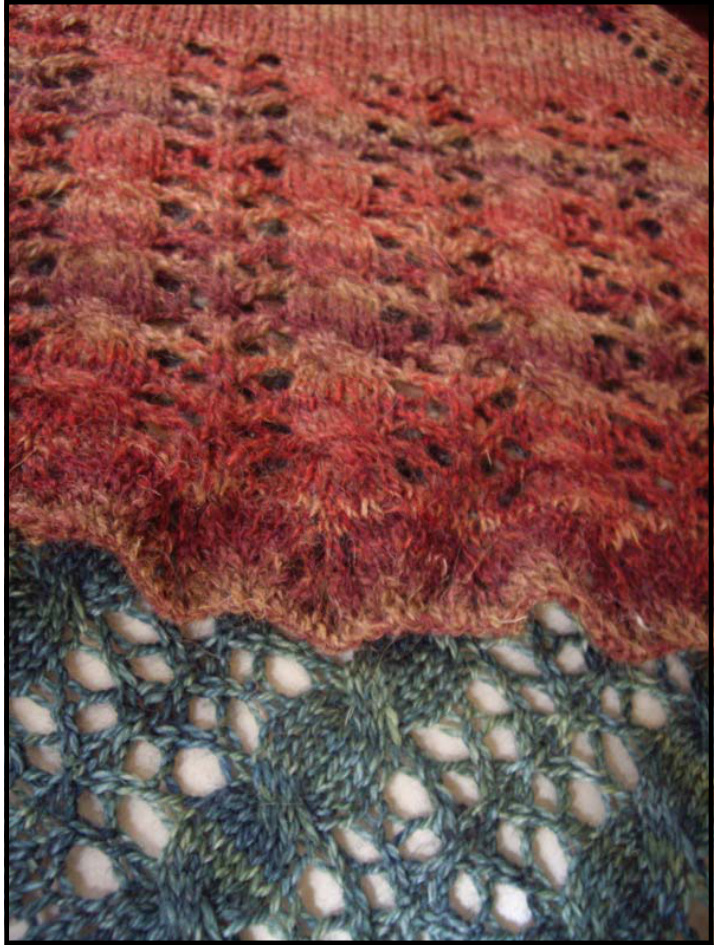
Fiber: Spunky Eclectic Handpainted Shetland combed top, 4 ounces, “Pomegranate" colorway Drafting method: Worsted spun, short forward draw Wheel system: Double drive, 10:21:1 ratio on spin and 2-ply Wraps per inch (WPl): 22 Yardage used: 500 yards Yarn classification: Fingering Weight Commercial yarn substitute: The Woolen Rabbit Kashmir, 1 skein, “Mystic Mountain Pine" colorway
Pattern Specifications
Needle: US 5 $(3.75\ \mathsf{m m})$ 30 or 36-inch circular Gauge: 24 stitches and 32 rows in stockinette stitch $=4$ inches Finished measurements: 18 inches X 41 inches Notions: stitch markers, cable needle, tapestry needle, blocking wires (opt.)
Abbreviations
k: knit yo: yarn over p: purl sts: stitches RS: right side sl: slip stitch WS: wrong side pm: place stitch marker k2tog: knit two stitches together ssk: slip, slip, knit two slipped stitches together psso: pass slipped stitch over kfb: knit into the front and back of stitch
Directions
Cast on 3 sts. Knit 6 rows even. Pick up and knit 3 sts from long edge of garter stitch tab and 3 sts from cast-on edge. (9 sts total)
Set-up Rows
Row 1 and every odd-numbered row (ws): k3, yo, p to 3 sts from end of row, yo, k3 (11 sts) Row 2 (Rs): k3, yo, k2, yo, pm, kl, pm, yo, k2, yo, k3 (15 sts) Row 4: k3, yo, k to first marker, yo, slip marker, kl, slip marker, yo k to last 3sts, yo, k3 (21 sts) Repeat Rows 1 and 4, increasing until piece measures approximately 11 inches and 239 sts are on needle.
Pattern
Begin Chart A. Work through Chart A one time. Then work through Chart B one time. Then work through Chart C one time. After completing Chart C, there should be 387 sts on needle. Next Row (RS): Increase row: K3, \*k1, kfb, repeat from \* to first marker, sl marker, kl, sl marker, $\because k\rceil$ ?kfb, repeat from \* to last three stitches, k3 (577 sts) At this point, the piece will not increase in stitch count any further. All final rows are worked over these 577 sts. Be sure not to yo at the beginning of the rows. Next Row (WS): k3, p to last 3 sts, k 3 Begin Chart D. Work through Chart D one time. Bind off loosely as follows on RS, going up needle sizes if necessary: kl, \*slip st back to left needle, k2tog, repeat from \* until one st is left. Cut tail and pull through last st. Weave in ends with tapestry needle. Wash and block to finish.
Chart Instructions and Notes
All charts are knit one time. Due to their size, Charts A, B and C are split in half on the page at the center stitch. Right Side rows should be worked first, from right to left, followed by the mirror-image Left Side on the same row. The center stitch is shown on both halves of charts to allow for ease in alignment of the rows; however, center stitches should only be worked once per row. For Charts A, B and C: Each RS and WS row should begin with k3, yo and end with yo, k3. This is NOT included on the charts. For Chart D: Each RS and WS row begins with k3. This IS included on the chart. Chart D is the edging chart. For a more ruffled edge, repeat Rows 5 through 8 until desired length is reached. WS rows are not charted. For Charts A, B and C, work all wrong side rows as follows: k3, yo, p to 3 sts from end of row, yo,k3 For Chart D: Work all wS rows as follows: k3, p to last 3 sts, k3. All cables are worked over 6 sts. Cable sts should be slipped to cable needle as if to purl. All other slipped sts should be slipped as if to knit. Cable Front should be worked as follows: Sl three sts to cable needle and hold to the front of work, k 3 sts, then k 3 sts from cable needle Cable Back should be worked as follows: Sl three sts to cable needle and hold to the back of work, k 3 sts, then k 3 sts from cable needle In the lace patterning, the two slipped stitches in the sl 2, kl, psso should be slipped individually, then passed over together.
Valeria: Charts
\*\*NOTE: Be sure to read "Chart Instructions and Notes" section of pattern before beginning charts.
Chart A
Right Side

Center Stitch

Chart B
Right Side
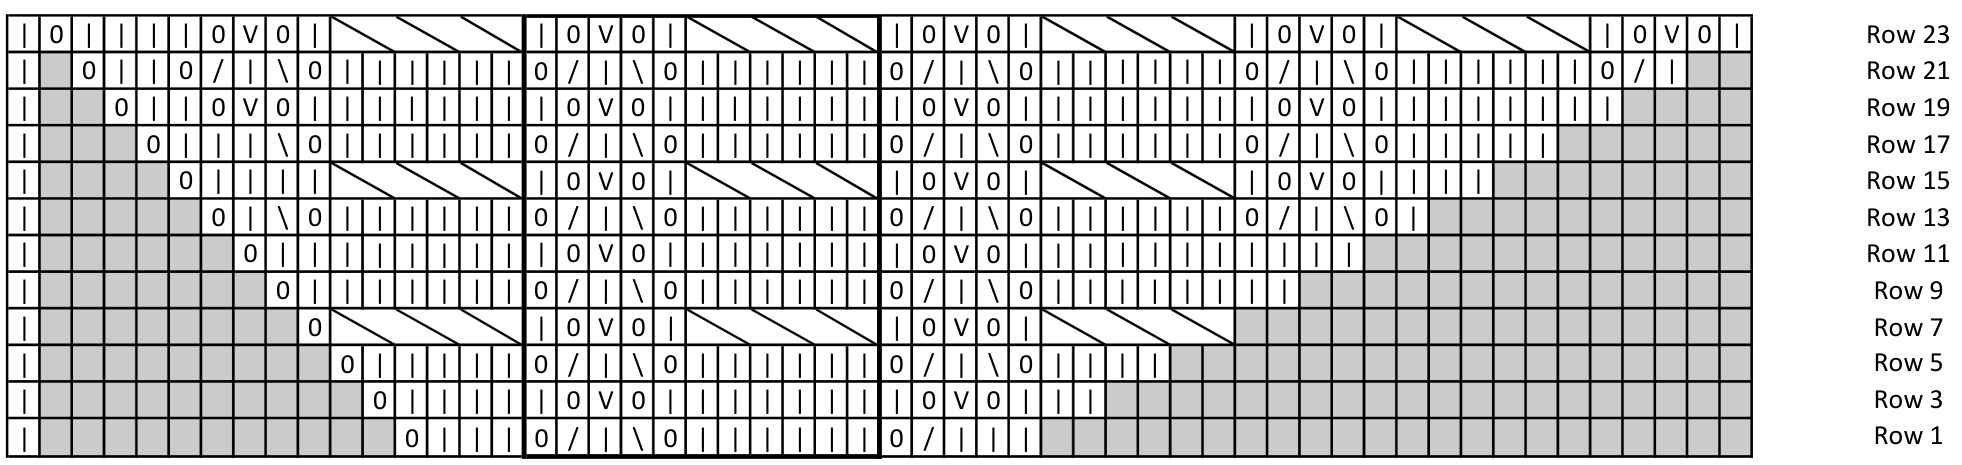
Center Stitch
Chart B
Left Side
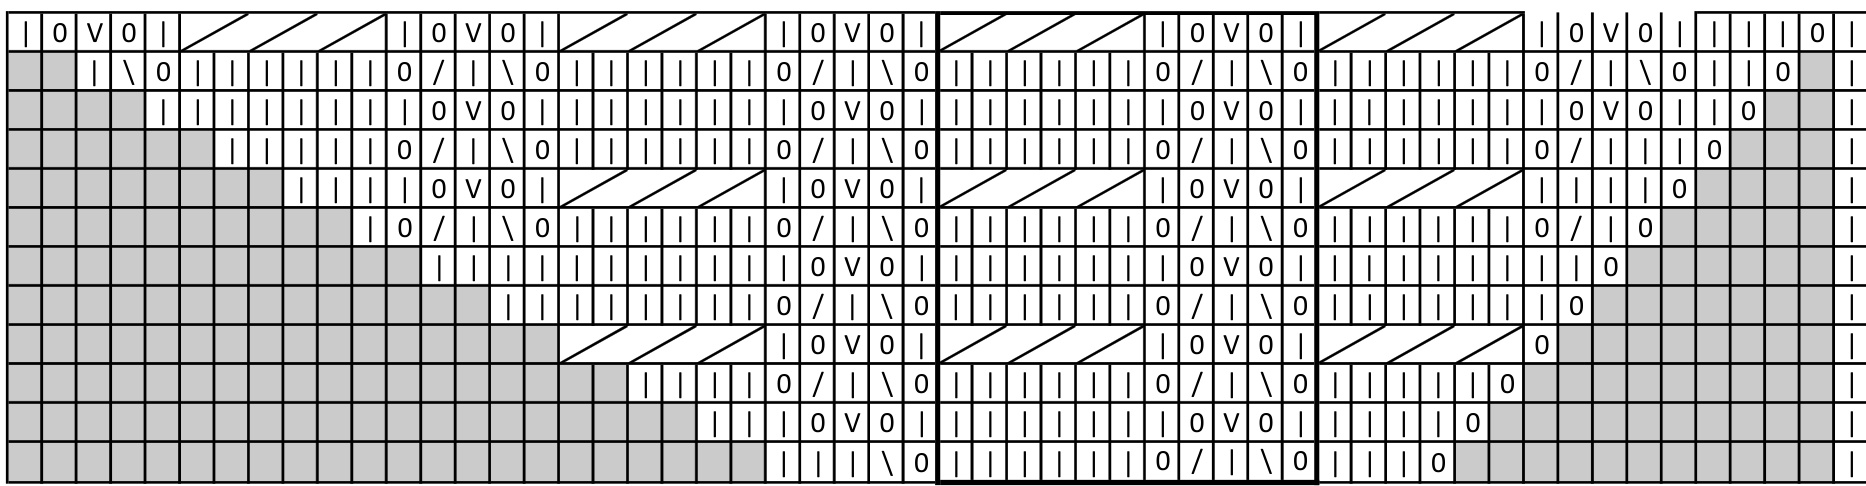
Chart C
Right Side

Center Stitch
Left Side

Chart D

Center Stitch
Credits Lacey cable pattern adapted from “The Big Book of Knitting Stitch Patterns," Sterling Publishing, 2005 Edging chart adapted from Nicky Epstein's "Knitting on the Edge' Special thanks to model Jennifer Kaczetow, photographer Kris Granatek and Emilee Mooney Scott, who provided invaluable photo shoot moral support.


