Watermelon crochet coin purse with lining and zip By Fabcroc
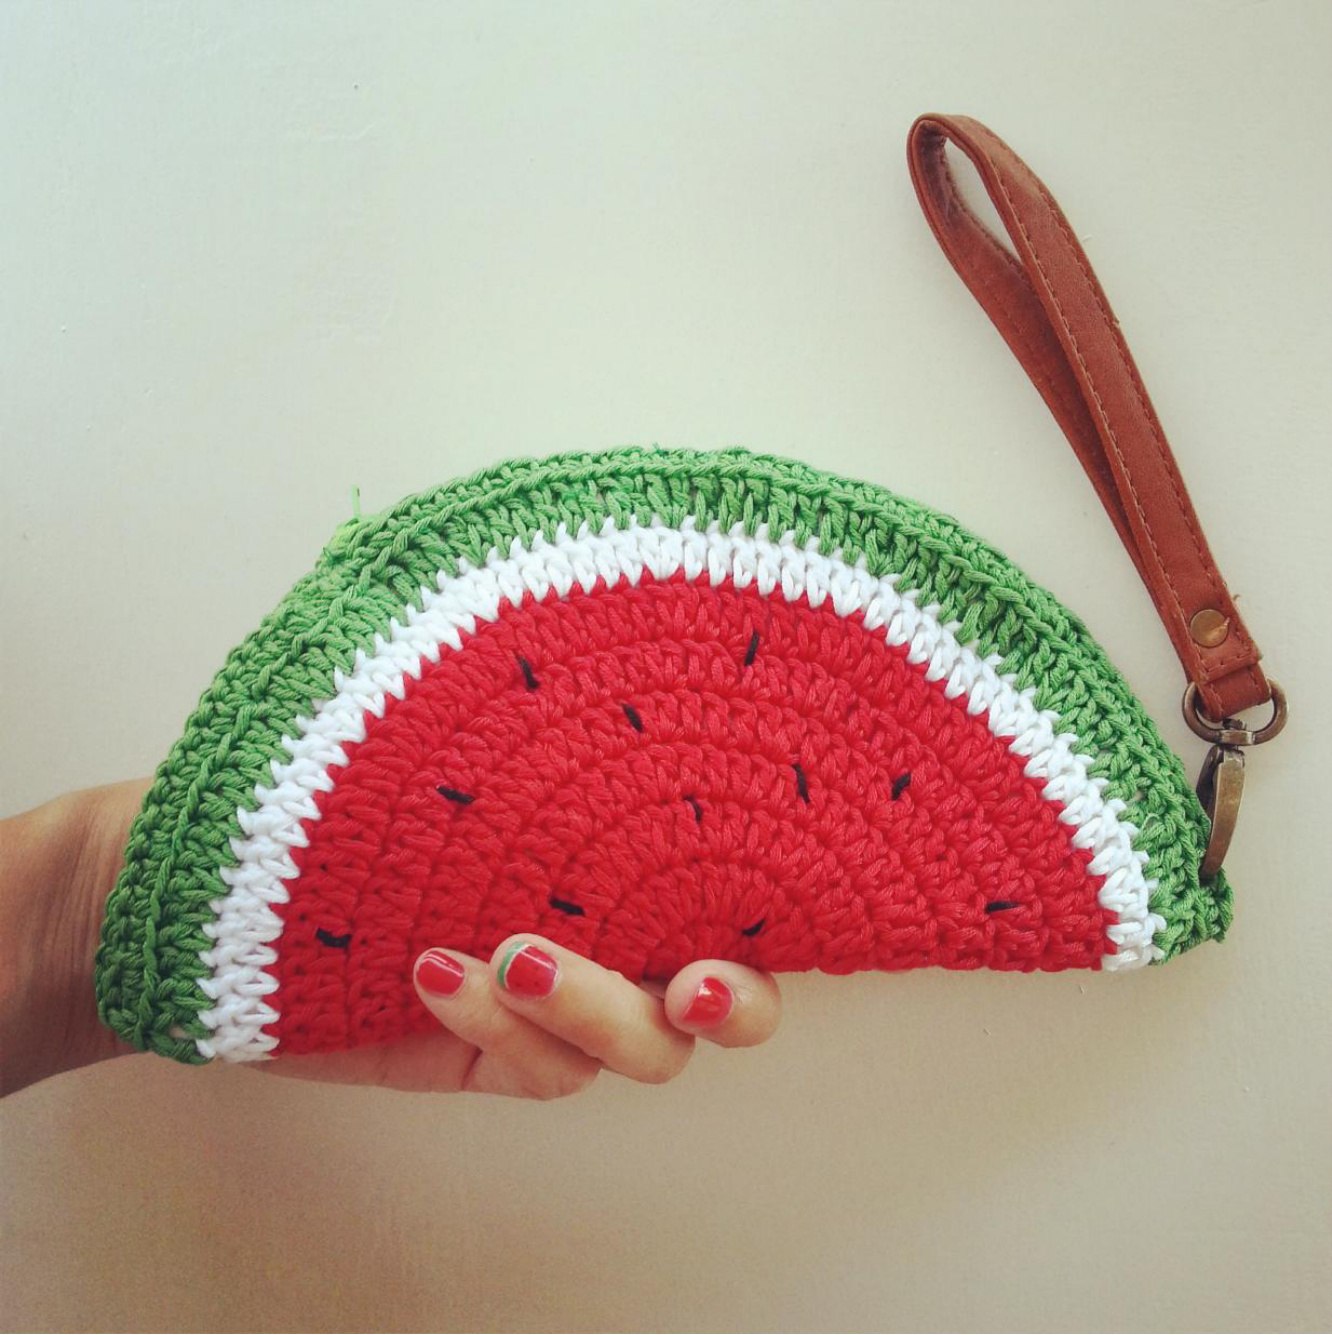
Skill level easy: You will need (picture 1) : 1 skein red cotton yarn (color A) 1 skein white cotton yarn (color B) 1 skein green cotton yarn (color C) small amount of black cotton yarn size 3,5 mm hook yarn needle polyester all purpose zipper 16 mm lining fabric Note each first 3 chain (ch) count as first double crochet (DC). Finish each round joining with a slip stich (sl st) to the top of chain 3 With color A yarn Rnd 1 ch 5, sl st in 1 st ch to create a ring Rnd 2 ch 3, 13 DC into the ring (14) Rnd 3 ch3, 2 DC in each stich around (28) Rnd 4 ch 3, \*2 DC in next st + 1 DC \* repeat (42) Rnd 5 ch 3, \*2 DC in next st + 2 DC \* repeat (56) Rnd 6 ch 3, \*2 DC in next st + 3 DC \* repeat (70) Rnd 7 ch 3, \*2 DC in next st + 4 DC \* repeat (84) Rnd 8 ch 3, \*2 DC in next st + 5 DC \* repeat (98) With color B yarn Rnd 9 ch 3, \*2 DC in next st + 6 DC \* repeat (112) With color C yarn Rnd 10 ch 3, \*2 DC in next st + 7 DC \* repeat (126) Rnd 11 ch1, on the back only 1 SC around (126) (picture 2) Now sew on small black buttons on the red rounds or use black yarn to embroidery scattered seeds. Lining Place the lining fabric on top of the watermelon, cut a round piece 1, 5 cm larger (for hem) and sew it (picture 3) .l recommend pinning the lining before cutting and sewing so you have it in the position you like best. Fold in half Using the green yarn Sew the zip along the upper edge (picture 4) Close the sides with sl st Your purse is finished and if you like you can crochet a shoulder strap. I hope you have followed easly my pattern and enjoy the result. For any help please do not hesitate to contact me on http://www.facebook.com/italyfabcroc and share your creation!
Borsetta cocomero con zip fatta all'uncinetto
Schema di fabcroc Livello: facile Materiale occorrente (picture 1) Cotone rosso (colore A) Cotone bianco (colore B) Cotone verde (colore C) Cotone nero per semi Uncinetto da 3,5 mm Zip da 16/18 mm Ago da ricamo e ricamo Tessuto per fodera Nota Le prime 3 catenelle (CAT) contano come 1° maglia alta (MA). Finire ogni giro con una maglia bassissima (MBB) nell'ultima delle 3 catenelle iniziali. Colore A Giro 1 5 cat, 1 MBB nella 1° cat per creare un cerchio Giro 2 3 cat, 13 MA nel cerchio (14) Giro 3 3 cat, 2 MA in ogni M del giro precedente (28) Giro 4 3 cat, \*2 MA nella 1° M + 1 MA nella M succ\* ripetere da\*a\* (42) Giro 5 3 cat, \*2 MA nella 1° M + 2 MA nella M succ\* ripetere da\*a\* (56) Giro 6 3 cat, \*2 MA nella 1° M + 3 MA nella M succ\* ripetere da\*a\* (70) Giro 7 3 cat, \*2 MA nella 1° M + 4 MA nella M succ\* ripetere da\*a\* (84) Giro 8 3 cat, \*2 MA nella 1° M + 5 MA nella M succ\* ripetere da\*a\* (98) Colore B Giro 9 3 cat, \*2 MA nella 1° M + 6 MA nella M succ\* ripetere da\*a\* (112) Colore C Giro 10 3 \*2 MA nella 1° M + 7 MA nella M succ\* ripetere da\*a\* (126) Lavorando sul filo dietro della maglia (picture 2) Giro 11 1 CAT, 1MB in ogni M del giro precedente (126) Semi Potete cucire piccoli bottoni o paillettes sulla parte rossa del cocomero, o come ho fatto io, ricamare con un filo nero piccoli punti in modo disordinato. Fodera Posizionate la fodera sopra il vostro cocomero appuntatela con degli spilli e ritagliatene la forma lasciando 1,5 cm di tessuto in piu lungo tutto il perimetro. Tagliate su questi 1,5 cm delle piccole tacche per riuscire a piegare e cucire la stoffa in cerchio (picture 3). Piegate in due e fate combaciare i punti. Posizionate la zip nella parte superiore della mezzaluna, cucitela con del filo verde (picture 4) e chiudete le parti laterali con MBB. ino e finito. Potete personalizzarlo e trasformarlo in borsetta aggiungendo una tracoll Spero il mio tutorial sia stato chiaro e utile, se avete dubbi potete contattarmi su http://www.facebook.com/italyfabcroc e magari condividere le vostre creazioni.


2014 Fabcroc. Questo tutorial e gratuito e per uso personale, non é permesso copiare o vendere questo schema


