Dubois
By Josie Mercier Dubois: French surname meaning "of the woods"
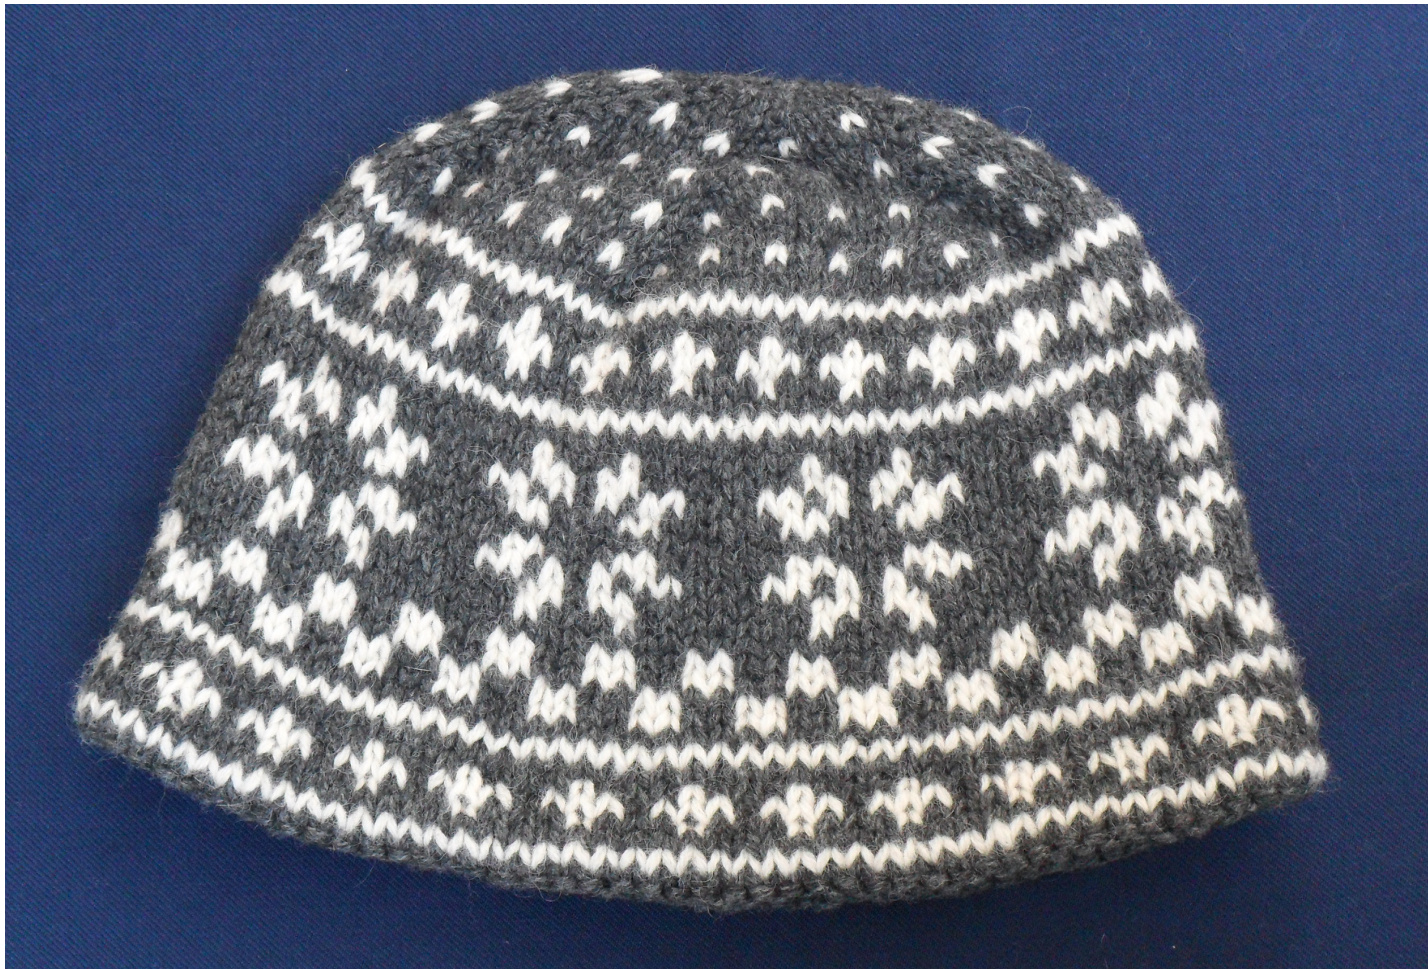
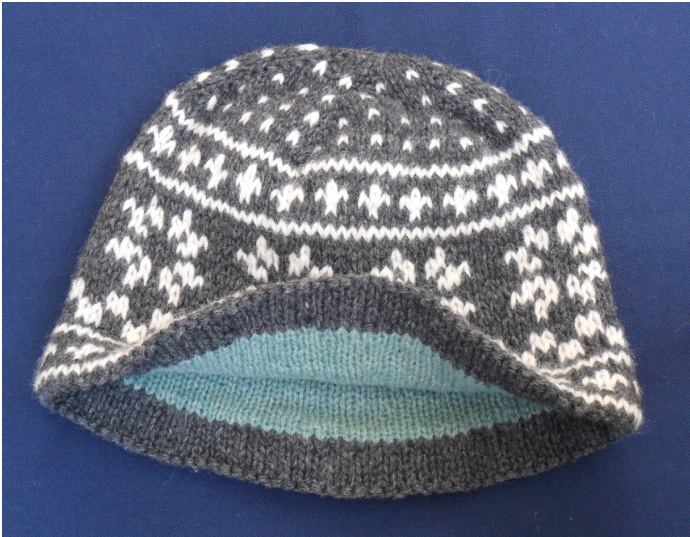
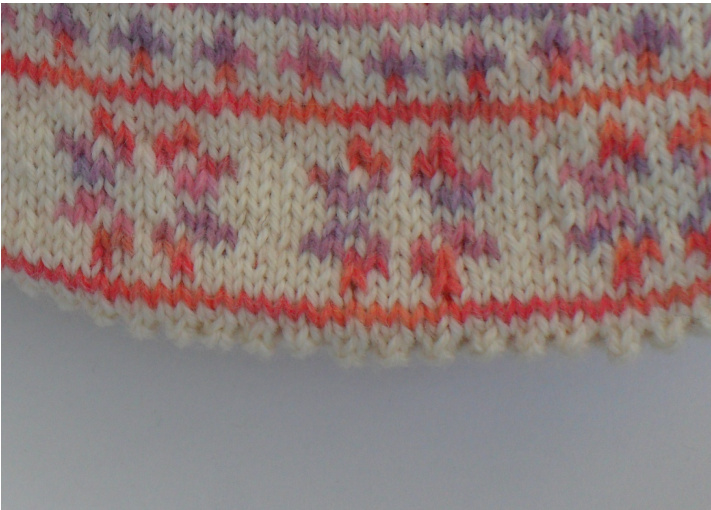
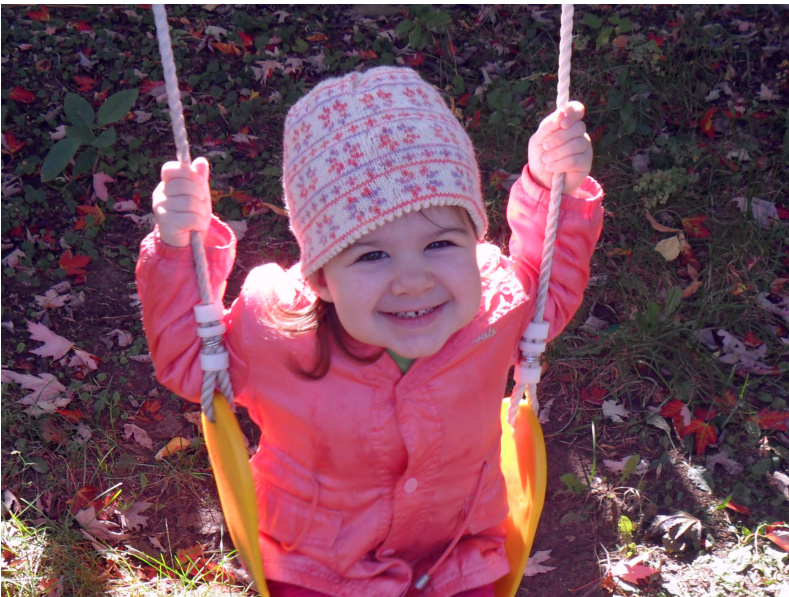
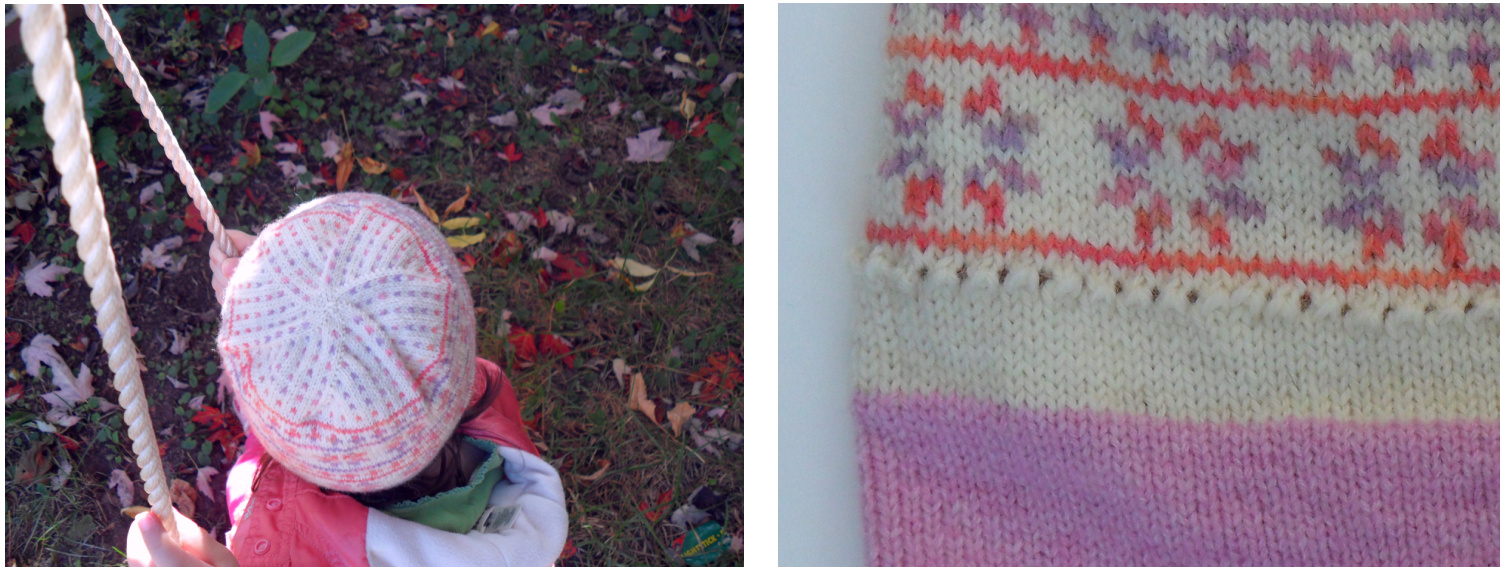
A walk through the woods in the winter requires a good, warm hat. This pattern is for a very warm winter hat made from recycled, left-over or hand-spun yarn. This lined hat is knit from the top down and is suitable for nearly any gauge of yarn. The main color and contrast color must be knit from yarn approximately the same weight. The liner yarn can be the same weight or a slightly thinner yarn. A liner knit at a slightly loose gauge will still trap plenty of air and be warm to wear. The liner is also an excellent place to use small amounts of warm, luxury yarns, especially those in colors that may not be to your taste. The gray sample hat measures 22" / 56 cm in circumference and was knit on US 8 / 5.0 mm needles using gray 100% lambswool, white 100% wool and green 100% cashmere, all of which were recycled from thrift store sweaters. The white and pink sample hat measures 18" / 46 cm in circumference and was knit on US 2 / 2.75 mm needles using 1 50g ball of Patons Kroy Sock yarn (75% wool, 25% acrylic), 14 g of unknown variegated sock yarn (100% acrylic), and about 20 g of recycled 100% cashmere.
Pattern Overview:
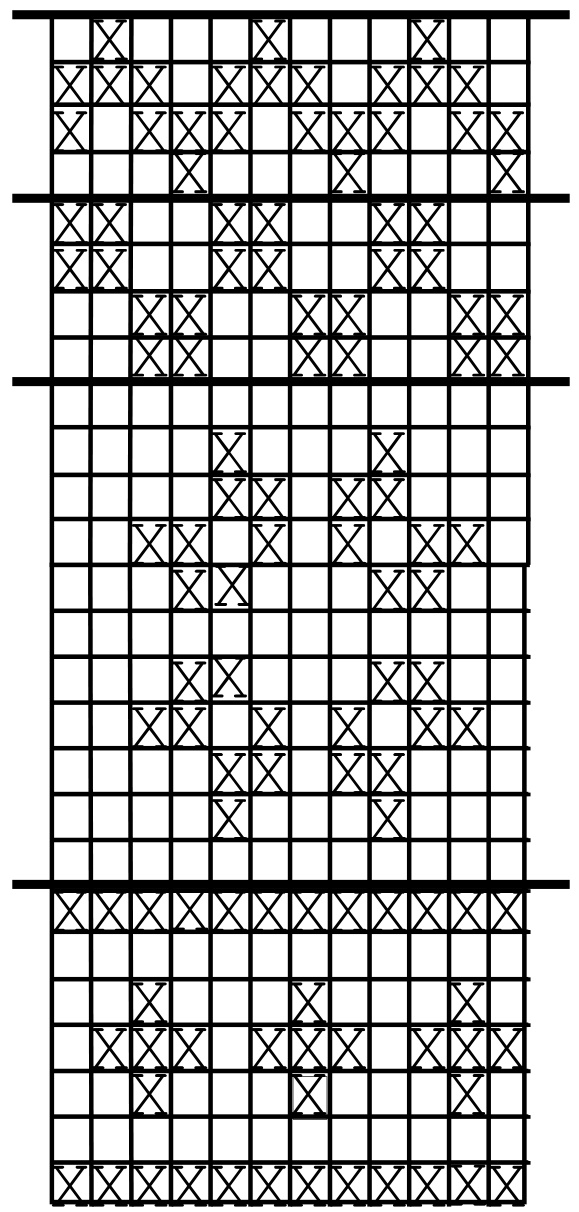
The hat is knit in the round from the top down. Increases are worked in the main color and contrast color by following Chart 1 until there are sufficient stitches for your size. Fair-isle patterns are worked using Chart 2 until the hat is the desired length. A purl row or yo-k2tog row is worked for a turning row and then a short piece of knitting is worked in the main color for the turned hem. The liner is then knit with the third color of yarn and shaped with decreases to fit snugly inside the hat. End Chart 1 after working an odd-numbered row in order to have a multiple of 12 stitches on which to work the fair-isle pattern. End after the row that gives you the stitch count closest to your calculated stitch count. If your calculated stitch count falls between the final number of stitches for two rows, choose the row with the smaller number of stitches. The hat will stretch and fit snugly even when knit a few stitches smaller than the desired size.
The individual motifs on Chart 2 are separated with bold lines. Try not to end the outside of the hat in the middle of a motif. If you are near the desired length of the hat, work a motif that takes only a few rows or work a few rows in the main color alone. If you wish to print this pattern, the most pertinent information is on pages 4 and 5. Sizes: Child (Small Adult, Large Adult) Finished Brim Circumference: 18 (20, 22)" / 46 (51, 56) cm Finished Length: 8 (8.5, 9)" / 20 (21.5, 23) cm
Materials:
Sport-weight yarn: apprx. 155 (205, 255) yards / 140 (190, 230) m of each color Worsted-weight yarn: apprx. 155 (205, 230) yards / 140 (190, 210) m of each color Chunky-weight yarn: apprx. 105 (130, 155) yards / 95 (120, 140) m of each color Double-pointed needles of a size appropriate for your yarn Double-pointed needles one size smaller for the liner of the hat Darning Needle
Gauge:
Any. Specific stitch counts are written out for a gauge of 24, 20 and 15 stitches to 4"/10cm. See"Swatch" section of Directions
Abbreviations:
k2tog - knit two together kfb - increase by knitting into the front and back loop of the next stitch dpn - double pointed needle yo - yarn over
Directions:
Swatch:
Knit a swatch by casting on 24 stitches and following Chart 2 until the swatch measures at least four inches long. Measure how many stitches you have in four inches of knitting and divide this number by four to find your gauge per inch. Multiply your final stitch gauge by the number of inches around you want your hat to be. Children's hats measure 18" around, women's about 20" and men's about 22". You may skip the swatch and measure your gauge after you have at least two inches of knitting between increases, measuring the number of stitches in two inches and dividing by two to get your gauge per inch. However, this method is less accurate.
Hat:
Cast on 6 stitches. 1st row: work row 1 of Chart 1 six times around. Continue to follow Chart 1 until you have increased the appropriate number of stitches for your size. End Chart 1 after completing an odd-numbered row so that you have a multiple of 12 stitches. For a sport-weight hat at 24 stitches to 4"/10cm, end increasing at row 17 (19, 21) - 108 (120, 132) stitches. For a worsted-weight hat at 20 stitches to 4"/10cm, end increasing at row 13 (15, 17) - 84 (96, 108) stitches. For a bulky-weight hat at 15 stitches to 4"/10cm, end increasing at row 9 (11, 13) - 60 (72, 84) stitches. If you are unsure about size, round down as the hat will stretch.

Work chart 2 until the hat measures 8 (8.5, 9)"/ 20 (21.5, 23) cm in length, repeating the motifs as many times as necessary. Work the motifs in chart 2 in any order you desire. If you wish, you can thread all the stitches for the hat onto a thread and try on the hat in order to check the length. When the hat is the desired length, work a turning row. Purl one round in main color to form a plain turning edge, or work \*yo, k2tog\* around the hat to form a picot turning edge. Chart 2 - Pattern Chart X- Contrast Color
Change to smaller needles and knit 1" / 2.5 cm in main color. Weave in any ends left from the stranded color-work now as once the liner is knit, the hat will form a closed tube and you will not have access to these ends later. Change to liner color and knit in stockinette stitch until the liner, measured from the turning row, measures 1/4" / 1/2 cm less than the outer hat length from the turning row to the first row worked of Chart 2. This will be about 6.5 (7, 7.5") / 16.5 (18, 19) cm. Begin decreases to shape the crown of the liner: Row 1: \*K 10, k2tog\* around Row 2 and all even-numbered rows: knit all stitches Row 3: \*K 9, k2tog\* around Row 5: \*K 8, k2tog\* around Row 7: \*K 7, k2tog\* around Row 9: \*K 6, k2tog\* around Row 11: \*K 5, k2tog\* around Row 13: \*K 4, k2tog\* around Row 15: \*K 3, k2tog\* around Row 17: \*K 2, k2tog\* around Row 19: \*K 1, k2tog\* around Row 21: \*k2tog\* around If you have more than 10 stitches left, repeat row 21 again. Break yarn and pull through all remaining stitches.
Finishing:
Weave in any ends remaining after knitting the hat liner. Wash the hat with cool water and mild laundry soap. Fold the hat into a towel and gently press out as much water as possible. Lay the hat flat to dry with the liner pulled out of the hat. Tuck liner in place inside the hat. Thread darning needle with main color. Neatly sew down the turned hem to keep the hem and liner in place. When washing the hat after the liner has been sewn down, the hat will be six layers of yarn thick when lying flat. To speed drying time, prop open the hat with crumpled polar fleece, a new kitchen sponge or another light, porous material. Please contact me with any questions, comments or concerns at pibble959@hotmail.com This pattern is for individual use only. You may print this pattern for personal use, but may not distribute digital or paper copies of this pattern to anyone else.


