Sea-of-Knits designs
Llama Hat (basic version)
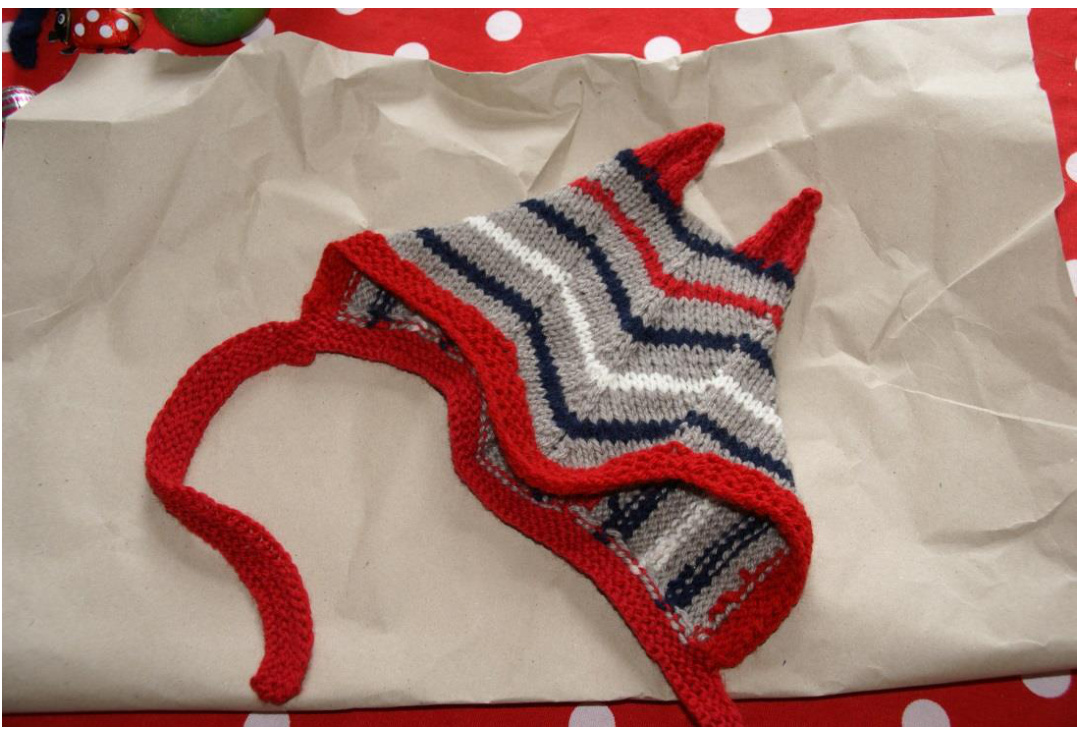
Cute child hat from the Andes Reverse engineered by Thelma Egberts@ Did you think all Andean children wore chullo's (ear flap hats) ? No, you can also see them in this cute hat, or bonnet. It has a pointy shaped front and usually two little ears. It is knitted flat in one piece and has no seams. Andean people knit it in several variations, probably without a written pattern. This is a revers engineered pattern of the basic version. If you want to skip the ears, you can add pompons or tassels. The Peruvians do so too, so you still have an traditional Andean hat.
SIZE Baby (3 - 12 month)
MATERIALS
About 50 - 75 gr light fingering or fingering yarn. Color(combinations) to your own liking and creativity Bit of wasteyarn 1 set US #1 or 2/2,5 mm straight needles 1 set(s) US #3/3 mm straight needles 1 set of 4 short sock needles Us#1 or 2/2,5 mm for ears Optional: pompon maker
GAUGE
Gauge is not very important for this hat. Babies(heads) come in all sizes. Fitting hats for babies of 3-6 months to 6 month -1 year old have been created with gauges like: 22 sts/32 rows = 10 cm/4" in stockinet stitch 18 stsd/30 rows = 10 cm/4"in stockinet stitch For larger hats, work in a larger gauge (by using bigger yarn and needles) NB: this hat is best knit quite tight for best shaping. Use a smaller needle size if necessary.
PATTERN NOTES
This seamless hat is knit flat in one piece from front to back. The front is a rectangle, consisting of two side parts and a chevron stitch center. When the front is worked, mark placement of ears with waste yarn (as instructed). Continue for back of hat. The back is shaped by knitting short rows. At the same time, the hat is closed. Extra shaping is done by darts (extra decreases) in the lower backside. If you decide not to knit the ears, you may attach pompons or tassels later.
ABBREVIATIONSUSEDINTHISPATTERN
co: cast on st or sts: stitch or stitches k: knit p: purl pm: place marker sm: slip marker k2tog: knit 2 sts together (1 st decreased) k3tog: knit 3 sts together (2 sts decreased) s1: slip one stitch s2kp: slip 2 sts, knit 1, pas slipped stitches over (2sts decreased) kfb: knit in front and back of same st (1st increased) BO: bind off RS: right side WS: wrong side dpn: double pointed needle(s) St st: stockinet stitch NB: Nota Bene, take note!
PATTERN
Front brim
CO 61 st with needle size nr. US #1 or #2 (2,5 mm) Row1-5:k Row 6 (WS): k3, kfb, \*k6, kfb, repeat 9 times from \*, k4 (71 sts)
Front of hat
Switch to needle size US#3 (3 mm). Row 1 (RS): k25, pm, kfb, k9, k3tog, k9, kfb, pm, k25 Row 2 (WS): p71 Repeat until 30 rows are worked. (pm will be sm from row 3 on). Prepare for ears: (if you skip the ears, just work 2 rows of stockinet) Row 31 (RS): k25, with waste yarn k7, with working yarn k7, with waste yarn k7, k25 Row32 (WS): p71
Back of hat
Back is worked in short rows over the middle sts. At the same time, the hat is shaped and closed. There are no seams to sew later. To do this, replace markers by 1 stitch: between 26th and 27th stitch and between 46th and 47th sts. After each marker, knit or purl 2tog, and turn. Row 1 (RS): k26, sm, k19, sm, k2tog, turn; Row 2 (WS): sl1, sm, p19, sm, p2tog, turn; Row 3 (RS): sl1, sm, k19, sm, k2tog, turn Row 4 - 30: work like row 2 and 3 For the dart in the middle of the back, decrease 2 sts extra every other RS row. Work like this: Row 31(RS): sl1, sm, k8, sk2p, k8, sm, k2tog, turn (17 sts) Row 32 (WS) and all WS rows: s1, sm, purl sts until last st before marker, p2tog, turn Row 33: s1, sm, k17, sm, k2tog, turn Row 35: s1, sm, k7, k3tog, k7, sm, k2tog (15 sts) Row 37: s1, sm, k15, k2tog, turn Row 39: s1, sm, k6, k3tog, k6, sm, k2tog (13 sts) Row 41: s1, sm, k13, sm, k2tog, turn Row 43: s1, sm, k5, k3tog, k5, sm, k2tog (11 sts) Row 45: s1, sm, k11, sm, k2tog, turn Row 47: s1, sm, k4, k3tog, k4, sm, k2tog, turn (9 sts) Row 49: s1, sm, k9, sm, k2tog, turn (End with RS row 50). Place 11 remaining sts on hold on safety pin. You'll use them again for back brim. Break yarn.
Back brim and tying ropes
CO 40 sts. Pick up 51 sts from edge of hat (20 sts from left side, 11 from safety pin, 20 sts from right side). C0 40 more st. (131 sts) Knit6rows. BO all, cut yarn, pull yarn end through last sts, pull tight and secure.
Ears
Unravel waste yarn. Pick up loose sts (7+6=13), pick up one sts on each side and divide these 15 sts over 13cm long sock needles, size 2,5 mm. NB: beginning of row will be in middle of front sts, for ear opening. With preferred color of yarn, work back and forth.
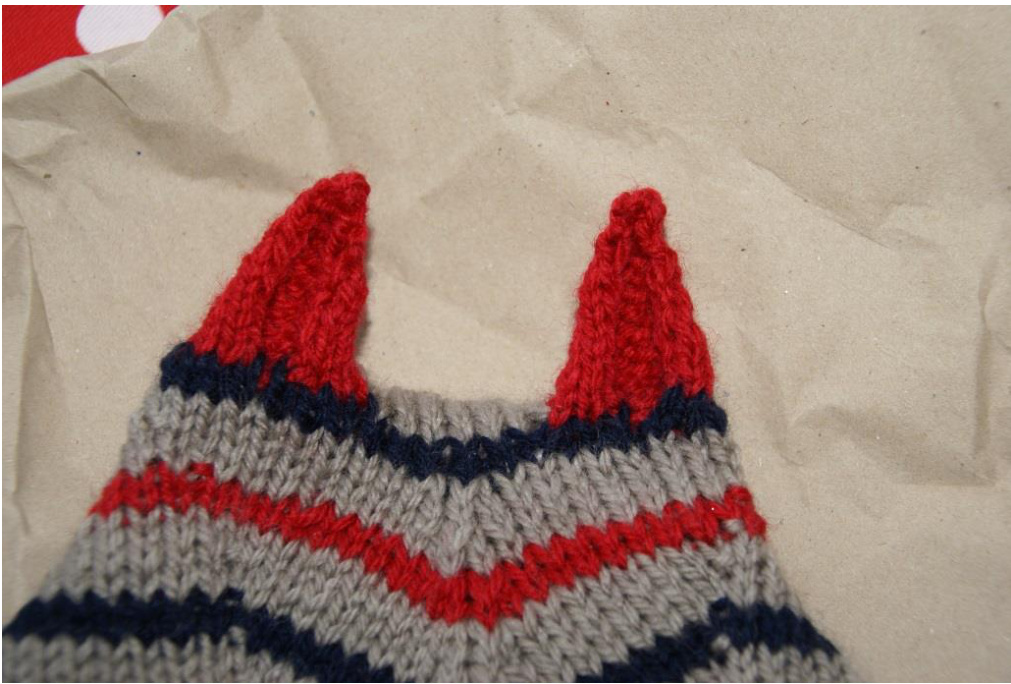
Row 1: k6, s2kp, k6 (13sts) Row 2 and all uneven rows: purl Row 3: k 5, s2kp, k5 (11sts) Row 5: k4, s2kp, k4 (9 sts) Row 7: k3 , s2kp, k3 (7 sts) Row 9: k2, s2kp, k2 (5 sts) Row 11: k1, s2kp, k1 (3 sts) Row 10: k3t0g (1sts) Break yarn, thread yarn end through stitch, pull tight and secure. Repeat for second ear.
FINISHING
Weave in yarn ends. If you didn't make ears, you can attach pompons or tassels. Designed by the people of the Andes. Pattern written by Thelma Egberts@ Copyright notice: @ Thelma Egberts, 2012. You can make backup copies and paper copies of the pattern for your own use. You can make as many things as you like using the pattern if they are for yourself or gifts, for charity or for sale. It would appreciated if you add a tag mentioning the designer andherwebsite.


