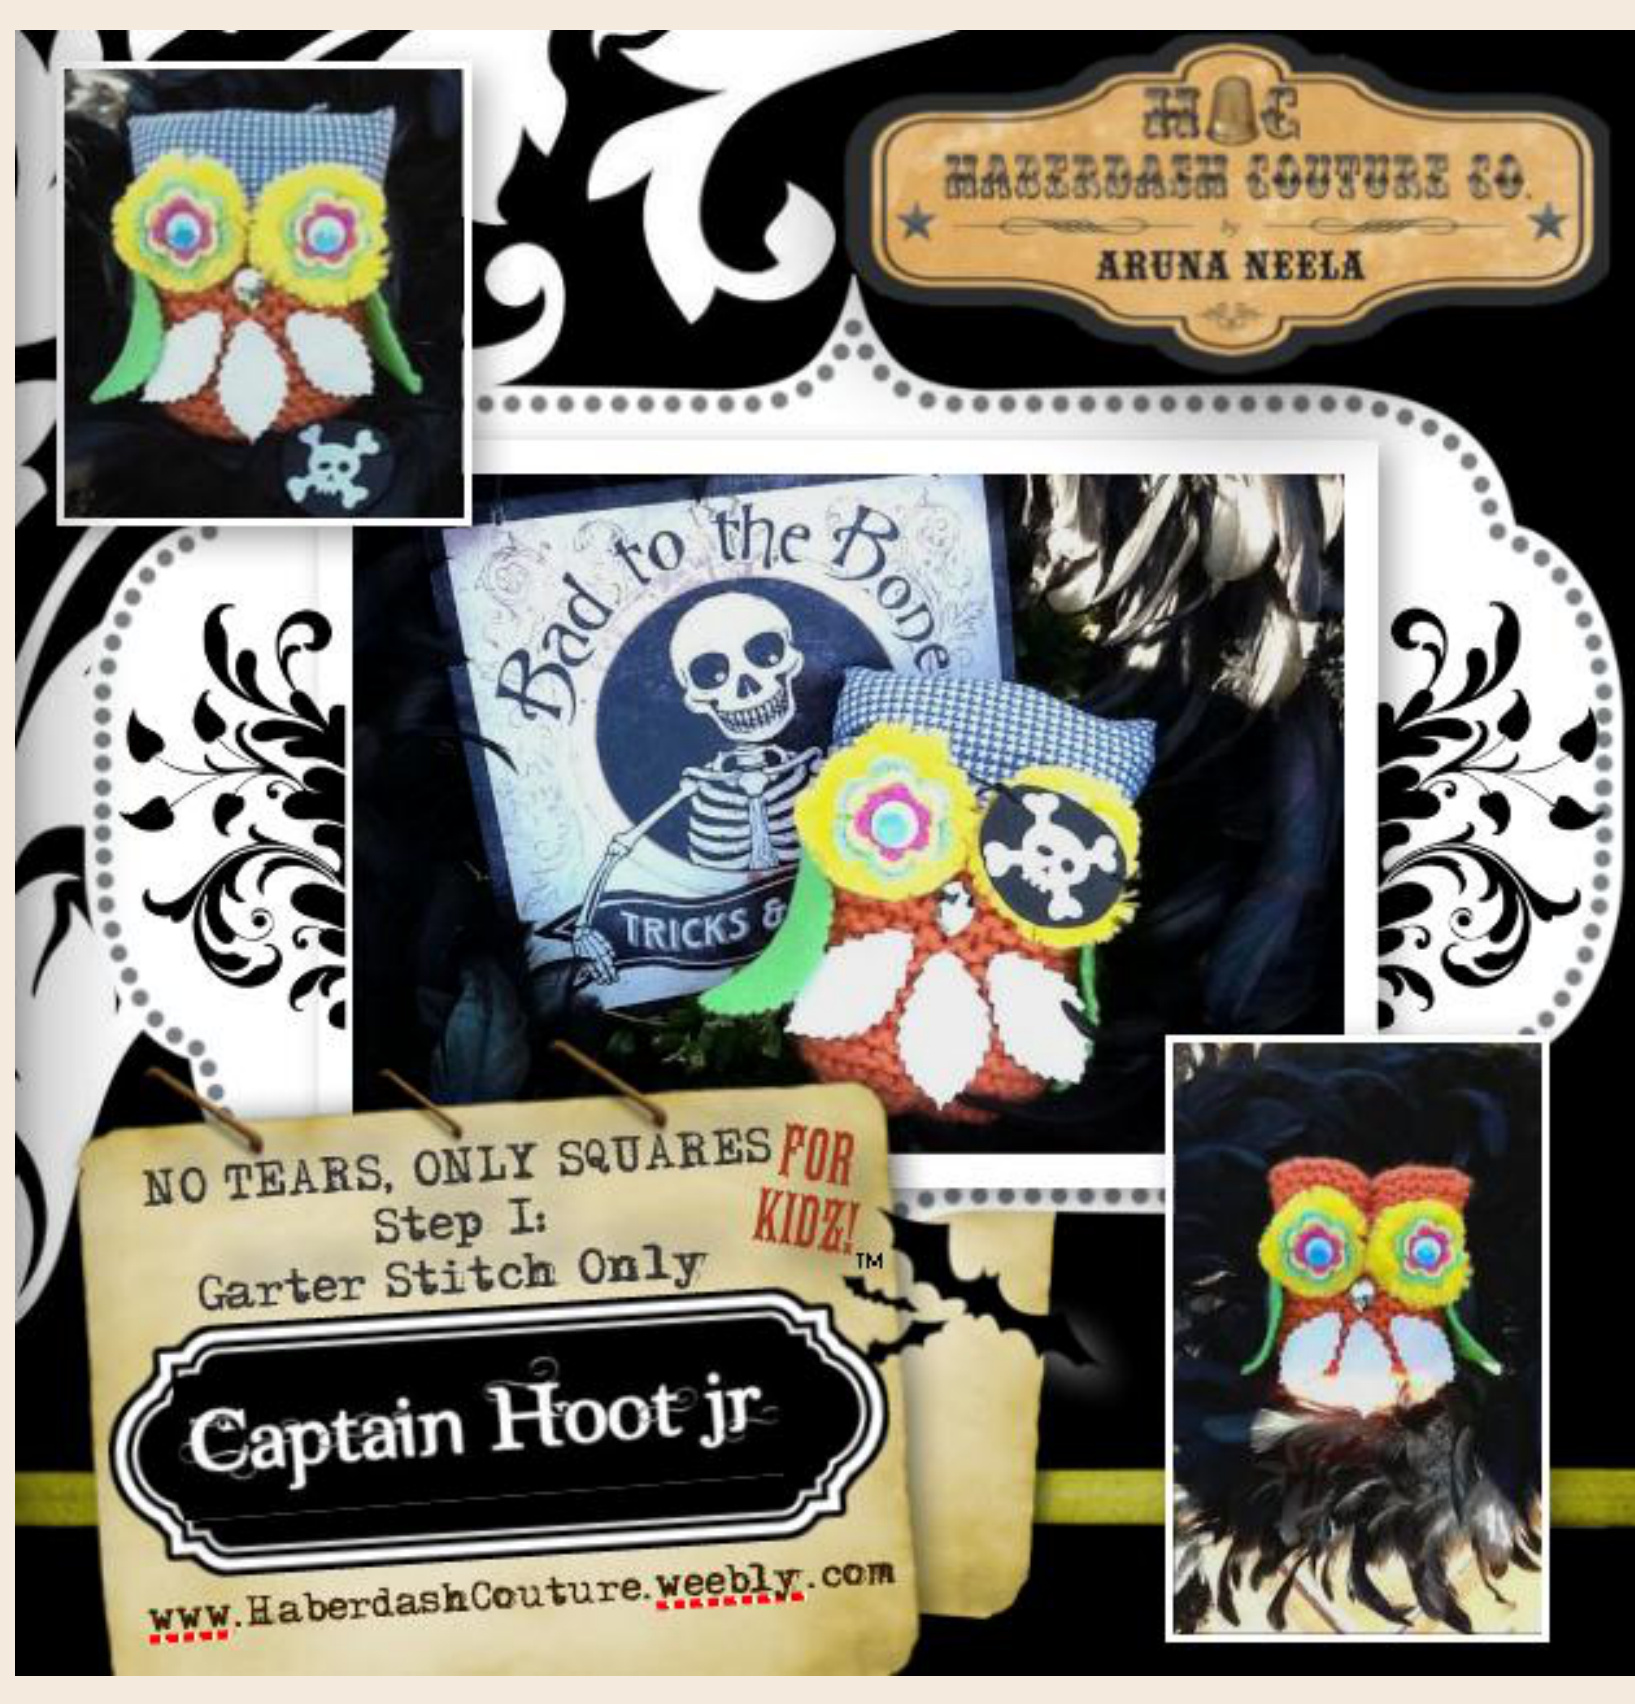
Arrr!!! Just in time for Halloween, this quick n’ easy swashbuckling character Captain Hoot Jr. is so much fun to make, you can pop out a whole brood in a weekend! As part of Haberdash Couture's NO TEARS, ONLY SQUARESTM series, even a beginner knitter can make these with fiercesome success! This spunky little feathered friend is made entirely from a rectangle of garter stitch, which means there are no increases or decreases, heck we don't even need a regular needle and thread! So dive right in and have a °hoot'-The Haberdasher's way! Copyright 2012 Haberdash Couture Co.

Mynameis rumaNean I am the founderandsgner hehind HaberdashCoutere of three children, I know firsthand the limited time parents have to devote to knitting, sewing and other creative activities. This was the motivating factor behind creating my company. I wanted to reach out to all the other parents who, like me, eagerly started to knit a baby blanket or sweater, only to finish it when baby was far too old to fit into it! I create patterns which specifically incorporate little tricks to speed up the process— “plumper yarns′, appliqués and of course the use of—-haberdashery-- such as felt and button eyes, sew on lace trims, embroidery on knitwear, appliques etc. This also gives each piece yet another layer of beauty, texture, interest and charm. I call my technique The Crafter's FUNtastic Approach to Knitting! My motifs celebrate the golden age of vintage with a twist of the contemporary. I hope you enjoy creating my heirloom designs. If you have any questions or comments, I would love to hear from you! Kindly,
ARUNA NEELA
Email: HaberdashCouture @ gmail.com Website: www.HaberdashCouture.weebly.com Pinterest: HaberdashCouture Twitter: HaberdashCouture \*\*\*All patterns are copyrighted and are property of Haberdash Couture Co.Patterns can be used slelyfor personal use and for limited resale (12 or less per year), as in craft fairs or online such as Etsy and Ebay, with the stipulation that Haberdash Couture is credited for the design and this information is attached to the garment. If you are interested in larger production runs, please contact Aruna Neela. Patterns cannot be reproduced in any wayforrecirculation. Step 1 of Haberdash Couture's NO TEARS, ONLY SQUARESTM series: IONLY KNOWGARTERSTITCH!
Captain Htoot jr:
Learning to knit step-by-step, the Haberdasher's way, is a lot of fun! I'm so glad you have joined me on this exciting adventure. My NO TEARS, ONLY SQUARESTM series is aimed at newbie knitters who would like to learn how to knit-the easy way. The series is essentially an easy-to-follow map of sorts, guiding you step-by-step to get you knitting in no time. Each project adds just one more technique to your repertoire, so nothing is overwhelming. But the best part about learning to knit the Haberdasher's way, is that right from your very first project, you will be creating really amazing stuff-all with very basic stitches. Experienced knitters love this series too as they know that not only can they pop out these babies in no time at all, but that they will also learn how to add dimension and character to all their knits. Haberdash Couture is all about being really excited about your project, learning little tricks of the trade and a whole lotta embellishments. We loooove embellishing! Join me as we make swashbuckling Captain Hoot Jr.!

Garter Stitch - simply making a knit stitch on both the right and wrong sides of your project. It produces lovely rows of ripples on both the right side and on the wrong side, making the fabric reversible.
GARTERSTITCH
On the right side (Rs) of your work, do one row of KNIT STITCH. Turn piece around. On the wrong side (WS) you will do one row of KNIT STITCH. Repeat till desired length. 2. Embellishing with Haberdashery! Copyright 2012 Haberdash Couture Co.
VIDEOTUTORLALS:
Log onto Haberdash Couture's Pinterst by going to www.Pinterest.com. In the Search box type in Haberdash Couture and click on ‘People'. Click on KNITTING HOW-TO VIDEOS to see how to do GARTER STITCH, CAST ON, CAST OFF andMATTRESSSTITCH. Now....let's get you knitting the exciting Haberdasher's Wa!

N: Knit Picks Brava Bulky (order directly online at www.knitpicks.con NEEDLES: size 6 mm (10 US) Fabric Glue: I recommend Beacon's Fabri-Tac Regular Scissors Scallop Scissors Yarn Needle An assortment of haberdashery: \*EYEs: jumbo pipecleaner, crochet flowers, googley eyes, eyepatch \*BEAK: gem stone \*FEATHERS: leaf shaped trim \*WINGS: felt Fabric for scarf Stuffing Pen
Essentially, you will be making a long rectangle which will be folded and stuffed. Easy huh? As this is a bag and not a fitted sweater, we won't worry about if your knitted dimensions are exactly like mine. Relax and have fun!
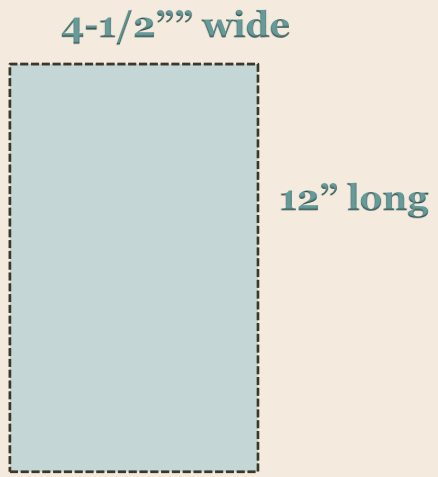
Using size 6mm / 1o US needles, cast on 15 stitches. Work in GARTER STITCH for 12". (Work knit stitch on both the front AND the back of yourwork).
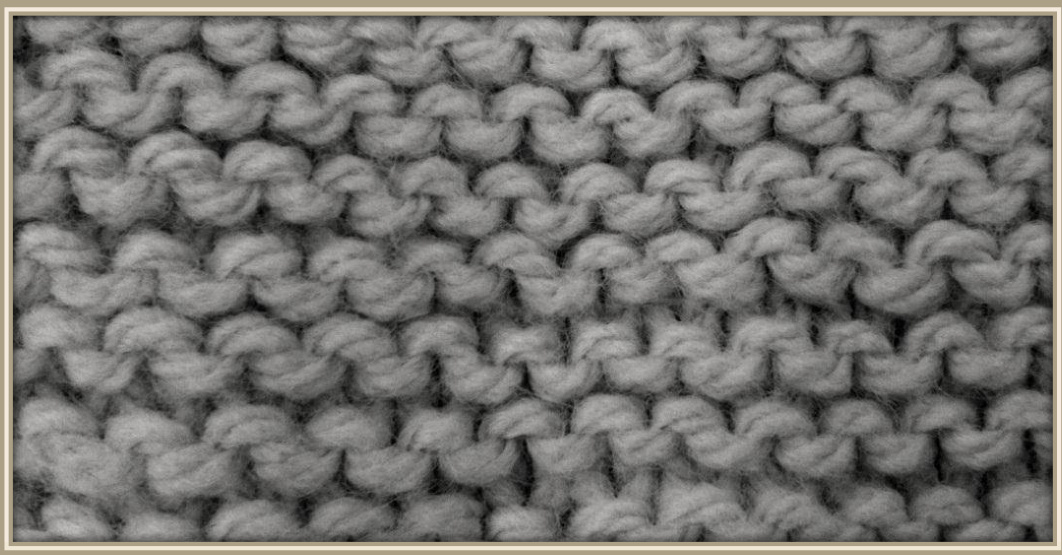
ExampleofGARTER STITCH. Garter Stitch produces rippley waves. End with a WS (wrong side) row. Flip around and CAST/BIND OFF on RS. (right side). Snip yarn to about 12". Fold rectangle in half. Copyright 2012 Haberdash Couture Co.
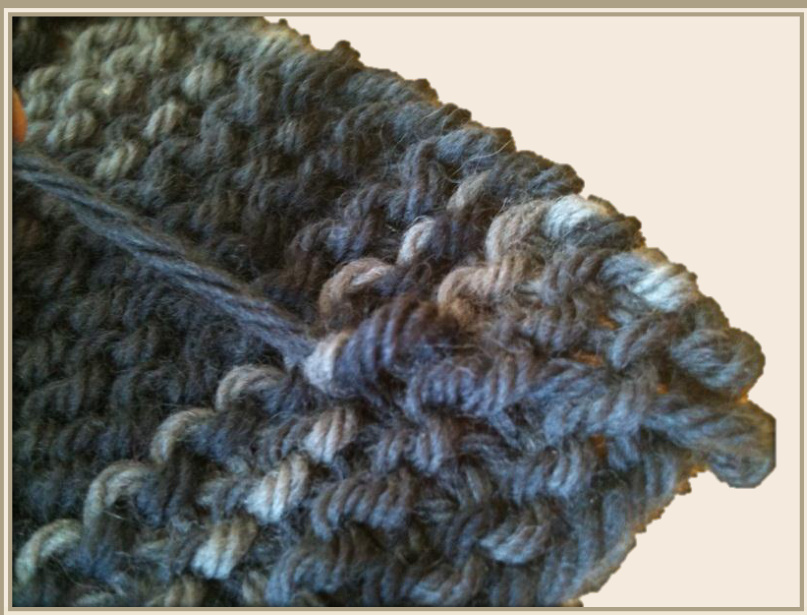
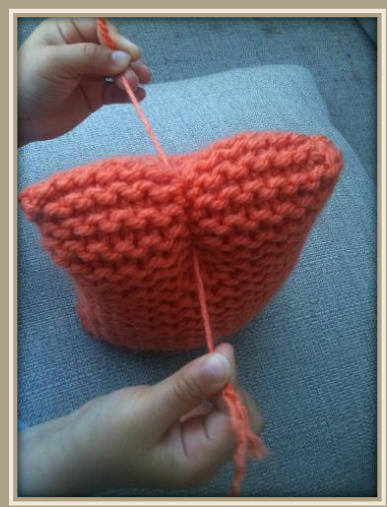
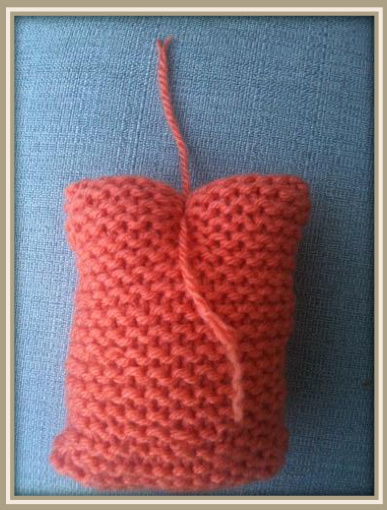
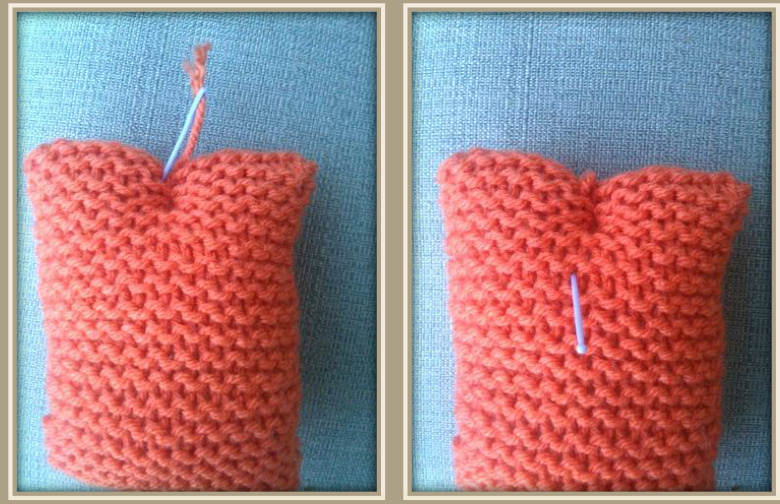
Thread yarn tail into eye of yarn needle. MATTRESS STITCH up one side to close seam. When you reach the top, poke needle into inside of work and weave in tail. PHOTO: Weave tail under at least 4 stitches. Then do another 4 at a right angle to make a L shape. Snip yarn to 1/4" Cut a new length of yarn. Sew up other side seam the same way. Weave in all tails. Now you have a little pouch! The folded end is the top of the owl and the open end is the bottom. Stuff owl.
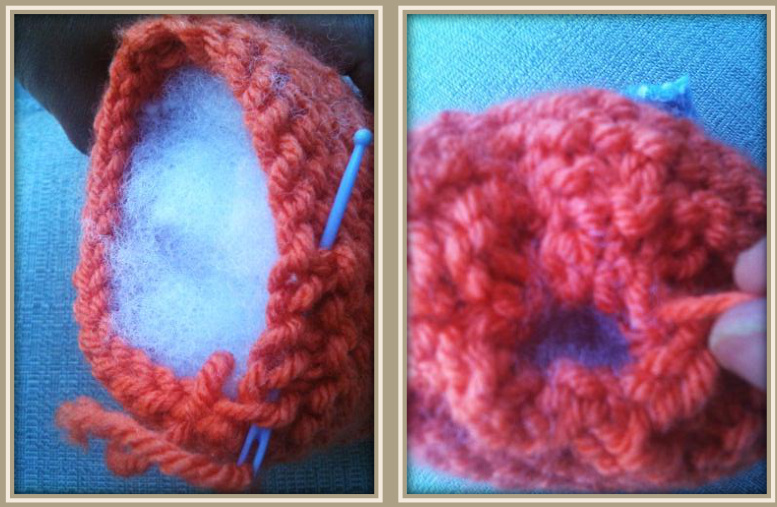
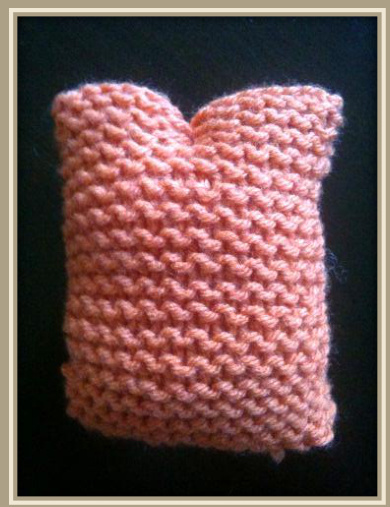
Cut a length of yarn 4X longer than circumference of opening. Thread through yarn needle. Start by knotting yarn at one end of opening. Do a simple running stitch along perimetre of opening. Onceyouhave gone all the way around, pull yarn to draw opening close. End with a knot and then weave tail along 4-5 stitches along seam. Snip yarn.
EYEBROWS:

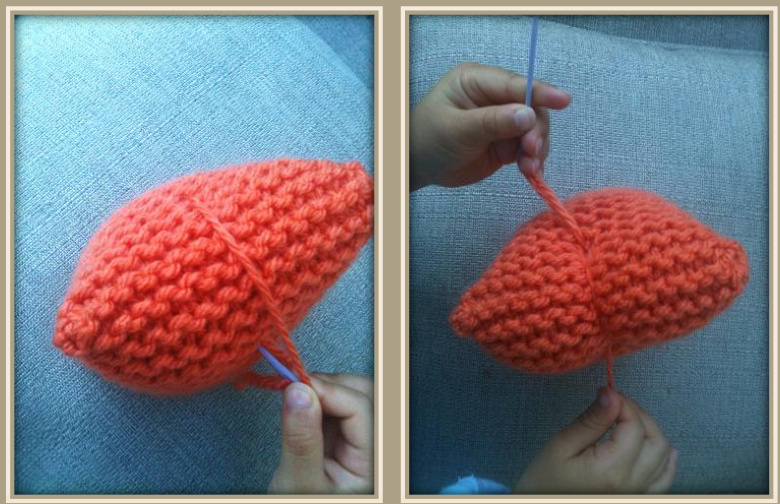
Thread yarn. Poke through centre of bottom of eyebrow. (About 1-1/2" down from centre). Go right through to the other side. Wrap yarn around top of head and go back into same centre hole.
Pull tails to tighten and depress eyebrows.
Tie a secure knot.
Thread yarn tail and poke close to knot right into owl and bring up needle several inches below. This will leave a long tail inside owl. Snip yarn on outside. Finish other yarn tail in the same way.
Ready to add character!

SCARF:
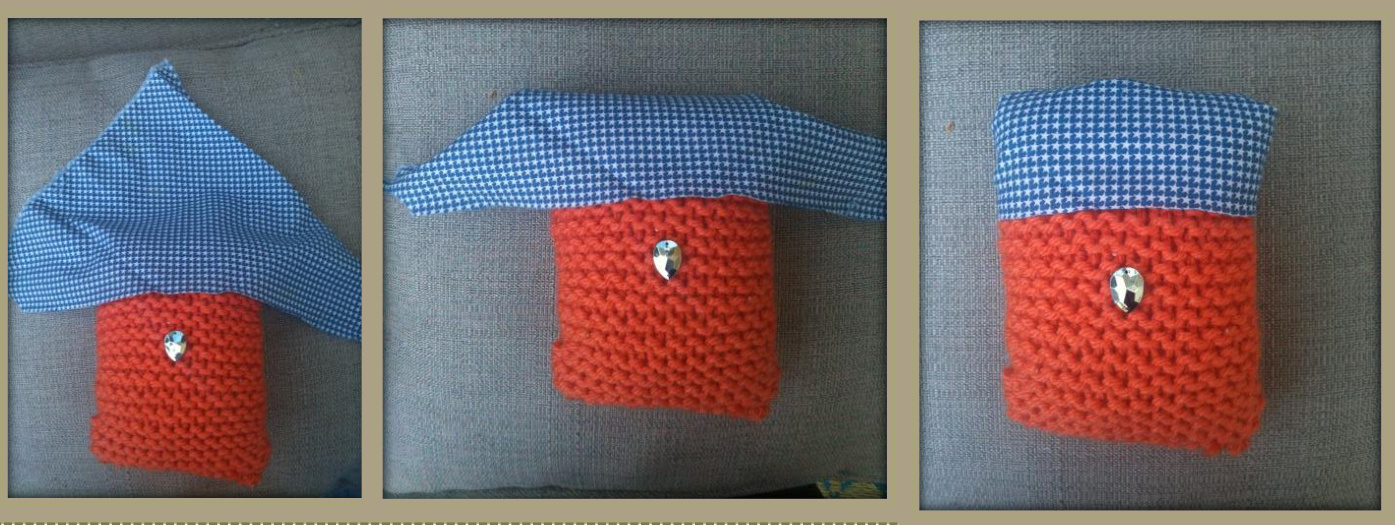
Cut a triangle with the longest edge measuring 17" across. Place scarf on top of head. Point of triangle facing north. Fold point down to back side of head. Wrap ends to back and tie in knot. (NOTE: gem stone beak placed in photo just to illustrate rectangle orientation.)
BIG BURLY EYES:
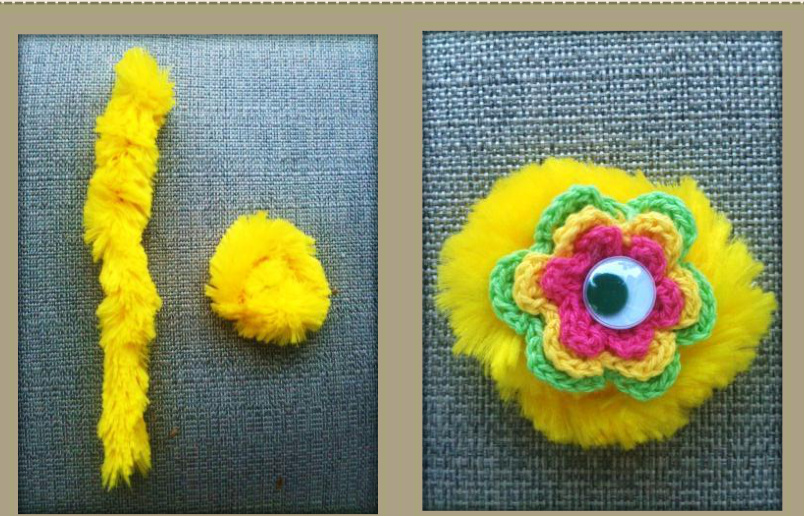
Coil a 5-1/2" length of jumbo pipe cleaner. Wrap end tip over part of the coil to secure end.Make another. Glue a crochet flower onto each pipe cleaner coil. Copyright 2012 Haberdash Couture Co. Glue coloured googley eyes with Fabri-Tac. Place eyes on owl. It should overlap scarf. Lift bottom part of eye and put glue on owl only on knitted area. Stick eyes to owl. Do not glue eyes to scarf as child may want to take off scarf sometimes. Place eye patch over one eye. BEAK: Glue gem stone with Fabri-Tac glue.
WINGS:
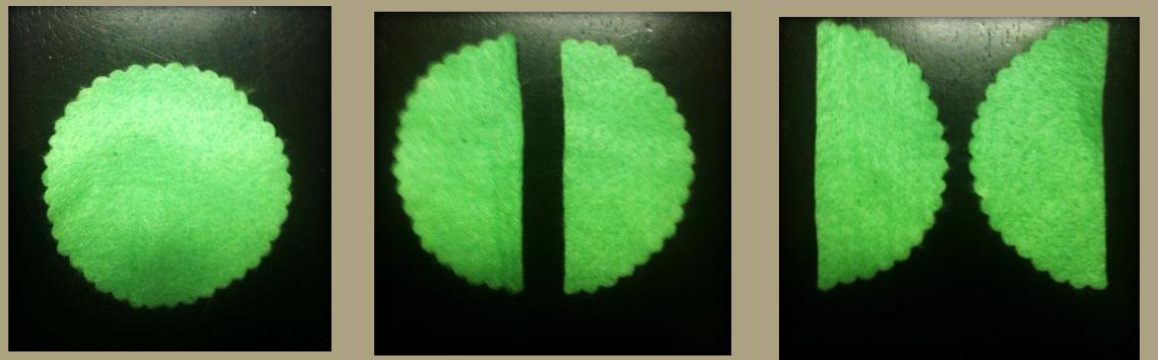
Use pen to draw circle out of felt about 3-1/4" in diametre. The top of a jar, a lid or a glasswould all work. Cut circle with scallop scissors. Cut circle in half with straight scissors. Swap halves so rounded edge faces tummy of owl. Glue wings to owl only on top tips. FEATHERS: Glue 3 feathers to chest.
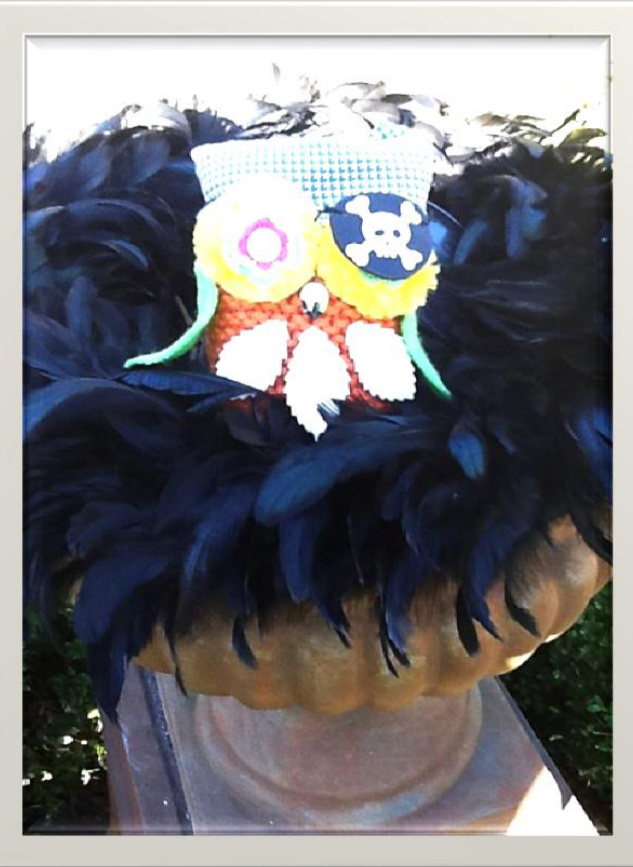
VOILA!!

Captain Hoot Jr is ready for the seas! Be careful, he may make you walk the plank!

\*\*Special Thank You to my son, Aryn, for the use of his hands in the photos. His are nicer loking than mine!\*\* If you enjoyed doing this project and would like to post a photo of your completed Haberdash Couture creation, email a photo to us at HaberdashCouture@gmail.com and we will post it on our website!
Now did you ever think you can make something so fun and fanciful so easily?
You did great!
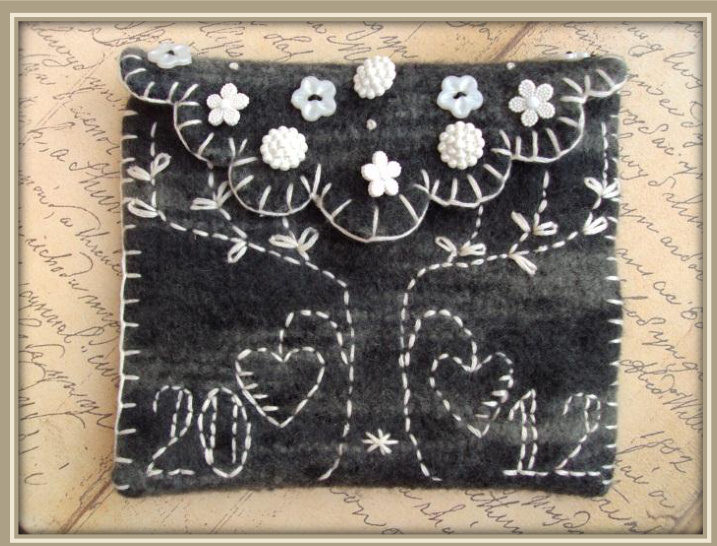
You are now ready to learn how to make the most adorable felted keepsake pouch! Maybe Captain Hoot Jr. keeps his treasures in there! Go onto NO TEARS, ONLY SQUARESTM Step 2: “Pinky Promise Felted Pouch" You'll amazeyourself!