napper Knits
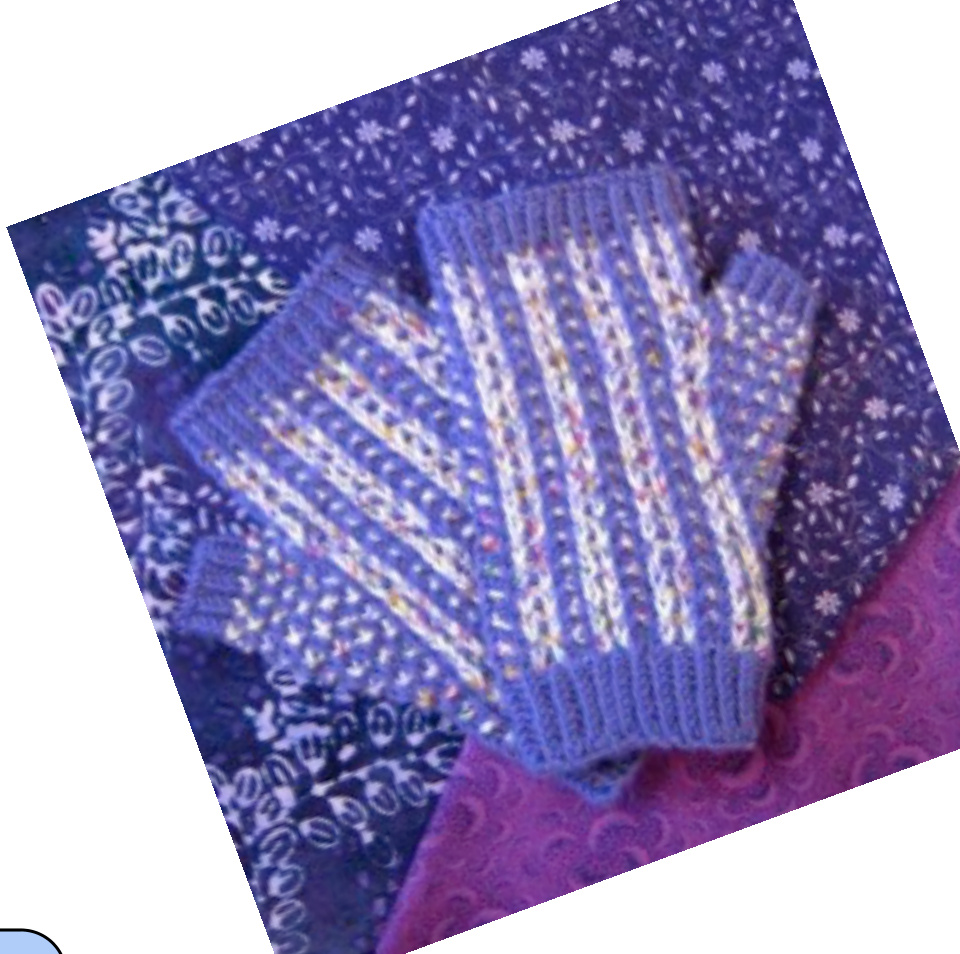
GILLY BEAN by Paula McKeever Snapper Knits
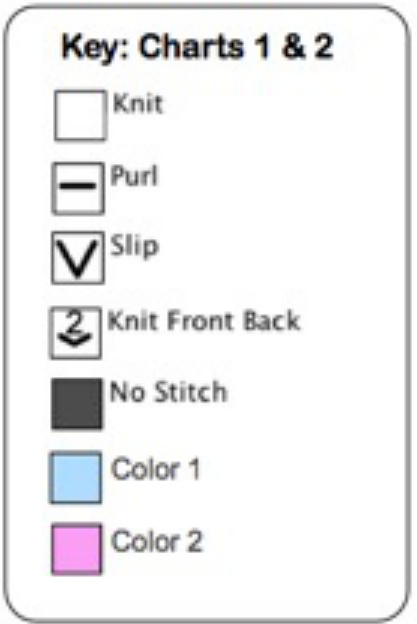
PATTERN NOTES
· Instructions are provided both in written form and in charts. Modifications to size can be done by adjusting the needle size and gauge, or adding or subtracting a pattern repeat. The size of the thumb gusset can be adjusted by doing one more or one less of the increase row. Keep in mind that the pattern in the rows above may need to be adjusted as well. · All stitches are slipped as if to purl. Carry yarn behind slipped stitches loosely, or your fabric will pucker. ·Stretching the mitt slightly while blocking, or even while knitting, will help the stitches settle into place.
MATERIALS
Two 50 g balls of DK weight yarn, such as Classic Elite Wool Bam Boo, in contrasting colors Size5(3.75 mm) needles, either double pointed or circular if using the Magic Loop method Two stitch markers Scrap yarn, or stitch holder Gauge: 5 sts = 1 inch in stockinette stitch on 3.75 mm needles Instructions: Using Color 1, cast on 48 sts with 3.50 mm needles and join in the round. Evenly distribute on double pointed needles, or work with the Magic Loop method. Work in K1b, P1 rib for 8 rounds. Knit next round. Change to Dotted Ladders pattern for 15 rows, or desired length to base of thumb, ending having completed pattern row 3. Dotted Ladders Pattern: Worked on multiples of 6 sts -- see Chart 2 for mitt body Using Color 2: Row 1: \* Sl1wyib, K1, Sl1wyib, K3; repeat from \* around Row 2: \* Sllwyib, P1, Sl1wyib, K3; repeat from \* around Using Color 1: Row 3: \* K3, Sl1wyib, K1, Sllwyib; repeat from \* around Row 4: \* K3, Sl1wyib, P1, Sl1wyib; repeat from \* around Thumb Gusset: The gusset will be worked in a modified Dotted Ladders stitch, increasing 2 sts every fourth row in between the markers. Set up Row: (Color 1) Work the first 6 stitches in the pattern as established, place marker, Kfb, Kfb, K1. Place 2nd marker, work in pattern as established to end of round (Dotted Ladders pattern Row 4). The instructions below are written for the sts in between the markers only; work all other sts in the round in pattern as established.
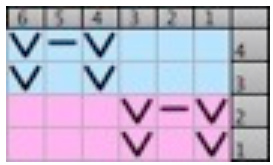
Chart 1: Dotted Ladders Stitch Pattern Row 1: (Color 2) sl m, (Sl1wyib, K1) 2 times, Sl1wyib, sl m. Row 2: (Color 2) sl m, (Sl1wyib, P1) 2 times, Sl1wyib, sl m. Row 3: (Color 1) sl m, K all sts between markers, sl m. Row 4 (Color 1) sl m, Kfb, K until two sts before next marker, Kfb, K1, sl m. Repeat Gusset Rows 1-4 until you have 17 sts between markers. On Rows 1 and 2, you will be adding one repeat of the instructions in () after each increase round. Work 10 more gusset rows without increasing as follows: Row 1: (Color 2) (sl 1, K1) 8 times, sl 1 Row 2: (Color 2) (sl 1, P1) 8 times, sl1 Rows 3 & 4: (Color 1) Knit Row 5: (Color 2) sl 1, (sl 1, K1) 7 times, sl 2 Row 6: (Color 2) sl 1, (sl 1, P1) 7 times, sl 2 Repeat Rows 3&4 once, then repeat Rows 1&2 once. You will be ready to work Dotted Ladders Pattern row 3 using Color 1. Next round: Work 6 sts, place next 17 sts on waste yarn, backward cast on 3 sts, work remaining sts in pattern. Continue working in pattern until desired length to base of fingers, ending after pattern row 4. Knit one round in Color 1. Work K1b, P1 rib for 5 rows. Bind off using a sewn bind off, or other elastic bind off method.
Thumb:
Using DPNs or Magic Loop Circular, pick up and knit 7 sts along the cast on edge with Color 1, then knit the stitches from the waste yarn. There will be 24 sts on your needles. Row 1: Using Color 1, ssk, K3, K2tog, K17 (19). [22 sts] Row 2: Using Color 2, sl 1, sl 1 as if to knit, K2tog, PSSO, \* sl 1, K1; repeat from \* around. [20 Sts] Row 3: Using Color 2, \* sl 1, P1; repeat from \* around. Rows 4 & 5: Using Color 1, Knit all sts. (if you want a shorter thumb, stop after Row 4 and start ribbing.) Row 6: Using Color 2, \* K1, sl 1; repeat from \* around. Row 7: Using Color 2, \* P1, sl 1; repeat from \* around. Row 8: Using Color 1, Knit all sts. Work in P1, K1b rib for 4 rows. Bind off using Sewn Bind Off or other stretchy bind off. Weave in ends. Block if desired. Make second mitt same as first.
Abbreviations:
Kknit K1b knit one through the back loop K2tog Knit 2 stitches together Kfb Knit in the front and back of a stitch ssk slip, slip, knit sl m slipmarker st stitch sl1 Slip 1 st from left to right as if to purl PSSO Pass slipped st over the st to its left wyib with yarn in back of work Dotted Ladders Pattern from The Essential Guide to Color Knitting Techniquess by Margaret Radcliffe. Instructions for Elizabeth Zimmerman's sewn bind off can be found in the Summer 2006 issue of Knitty.com: http://www.knitty.com/ISSUEsummer06/FEATsum06TT.html Copyright Paula McKeever 2010. Pattern and garments made from pattern are for personal use only and not for resale. Pattern or parts of pattern may not be reproduced for sale in any manner.
Chart 2: Mitt Body Showing Thumb Gusset
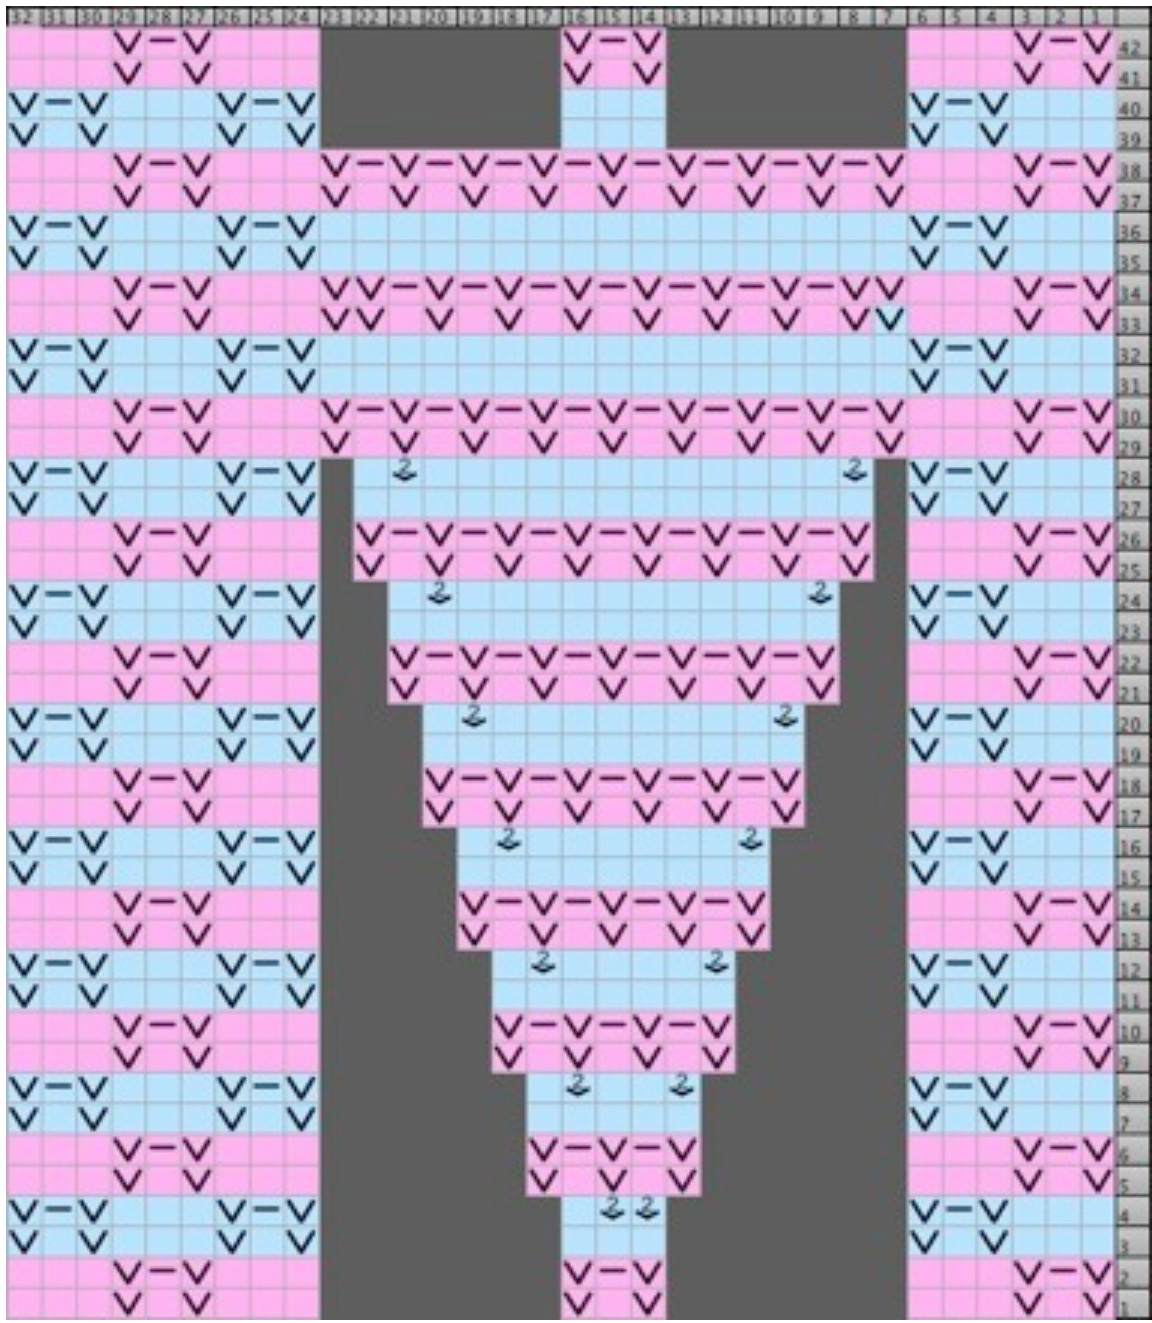
Not all 48 stitches of the round are shown; continue knitting the round in pattern. If the number of gusset stitches are increased or decreased, adjustments may be needed in the placement of slipped stitches in later rows.


