TOMSERVOAMIGURUMIROUGHPATTERN
'Bot instructions by NrrdGrrl89 \*\*Disclaimer: Ido not own MST3K or any o the bots (though I wish I had created them to keep me company while watching bad movies - hence this pattern). They are the property of Best Brains, Inc. and were created by the fabulous and brilliant Joel Hodgson!\*\*\* \*\*NB: I wrote down this pattern as I went, winging it all the way - as such, it isn't as methodical as it could be. It's less a "pattern" than "here's what I did, good luck suckers!" You'll probably find yourself fudging stitches or changing things here and there. It might not be the best project for someone who's scared of improvising, or maybe it's the perfect way to get comfortable with it. Some of the pictures are progress shots, some are details of the finished product. \*\* \*\*Also NB: This is a character that is owned by others and which I recreated out of love for the series. Please don't sell anything based off this pattern, or reproduce the pattern itself for that matter!\*\*
Materials to buy/have on hand:
· 1 skein worsted/aran weight red yarn (l used Red Heart TLC Essentials in 'Cranberry') 1skein worsted/aran weight white yarn (Red Heart Super Saver white) 1 skein worsted/aran weight black yarn (Red Heart Super Saver black) 1 skein worsted/aran weight silver/grey yarn (Loops & Threads Soft & Shiny 'Gray') 1 skein worsted/aran weight yarn in a light blue or other colour that you feel could simulate a glass dome (I used less than % skein of Vanna's Choice #105, Silver Blue) Size G crochet hook Size F crochet hook Sewing pins Yarnneedle Stiff interfacing (optional) Fabric glue or hot glue (optional)
Stitches Used:
Chain (ch) Single crochet (sc) Double crochet (dc) Half double crochet (hdc) Triple crochet (trc) Double crochet decrease (Dc2tog) Single crochet decrease (sc2tog) Back loop only sc (BLO) Slip stitch (sl st) Fasten off w/ slip stitch (FO)
PART 1: HEAD
A) Head cap disc: (red, G hook)
| R1 | Magic circle. Ch 1. 12 hdc in circle. Join with sl st. |
| R2 | Ch 1. Hdc in same st as ch 1. 2 hdc around. Join with sl st. |
| R3 | Ch 1. Hdc in same st as ch 1. *1 hdc in next st. 2 hdc in next st.* F Repeat 米 around,join. |
| R4 | Ch 1. Hdc in same st as ch 1. *1 hdc in next 2 st. 2 hdc in next st.* F Repeat 米 around, join. FO. |
Start a new piece for the side of the cylinder; this will be stitched to the top once you've made it, so you can leave a long tail and use that. Ch 47. Hdc in 3rd ch from hook, hdc across, FO and attach to top.
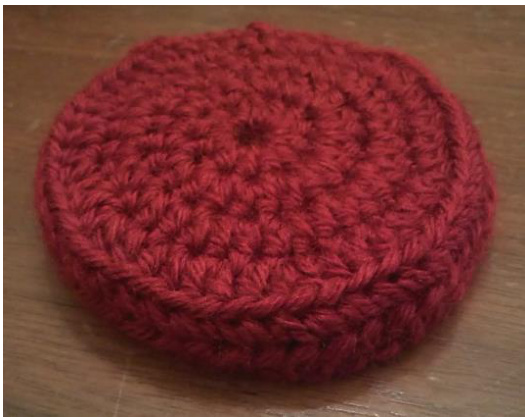
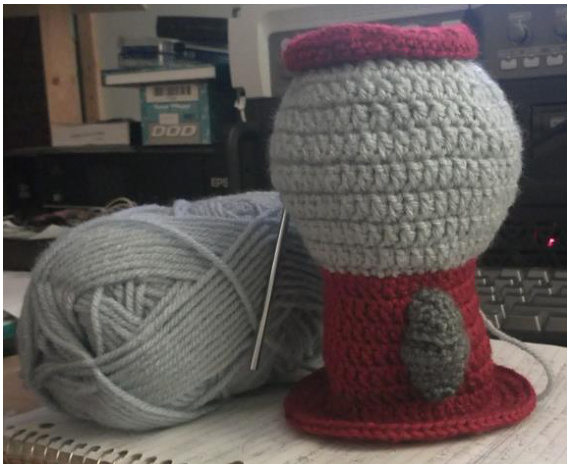
Doesn't seem like much to start with.
B) Head base: (red, G hook)
| R1 | Ch 40. Join w/ sl st. |
| R2-9 | Ch 2. Dc in each ch across. Join w/ sl st @ top of ch. |
| R10 | Ch 2. *2 dc in next st. 1 dc in next 2 st.* Repeat around. Join w/ sl st. |
| R11 | Ch 2. *2 hdc in next st. 1 hdc in next 2 st.* Repeat * around. Join w/ sl st. FO. |
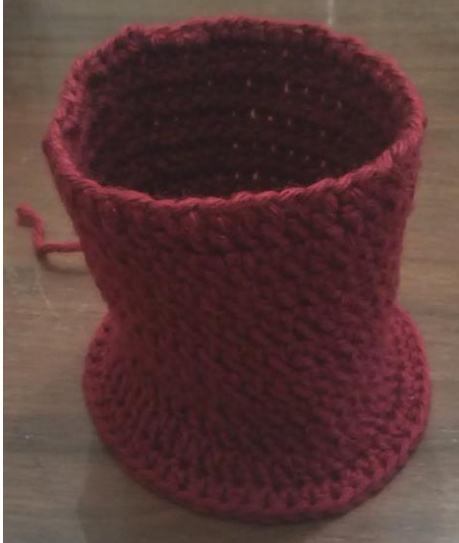
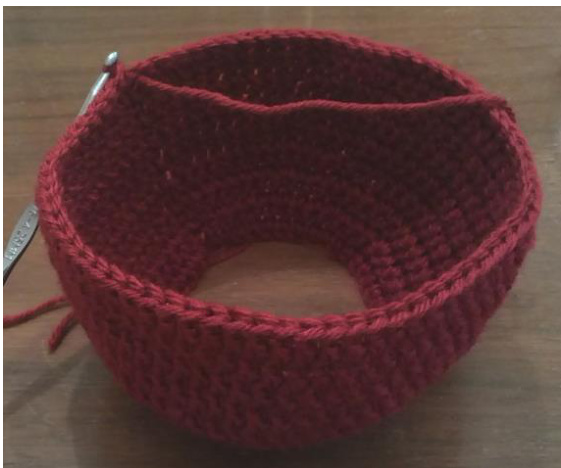
Starting to look familiar?
Mandibles/beak: (grey, F hook)
C) Upper mandible
| R1 | Ch 9. Sc in 2nd ch from hook, and sc to end. Ch 1, turn. |
| R2 * | Sc in next 2 st, sc2tog.* Repeat *, ch 1, turn. |
| R3 | 下 Sc in next st, sc2tog.* Repeat *, turn. |
| R4 | Sc in next st, skip 1 st, sl st. FO. |
D) Lower mandible
| R1 | Ch 9. Sc in 2nd ch from hook, and sc to end. Ch1, turn. |
| R2 | Sc across. Ch 1, turn. |
| R3-6 | * Sc in next 2 st, sc2tog* Repeat t *, ch 1, turn. |
| R7 | Sl st in 1st st of previous row. FO. |
Sew the beak pieces onto the face part now, before attaching the dome!
E) Head dome: (blue, G hook)
Attach yarn to the head base and work it around the top.
| R1 | Attachtotopofheadwithslst,ch1.Scaround,joinw/slst. |
| R2 | |
| R3 | Ch 2. Dcin next 5 st. 2 dc in next st. *Dc in next 10 st, 2 dc in next st.* Repeat * 4x. Dc in |
| R4 | next5st,join. Ch 2.*Dcin next11 st,2 dcinnext st.* Repeat *around,join. |
| R5 | Ch 2. Dc in next 13 st. 2 dc in next. Dc in next 25 st. 2 dc in next. Dc in next 12 st. Join. |
| R6 | Ch 2. *Dc in next 11 st, dc2tog.* Repeat * 4x, dc in next 2 st. Join. |
| R7 | Ch 2. Dc in next 5 st, dc2tog. *Dc in next 10 st, dc2tog.* Rep * 3x. Dc in next 7 st. Join. |
| R8 | |
| R9 | Ch 2. *Dc in next 5 st, dc2tog.* Rep * around. Join. FO. |
Put the head pieces aside for now.
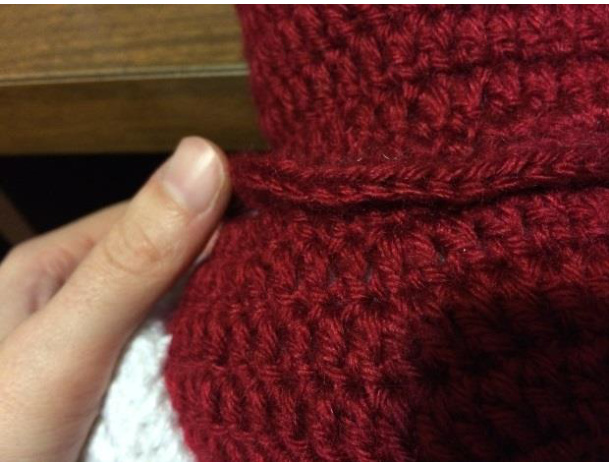
PART 2: MAIN BODY
That beefy, manly body.
A) Barrel: (red, G hook)
| Ch 47,join w/sl st. | |
| R1 | Ch 2.Dcin each charound.Join w/sl st. |
| R2 | Ch 2. *2 dc in next st. Dc in next 3 st.* Rep * 11x. Dc in next 2 st. Join. |
| R3 | Ch 2. *2 dc in next st. Dc in next 6 st.* Rep * 8x. Dc in next st. Join. |
| R4 | Ch 2. *Dc in next 13 st.2 dc in next st.* Rep * 4x. Dc to end. Join. |
| R5 | Ch 2. Dc in next 34 st. 2 dc in next st. Dc in next 33 st. Join. |
| R6-11 | Ch 2.Dc around.Join. |
| R12 | |
| R13 | Ch 2. *Dc in next 8 st. Dc2tog.* Rep * around. Join. |
| R14 | Ch 2. *Dc in next 6 st. Dc2tog.* Rep * around. Join. |
| R15 | Ch 2. *Dc in next 5 st. Dc2tog.* Rep * around. Join. |
| R16 | Sameasrowabove.Fo. |
Partially-finished barrel.
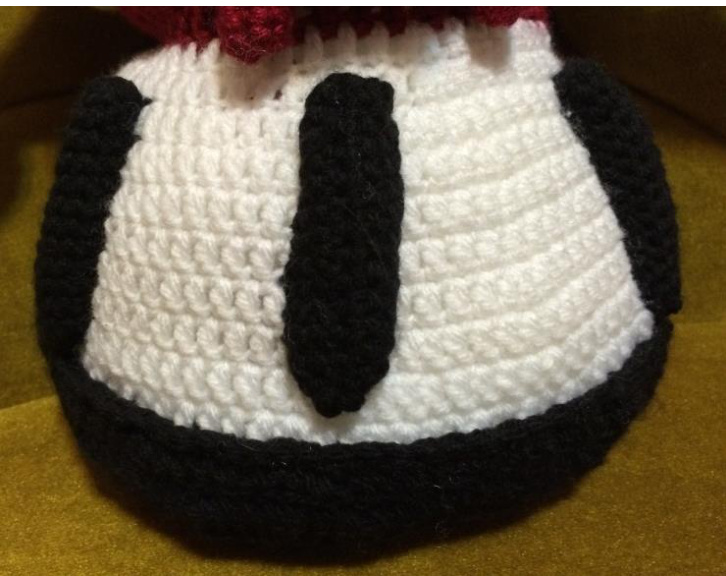
B) Hoverskirt bowl: (white, G hook)
I worked the skirt into the bottom edge of the barrel. This section was really improvised, so the increases and decreases don't follow much logic other than "it looks OK like this." I didn't count the repeats, so just follow them until there aren't enough stitches left to repeat again, and just fill in with single crochets. The pattern ain't pretty, but it worked for me.
| R1 | Ch 2. *2 dc in next st. Dc in next 3 st.* Rep * around, sc in remaining sts after last rep. Join. |
| R2 | |
| R3 | Ch 2. *Dc in next 6 st. 2 dc in next st.* Rep * around,and fill in as above. Join. |
| R4 | Ch 2. *2 dc in next st. Dc in next 14 st.* Rep * around, and fill in as above. Join. |
| R5 | Ch 2. *Dc in next 18 st. 2 dc in next st.* Rep * around, and fill in as above. Join. |
| R6 | |
| R7 | Ch 2. *Dc in next 22 st. 2 dc in next st.* Rep * around, and fill in as above. Join. |
| R8-9 | Repeat rows 6-7. |
| R10 | Repeatrow6.Fo. |
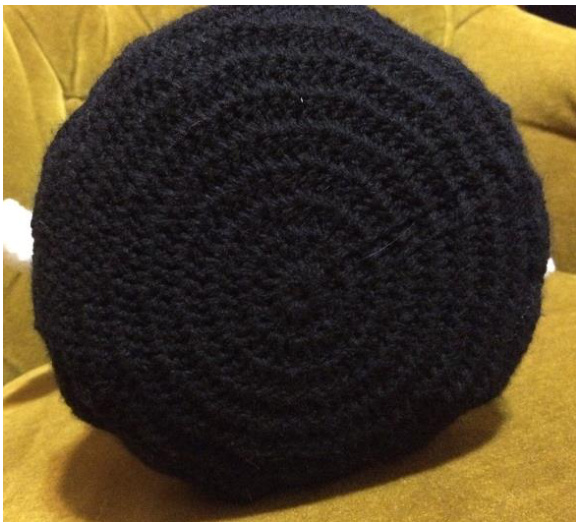
C) Hoverskirt bottom: (black, G hook)
I adapted this great pattern for potholders from MyZigZagStitch.com: http://www.myzigzagstitch.com/patterns/other/maggies-kitchen/ Follow that basic pattern, and repeat as she establishes until you have 8 rounds. Then: R9 Ch 3. \*2 dc in next st, dc in next 7 st.\* Rep \* around. Join. R10 Ch 3. \*Dc in next 6 st, dc2tog.\* Rep \* around. Join. R11 Ch 3. \*Dc2tog, dc in next 6 st.\* Rep \* around. Join. FO.
"Hey! Don't look up my skirt!!"
D) Hoverskirt tabs: (black, G hook) - MAKE 6
| R1 | Ch 13. Sc around, working 3 sc in the two ends. Join with a sl st. |
| R2 | Ch 1. Sc around. Join. |
| R3 | Ch 1.Scaround.Join.FO. |
PART 3: APPENDAGES (each x2)
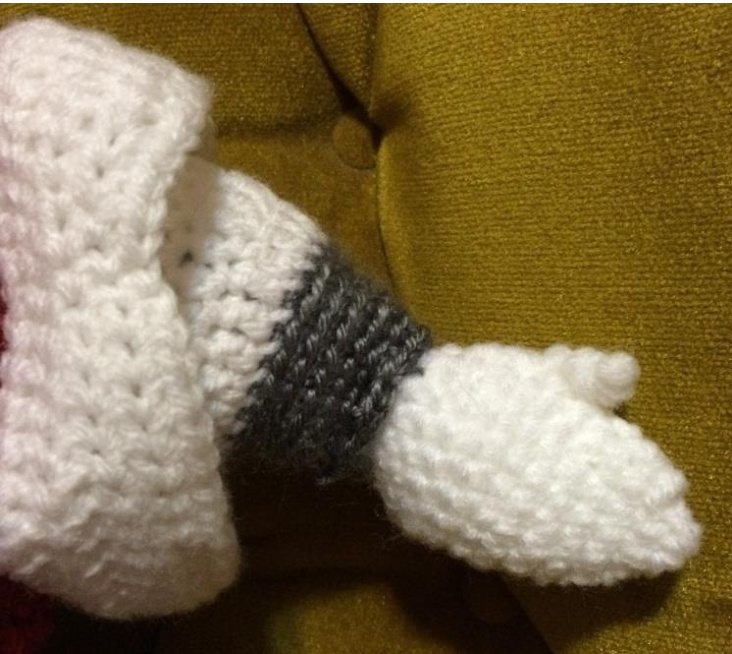
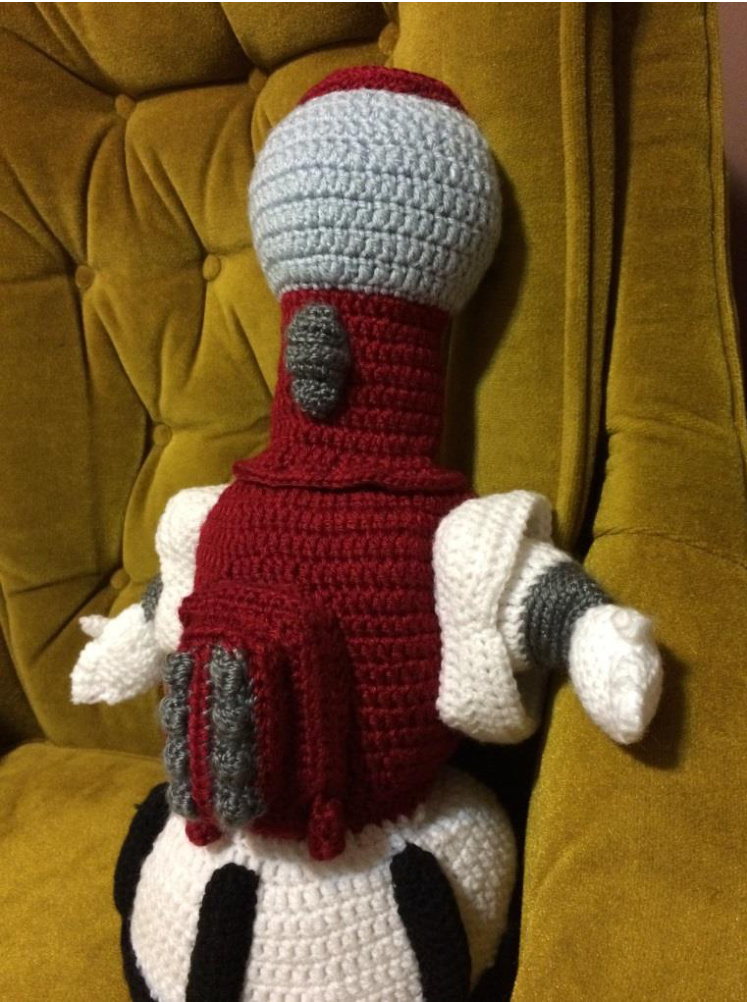
Assembled (sadly still inoperative) arms.
A) Shoulders: (white, G hook)
| R1 | Ch 14. Dc in 3rd ch fromhook.Dc across.Ch2,turn. |
| R2-5 | Dc across.Ch 2,turn. |
| R6 | Dcacross.Don'tturn. |
| R7 | Sc around the rectangle edges, putting 2 sc in the corners. Join w/ sl st. |
| R8-9 | Ch 2.Dcin each st around.Join. |
| R10 | Ch 2. 14 dc across top and partway down one side. Hdc in next 3 st. Sc in next 2 st. |
B) Arm tubes: (white, G hook)
| Ch 25. Join w/sl st. | |
| R1 | Ch 1.Sc in next 3 ch, hdc in next 6 ch, dc in next 6 ch, hdc in next 6 ch, sc in next 3 ch. Join. |
| R2-4 | Ch 1. Sc in next 3 st, hdc in next 6 st, dc in next 6 st, hdc in next 6 st, sc in next 3 st. Join. |
| R5 | Ch3.Dc around.Join.FO. |
C) Arm springs: (grey, F hook)
| R1 | Work row of sc into the flat, even end of the arm tube. Join. Don't ch 1. |
| R2-5 | Sc around in back loop only, in a spiral. Don't join w/ sl st or ch 1. |
| R6 | Sc aroundBLO.FO. |
D) Hands: (white, F hook)
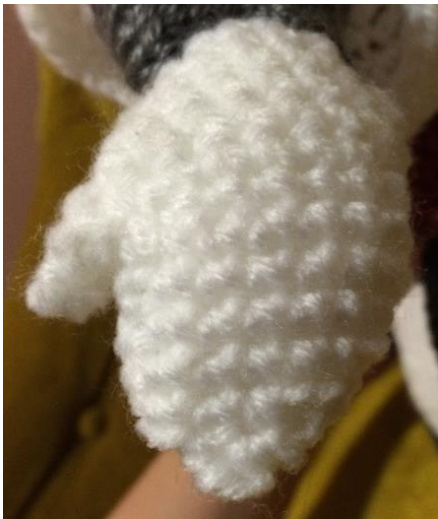
Servo's dainty hands. These are worked in two parts - the thumb and bottom of the hand down to the wrist, and then up from the thumb to the fingertips.
| 1R1 | Ch 2. Sc into 2nd ch from hook. | |
| R2 | Sc in ch and sc. | |
| R3 | Sc around.Ch 17,fasten end of chain back into base of thumb with a sl st. | |
| R4 | Ch 1. Sc into each ch around.Join. | |
| R5-8 | Ch 1. Sc around to end of row, sc2tog at the far end of the wrist (halfway around your round) and in last 2 st, under thumb. Join. | |
| R9 | Ch 1. Sc around to end of row, sc2tog at the far end of the wrist (halfway around your round) and in last 2 st, under thumb. Join. FO. | |
| 2R1 | Attach yarn at the st right after where the thumb attaches. Ch 1. Sc around, skipping the thumb and joining with sl st. | |
| R2 | Ch 1. Sc around, with sc2tog at the midpoint and end of the row. Join with a sl st. | |
| R3 | Ch 1. Sc around, with 2 sc2tog decreases at the opposite end of the hand, and 1 sc2tog at the thumb. Join. | |
| R4 | Ch 1. Sc around. Join. | |
| R5 | Ch 1. Sc in next 4 st. Skip 2 sc at the opposite end of hand. Sc to end of round, skipping 2 sc and turning again, working sc in next 2 st. Skip 2 sc, and sc in what should be the middle of the fingers. FO. |
PART 4: ENGINE BLOCK
A) Lower tier - flat part (red, G hook)
| R1 | Ch 14. Dc in 3rd ch from hook, and across. Ch 2, turn. |
| R2-5 | Dcin eachst across.Ch 2,turn. |
| R6 | Dc in each st across. Do not turn. |
| R7 | Sl st around the corner onto the adjoining side of the piece. Work 10 more sl st across theend.Ch 1,turn. |
| R8 | Sc in next 3 st.Ch 3.Trcin next 4 st. 1 sl st worked down the side of last trc.Sc in next 3 st. FO. |
B) Lower tier - sides (red, G hook)
| R1 | Ch 57. Dc in 3rd ch from hook and across. Ch 2, turn. |
| R2 | Dcacross.Fo. |
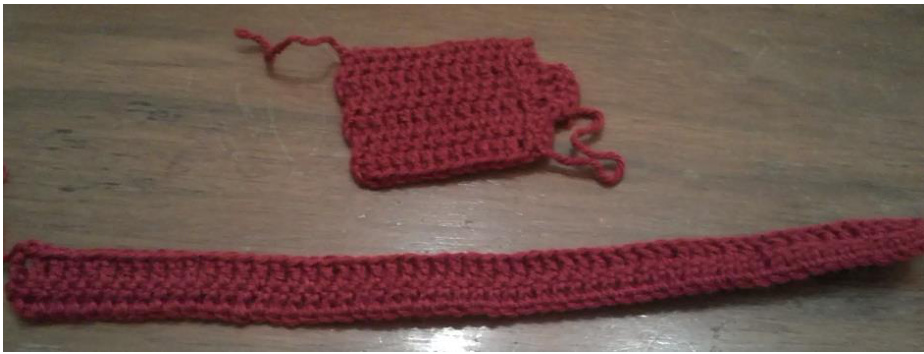
Lower tier & sides.
C) Top tier (red & grey, G hook)
| R1 | Ch 13 in grey. Sc in 2nd ch fromhook andacross. |
| R2 | Turn, ch 1. Sc in next st, bobble in next st, 2 sc in next st, bobble in next st, 2 sc in next st, bobble in next st, sc in next st. |
| R3 | Turn, ch 1.Sc across. Change to red yarn. |
| R4 | Turn, ch 1. Sc across. Change to grey yarn. |
| R5 | Turn, ch 1.Sc across. |
| R6 | Turn, ch 1.Scin next st, bobble in next st, 2 sc in next st, bobble in next st, 2 sc in next st, bobble in next st, sc in next st. |
| R7 | Turn, ch 1.Sc across. FO. |
D) Top tier - sides (red, G hook)
| R1 | Ch 40. Dc in 3rd ch from hook and across. FO. |
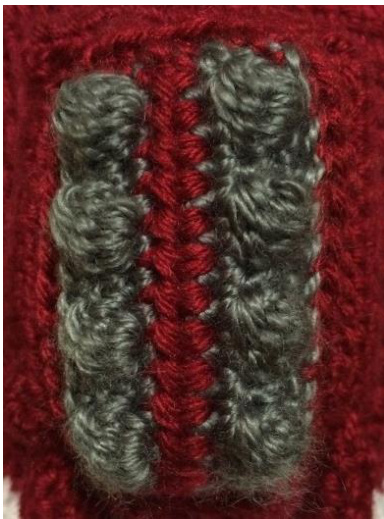
Top view of the high-powered engine block.
E) Exhaust pipes (red, G hook) - MAKE 2
| R1 | Ch 5. Join with a sl st in 1st ch to form a ring. 5 sc in ring. Join with a sl st. |
| R2-6 | Ch 1. Sc in next 5 st. Join with a sl st. |
| R7 | Ch 1. Sc in next 5 st. Join with a sl st. FO. |
low all that remains to be done is stuffing, sewing, and lining with interfacing For the arms: 1. Stitch arm tubes (with springs attached) into shoulders. Stitch shoulders onto main barrel. 2. Stuff as full as you can - pack it in good! Then stuff the hands similarly and stitch to ends of arms, fitting them so they sit just on the inside of the spring bits.
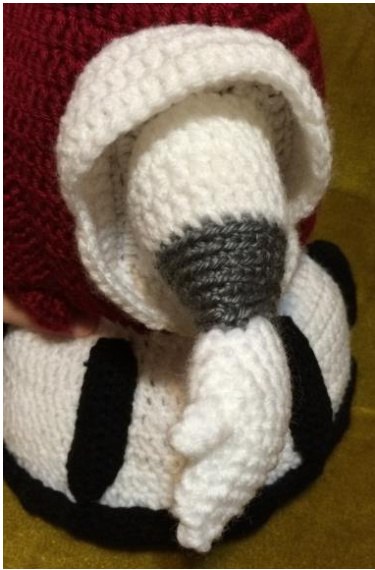
Better view of arm position. For the engine block: 1. Stitch the top tier (top and sides) together, making the corners as crisp as possible. 2. Cut stiff interfacing to fit into each side and glue into place. 3. Cram top tier with stuffing then position and stitch onto the lower tier, once again making the angles as crisp as possible. 4. Stitch lower tier sides on, attach exhaust pipes, then repeat the interfacing process. 5. Stuff and attach to main body barrel.

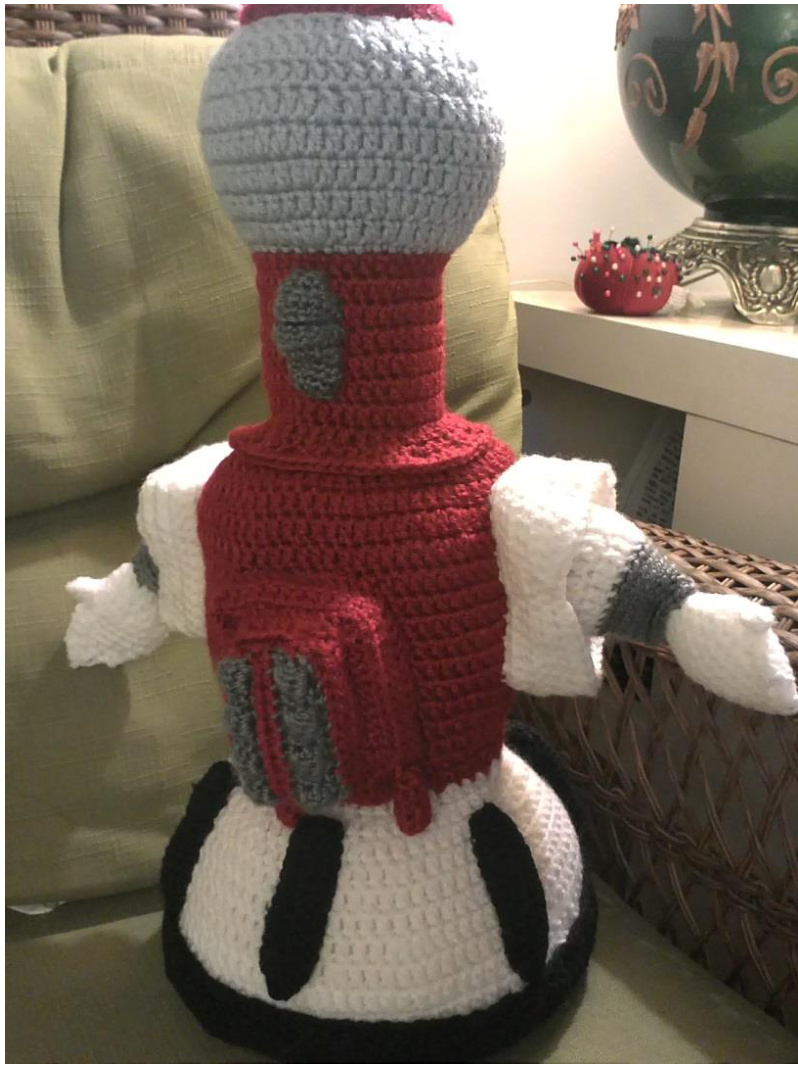
How it should look assembled. For the hoverskirt: 1. Stuff each skirt tab and position them around the main skirt. Leave room for the hoverskirt bottom's "lip," since there will be some overlap. 2. Cut a circle of interfacing to fit in the hoverskirt bottom and glue into place. Position the bottom to fit just over the lower edge of the main skirt, pin and sew into place.
You'll still have to carry him over grates. For the head: 1. Cut a circle of interfacing to fit into the head cap disc, and glue into place. Then stuff it, being careful to smush the stuffing as flat as possible - you don't want it to bulge out too much. If you have quilt batting, that would be a good alternative. 2. Now pin and sew the cap onto the dome, making sure you have a nice crisp edge (or it will look like crap). I'd sew through the back loops only here. 3. Next cut some interfacing to fit inside the base of the head as a cylinder, and glue. 4. Now stuff the dome nice and full to get that round, bulbous, glorious Servo head! Do the same for the base, but make sure it doesn't bulge out.

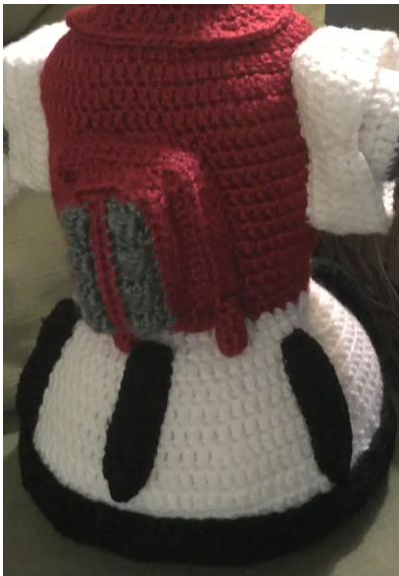
Or it'll be Kaboom all over again... POP HIM, POP HIM, POP POP POP! NOW you can finally stuff the main body! Stuff the heck out of it! Then it's time to attach the head. Position it on top of the body (there should be plenty of overlap here), and stitch around. Make sure you avoid actually stitching over the edge - leave a little lip of fabric or it will look like crap (ask me how I know this.) Use a straight stitch rather than a whip stitch.
Make sure you don't raise the level on his sarcasm sequencer. Enjoy!