Mischievous Monster Gnome
@ Designed by Kimberly Kwon Not for resale or distribution.
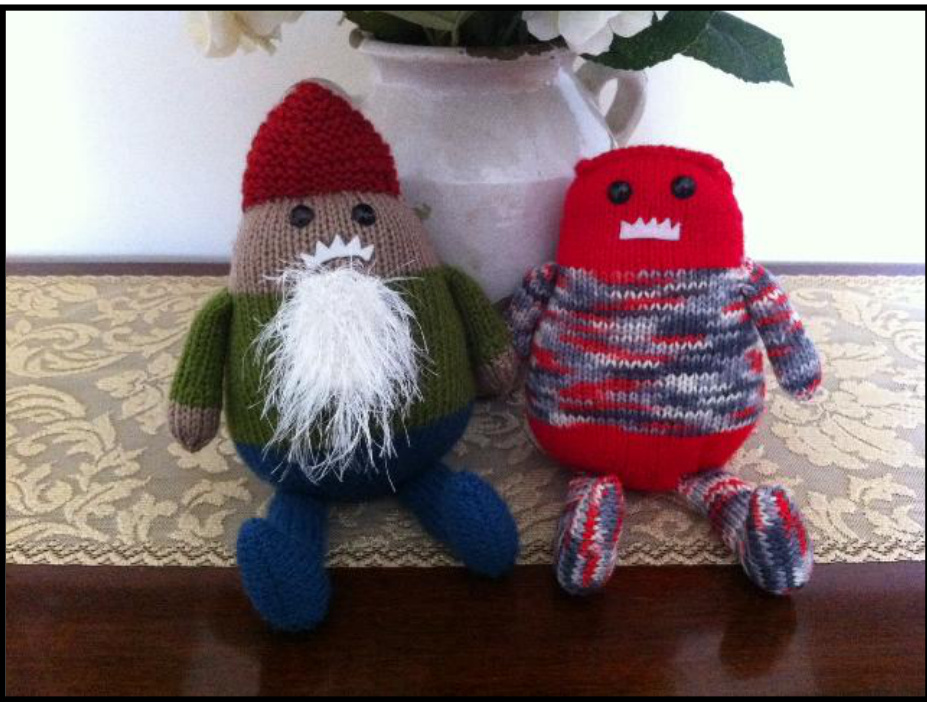
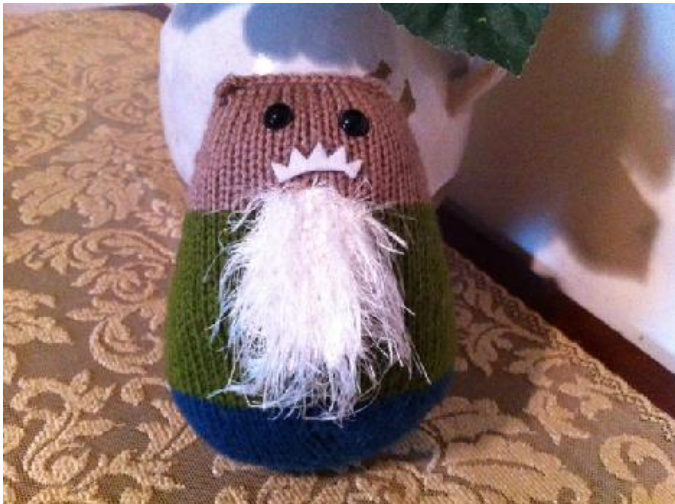
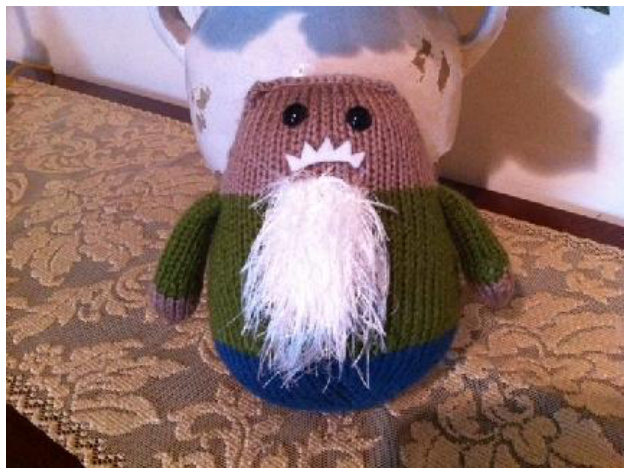
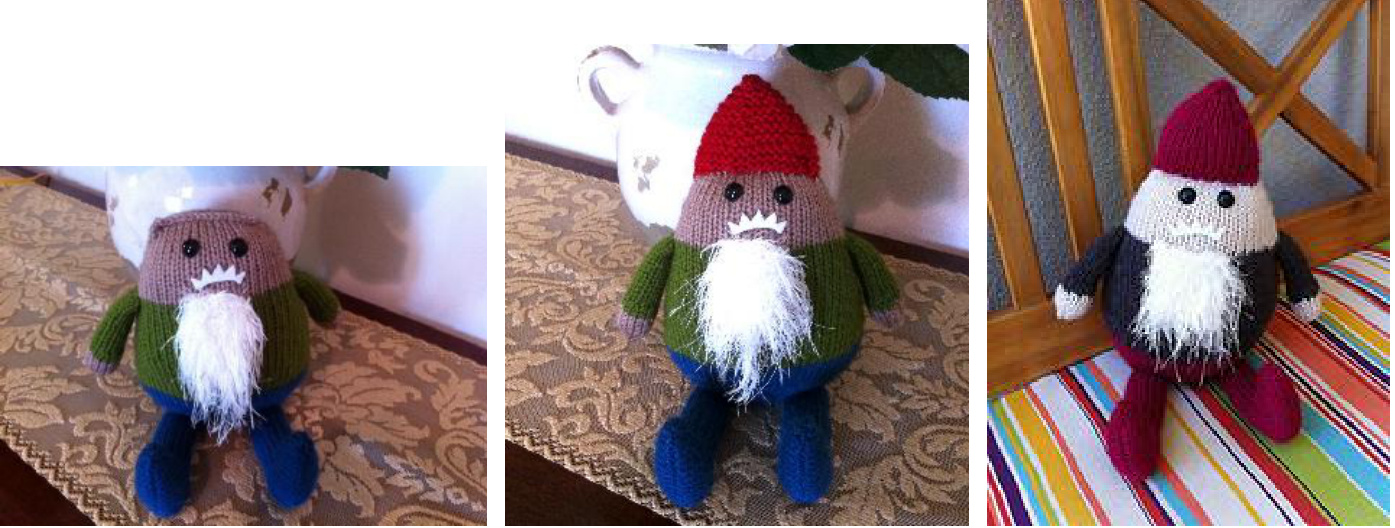
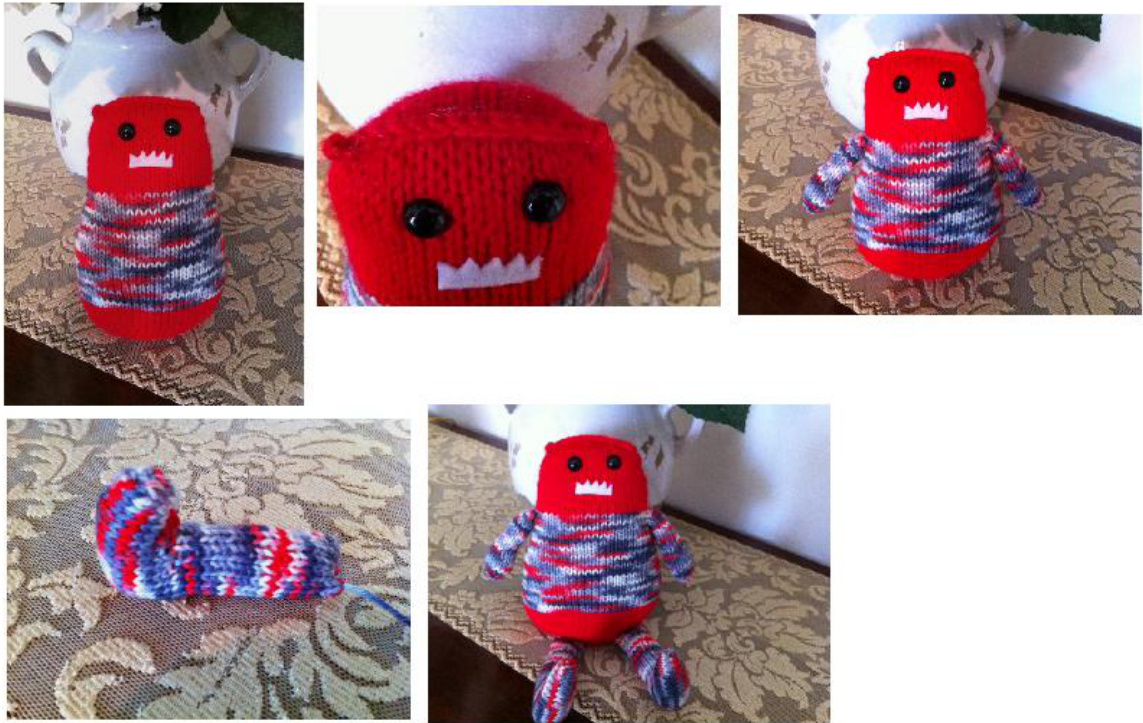
This little guy is very indecisive. One day he is a grumpy gnome working in his garden, and the next he uses the forest magic to change into a mischievous monster. Any worsted weight yarn will work for this pattern. Suggested yarns include Plymouth Encore, Bernat Waverly, Cascade 220, Patons Classic Wool, or Dancing Dog Dyeworks. If you decide to make a beard for your gnome or monster, you will also need a brand of fun fur, eyelash yarn for the beard such as Sensations Cello. Your finished gnome will be ready for your garden or home, sitting at 9 inches in height with his hat on. The legs add extra length, but this gnome prefers to sit and nap under a tree. If you decide to make the mischievous monster version, he will be sitting at 7 to 7.5 inches in height (not including legs).

Materials:
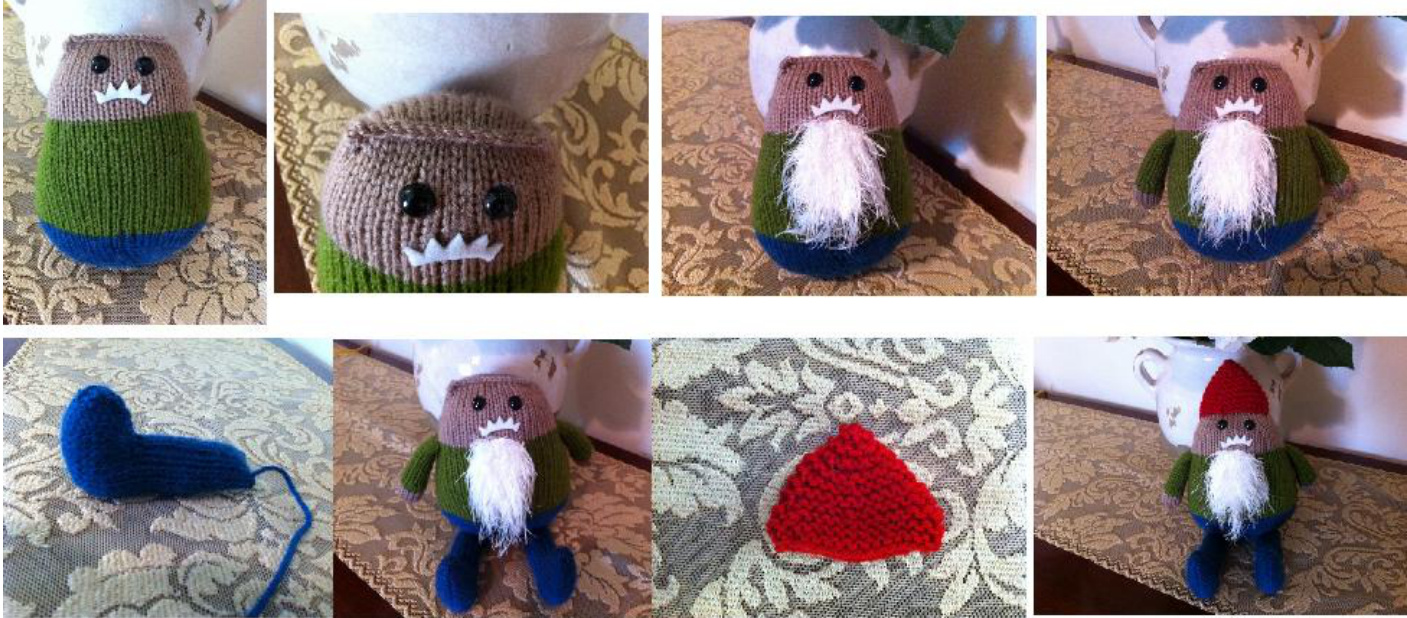
150 yards of Color A (body base and feet), worsted weight yarn. 50 yards of Color B (body shirt and arms), worsted weight yarn 50 yards of Color C (face), worsted weight yarn 20 yards of Color D (hat), worsted weight yarn 15 yards of “fun fur" yarn in white or other contrasting color to the face Set of US Size and 6 double pointed needles ·A 32-inch circular needle, US Size 6 12 mm safety eyes in black or color of your choice. These safety eyes were purchased from the 6060 Etsy store: http://www.etsy.com/shop/6060?ref=seller_ info Polyfil fiber stuffing One piece of felt, white or color of choice, for the mouth Fabric glue Knitting Abbreviations: Row counter Scissors K: knit You will be knitting your monster gnome from the bottom up, stuffing the body along the way. You can choose to knit this monster with circular needles using the magic loop method. or using a set of 3 or 4 double pointed needles. When using dpns, I like dividing my stitches evenly between two dpns, and knitting with the third one. P: purl DPNS: Double pointed needles KFB: knit into the front and back of the same stitch K2tog: knit two stitches together Gnome Photo Tutorial: These are the steps you will take to put this Grumpy Garden Gnome together...
Start Your Body:
With Color A (body base), cast on 12 stitches. Join stitches in the round, being careful not to twist stitches. Place a stitch marker to indicate the beginning of each round. R1: knit (12 sts) R2: (k1, kfb) repeat around (18 sts) R3: knit R4: (k2, kfb) repeat around (24 sts) R5: knit R6: knit R7: (k3, kfb) repeat around (30 sts) R8: knit R9: knit R10: (k4, kfb) repeat around (36 sts) R11: knit R12: (k5, kfb) repeat around (42 sts) R13: knit R14: (k6, kfb) repeat around (48 sts) R15: knit R16: (k7, kfb) (54 sts) R17: knit R18: (k8,kfb) (60 sts) R19: knit R20: (k9, kfb) (66 sts) R21: knit R22: (k10, kfb) (72 sts) R23 - 26: knit Change to Color B (shirt): R27- R30:knit (72 sts) R31: (k2tog, k32, k2tog) repeat (68 sts) R32: knit R33: (k32, k2tog) repeat (66 sts) R34: knit R35: (k2tog, k31) repeat (64 sts) R36: knit R37: (k30, k2tog) repeat (62 sts) R38: knit R39: (k2tog, k29) repeat (60 sts) R40: knit R41:(k28, k2tog) repeat (58 sts) R42: knit R43: (k2tog, k27) repeat (56 sts) R44: knit R45: (k26, k2tog) repeat (54 sts) R46: knit R47: (k2tog, k25) repeat (52 sts) R48: knit R49: (k24, k2tog) repeat (50 sts) R50: knit R51: (k2tog, k21, k2tog) repeat (46 sts) R52: knit
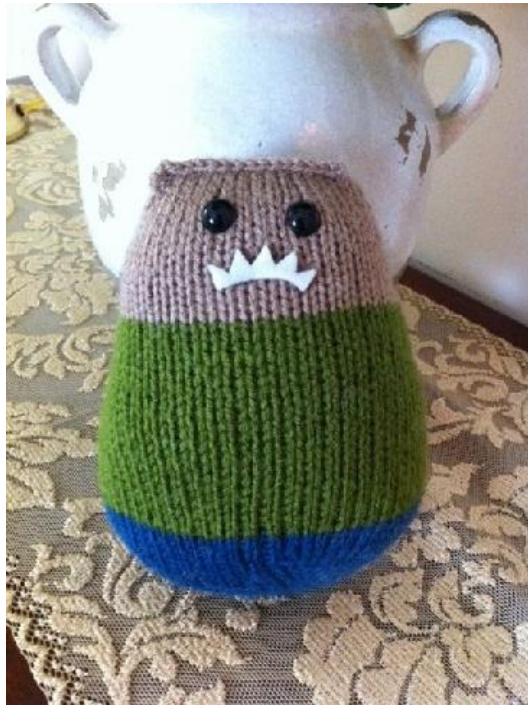
Now it is time to start stuffing and shaping the body base. Stuff the body with polyfil stuffing of choice so that the base looks rounded like a witch's cauldron. Sew the bottom of the base closed with scrap yarn.
Change to Color C (face):
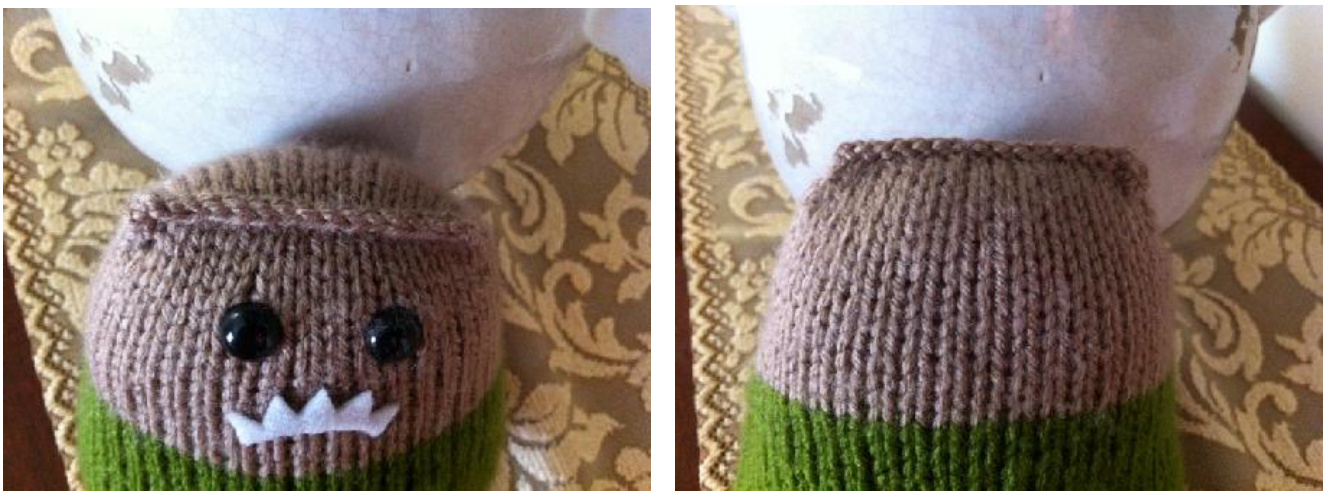
R53- R56:knit (46 sts) R57: (k2tog, k21) repeat (44 sts) R58: knit R59: (k20, k2tog) repeat (42 sts) R60: knit R61: (k2tog, k19) repeat (40 sts) R62-R64: knit R65: (k2tog, k16, k2tog) repeat (36 sts) R66: knit R67: (k2tog, k14, k2tog) repeat (32 sts) R68: knit Add more stuffing to your gnome. Now add your safety eyes to the face of your gnome. Place eyes just below the top few rows of your head. Finish stuffing the head and body as desired. You will now bind off your stitches to close the top of your gnome head. To bind off, make sure your 32 stitches are evenly divided on your two needles or dpns. Then, work a 3-needle bind off with those stitches without turning the body inside out. You will have a set of bumpy stitches at the top of your gnome head. These stitches will eventually be covered by a hat.
Add Mouth:
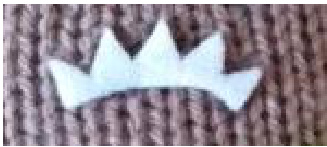
Take a piece of felt from the craft store (white or any color of choice) and cut out a mouth for your gnome. You can create monster like teeth by cutting a jagged crown shape. Add fabric glue to the back of the felt mouth and press firmly on the face. I made the mouth frown on my grumpy gnome; it willook a mustache when you add your beard.
Take some heavy books and add it on top of the mouth for 10 minutes to flatten and secure it onto the face. Then take your blow dryer and dry the mouth completely for several minutes. Another option would be to use any color scrap yarn to embroider mouth stitches.
Beard:
You will be knitting the beard flat on your needles (not in the round). Once you finish the beard stitches, you will sew it on to the face using leftover yarn from your bind off tail. Using your fun fur, eyelash yarn in desired color for your beard, Cast on 10 stitches R1 - R12: knit Bind off your 12 stitches and cut the yarn so that you have 8 to 10 inches of a tail.
Turn the beard so that the bind off edge is standing vertically. Take your long tail and sew the top of the beard onto your gnome's face. It should be placed directly underneath the frowning mouth. Use the tail to sew and secure the sides of the beard to the face (this includes the bind off edge). Fluff the yarn so that it is spread evenly on the face.
Arms (make two):
shirt), using dpns, cast on 10 stitches and divide evenly and join to work in the round. R1 - R12: knit (10 sts) R13: (k1, kfb, k1,kfb, k1) repeat (14 sts) R14: knit Change to Color C (hand): R15 - R19: knit (14 sts) R20: k2tog, repeat around (7 sts) R21: k5, k2tog (6 sts) Place all 6 stitches onto one needle, cut yarn leaving a six inch tail, and pull yarn through all 6 stitches to close up the hand. Sew the top of the hand as needed with tail.
Stuff hand and arm firmly with polyfil stuffing of choice. Sew the closed arm to each side of the gnome's body,using Color B.
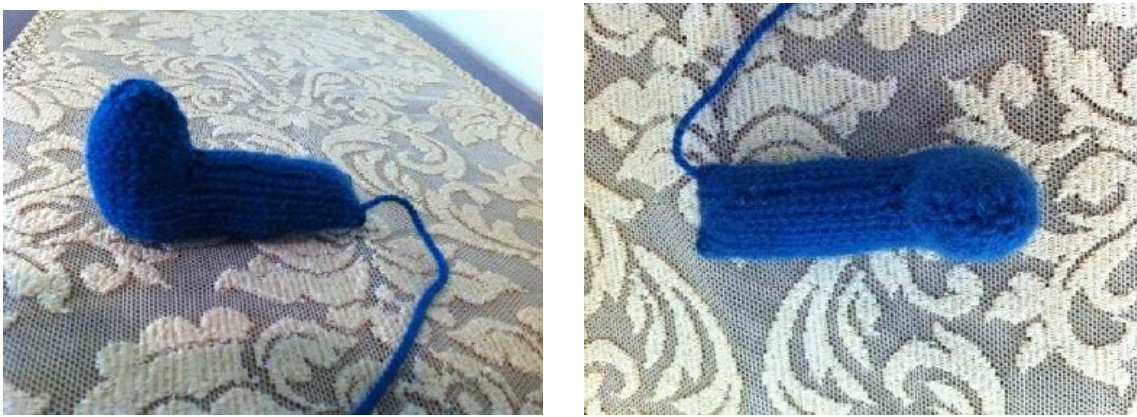
Feet (make two):
olor A, using dpns, cast on 14 stitches and divide evenly and join to work in the roun R1 - R20: knit (14 sts) R21: k5, kfb next 4 sts, k5 (18 sts) R22: k7, kfb next 4 sts, k7 (22 sts) R23: k9, kfb next 4 sts, k9 (26 sts) R24: k12, kfb next 2 sts, k12(28 sts)R25; k13, kfb next 2 sts, k13 (30 sts) R26 - R28: knit (30 sts) R29: k2tog, k26, k2tog (28 sts) Make sure that that 28 sts are divided evenly on both needles, turn the foot inside out and work a 3- needle bind off to close the foot. Turn the foot back to normal and stuff the leg and foot firmly with polyfil stuffing of choice. Closing the top of the foot: Before sewing the top of the foot closed, be sure that the sides at the top of the foot are flattened properly for your gnome. The top sides should lie flat so that the heel is resting on the floor and the foot is sticking upwards. Sew the top of each leg as shown, and attach to the base of your grumpy gnome, who will now be able to sit properly under a tree.
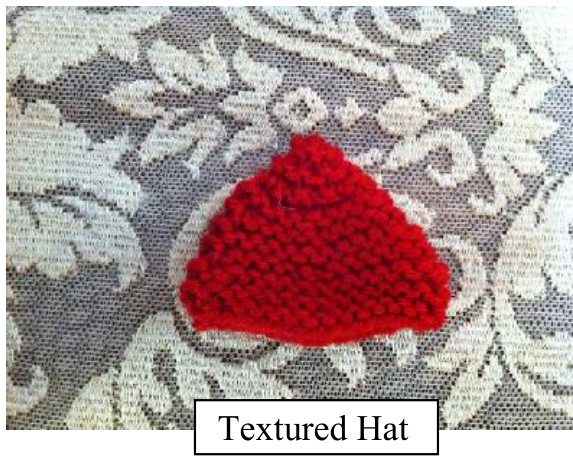
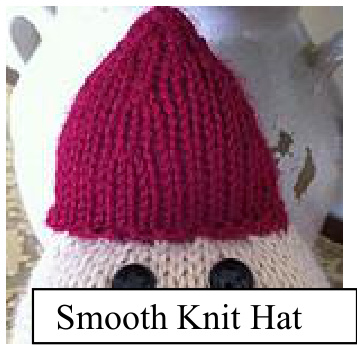
The Perfect Finish - A Gnome Hat: You can knit the hat two different ways. The first version has a hat with ridges and textures from the purl rows worked in the round. If you want a completely smooth knit hat, just change the purl rows, starting at R3, to knit ones. With Color D (hat), using cast on 30 sts, divided evenly and join in the round. R1: k1, p29 (30 st: R2: knit R3: purl (change to knit, if making a smooth knit hat) R4: knit R5: purl (change to knit, if making a smooth knit hat) R6:knit R7: purl (change to knit, if making a smooth knit hat) R8: (k2tog, k5, k2tog, k4, k2tog) repeat (24 sts) R9: purl (change to knit, if making a smooth knit hat) R10:knit R11: purl (change to knit, if making a smooth knit hat)
R12: (k2tog, k3, k2tog, k3, k2tog) repeat (18 sts) R13: purl (change to knit, if making a smooth knit hat) R14: knit R15: purl (change to knit, if making a smooth knit hat) R16: \* (k2tog four times, k1) repeat from (10 sts) R17: purl (change to knit, if making a smooth knit hat) R18: knit R19: purl (change to knit, if making a smooth knit hat) (5 sts)
Place all 5 stitches onto one needle or dpn, cut yarn with a 6 inch tail. Pull tail through all 5 stitches to close the top of the hat. Sew any final stitches as needed with tail for desired shape. Gently stretch out the hat to fit across and over the top stitches of your grumpy gnome's head. Lightly stuff the hat with polyfil stuffing of choice. Using scrap yarn in Color D, sew the hat onto the head so that the top stitches are now hidden completely.
Misc hievous Monstep
Materials:
100 yards of Color A (body base and face), worsted weight yarn. ·100 to 150 yards of Color B (body shirt, arms, feet), worsted weight yarn ·Set of US Size and 6 double pointed needles A 32-inch circular needle, US Size 6 12 mm safety eyes in black or color of your choice. These safety eyes were purchased from the 6060 Etsy store: http://www.etsy.com/shop/6060?ref=seller_ info Polyfil fiber stuffing One piece of felt, white or color of choice, for the mouth Fabric glue ?Row counter Scissors Large tapestry sewing needle Mischievous Monster Photo Tutorial: These are the steps you will take to put this Mischievous Monster together...
Start Your Body:
With Color A (body base), cast on 12 stitches. Join stitches in the round, being careful not to twist stitches. Place a stitch marker to indicate the beginning of each round. R1: knit (12 sts) R2: (k1, kfb) repeat around (18 sts) R3: knit R4: (k2, kfb) repeat around (24 sts) R5: knit R6: knit R7: (k3, kfb) repeat around (30 sts) R8: knit R9: knit R10: (k4, kfb) repeat around (36 sts) R11: knit R12: (k5, kfb) repeat around (42 sts) R13: knit R14: (k6, kfb) repeat around (48 sts) R15: knit R16: (k7, kfb) (54 sts) R17: knit R18: (k8,kfb) (60 sts) R19: knit R20: (k9, kfb) (66 sts) R21: knit R22: (k10, kfb) (72 sts) R23 - 26: knit
Change to Color B (shirt):
R27 - R30:knit (72 sts) R31: (k2tog, k32, k2tog) repeat (68 sts) R32: knit R33: (k32, k2tog) repeat (66 sts) R34: knit R35: (k2tog, k31) repeat (64 sts) R36: knit R37: (k30, k2tog) repeat (62 sts) R38: knit R39: (k2tog, k29) repeat (60 sts) R40: knit R41:(k28, k2tog) repeat (58 sts) R42: knit R43: (k2tog, k27) repeat (56 sts) R44: knit R45: (k26, k2tog) repeat (54 sts) R46: knit R47: (k2tog, k25) repeat (52 sts) R48: knit R49: (k24, k2tog) repeat (50 sts) R50: knit R51: (k2tog, k21, k2tog) repeat (46 sts) R52: knit

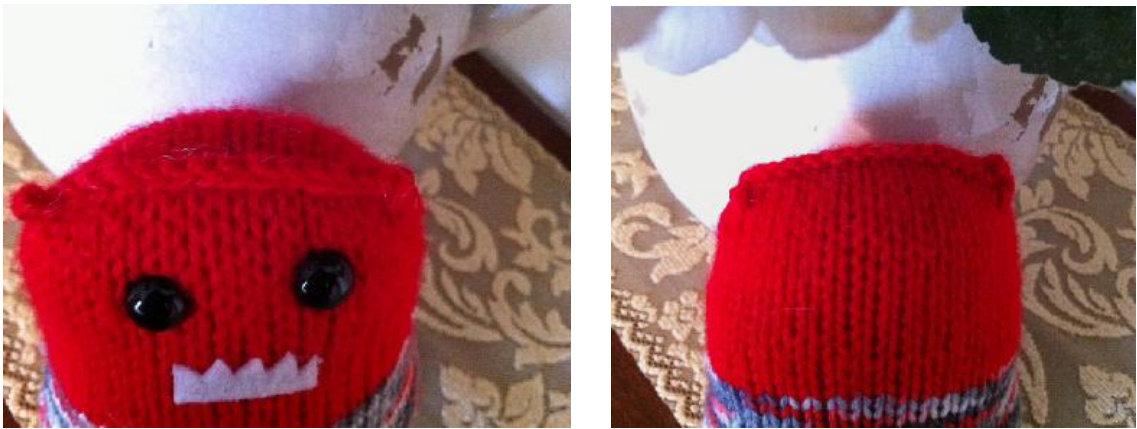
Now it is time to start stuffing and shaping the body base. Stuff the body with polyfil stuffing of choice so that the base looks rounded like a witch's cauldron. Sew the bottom of the base closed with scrap yarn. Change back to Color A (face): R53- R56:knit (46 sts) R57: (k2tog, k21) repeat (44 sts) R58: knit R59: (k20, k2tog) repeat (42 sts) R60: knit R61: (k2tog, k19) repeat (40 sts) R62 - R64: knit R65: (k2tog, k16, k2tog) repeat (36 sts) R66: knit R67: (k2tog, k14, k2tog) repeat (32 sts) R68: knit Add more stuffing to your monster. Now add your safety eyes to the face of your monster. Place eyes several rows down from the top of your head, making sure there is room for your mouth. Finish stuffing the head and body as desired. You will now bind off your stitches to close the top of your monster head. To bind off, make sure your 32 stitches are evenly divided on your two needles or dpns. Then, work a 3-needle bind off with those stitches without turning the body inside out. You will have a set of bumpy stitches at the top of your mischievous monster.
Add Mouth:
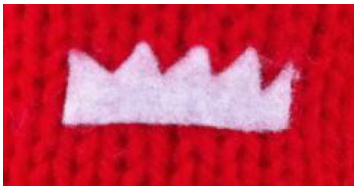
Take a piece of felt from the craft store (white or any color of choice) and cut out a mouth for your gnome. You can create monster like teeth by cutting a jagged crown shape. Add fabric glue to the back of the felt mouth and press firmly on the face. Take some heavy books and add it on top of the mouth for 10 minutes to onto the face. Use your blow dryer and dry the mouth completely for several minutes. Another option would be to use any color scrap yarn to embroider mouth stitches.
Arms (make two):
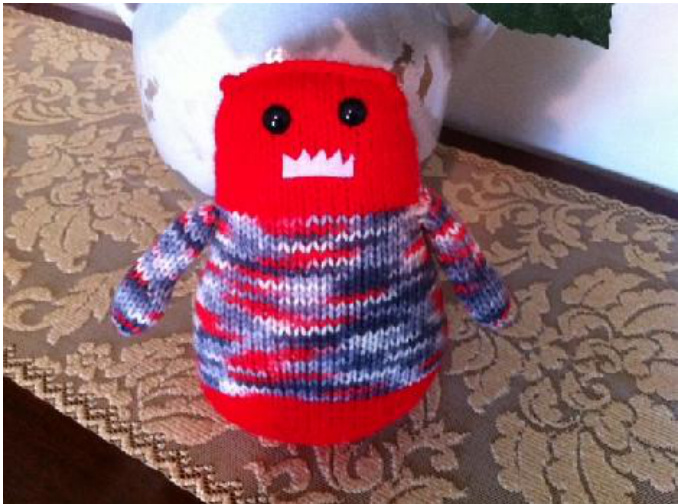
shirt), using dpns, cast on 10 stitches and divide evenly and join to work in the round. R1 - R12:knit (10 sts) R13: (k1, kfb, k1,kfb, k1) repeat (14 sts) R14 - R19: knit R20: k2tog, repeat around (7 sts) R21: k5, k2tog (6 sts) Place all 6 stitches onto one needle, cut yarn leaving a six inch tail, and pull yarn through all 6 stitches to close up the hand. Sew the top of the hand as needed with tail. Stuff hand and arm firmly with polyfil stuffing of choice. Sew the closed arm to each side of your monster body, using Color B.
Feet (make two):
olor B, using dpns, cast on 14 stitches and divide evenly and join to work in the roun R1 - R20: knit (14 sts) R21: k5, kfb next 4 sts, k5 (18 sts) R22: k7, kfb next 4 sts, k7 (22 sts) R23: k9, kfb next 4 sts, k9 (26 sts) R24: k12, kfb next 2 sts, k12(28 sts)R25; k13, kfb next 2 sts, k13 (30 sts) R26 - R28: knit (30 sts) R29: k2tog, k26, k2tog (28 sts) Make sure that that 28 sts are divided evenly on both needles, turn the foot inside out and work a 3- needle bind off to close the foot. Turn the foot back to normal and stuff the leg and foot firmly with polyfil stuffingofchoice. Closing the top of the foot: Before sewing the top of the foot closed, be sure that the sides at the top of the foot are flattened properly for your gnome. The top sides should lie flat so that the heel is resting on the floor and the foot is sticking upwards. Sew the top of each leg as shown, and attach to the base of your monster, who will now be able to sit anywhere and everywhere in your home.
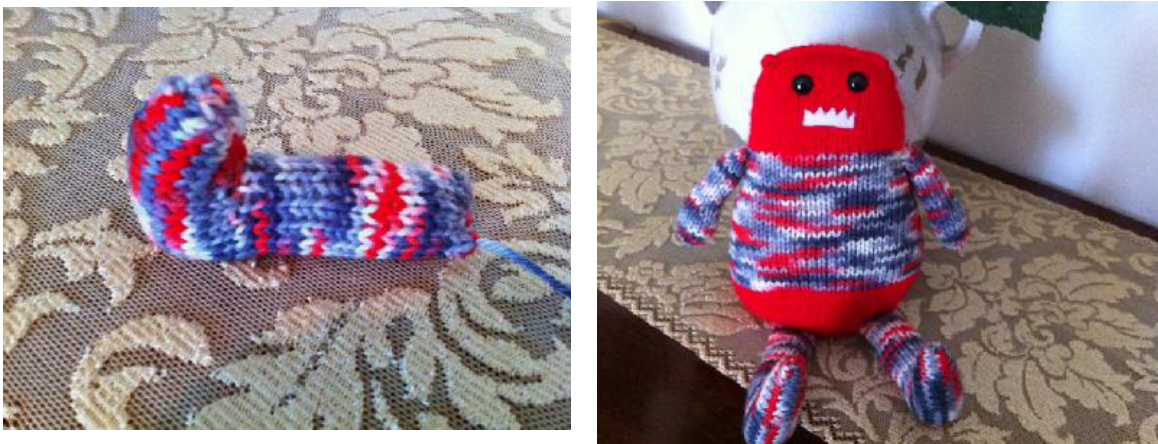
You can turn this monster back into a gnome by adding a beard, hat or both. You can also embroider decorative details into your monster, or add an iron-iron applique design. Have fun with your color combinations and yarns, and make this monster gnome your very own.


Kimberly has been knitting for several years, and finds monster making as one of her favorite things to knit and purl. She lives with a long list of chronic health conditions, and knits monsters to help her fight her daily battles with pain and fatigue. Kimberly lives "one stitch at a time" and chronicles her life on her blog at http://kkhymn.wordpress.com. You can read stories about her random acts of monsters where she gives her knitted monsters and handmade toys to other chronically ill patients she meets while at her many doctor appointments to help them with their own battles. She can be contacted via Ravelry as kkhymn. Feel free to join her on Ravelry in the Random Acts of Monsters group


