Macaron Baby Blanket
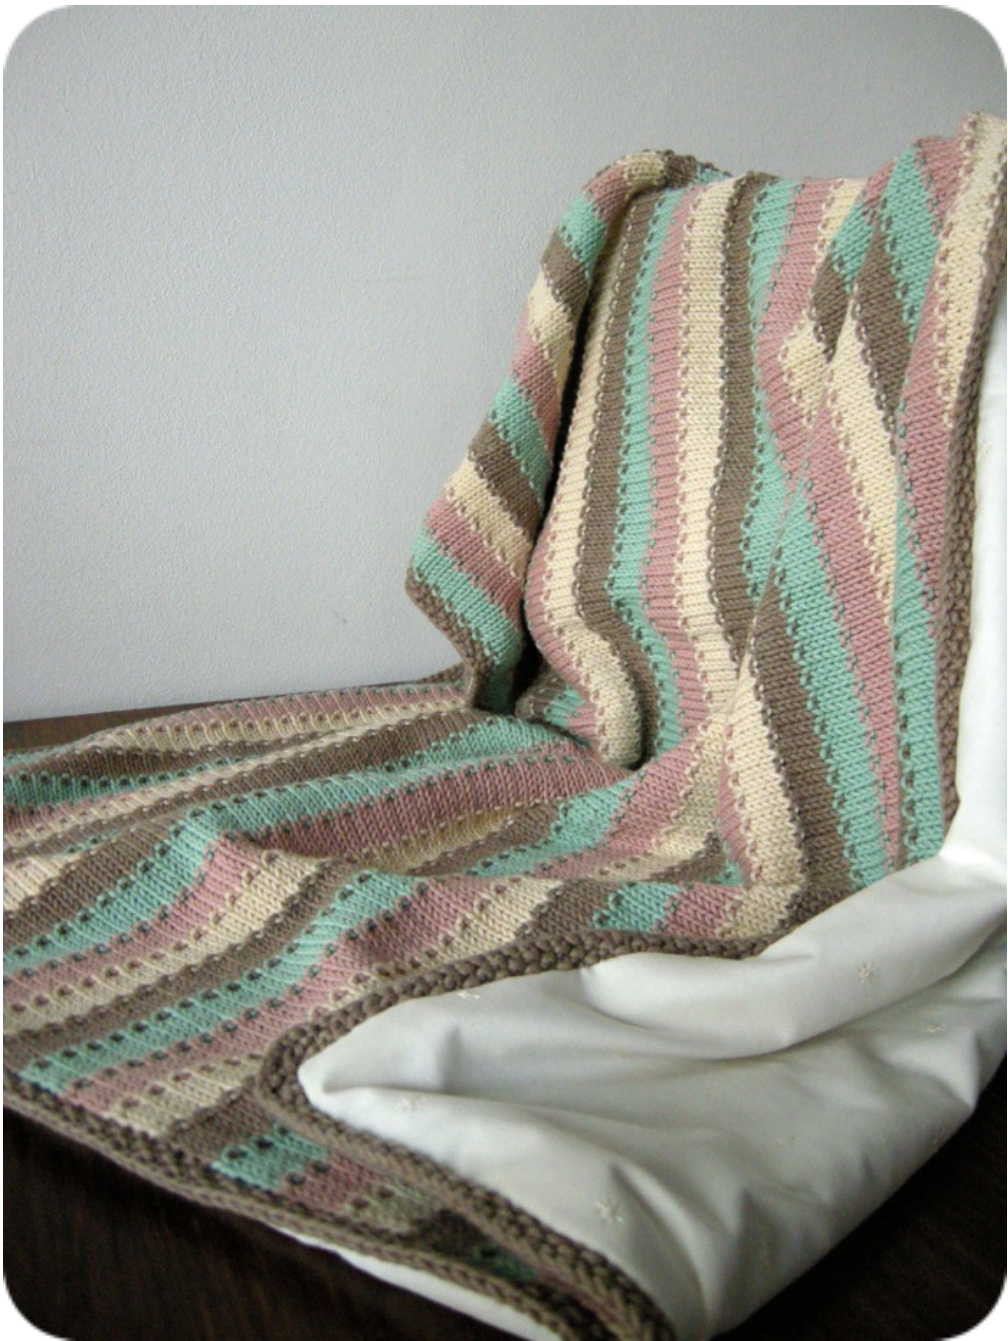
This cute baby blanket is as sweet as the pastel colored French confection. Really easy and very quick to make, it looks especially nice with a fabric backing. It's perfect for beginning knitters, but does use a couple of techniques beyond basic knit and purl, so it's a great opportunity to learn. You need to be(come) able to: Knit & purl Use the provisional cast on Increase Pick up stitches
Materials
Any yarn you want. The smaller the gauge, the more stitches you will need to cast on and the longer your project will take. For baby blankets I really recommend a washable yarn, like cotton or a superwash merino. I used Wool and the Gang Shiny Happy Cotton in Ivory, Nude Pink, Sahara Dust & Spearmint Green, approx. 233 yards/210 metres of each color. Two circular needles matching your yarn, I used 5mm/ US 8. Main needle length; at least 120 cm. For interchangable needle sets, there is this nifty little gadget that lets you attach cables and so make an even longer cable. This will come in especially handy when working the border. The second needle need only be as long as the width of your blanket. Crochet hook, size matching your knitting needles. Waste yarn for provisional cast on. Use a length several times more than the width of your blanket. 8 stitch markers Fabric for backing your blanket & thread in a matching color.
Gauge
Your gauge, yarn, needles; everything depends on what you want. You might have a specific size in mind for the blanket, or you might already have the yarn. My gauge was: 16,5 sts x 25 rows I liked the fabric this gave me, so I went with it.
How many stitches to cast on?
It is easiest to go by the information on the ballband of your yarn. It is not as precise as making your own swatch, but as this is a blanket and not a garment, it gives you a good estimate and a place to start. gauge sts per 4 inches x intended width blanket (inches) number of Formula stitches to cast on 4 inches If you want to end up with a blanket that is around 32 inches / 81,5 cm wide (without the border) and your gauge is 16,5 sts per 4"/10 cm, you will need to cast on 132 stitches. If you're really a stickler for detail, cast on an uneven number of stitches for a symmetrical result in the seed stitch row. Pattern Text & Photography Copyright @ 2014 Sarinah Leezer Pattern is for personal use only. All rights reserved.
Knitting
Main et is mostly in stockinette stitch. Every color change is done in a seed stitch rc CO your number of stitches with a provisional cast on. Work in stockinette for 4 rows. The 5th row (RS), cut the yarn of the color you're working with and take your next color. If you are going to add a fabric backing, leaving tails of around 4 inches/ 10 cm is enough, otherwise you might want to leave a tail of 6 inches. With this new color, \*knit 1, purl 1\* and repeat until the end of the row. Then, \*\*Work in stockinette for 5 rows. ith row, cut the yarn of the color you're working with and take your next color With this new color, \*knit 1, purl 1\* and repeat until the end of the row.\*\* Repeat the steps between \*\* alternating your colors as you wish until you've reached the desired length, thus ending with a seed stitch row. Do not cast off. That sequence written out for the first two color changes: Row 1: knit all stitches Row 2: purl all stitches Row 3: knit all stitches Row 4: purl all stitches Row 5: \*knit 1, purl 1\* with new color, repeat until end of row Row 6: purl all stitches Row 7: knit all stitches Row 8: purl all stitches Row 9: knit all stitches Row 10: purl all stitches Row 11: \*knit 1, purl 1\* with new color, repeat until end of rov All knitted stitches are on the right side (RS) of the fabric, all purled stitches on the wrong side (WS). The seed stitch rows always start at the RS.
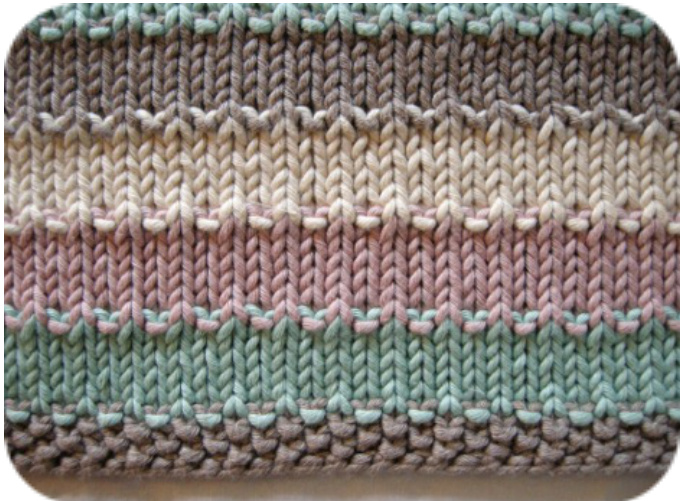
Right Side
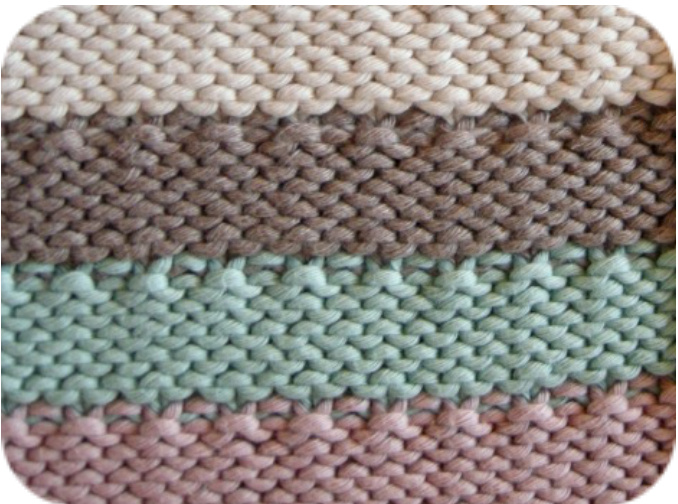
Wrong Side Pattern Text & Photography Copyright @ 2014 Sarinah Leezer Pattern is for personal use only. All rights reserved.
Border
You still have all your stitches on the needle. Consider these the picked up stitches of this side of your blanket. That leaves three more sides where you need to pick up stitches. Pick up stitches with the RS facing you. Carefully unravel your provisional cast on and put the live stitches on the spare needle. Back to your main needle, when picking up stitches from the side, don't pick up one stitch for every row. Because knitting stitches are not square, this will leave you with a lot of excess fabric and will give a curly edge. Instead, try this: \*pick up one stitch per row two times, then skip a row\* and repeat. When you get to the corners place a stitchmarker before and after every corner stitch (when finished, 8 markers placed). When you get to the cast on edge, with your live stitches on the spare needle, knit a seed stitch row so it matches the other side of the blanket. You can put away the spare needle. The border can be worked in any type of stitch you want. I used seed stitch, but you can also use garter stitch for example. When working a corner, do the following: \*knit up to the stitch marker, make 1, knit to the second stitch marker, make 1\* To make 1 stitch: lift the bar between two stitches onto your left needle by inserting it from back to front, then knit this stitch by inserting your right needle into the stitch from left to right in front of the left needle. Work as many rounds as you want, then bind off. Be careful that your bind off is not too tight nor too loose. Either might make the edge curl. Lay your work on a flat surface every couple of inches to check.
Pattern Text & Photography Copyright @ 2014 Sarinah Leezer Pattern is for personal use only. All rights reserved.
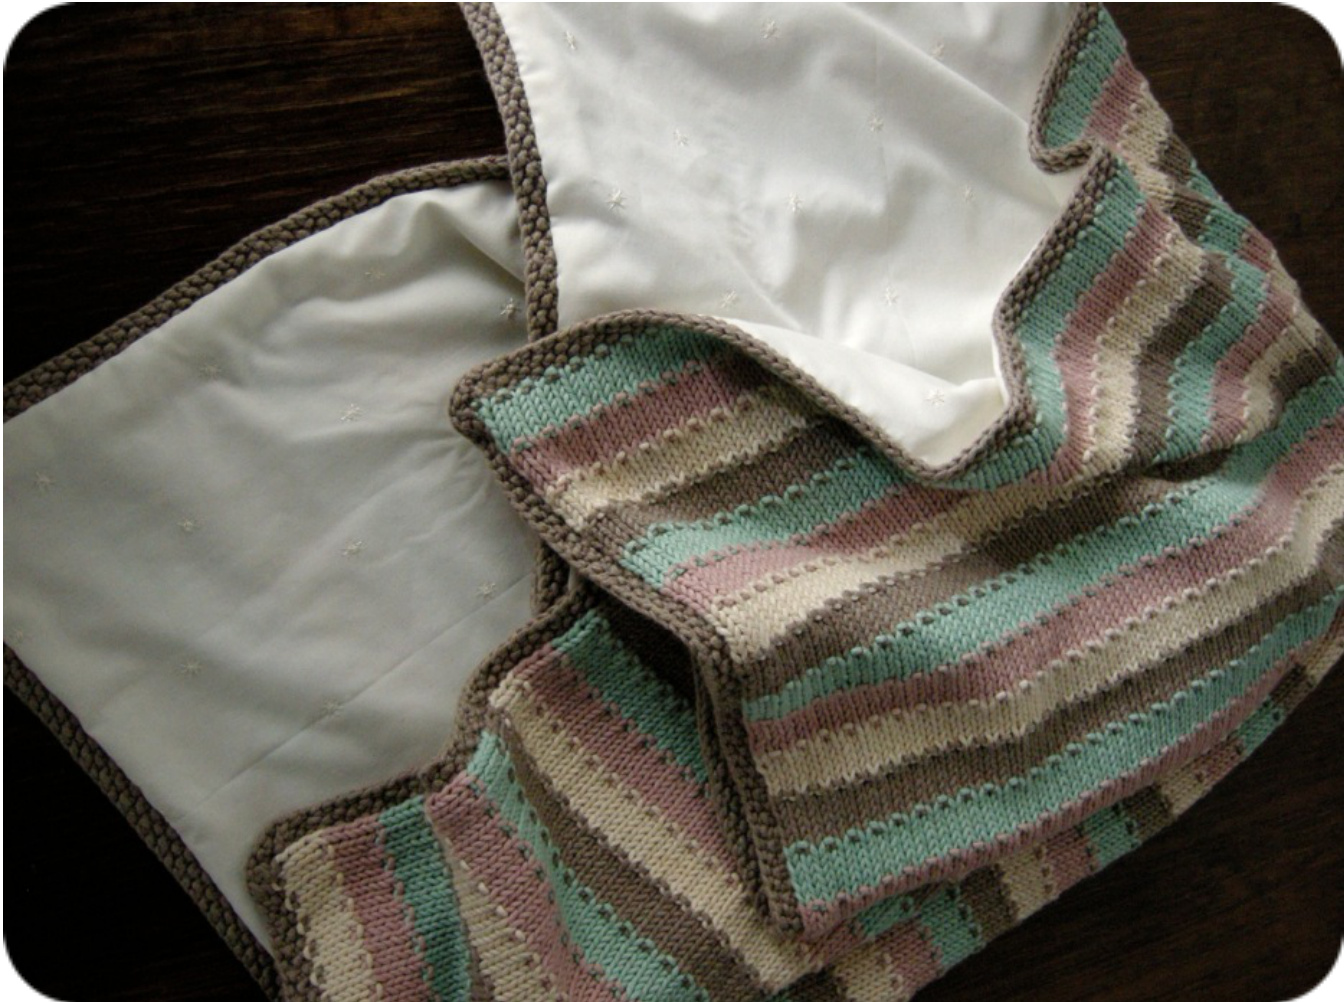
Backing your blanket
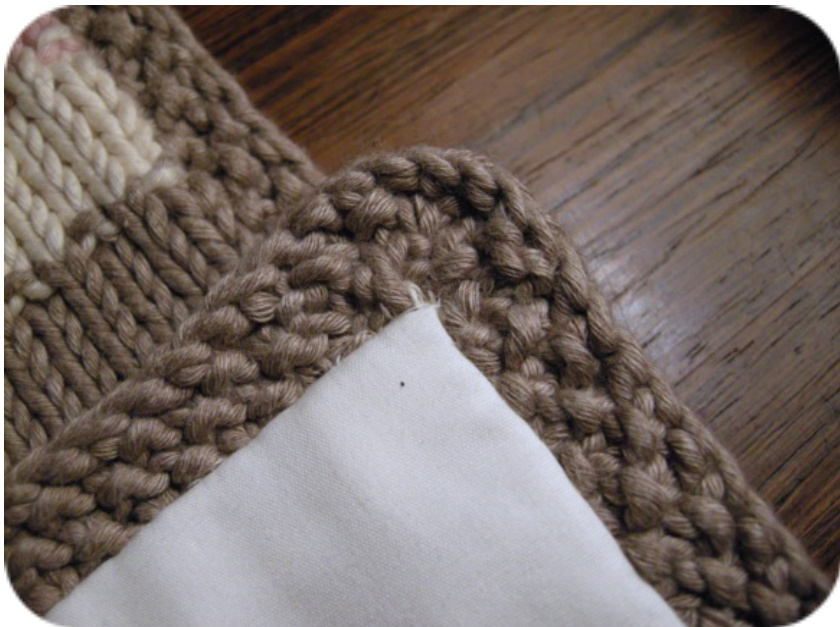
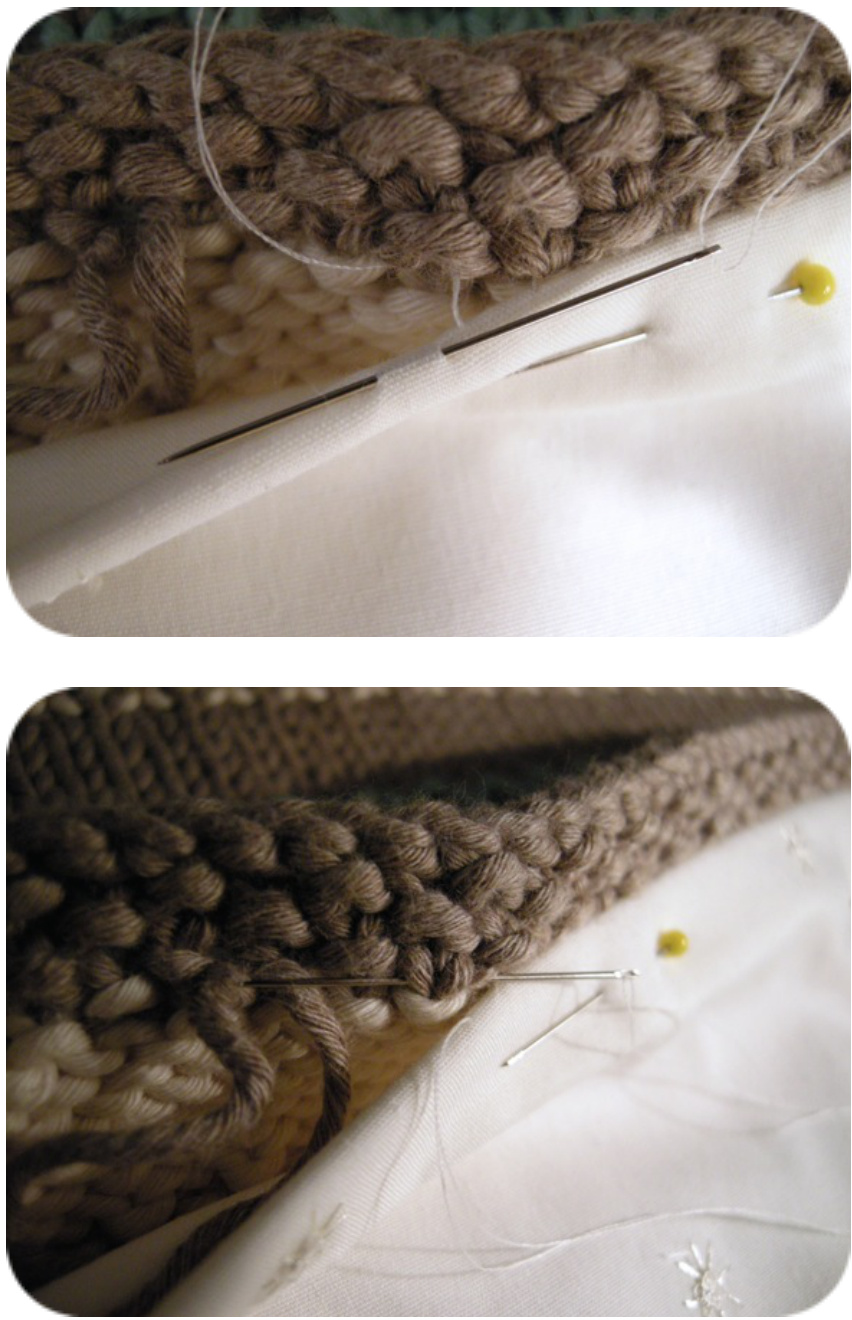
If you want, you can back your blanket. This also means you won't have to weave in all those loose lengths of thread still hanging. If you do decide to back it, tying your ends with a reef knot, or weaving them in for just a little bit, will suffice. Be sure to wash and iron your lining fabric and block your knitting before you start. This gets most of the shrinking that will inevitably happen out of the way. It will also make the stitches of your work nice and even. Blocking basically means you lay your blanket on a flat surface nice and evenly and let it dry. Cut your lining fabric with a 2 inch seam allowance to fit the blanket. Turn over the edge twice and pin across the border of the blanket. Double check if the sides of your blanket are even in length and the corners make a 90° angle. Probably the best way to seam fabric to knits is by using the overcast stitch because it stretches with the knitting. I used a blind stitch (see photo's) because I didn't want the seam tobevisible.
Pattern Text & Photography Copyright @ 2014 Sarinah Leezer Pattern is for personal use only. All rights reserved.