Arbor Shawlette by Kay Jean
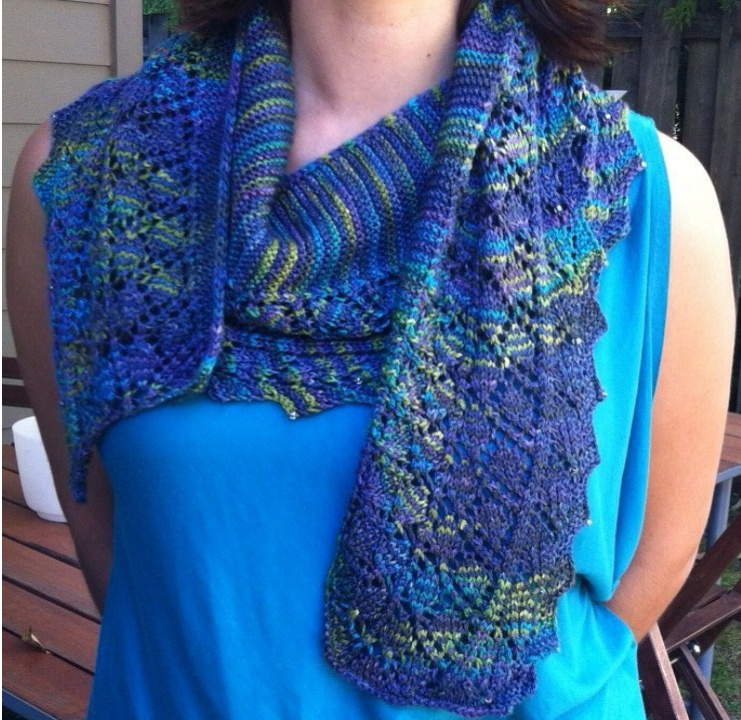
This long, crescent-shaped shawlette was designed in honour of Inés V. and was inspired by the lush greenness of Portland, Oregon. It uses lace patterns adapted from Barbara Walker and techniques learned in Sivia Harding's Sideways Lace class. Yarn: Sea Sock by Handmaiden Fine Yarns or approx. 400 yards fingering weight Needles: 3.75 mm (US 5) 2 stitch markers Size 6/0 beads (approx. 50) Approx. finished dimensions: length 60", width 7"(ends) to 10" (middle) The shawlette is knit with a rolled edge, a section of garter stitch that gradually increases (and then decreases) in width to form the crescent shape, and a lace edging. If possible, I recommend weighing your skein before you start so you know how much to increase before starting to decrease. (Start to decrease when you have slightly more than half of your skein left - don't weigh the knitted part because the needles and beads will add extra weight.) Gauge is not terribly important. The stitch count will not remain constant within a repeat, but it always works itself out by the end of a 10-row repeat. Beads: For the example shown, I beaded as follows - 1" repeat, bead only on bind off 4 at beginning of Row 10. 2"d repeat, bead only above double decrease in row 8. Continue this 2- repeat pattern of beading. For the bind off 4, place a bead on the first loop, slip the loop pw, knit the next st, pass the first loop (with the bead) over. Continue knitting/passing stitches over until 4 stitches have been bound off.
Abbreviations:
sl 1pw: slip 1 stitch purlways, with yarn in front pm : place marker k1f+b: knit into the front and back of the stitch sl 1-k2tog-psso: slip 1 stitch knitways, knit 2 together, pass slipped stitch over s2kp2: slip 2 stitches together knitways, knit 1, pass two slipped stitches over kb1: knit into the back of the stitch Note about the chart: The garter stitch increase/decrease section is represented by the grey shaded area. Place your markers on either side of the grey area. Follow the directions for increasing/decreasing below, and this grey shaded area will get wider/narrower by one stitch with each pattern repeat. Cast on 40 sts. Work chart or follow written instructions as follows: Row 1(RS): k1, sl 1pw, kl, pm, k1f+b, pm, sl 1-k2tog-psso, yo, k2tog, yo, k1, yo, ssk, k1, k2tog, yo, s2kp2, yo, ssk, k1, k2tog, yo, kl, yo, ssk, yo, k3tog, kl, yo, kb1, k2tog, pl, ssk, kb1, yo, k3. Row 2: sl 1pw, k2, p3, k1, p to marker, k to next marker, sl 1pw, k1, sl 1pw. Row 3: k1, sl 1pw, k1, k to next marker, k1, k2tog, yo, k3, {yo, s2kp2} 3 times, yo, k3, y0, ssk, k2, yo, kb1, k2tog, pl, ssk, kb1, yo, k3. Row 4: sl 1pw, k2, p3, k1, p to marker, k to next marker, sl 1pw, k1, sl 1pw. Row 5: k1, sl 1pw, k1, k to next marker, ssk, yo, k5, yo, {kl, yo} 5 times, k5, yo, k2tog, k1 yo, kb1, yo, k2tog, pl, ssk, yo, k4. Row 6: sl 1 pw, k3, p2, k1, p to marker, k to next marker, sl 1 pw, k1, sl 1 pw. Row 7: k1, sl 1pw, k1, k to next marker, ssk, yo, ssk, k1, {k2tog, yo} 2 times, k3, yo, k1, yo, k3, {yo, sk} 2 times, k1, k2tog, yo, k2tog, kl, yo, kb1, kl, kb1, yo, sl 1-k2tog-psso, yo, k5. Row 8: sl 1pw, k4, p1, place bead (or just purl, if not placing bead), p to marker, k to next marker, sl 1pw, k1, sl 1 pw. Row 9: k1, sl 1pw, k1, k to next marker, ssk, yo, s2kp2, yo, k2tog, yo, k5, yo k1, yo, k5, yo ssk, y0, s2kp2, yo, k2tog, kl, yo, kb1, k3, kb1, yo, k7. Row 10: (Place bead) Bind off 4: sl 1pw, {k1, psso}4 times, k2, p to marker, k to next marker, sl 1pw, kl, sl 1 pw.
Increasing/decreasing
On Row 1 of next and all following increasing repeats, k1, sl 1pw, k1, knit to within one stitch of second marker, k1f+b. All other instructions remain the same. Continue in this manner, always increasing one stitch every 10 rows by knitting into front and back of the stitch just before the marker in Row 1 of the repeat. When you have reached slightly less than the middle point of the finished length, do one repeat without increasing, then on the next repeat, begin to decrease by k2tog the two stitches before the second marker. All increases and decreases are done in Row 1 of the repeat, which is a RS row. For the example shown, I did 24 patterns increasing, one neither increasing nor decreasing, then 23 decreasing. After completing Row 10 of your final repeat, bind off all stitches.


