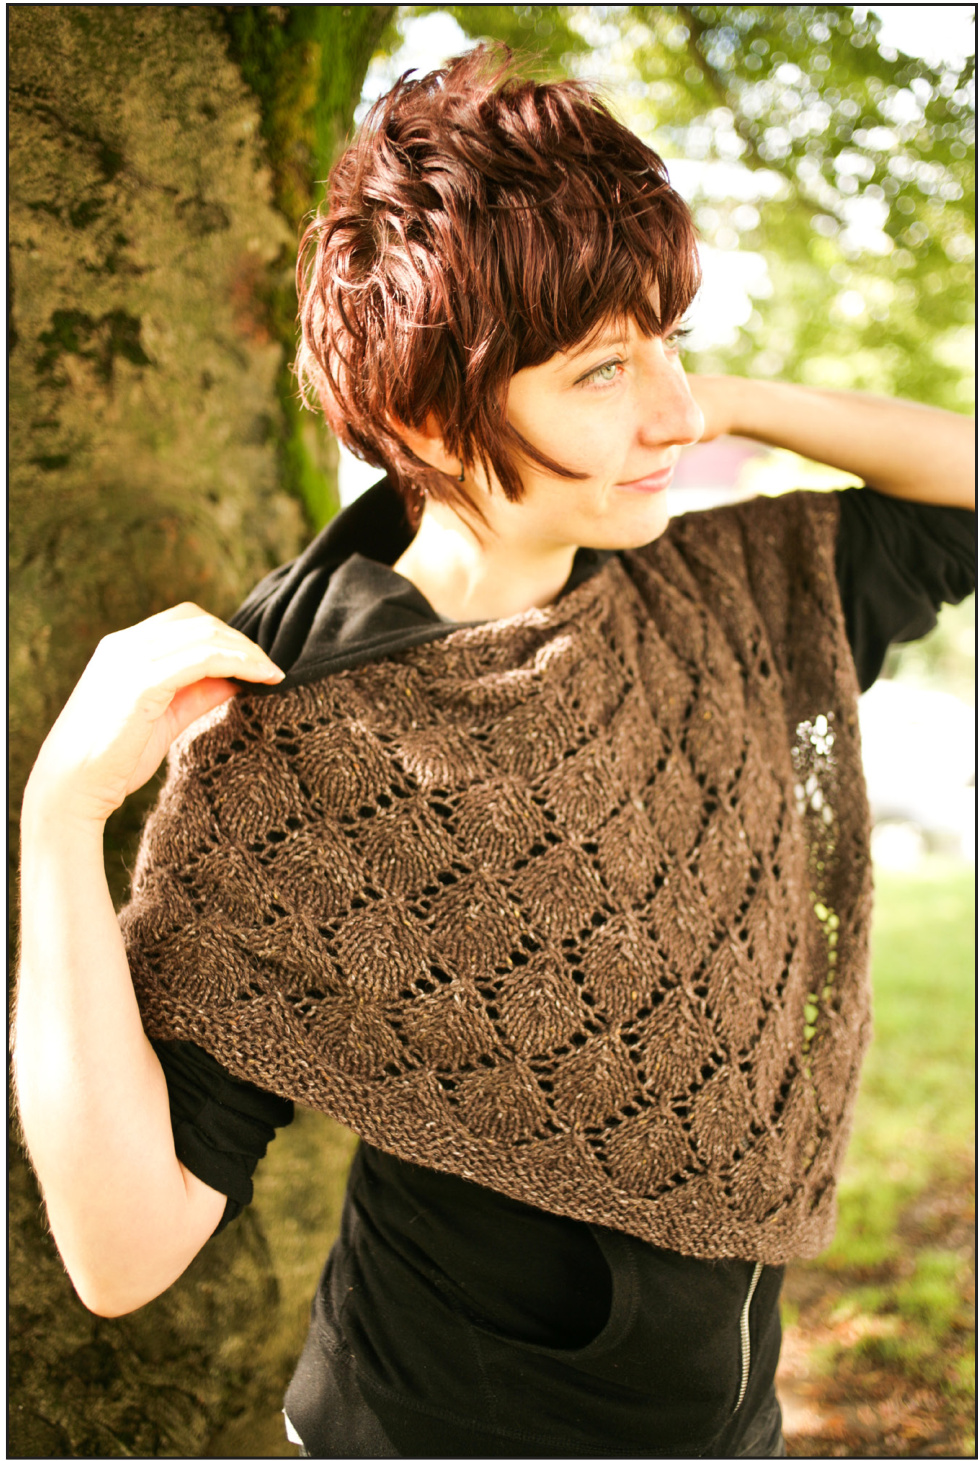
The Heartwood Cape
(A Lonely Tree Shawl inspired cape)
The Lonely Tree is a year old!!
My goodness! A year old! This lovely pattern has been on the top five front pages of hot right now on ravelry for almost a year. I can't believe it's success! I want to thank everyone who has supported me and the lonely tree throughout the past 12 months! The Heartwood Cape uses the same leafy lace pattern as the Lonely Tree, (and the same yarn) but is constructed completely differently! And it's a cape instead of a shawl. Hope you enjoy! The reason why I came up with, a cape version of The Lonely Tree is because I ride a SCooter now!' And shawls just fly off out of me! (I learned that the hard way) This cape stays on at high' speeds, keeps me warm and looks great!
Materials:
4 balls of Grignasco Loden or 440 meters (480 yards) of worsted weight yarn 5.5mm needles.
Size:
One size fits most. It is also pretty easily modifyable. Make it deeper by just kniting more repeats of the lace'chart. Or add more repeats by adding more stitches in batches of 1o!
Gauge:
11 stitches and 16 rows = 4 inches in In leaf pattern blocked Or: One and a half of the leaf pattern measured along the middle of the leaf pattern in either direction = 4 inches blocked A general note on gauge is that this is calling for quite a loose gauge. Tight knitters will need to step up their needle size!
Measurements of garment:
25 inches at the deepest point (from neck to triangle point) 32 inches from shoulder to shoulder (measured flat, seamed up and folded) so that would be approximately 64 inches as an ungrafted rectangle.
Getting started:
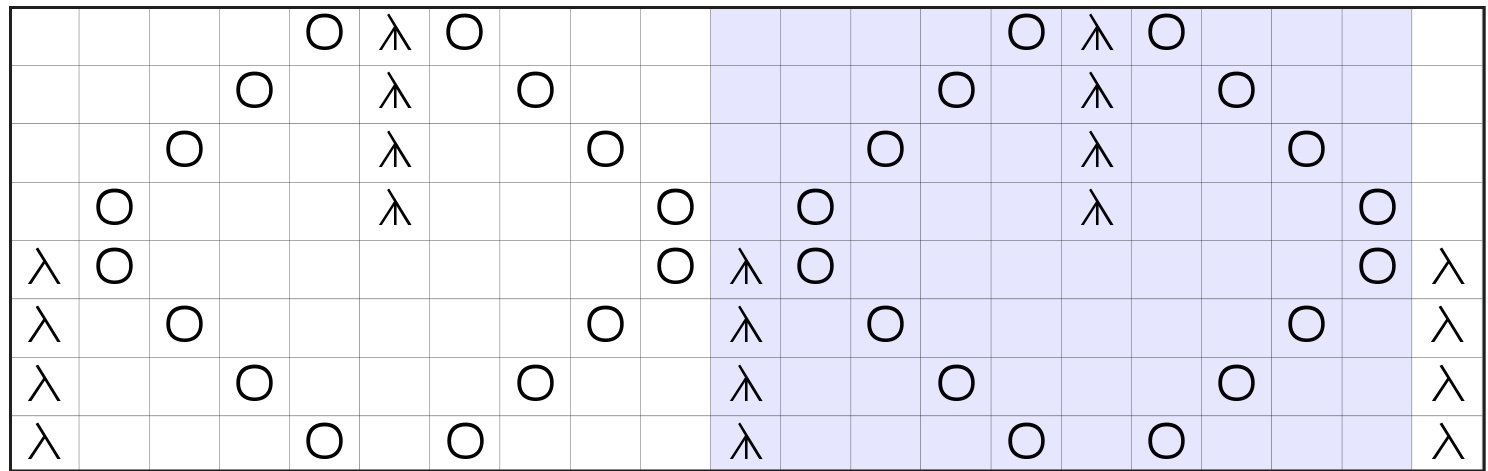
Cast on 151 stitches knit 9 rows of garter (so knit every row for 9 rows) Already it's time to start the chart! Here's the chart! The shaded parts are meant to be repeated over and over again until the last 1o stitches, then you can follow along with the rest of the chart. The chart is meant to be read from right to left on every row. Each Right Side row is worked like this K5, knit relevant row of chart, K5. That leaves a 5 stitch border on either side of the chart. Wrong side rows aren't charted. Every wrong side row goes K5, purl to last 3 stitches, k5


Grafting
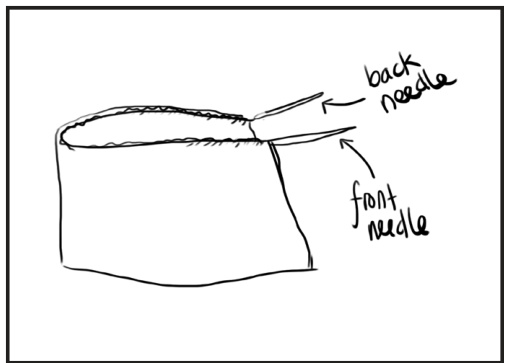
Alright, so you're going to knit that chart until it measures 2oish inches deep. This is the part where you can make it a deeper poncho, for folks with bigger shoulders, Or even if you just want a really deep cape. You'll just keep repeating these charts until you have your desired size of cape. d length, make sure you're on a Ws row to start the grafting To start the grafting you will fold your project in half (with the Rs facing,you) with both the needles pointing towards your right. The yarn attached to your ball will be on the back needle (the one farthest away from you.
More Grafting If you aren't super comfortable with grafting I would reccommend to watch some videos, and maybe practice on something that isn't this project, I'm going to write the instructions out here, but this isn't meant to be a tutorial, more of just instructions for folks who are already familiar with the concept of grafting. If you aren't super Comfortable it's worth going online to find some tutorials - or even' check out your LYS for classes. Okay. graft time! Youll be grafting in.garter and then grafting in stockinette after that! Don't be scared!
The first three stitches on both needles need to be grafted together like this:
Put your Darning Needle (known from now on as DN) as if to purl into the first stitch on, your front needle_ and pull the yarn through while keeping the stitch still on the needle, then put your DN as if to purl through your first stitch on your back needle, and pull the yarn through, while keep the stitch on the' needle. Then, on your front needle, put your DN through as if to knit and pull that stitch off. then put your DN as if to purl, an pull the yarn through without dropping that stitch off. Then, on your back needle, put your DN'through as if to knit and pull that stitch off. then put your DN as if to purl into the next stitch, and pull your yarn through without dropping that stitch off. Repeat those two steps until all three of the stitches on both the needles are grafted Of. Pg。3
Next: Grafting in stockinette.
A quick note: it's important that you concentrate on this one, just becuase it's easy to lose count, and it's important to graft the right stitches together or the lace won't'line Up. On the front needle, put your DN (remember that means Darning Needle) in as-if-toknit and pull that stitch off, then put your DN in the stitch behind that as-if-to-purl, and keep that stitch on your needle. On the back needle, put your DN in as-if-to-purl and pull it off then put your DN as-ifto-knit and pull it off. You're going to repeat those two steps until you have reached the amount of grafting that you desired. The hole you have leftover is for your head (I imagine that you'd know that by now but I thought I would just clarify the construction here in case you missed something along the way). My head-hole is about 12 inches accross. You can make yours bigger or smaller depending on how big or small you want it to be. Alright, so you've done your grafting, and you have some live stitches on your needle still. if you wanted to, you could just keep on knitting and make yourself a happy little cowl neck for your cape, but if you want it to look like how it does in the photos, then you're just going to be casting'that off. I used a bigger needle to make sure my cast Off edge wasn't too tight. Then I wove in my ends and wore it! Thanks for knitting this!


