freshstitches
animals made to be cuddled
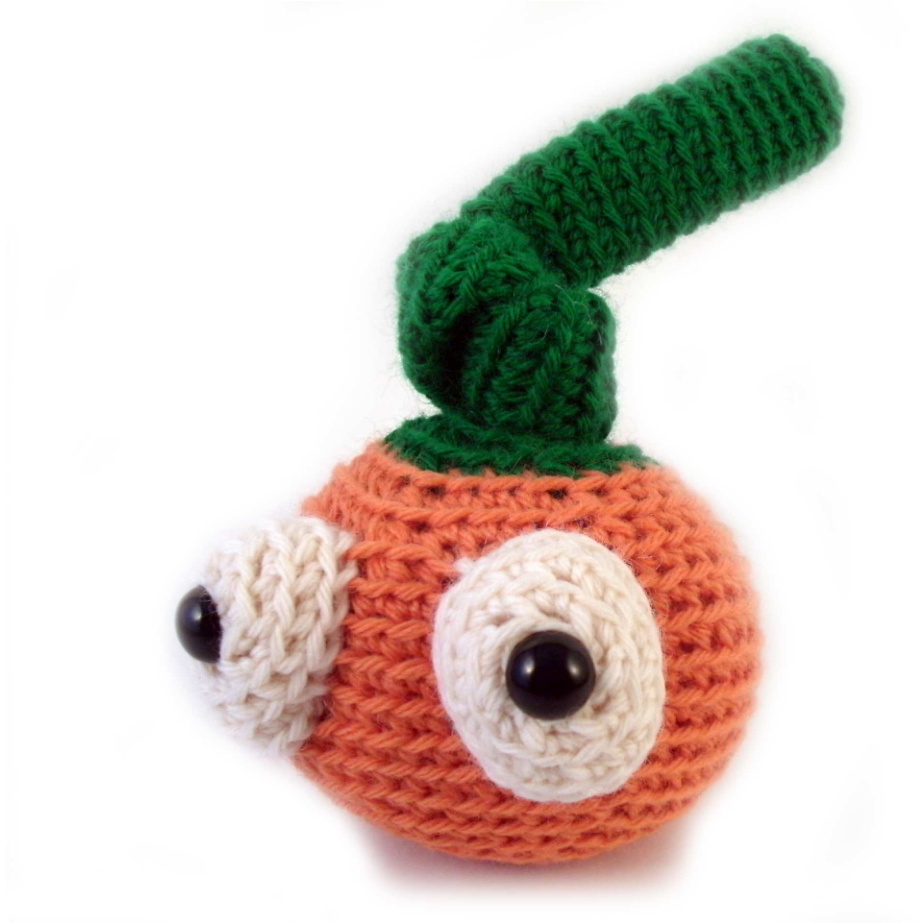
Jack, the tiny pumpkin
designed by: Stacey Trock Size: 3" tall body (10" long vine) DOB: October, 2011 For detailed instructions, articles and more patterns, visit: www.freshstitches.com
Abbreviations
Materials
ch: chain sc: single crochet sc2tog: single crochet 2 stitches together st(s): stitch(es) Size H crochet hook tapestry needle 12mm black animal eyes polyester stuffing
Yarn
This pattern can be used with any weight yarn! Just use the hook receommended on the ball band, and adjust as needed (see 'gauge notes'). For a bigger, super-cuddly animal, try a bulky weight yarn! Just keep in mind that you'll use more yardage than recommended. The sample is crocheted in worsted weight yarn (Ella Rae Classic, 100% wool), and all yardage/hook recommendations are calculated based on the sample. To complete this pattern, you'll need: MC- Orange (Ella Rae Classic color # 27), 30 yards SC- Green (Ella Rae Classic color # 75), 25 yards AC- White (Ella Rae Classic color # 01), 10 yards Stuffed animals are a great time to experiement with awesome yarns in fun colors! Some of our favorite yarns are: Ella Rae Classic Wool (100% wool), Spud and Chloe Sweater (50% wool, 50% cotton), Blue Sky Alpacas Worsted Cotton (100% Organic Cotton) and Plymouth Galway (100% wool, available in worsted and chunky). Give them a try!
Directions
Gauge Notes
This pattern doesn't specify a gauge. It's a stuffed animal, and you don't need to be too picky about exact sizing. The most important thing is that you use a hook size that creates a nice looking fabric for your yarn. If you use the recommended hook size, and your fabric looks very loose (so that stuffing would show through), then you will want to use a smaller hook. Other than that, no measuring required! 2008-2011 FreshStitches. All rights reserved. This pattern and items made from this pattern are for personal use only, and may not be distributed or sold without written consent.
Stitch into the back
All stitches in the round are into the back loop, unless otherwise directed. Look at picture (a), and see how the arrow points to the back loop? You will stitch into this loop, as pictured in (b). Stitching into the back loop creates ridges on the right side of the piece. For rows, you will stitch into the front loop, unless otherwise directed. You can stitch into both loops if you desire, but this will change the look of the final product.
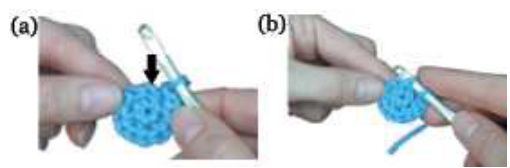
Want to see crocheting through the back loop in action? Watch our video on crocheting through the back loop!
Starting out: the sloppy slip knot
Most pieces in this pattern (as they are based on circles) begin with stitching six times into one loop. We recommend the 'slopply slip knot' to avoid creating a hole in the center (a). To do this, twist the yarn around the hook to begin, and crochet as directed. Once you have completed your first round, pull on the tail, while holding the loop you have created (b). The loop will end up tighter, as pictured in (c).
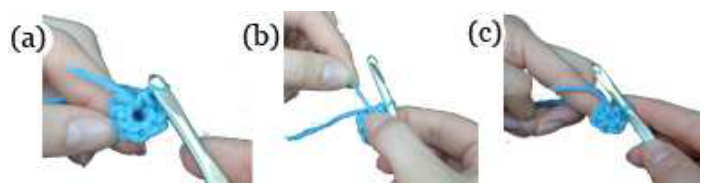
Want to see the sloppy slip knot in action? Watch our video on the sloppy slip knot!
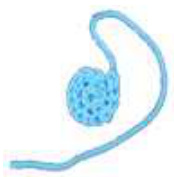
Fasten off with long tail
What does this mean? It just means that when you are ending a piece, to leave a lot (about 6-9 inches) of extra yarn, as pictured. This will be used to attach this piece to another piece. To attach your piece to another, just thread the long tail through a tapestry needle, and stitch to the second piece.
@2008-2011 FreshStitches. All rights reserved. This pattern and items made from this pattern are for personal use only, and may not be distributed or sold without written consent.
Attaching Parts Together
In this pattern, you will be instructed to attach two pieces together, usually attaching a smaller part (such as a leg) onto a larger part (like a body). The small part will have a row of stitches at the opening, and a long tail. Thread a tapestry needle with the long tail. Put the small part where it should go along the body, and pick up a stitch on the body. Keep going (one stich on small part, one stitch on the body), until you have fully attached the part. When you are done, tie a knot to fasten off. Use the tapestry needle to pull the knot inside, so you don't have any loose ends sticking out.
The Pattern
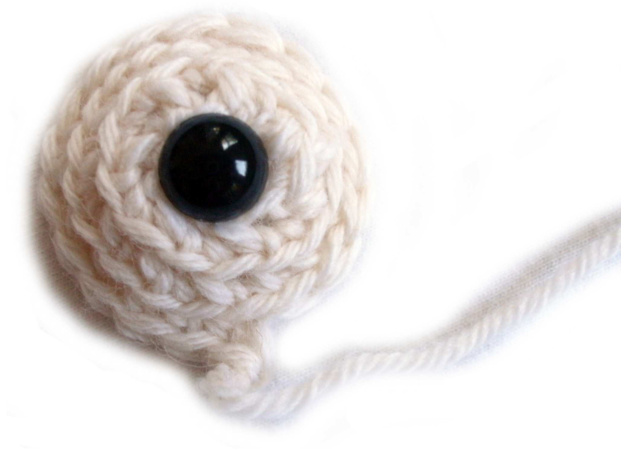
Eyes
Make2 With AC, ch 2 Round 1: sc 6 times in 2nd ch from hook (6) Round 2: sc twice in each st (12) Round 3: \* sc twice in next st, sc in next st. Repeat from \* 5 times (18) Round 4: sc in each st (18) Fasten off with long tail. Fasten plastic eyes onto the crocheted eyes. To do so, insert post between desired stitches, and press washer onto back post to secure.The pupil should be fastened to the center of the crocheted eye.
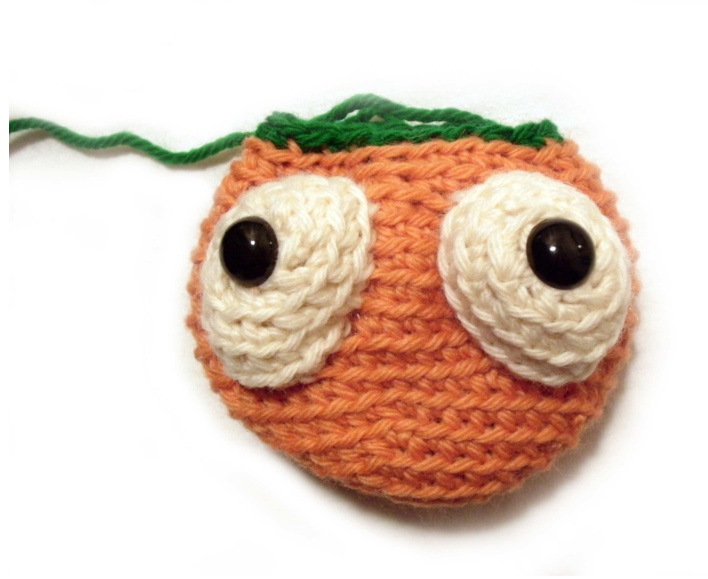
Body
With MC, ch 2 Round 1: sc 6 times in 2nd ch from hook (6) @2008-2011 FreshStitches. All rights reserved. This pattern and items made from this pattern are for personal use only, and may not be distributed or sold without written consent. Round 2: sc twice in each st (12) Round 3: \* sc twice in next st, sc in next st. Repeat from \* 5 times (18) Round 4: \* sc twice in next st, sc in next 2 sts. Repeat from \* 5 times (24) Round 5: \* sc twice in next st, sc in next 3 sts. Repeat from \* 5 times (30) Round 6: \* sc twice in next st, sc in next 4 sts. Repeat from \* 5 times (36) Round 7: \* sc twice in next st, sc in next 5 sts. Repeat from \* 5 times (42) Rounds 8-13: sc in each st (42) Round 14: \* sc2tog, sc in next 5 sts. Repeat from \* 5 times (36) Round 15: \* sc2tog, sc in next 4 sts. Repeat from \* 5 times (30) Round 16: \* sc2tog, sc in next 3 sts. Repeat from \* 5 times (24) Round 17: With SC, \* sc2tog, sc in next 2 sts. Repeat from \* 5 times (18) Remove hook, but do not fasten off.
Stuff body. Continue crocheting... Round 18: \* sc2tog, sc in next st. Repeat from \* 5 times (12) Rounds 19-54 (or until vine is about 10" long): sc in each st (12) Round 55: \*sc2tog. Repeat from \* 5 times (6) Round 56: sc next and 4th sts together (1) Fasten off, pulling knot to center. @2008-2011 FreshStitches. All rights reserved. This pattern and items made from this pattern are for personal use only, and may not be distributed or sold without written consent. Congrats! You now have an adorable pumpkin!
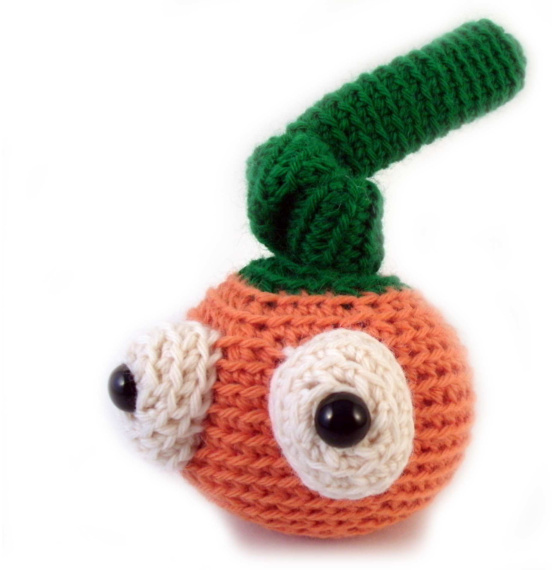
Style his vine any way you can think of! Congrats on finishing an awesome stuffed animal! Now it's time to show it off.. share your photos on our Facebook Page! @2008-2011 FreshStitches. All rights reserved. This pattern and items made from this pattern are for personal use only, and may not be distributed or sold without written consent.


