Fiddlehead Ferne
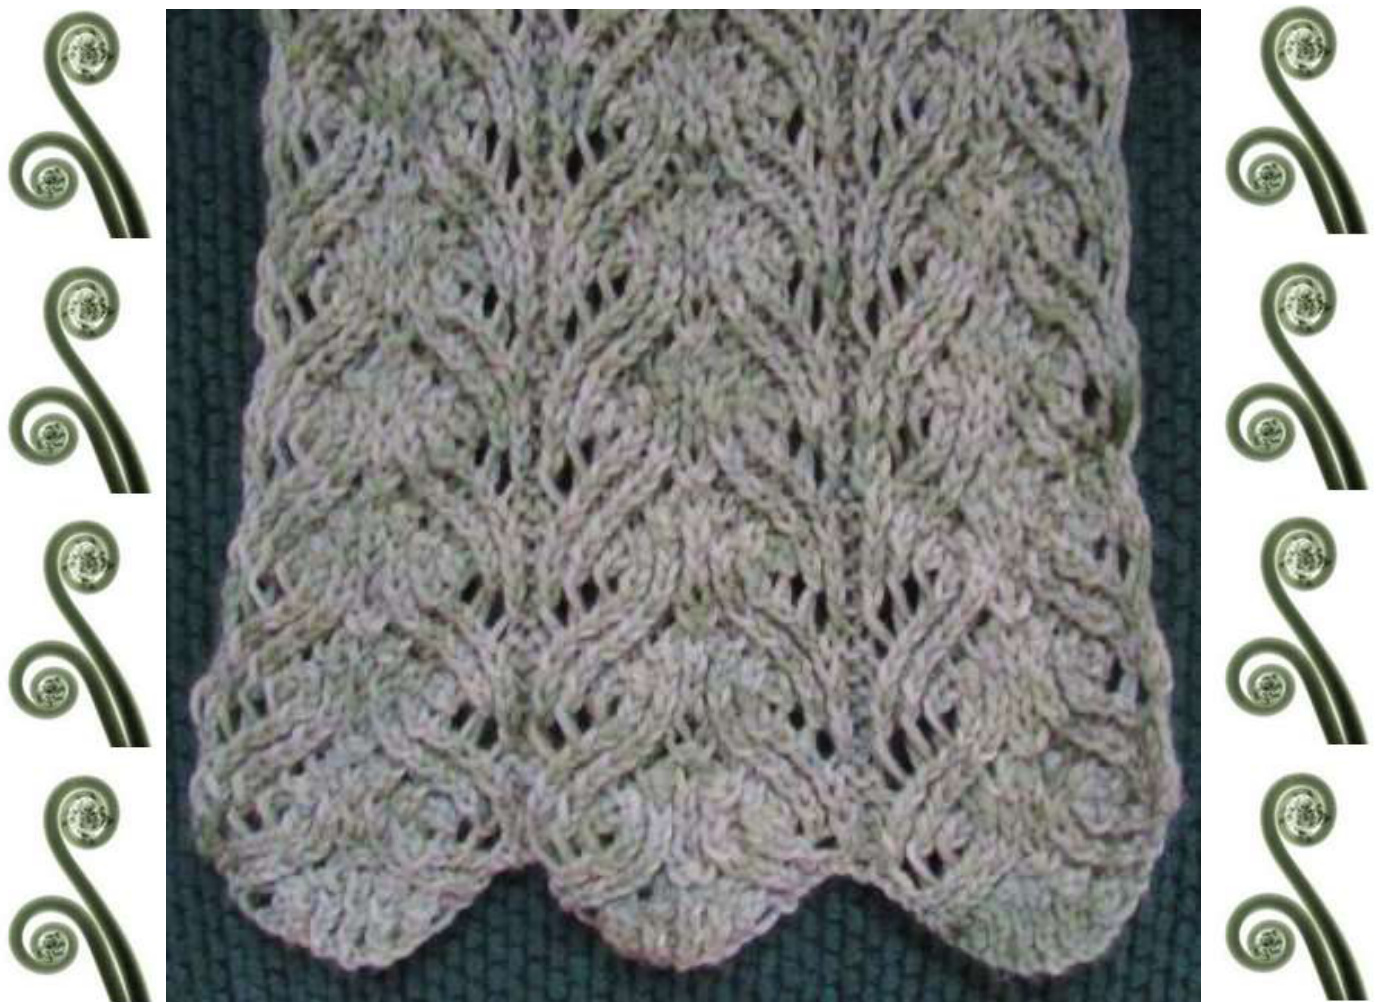
This delicate, light lace pattern reminds me of fiddlehead fern. It works up in layers of raised swirls that are equally beautiful on the front and back of the scarf. I used lightweight wool on the cover scarf, but you can use any fiber you like. Want a lighter, summer accessory? Use linen or cotton. Even silk blends will look fantastic here. Once blocked, the piece flows and swirls, naturally and beautifully. Wear it as shown, or tie it in the front, or shape it any other way you desire. You can knit it as long as or as short as you'd like. I employ a non-conventioanl form of charting, as I explain in the pattern. This chart is more intuitive, more straightforward and, candidly, easier to follow than conventional charts. But written instructions are included for chart-shy knitters! Size: TBD by knitter. Scarf measures approx. 6" x 60" after blocking. Materials: One 100g skein Knit Picks Stroll Fingering (462 yds) Colorway: Cucumber Tonal 75% Superwash Merino and 25% Nylon) #3 (Us) needle 2 stitch markers Gauge: Not critical in this project, and may vary considerably from knitter to knitter, depending on yarn used and needle size. Abbreviations: K - knit P-purl TBL - knit stitch through the back loop YO - yarn over SSK - slip 1 stitch knit-wise twice, insert left needle into front of these two stitches from left, and k2tog. K2tog - knit 2 sts together PSSO - pass slipped stitch off General Instructions: C0 75 stitches, placing a stitch marker after the 25th st and another after the 50th st. Then, follow the written instructions or chart below, repeating the 25-st pattern 3 times across row. Repeat the 6-row design until the desired length is reached, ending with row 6. BO loosely. NOTE: When the pattern calls for a yo after a purl st and before a knit stitch, simply keep the yarn in front where it is. If you need to yo before a purl st, you must wrap the yarn all the way around the needle.
Written Instructions:
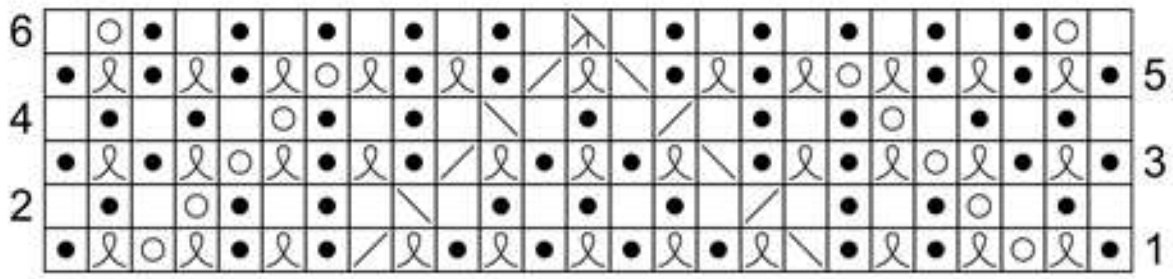
Row 1: P1, k-tbl, yo, [k-tbl, p1] twice, ssk, k-tbl, [p1, k-tbl] 4 times, k2tog, [p1, k-tbl] twice, yo, k-tbl, p1. Row 2: P1, kl, p1, yo, [k1, p1] twice, ssp, p1, [k1, p1] 3 times, p2tog, [p1, k1] twice, yo, p1, k1, p1. Row 3: [P1, k-tbl] twice, yo, [k-tbl, pl] twice, ssk, k-tbl, [p1, k-tbl] twice, k2tog, [p1, k-tbl] twice, yo, [k-tbl, p1] twice. Row 4: P1, [k1, p1] twice, yo, [k1, p1] twice, ssp, p1, k1, pl, p2tog, [p1, k1] twice, yo, p1, [k1, p1] twice. Row 5: [P1, k-tbl] 3 times, yo, [k-tbl, p1] twice, ssk, k-tbl, k2tog, [p1, k-tbl] twice, yo, [k-tbl, p1] 3 times. Row 6: P1, yo, [k1, p1] 5 times, sssp\*, [p1, k1] 5 times, yo, p1. \* sssp- sl 1 st, k2tog, then pass slipped st off Finishing: Weave in ends. Soak and block flat to desired shape. A word about the chart: Traditionally, lace charts have been written to be a symbolic representation of what the knitted piece should look like as seen from the front side. This means that, if you were knitting back and forth, you'd have to create a st on the back side that would result in the st that appears on the chart from the front side. (You are, no doubt, familiar with the blank square meaning k on the rs and p on the ws). Charts were written this way so the knitter could visualize what the design would look like when knitted, but it necessitated some fancy stitch-translating in the knitter's brain on the backside rows. We no longer need to have charts represent the design. We have digital cameras and can show actual swatches of the piece, so we can know what it looks like without having to interpret chart symbols. This makes life easier and eliminates that mental translation step. You simply notice which side of the chart a particular row is numbered, and you begin working from that side across, knitting the st the symbol represents. If you see a blank square, you always knit the st (see legend), and if you see a black dot in the square, you always purl that st, regardless of the direction from which you read the chart. Easy! And, you can always use the written instructions if you have chart allergies.
Legend:
Knit Purl Yarn Over K2tog SSK Knit st through back loop Slip 1, K2tog, PSSO (pass slipped st off) Copyright @ 2015 by Deborah Tomasello All rights reserved. This pattern or any portion thereof may not be reproduced or used in any manner whatsoever without the express written permission of the publisher. WARNING: Giving or accepting a free copy ofthis pattern, without permission of the designer, is stealing.


