oolly Thoughts
INPURSUIT OFCRAFTY MATHEMATICS
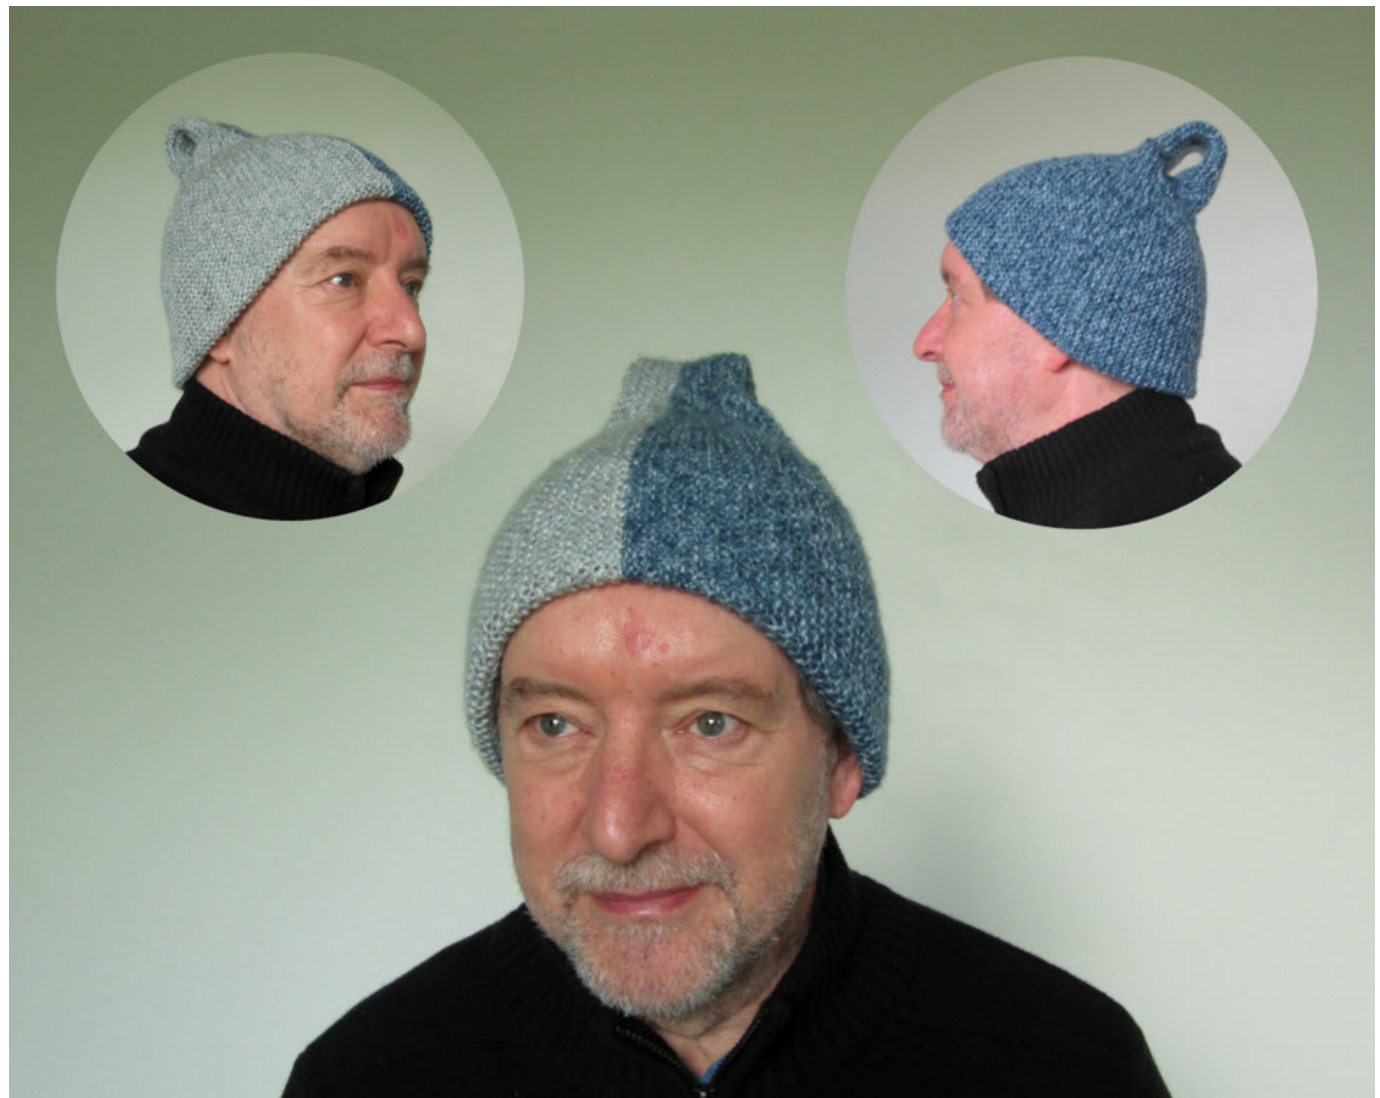
Conjoined Mobius Hat
A Klein bottle hat made from two Mobius strips designed by Pat Ashforth & StevePlummer
The Mobius Band
A Mobius Band (or Mobius Strip) has only one side and one edge. You can make one by taking a strip of paper, putting half a twist in it and sticking the ends together. You can prove that it has only one side by drawing a line along the centre of the strip until the line meets up with where you started. You will find that the line is on both sides of the original strip of paper.

August Ferdinand Mobius published a description of a Mobius band in 1865 and he explained its special properties. However, Johann Benedict Listing published a paper in 1861 (four years before Mobius) where he described the properties of the Mobius band. Both studied in Germany under Carl Friedrich Gauss, who was the greatest mathematician of his day, but they were not there at the same time. It is not really known why the name of Mobius was attached to the discoveries. Some scientists argue that the bands should be named Listing-Mobius. Although Mobius is remembered as a mathematician, his primary work was in astronomy. Listing studied many subjects and, amongst other things, made several discoveries about the human eye. He also invented several scientific terms, such as micron (one-millionth of a metre). In 1836 he gave the name topology to the study of objects such as the Mobius Band. This is still the name we use today but it didn't come into common usage until the twentieth century. The shape itself probably dates back to ancient times. The snake or serpent eating its own tail was common in some cultures and some of the drawings are thought to show a band with one surface rather than a circle. Mobius Bands have practical uses in conveyor belts and for tapes that can be recorded on both sides. A flattened Mobius Band is also very familiar as the universal recycling symbol. They are also well-known to magicians as Afghan Bands. This name seems to date from 1904 but the reason is unclear. Two Mobius Bands can be joined to make a Klein Bottle.
TheKlein Bottle
The Klein Bottle was first described in 1882 by the German mathematician Felix Klein. It is likely that he actually called it a Klein Surface and that the German was later mis-translated to become Klein Bottle. Whatever he intended, calling it a bottle makes this bewildering object more approachable and it certainly does resemble a bottle in some ways. Technically, a Klein bottle is a closed non-orientable surface that has no inside or outside
The Hat
The hat is made from two strangely-shaped Mobius Bands which are stitched together to create a Klein Bottle.
Conjoined Mobius Hat
Size
The hat stretches and is suitable for most adult heads.
Needles
Use the needles you would normally use for your chosen yarn (Probably 3.75 mm or 4.0 mm). The hat can be worked on straight needles though you may prefer the flexibility of a circular needle as the shapes curve.
Abbreviation
wt = wrap and turn = slip the next stitch purlwise, turn the work, take the yarn to the back, slip the next stitch purlwise, continue knitting.
Yarn
135 metres (150 yards) DK in each of two colours The pieces are constructed using short rows and are then stitched together with some of the stitching remaining visible. Yarns that are flecked or slightly textured help to hide these elements of the construction.
Markers
Two stitch markers are required.
Tension
20 stitches to 10 cm (4") measured across garter stitch.
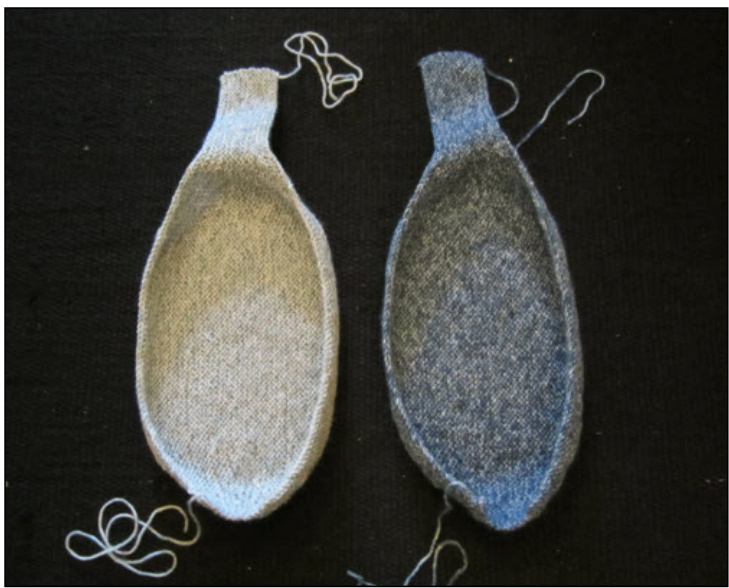
Method (Make 2)
Cast on 100 stitches. (See below for note about cast-on.) Next row: Knit, placing marker 1 after the 43rd stitch and marker 2 after the 83rd stitch. Row 1: Knit to marker 1, k15, wt Row 2: Knit to marker 2, k15, wt Row 3: Knit to marker 1, k9, wt Row 4: Knit to marker 2, k9, wt Row 5: Knit to marker 1, k3, wt Row 6: Knit to marker 2, k3, wt Row 7: Knit to end Row 8: Knit to end Row 9: Knit to marker 1, k12, wt Row 10: Knit to marker 2, k12, wt Row 11: Knit to marker 1, k6, wt Row 12: Knit to marker 2, k6, wt Row 13: Knit to marker 1, wt Row 14: Knit to marker 2, wt Row 15: Knit to end Row 16: Knit to end

Repeat these 16 rows twice more, casting off loosely on the last row. Make a second piece exactly the same. Note about cast-on: Long tail cast-on probably gives the best edge but other cast-ons can be used. A temporary cast-on would allow for grafting the two pieces together later but this makes a very complex join so is probably best avoided.
Notes:
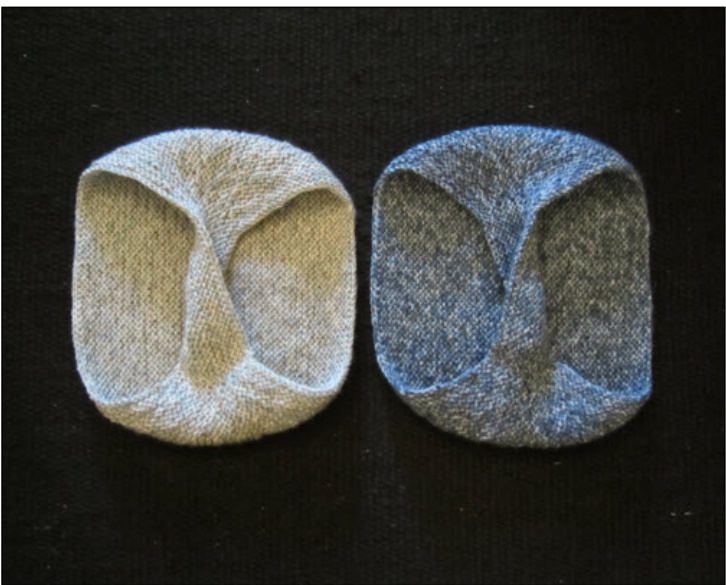
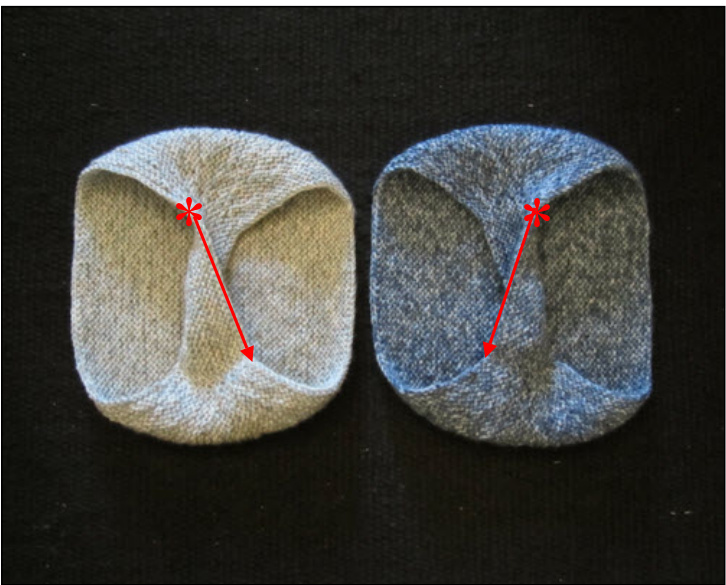
When you have finished you may see either side of the stitching so you should aim to be as neat as possible on both sides. Darn in any ends as you go, as invisibly as you can. Whilst stitching you may need to turn the piece in many different directions but it should always be obvious which parts have to go together. It may be helpful to place markers on each piece so that you can line them up correctly. You will need markers on “both edges’ of both pieces. Now comes the tricky bit! The two pieces are exactly alike. The long piece at the top will form the handle. On each piece, fold over the handle, give it a half twist and stitch to create a Mobius Band. The twists must be in opposite directions . The pieces will be mirror images. Bring the two pieces together about 1cm below the base of the handle, as shown by the stars. Oversew (whip stitch) the pieces together in the direction shown by the arrows. Keep stitching the two pieces together until you have a small hole (about 6 cm) left unstitched. Fasten off.
Your hat is hiding in there somewhere but it is not possible to tell you how to find it because you could have turned it many times while you have been stitching. Unfortunately, it is all down to trial and error. You may need to pull the whole hat through the narrow handle .. or you may not. When you have it in the correct position the hat will be a double layer and both layers will be roughly head shape. From the outside the inside layer will not be as rounded as the outside because the handle distorts it. When you look inside the hat the hollow handle will appear to be at the top of the hat. Pat Ashforth, Steve Plummer & Ben Ashforth First published in 2012 166 Keighley Road, Colne, Lancashire, BB8 OPJ, England All rights reserved


