Busy Bee
By Heather Hosford @2011
If you have any questions about this pattern, please contact me at thismomcrafts@gmail.com Please do not copy, sale or redistribute this pattern in any way. You may sell the item made from this pattern, but please use your own photos. SiZQ: Newborn, 3-6 months, 6-12 months, toddler, child,teen, adult Skill Lgvel: Easy Gaug&: 4" =11 hdc and 10 rows Supplies: G7, H8 and I9 hook Worsted weight yarn in yellow, black and white Tapestry needle 9mm x 12 inch Chenille sticks aka pipe cleaners NotQ: I tend to crochet on the tight side so I use a US I (5.5 mm) hook if you tend to crochet on the loose side work with the H (5 mm) hook for the hat.
Terminology:
Sc - single crochet St -stitch Hdc - half double crochet Ch - chain Sl st - slip stitch Sc inc -work two sc in the next space, single crochet increase made Sc2tog - single crochet two together, single crochet decrease made
Instructions:
You will change colors every two rows. To change to the new color the sl st at the end of the row will be worked by inserting the needle into the top of the first sc of the round, yarn over and pull up the new color and complete a slip stitch, tighten both yarns. Do not cut yarn of previous color, just drop it and continue to work with new color. When you have completed 2 rows, you will again insert the hook as to slip stitch to the first st of the row, yarn over and pull up the new color, continue as stated in pattern.

Pic 5
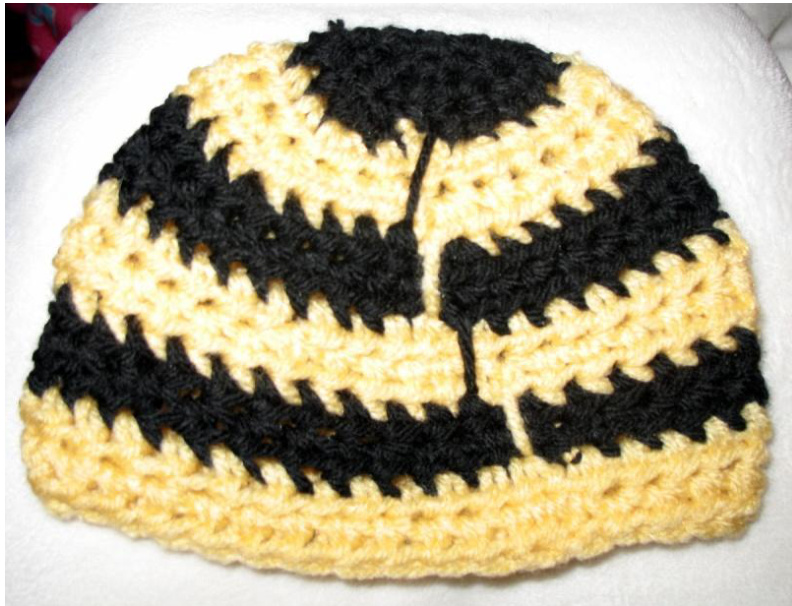
Pic 1: After working all st of round Pic 2: Inserting the hook into the top of the first hdc of the roun( Pic 3: Color change; dropping the yellow yarn, sl st to beginning of row using the blackyarn the sl st, ch 1 and hdc into the same space, color change complete Pic 5: this is how the inside of the hat will look. The yellow and black lines are where the yarn was dropped for working in the opposite color. Crown of hat: Round 1- With H or I hook and black yarn, magic loop and sc 6 times (or Chain 2 and sc 6 times into first chain), join to first sc with a sl st. (6) Round 2 - Ch 1, Starting in same space as sl st work 2 sc into each sc from previous round, sl st to top of first sc in the round (12) Round 3 - Ch 1, Starting in same space as sl st, work 1 hdc, then hdc 2 in next stitch, repeat to end, change to yellow yarn by inserting hook into top of first hdc in the round pull up the yellow yarn and sl st (18) Round 4 - Ch 1, Starting in same space as sl st, work 2 hdc, then hdc 2 in next stitch, repeat to end, sl st to top of first hdc in the round (24) Round 5 - Ch 1, Starting in same space as sl st, work 3 hdc, hdc 2 in same stitch, repeat to end, sl st to top of first hdc in the round with black yarn (30) skip to next forNewborn Round 6 - Ch 1, Starting in same space as sl st, work 4 hdc, hdc 2 in same stitch, repeat to end, sl st to top of first hdc in the round (36) skip to next for 3-6 mo Round 7 - Ch 1, Starting in same space as sl st, work 5 hdc, hdc 2 in same stitch, repeat to end, change to yellow yarn by inserting hook into top of first hdc in the round pull up the yellow yarn and sl st (42) skip to next for 6-12 mo Round 8 - Ch 1, Starting in same space as sl st, work 6 hdc, hdc 2 in same stitch, repeat to end, sl st to top of first hdc in the round (48) skip to next for 1-3 yr Round 9 - Ch 1, Starting in same space as sl st, work 7 hdc, hdc 2 in same stitch, repeat to end, sl st to top of first hdc in the round with black yarn (54) skip to next for 3-10 yr Round 10 - Ch 1, Starting in same space as sl st, work 8 hdc, hdc 2 in same stitch, repeat to end, sl st to top of first hdc in the round (60) skip to next for teen/adult Round 11 - Ch 1, Starting in same space as sl st, work 9 hdc, hdc 2 in same stitch, repeat to end, sl st to top of first hdc in the round (66) skip to next for large adult Body of hat: Continue to change colors every two rows. Hdc each st until hat measures desired length for beanie or %" less for ear flap hat, see sizing chart at end of pattern. Finish off beanie by working last hdc, sc next st and sl st next 2 st. Fasten off and weave in end.
Ear Flaps:
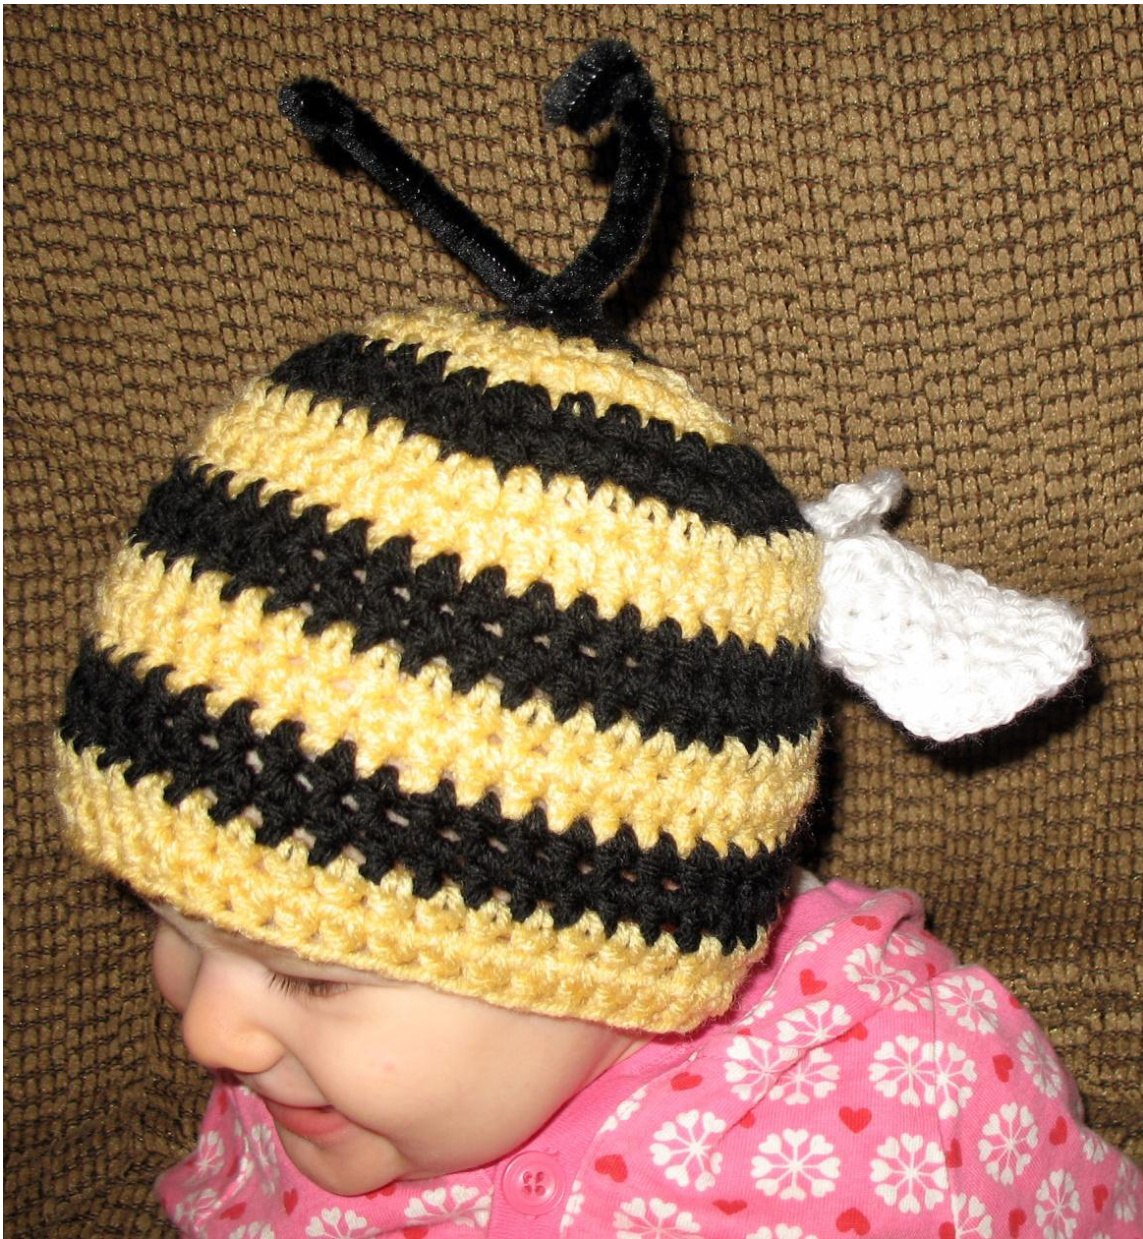
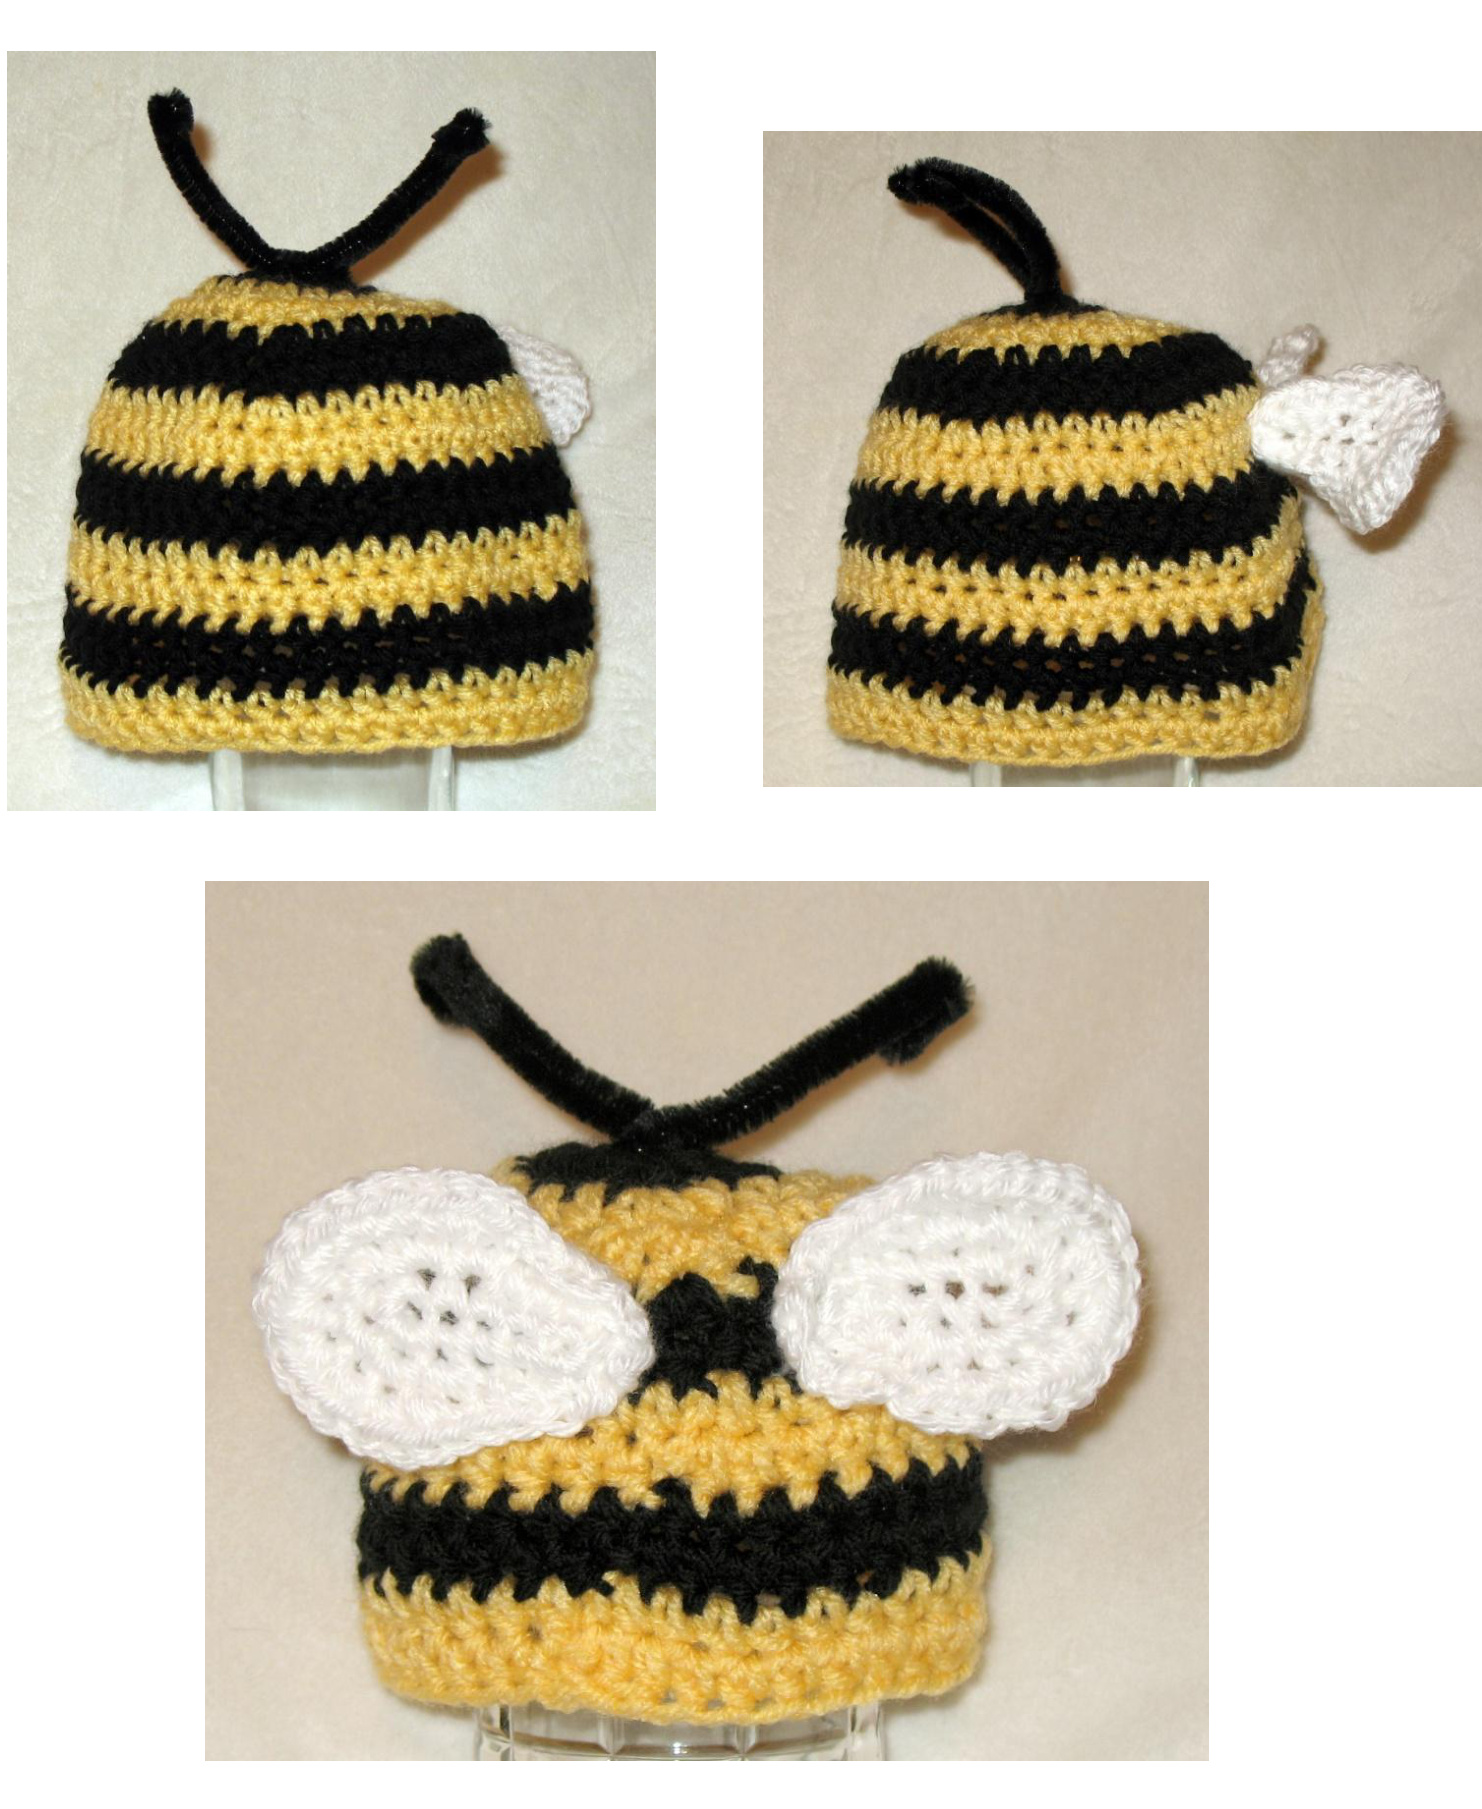
With either black or yellow yarn and hook used to make hat- join in yarn anywhere on beanie in bottom row, join by inserting needle into a stitch with the right side facing you and pull up a loop and slip st, insert needle into same stitch and sc 1, continue until number of sc have been worked for size needed. Newborn and 3-6 months: Sc7 turn, skip first st and sc across (6) repeat until only one st is left, fasten off and weave in end 6-12 month, Toddler and Child: SC9 turn, skip first st and sc across (8) repeat until only one st is left, fasten off and weave in end Teen and adult: SC 12 turn, skip first st and sc across (11) repeat until only one st is left, fasten off and weave in end For second ear flap, fold hat in half for placement. Join in yarn as before. Edging: Join in yellow, black or white yarn on back of hat near corner of ear flap, sc 1 row around entire edge, fasten off and weave in end. Ties: Cut 4 black, 4 white and 4 yellow, 20" - 24" lengths of yarn for each tie. Fold in half insert crochet hook from wrong side to right side and pull folded end through end of ear flap. Put ends of ties through loop and pull to tighten. Braid tie and knot off at end. Repeat for other side. Wings: With I hook and white yarn (Use H hook for newborn and 3-6 mo size), 1. ch 6, turn 2. Sc in 2nd stitch from hook and next 4 st (5) 3. sc 3 more into same stitch (curving around the side) 4. continue to other side and sc 4 5. sc 1 more into the same stitch (curving around the side) 6.3 sC 7. Work 2 sc in each st of the next 6 sts 8. 3 sl sts 9. 2 slip stitches in next (1) stitch 10. 4 sl sts 11. 2 sc in each of the next 10 sts 12. 1 sC 13. change to G hook - 9 sc (or sl st next 9 with current hook) 14. slip stitch and fasten off leaving a long tail to sew wing to hat
Assembly:
Sew wings to back of hat, see photo's for placement Take a pipe cleaner and make a U. Insert pipe cleaner into the inside of the hat, push the two ends of the pipe cleaner up through spaces in the stitches at the top of the hat. On the outside of the hat twist the pipe cleaners once to secure, do not twist too tight, leave a little room so the hat does not pucker at the top. Fold down the ends of the pipe cleaner spiraling it down to make the end of the antennae.
Hat Sizing:
First Hat length should be followed to make a hat with a fold up brim. The second height should be used for making skull caps and hats with ear flaps. The diameter measure is how big across your circle should be when making increase rows for each size, when size is reached go to working every stitch (no increases) until hat length is achieved. Newborn Head Circ: 13" - 14" Hat Circ: 12" - 13" Diameter - 4" Hat Height: With brim: 5.5" to 6" Without a brim: 4.5" - 5" Baby - 3 to 6 months Head Circ: 14" - 17" Hat Circ: 13"- 16" Diameter - 4.5" Hat Height: With brim: 6.5 - 7" Without a brim: 5 - 5.5" Baby - 6 to 12 months Head Circ: 16" - 19" Hat Circ: 15" - 18" Diameter-5.25" Hat Height: With brim: 7.5" Without a brim: 5.5 - 6.5" Toddler (1 - 3 years) Head Circ: 18" - 20" Hat Circ: 17" - 19" Diameter-5.75" Hat Height: With brim: 8" Without a brim: 6.5 - 7" Child (3 - 10 years) Head Circ: 19" - 21" Hat Circ: 18" - 20" Diameter - 6" Hat Height: With brim: 8.5" Without a brim: 7 - 7.5" Preteen/Teen Head Circ: 20" - 22" Hat Circ: 19" - 21" Diameter- 6.5" Hat Height: With brim: 9 -10" Without a brim: 7.5 -8" Adult Head Circ: 21" - 23" Hat Circ: 20" - 22" Diameter-6.75" Hat Height: With brim: 11" Without a brim: 8 - 9"


