
Materials
Mirasol Sulka [2 x 50g skeins = 100m/110 yards]. 2 x 2.5cm/1" buttons.
Needles & Notions
5.5mm [US size 9] straight needles, or size needed to obtain guage. Tapestry/knitters needle for weaving in ends. Cable needle.
Abbreviations
sl1 - slip one knitwise. C7 - cable stitch worked over a total of seven stitches like so: slip 2 stitches to cable needle and hold to back, knit one stitch from left needle, then knit both stitches from cable needle, knit one stitch, slip one stitch to cable needle and hold at front of work, knit two stitched from left needle, knit one stitch from cable needle. k1tbl - knit the next stitch through the back loop.
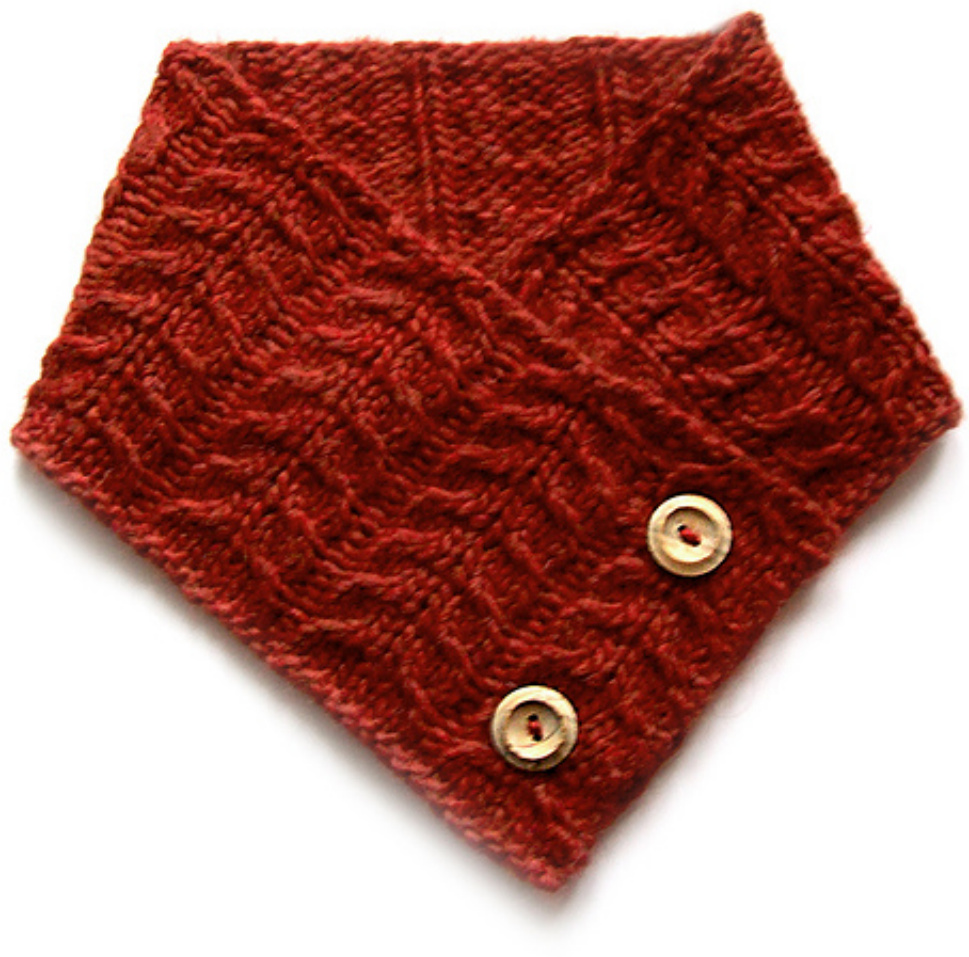
Promenade
The promenade scarf if the perfect warm and snugly accessory for those cold and blustery days. It sits perfectly in your coat neckline and, best of all, it won't blow away in a sudden gust of wind! Gauge: 17sts over 4"/10cm of cable pattern. Instructions: c/o 97 stitches start cable pattern as follows: Row 1: sl1, k7, [\*p1, k7], repeat from \* until one stitch remains, k1tbl. Row 2: sl1, p7, [\*k1, p7], repeat from \* until one stitch remains, k1tbl. Row 3: sl1, C7, [\*p1, C7], repeat from \* until one stitch remains, kitbl. Row 4: sl1, p7, [\*k1, p7], repeat from \* until one stitch remains, k1tbl. Row 5: repeat cable row 1. Row 6: repeat cable row 2. Row 7: repeat cable row 3 until 8 stitches remain, bind off 3 stitches, k4, k1tbl. Row 8: sl1, p4, c/o 3 using backwards loop method, [\*k1, p7], repeat from \* until one stitch remains, k1tbl. Rows 9-20: Repeat Rows 1-4 three more times. Row 21: Repeat Row 1. Row 22: Repeat Row 2. Row 23: Repeat row 7. Row 24: Repeat row 8. Rows 25-28: Repeat Rows 1-4 once more.
Finishing:
Bind off loosely. Weave in loose ends before wet blocking flat. Once dry, arrange scarf as in the picture, with one end overlapping the other at right angles. Sing a dressmaker's pin, mark where the buttons lay and attach buttons using spare yarn or coordinating thread..
Pattern Information
This pattern and its contents are @ Mimi Hill for Eskimimi Makes, 2012. Not to be copied or distributed in any way without permission. Pattern support available at http://www.eskimimimakes.com


