Langprook
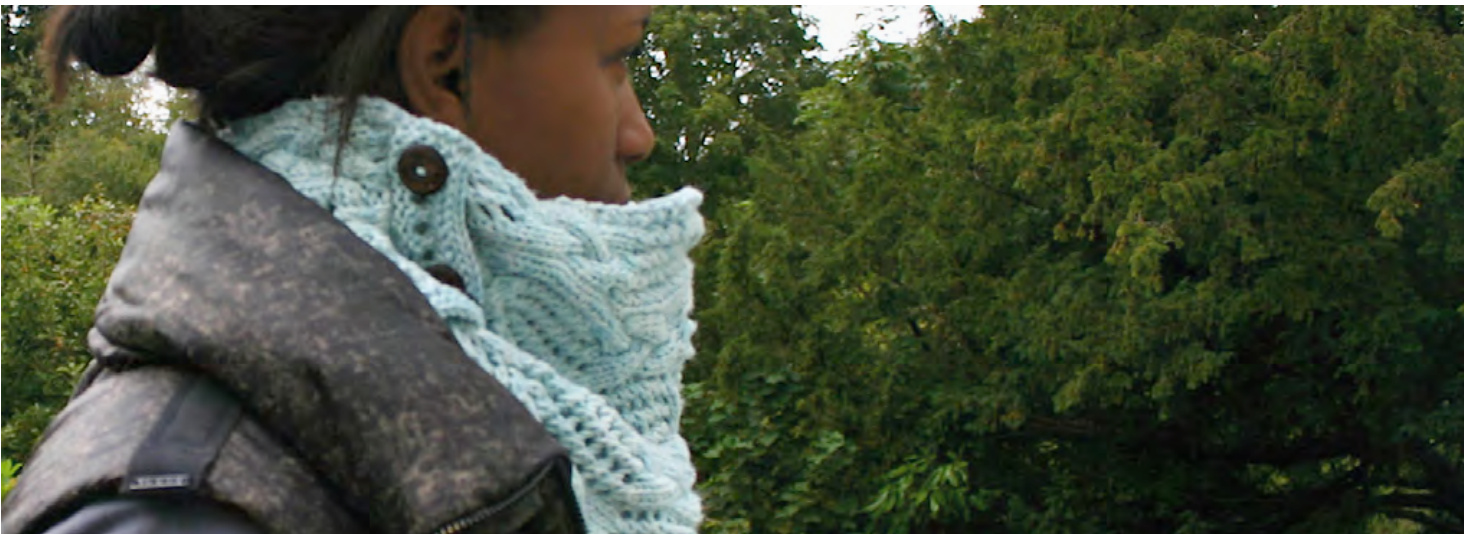
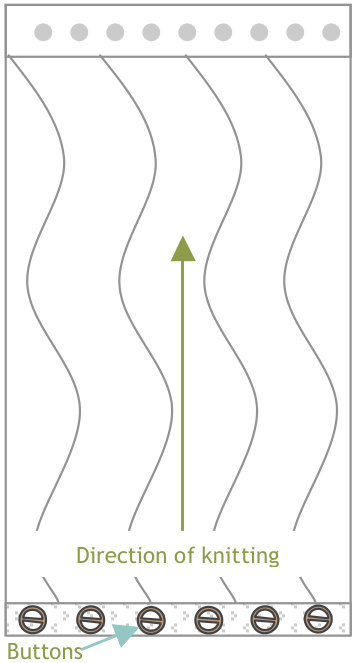
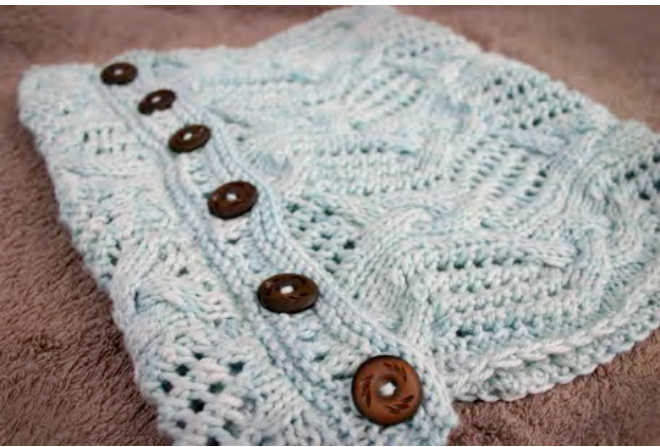
An elegant cowl with intricate cables and lacework, Langbrook is an ideal accessory to finish off any outfit. It is knitted flat from side to side and is finished off with button detailing that can be worn fastened any way you like.
Materials & Tools
2 skeins of suggested yarn: The Plucky KnitterPrimoWorsted(75/20/5% Merino/Cashmere/Nylon)200yds,100g; or Three Irish GirlsFelicityWorsted (50/50% Merino/Silk) 240yds, 113g. 4.5mm (Us7) needles ■Cableneedle ■6 x 2cm (0.75") Buttons, ■Yarn needle for weaving in ends ■2 Stitch markers ■Sewing needle ■Measuring tape.
Gauge
22sts x 28 Rows 10cm (4") square, knitted in pattern. Approx. 1.15 pattern repeats per 10cm (4").
Sizing & Resizing
One size - The finished size is 28cm wide x 54cm long (11"x 21.25"). To resize the cowl and make it longer (wider around the neck), simply add more rows. To make it deeper or narrower (cowl height), cast on sts divisible by 10 +1 plus 4 edge sts. The cable pattern itself is 20sts + 1, but can be worked to half a repeat for resizing purposes. See chartbelowfor more detail.
Abbreviations (in alphabetical order)
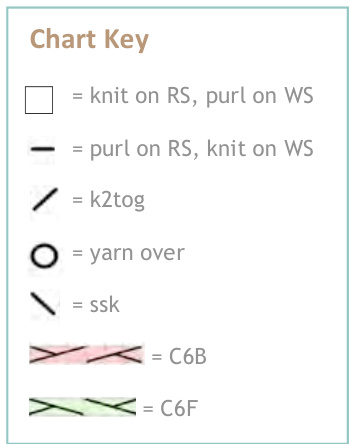
CO = Cast on K = knit K2TOG = Knit 2 sts together (1 stitch decrease) P = Purl PM=Placemarker RS = Right side SM = Slip marker SSK = slip slip knit. Slip 2 sts knit-wise then k2tog through back loop (1 stitch decrease) WS = Wrong side YO = Yarn over (yarn forward) C6B = slip 3 sts onto cable needle, hold back, k3 sts from left hand needle,then k3 sts from cable needle. C6F = slip 3 sts onto cable needle, hold front, k3 sts from left hand needle,thenk3stsfrom cableneedle. START! ing cable cast on or long tail method, CO: 2, pm (place marker), CO: 61, pm, CO: 2 sts = 65 sts tot RS (right side): Knit 6 rows of garter stitch (k all rows) slipping markers along the way, ending on a Ws (wrong side) row. RS: knit WS: k2, sm (slip marker), p to last 2 sts, sm, k2 On your next Rs row: k2, sm, work chart below for 3 repeats, sm, k2. All cable pattern activity takes place between the 2 markers. There are 32 rows in each repeat. Garter st (k all rows) the 2 end sts outside of markers.
Written version of chart
Note:CablePatternis20stsplus1 Row 1: p1 [k1, (yo, ssk) x 4; p1, k9, p1] repeat [] to end. Row 2 and all even rows: k1, [p9, k1] repeat to end. Row 3: p1 [k1, (yo, ssk) x 4; p1, k3 C6B, p1] repeat [] to end. Row 5: p1 [k1, (yo, ssk) x 4; p1, k9, p1] repeat [] to end. Row 7: p1 [k1, (yo, ssk) x 4; p1, C6F, k3, p1] repeat [] to end. Row8:asrow2. Repeat rows 1 to 8 once more. Row 17: p1 [k9, p1, (k2tog, yo) x 4; k1, p1] repeat [] to end. Row 19: p1 [k3, C6B, p1, (k2tog, yo) x 4; k1, p1] repeat [] to end. Row 21: p1 [k9, p1, (k2tog, yo) x 4; k1, p1] repeat [] to end. Row 23: p1 [C6F, k3, p1, (k2tog, yo) x 4; k1, p1] repeat [] to end. Row24:asrow2. Total = 32 rows. Continue working pattern until piece measures 50cm (19.5"), or desired length.
Buttonhole eyelets
Next RS row: knit 2 rows, at the same time, decrease by 1 st (k2tog) somewhere centrally in the row = 64sts Next Rs row: k2, [yo, ssk] repeat [] to last 2 sts, k2 WS: k2, p to last 2 sts, k2 RS: knit 4 more rows. Next RS row: Bind off. Weave in ends. Block if required.
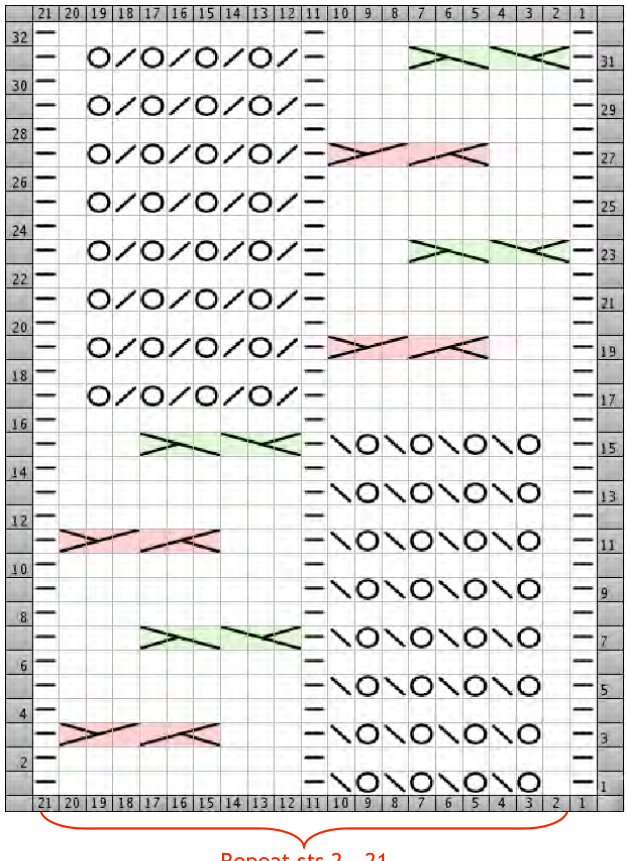
Repeat sts 2 - 21
Making up
Sew on 6 buttons, evenly spaced across the garter panel near the cast on end. Be mindful to line them up to their opposite buttonhole eyelet.
Suggestions
You can choose to sew closed the cowl and just have the buttons attached for decorativepurposes. To give the side edges a more refined finish, (and to stop the garter edges from curling over) run a line of single crochet stitches along the 2 edges using a similar sized crochet hook.


