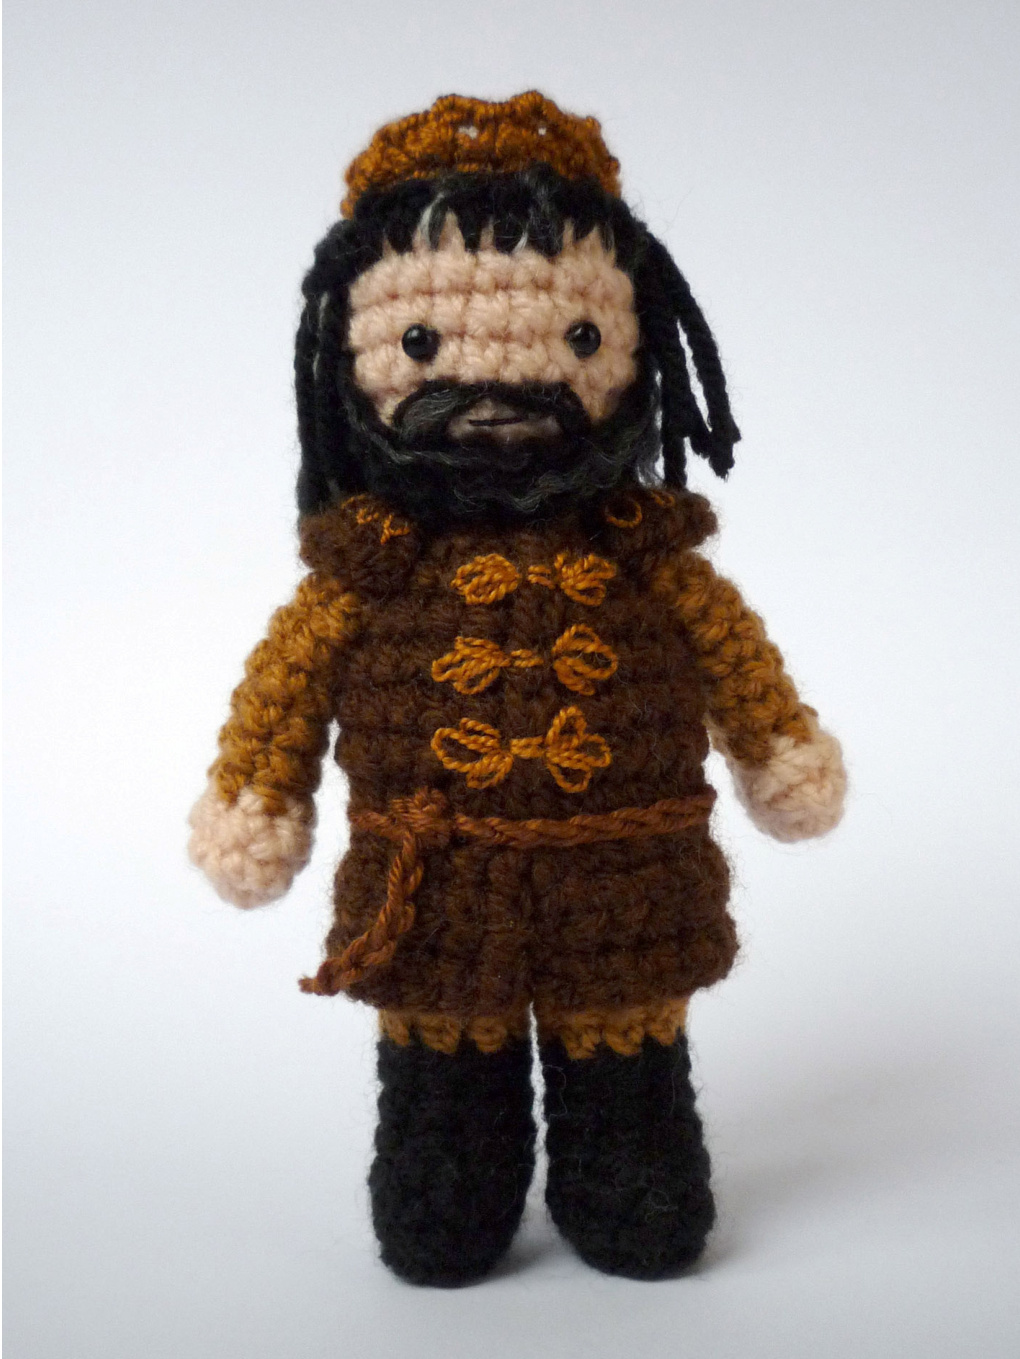
MEDIEVAL FANTASY: KING
a free crochet pattern by Kati Galusz

Items made using this pattern may be sold in your own shop, but please give me credit for the design and add a link to my Ravelry or Etsy account. Mass production, sale and distribution of pattern pieces and instructions is expressly prohibited.
Materials
Yarn: black, dark brown, golden brown and skin color Small amounts of each, best from a single brand. Yarn weight is not very important, as long as you choose hook size accordingly. You will also need a ^gold' yarn for the crown. Metallic would be perfect, or any yarn with a nice sheen (I used a microfiber acrylic one). Since it will be only used for the crown, no problem if it is slightly different thickness from the yarns chosen for the body. For his hair and beard, you can use the same black yarn (maybe with a little added grey), or any yarn you fancy - the thinner the prettier, but also the longer to cover the scalp sufficiently, the decision is yours. :) You will need fiberfill for stuffing, and something for eyes - I use 4 mm black beads for dolls made of DK yarn with 2,5 or 3 mm hook, but you may choose safety eyes or embroidery. You will also need black embroidery thread for the mouth. You will probably want to add some decorations to his doublet. I used embroidery with a golden brown thread, but you could try felt appliques or beads - quicker and easier and probably also prettier, unless you are much better at embroidery than me (which is not hard to be honest...)
Hook size
Choose a hook smaller than suggested on your yarn's label. You want a tight gauge so the fiberfill won't show between your stitches, use whatever size allows you to achieve that. If you are making more dolls from this series, you should use a hook 1 size (or 0,5 mm) bigger for the men than for the ladies - this will make them just a little bit taller. Abbreviations (aka you need to know how to do): start with a magic ring ch - chain st - stitch sc - single crochet sl st - slip stitch BLO - back loop only sc2tog - single crochet 2 together = single crochet decrease dc2tog - double crochet 2 together = double crochet decrease You can work in spirals if you prefer so, but for the legs I advise to work in joined rounds, so their top will be even and easy to join. Note: some pictures might show a process done at a different doll - taking pictures breaks the workflow so I recycle images if possible.
Legs (make 2)
With black, ch 5. 1. 2 sc in second ch from hook, sc in next 2 ch, 4 sc in last ch, then continue working on the other side of the foundation chain, into the free loops of the chains: sc in next 2 ch, 2 sc in next ch, sl st to join to the first sc you made (12) 2. ch 1, then working in BLO in this row, sc in each st around, sl st to join (12) 3. ch 1, sc in next 3 st, sc2tog, dc2tog, sc2tog, sc in next 3 st, sl st to join (9) Stuffoot, then continue stuffing leg as you go along. 4-6: ch 1, sc into each st around, sl st to join (9) Change to golden brown 7: ch 1, working in BLO this round, sc into each st around, sl st to join (9) 8-9: ch 1, sc into each st around, sl st to join (9) Finish off after row 9.
Torso:
Put the two legs together and find the innermost two stitches that are touching. Still using golden brown, make a knot across these two stitches, thus fixing the legs together, then pull up a loop through the same stitches and chain 1.

ignore colors on the pictures please, they are from a different doll but same process used) 1: Turn the legs so that the feet point away from you, and start to crochet - first on the left leg going around from rear to front, make a sc into each st (except the one you used to tie the two legs together), then continue on the other leg. You should end up with 16 stitches. You can continue working in joined rounds if you prefer so - Ifind working in spiral easier so I use that method from here on. 2: [2 sc in next st, sc in next 7 st] 2 times (18) Change to dark brown 3: [sc in next st, 2 sc in next st, sc in next st] 6 times (24) 4: working in BLO this round, [sc in next 7 st, 2 sc in next st] 3 times (27) 5-6: sc in each st around (27) 7: sc in next 8 st, sc2tog, sc in next 2 st, sc2tog, sc in next 2 st, sc2tog, sc in next 9 st (24) 8: sc in each st around (24) 9: [sc in next st, sc2tog, sc in next st] 6 times (18) Stuff body now, then add some more stuffing after the next round. 10: [sc in next st, sc2tog] 6 times (12) 11: sc2tog 6 times (6) Change to skin color 12: 2 sc in each st around (12) 13: [sc in next st, 2 sc in next st] 6 times (18) 14: [sc in next st, 2 sc in next st, sc in next st] 6 times (24) 15-17: sc in each st (24) 18: [sc in next st, sc2tog, sc in next st] 6 times (18) If using safety eyes, insert them to their place now - they should be placed between the 4th and 5th skin color rows, 4 stitches apart. Stuff head, then add some more stuffing after finishing the next round. 19: [sc2tog, sc in next st] 6 times (12) 20: sc2tog 6 times. Finish off, use yarn end to close the tiny hole.
Doublet bottom
Turn your doll upside down, with the toes towards you. On its belly, you will see the line of unused loops from row 4. 1: Join your dark brown yarn to the loop at the middle. Sc in the same loop, then in the next 11 stitches/loops. (12) 2-4: ch 1, turn, sc in each st below (12) Finish off, hide yarn ends. Then turn the doll so its back is towards you (but still upside down). Join your yarn in the next free loop at the middle of the back, and repeat the same process to create the other half of the doublet's bottom. There might be a small step between loops, don't worry about that (it comes from working in spirals) - just crochet on and it will all even out by the next row.
Doublet shoulders (make 2):
With dark brown, chain 5. 1: sc in 2nd chain from hook, sc in next 3 ch (4) 2: ch 1, turn, 2 sc in each st (8) Finish off leaving a long tail.
Arms (make 2):
Start with skin color. 1: 6 sc in magic ring 2: [2 sc in next st, sc in next st] 3 times (9) 3: [sc2tog, sc in next st] 3 times (6) Switch to golden brown 4: sc in next 5 st, 2 sc in last st (7) 5-10: sc in each st (7) Finish off leaving a long tail. Push only a small blob of stuffing into hand, no need to stuff the rest of arm.
Assembly
Before we start to join the pieces, this would be a good time to decorate the doublet, especially if you decided to go with embroidery. Here's how I did it (but feel free to design your own): First, using the brown yarn of the doublet I made a straight chain stitch line from waist to neck. Then using golden thread, embroidered half a lazy daisy on each side of the line and connected them with two small straight stitches. I made 3 of these on the front of the doublet. I also embroidered several loops (kinda like a stretched-out half lazy daisy) on the shoulder parts. Then it's finally time to attach all parts. Using the long yarn ends you've left, first sew on the two arms, then place the shoulder bits above (straight edge towards body of course) and sew them in place.

Finishing the head
If you didn't use safety eyes, add your eyes now - they should go between the 4th & 5th skin color rows, about 4 stitches apart. Embroider a mouth - it will be mostly hidden by facial hair, but will help you to find the right place for moustache and beard (see pictures for placement). Time to add the hair. Cut pieces of your hair yarn, about twice as long as the distance from top of head to shoulder (or rather somewhat longer, so it certainly won't end up too short -- you can always trim it later). Insert your crochet hook through a hole between stitches and come out through the hole right above. Fold the yarn in two and pull it through the head with your hook, but not all the way through, just to make a loop. Then grab the free yarn ends with the hook and pull through the loop. Looks so difficult when writing it down, but see the pictures on next page and it's a no-brainer. :)

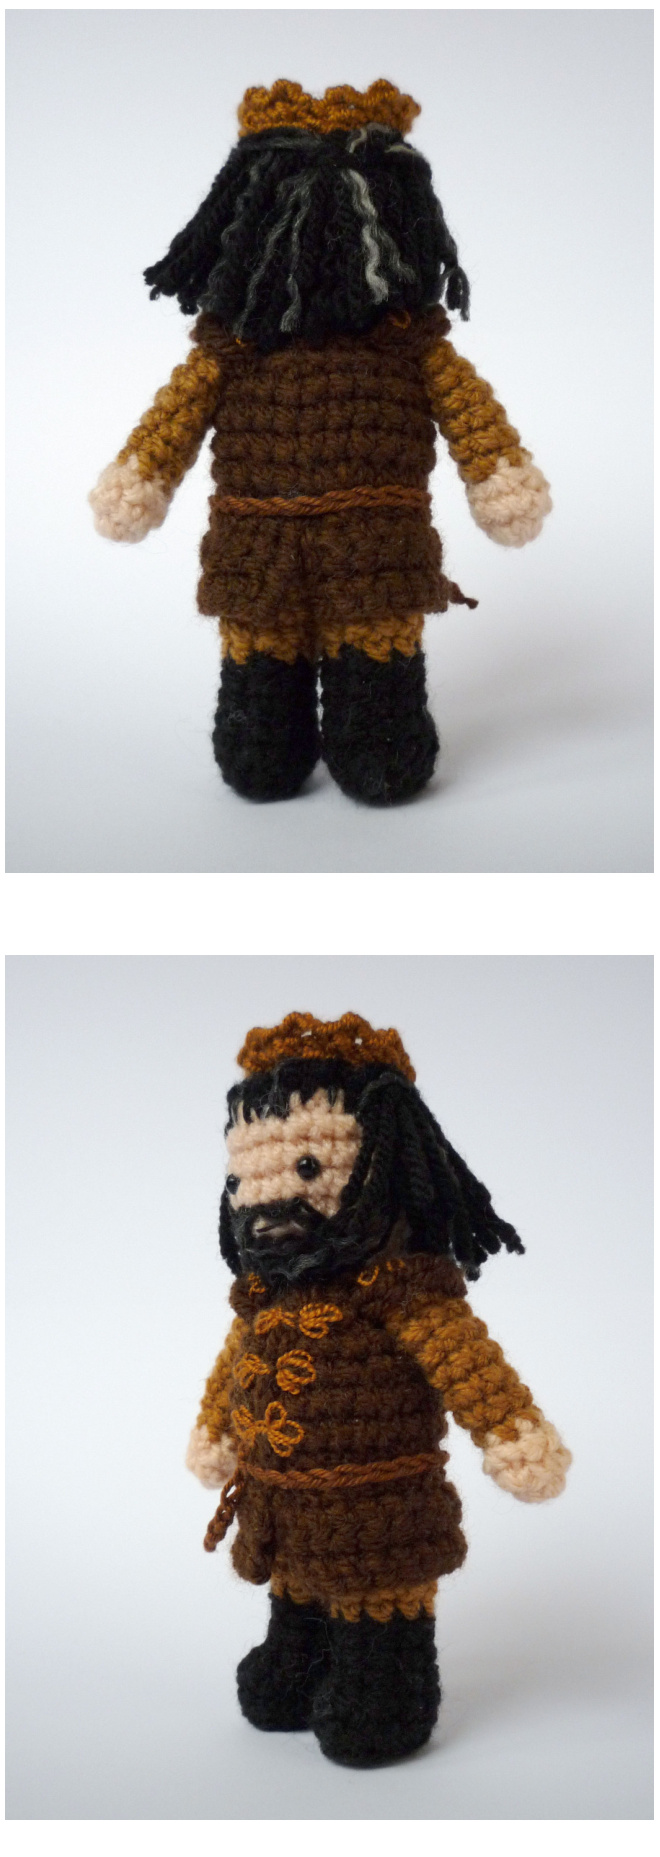
(different doll but same process used) Important to know: the yarn will want to hang the opposite of how you inserted your hook. So to direct the hair from the crown of head towards the nape, stick in the hook from the nape towards the top. First attach the hair to the back of the head - the 7th row from neck is a good place to start. Hook on strands until the lower part of scalp is neatly hidden (crown of head will still be bald at this point). Then do the forehead with the same method, but use longer pieces of yarn, because these strands will be pulled backwards, first covering the top of the head and then reach to shoulder length like the rest of the hair. Be careful to lay them in the right direction (insert your hook from top towards forehead). Clasping the strands from forehead together, see if there are areas where scalp is still visible and add more hair if necessary. Then, if you want, you can hook on a few thin grey lines either using finer yarn or single plies of your regular yarn. Finally, tie together the strands from the forehead, and if necessary trim the hair to desired length.

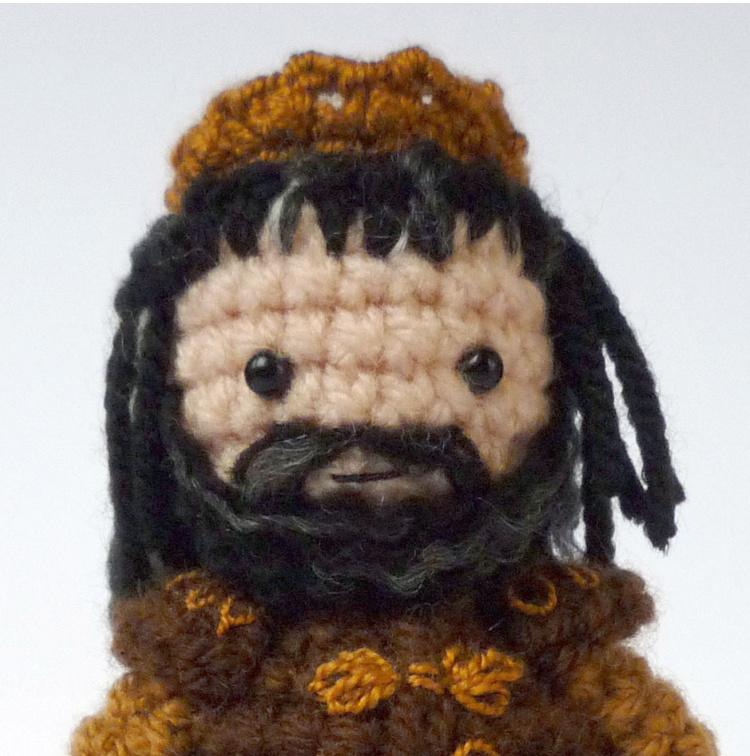
If you added grey to the hair don't forget to do the same for the beard. To get the bushy, slightly unruly beard, unwind a piece of your hair yarn and use the single plies to get a curly structure. Be gentle when working with these strands as a strong pull will stretch or break them easily. Start with embroidering the moustache, using picture for guidelines. Then comes the beard itself - just make several long stitches from temple to temple circling the whole chin area (do not pull too tight to keep the wavy look of the yarn). If necessary fill in with shorter stitches if there's skin visible between the longer strands.
Crown
Use your 'gold’ yarn of course. Starting with the usual slip knot, chain 3, then sc in the back bump of third chain from hook. Ch 3 again and sc in the back bump of third chain from hook, repeat until you have 10 picots. Chain 1, turn and work a sc in the bottom of the last picot made, and then 2 sc in every other picot. Finish off leaving a long yarn tail, then use it to join the two ends of the crown and to sew the whole thing to the doll (make sure at least some of your stitches go through the head too, not only through the hair.)
Belt
Use golden brown or even a different yarn if you wish.

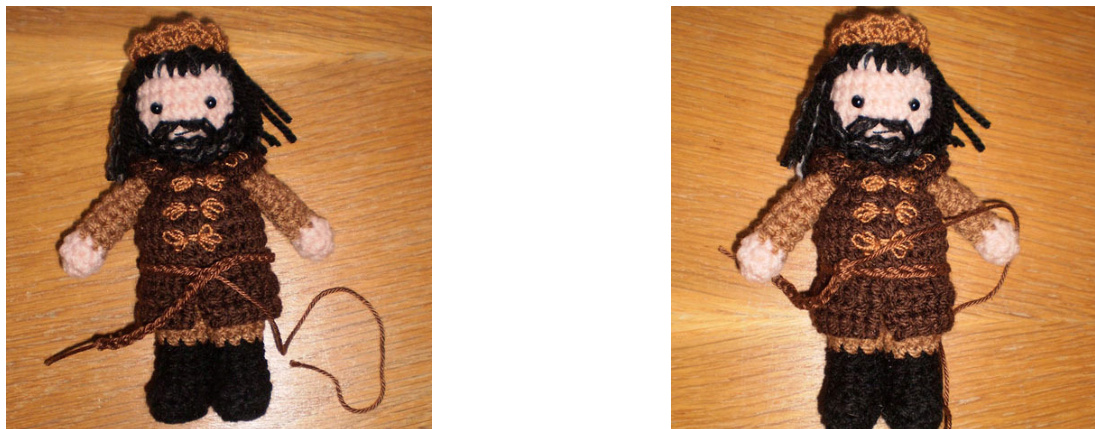
Leaving a long piece of yarn before your slip knot, chain 40 and finish off (but don't pull the last loop super tight just yet). Tie this around your doll's waist so that the knot falls at the beginning of the chain. Turn it so that the knot is on the right of your doll, and use the long yarn end you left to sew it in place. The other end of the belt will hang down, it should reach about to the boots - if it is too long, undo the last few chains, then finish off properly this time. Add a slip knot to the end to make sure your chain won't open up, and you are done. :)


