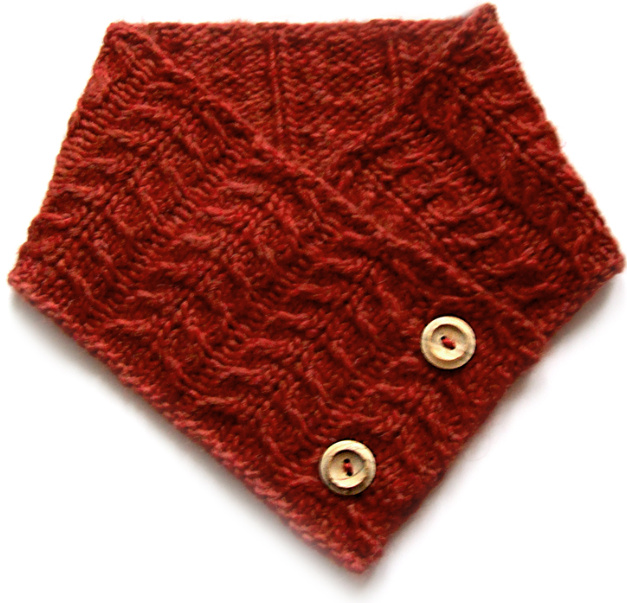
Promenade Scarf
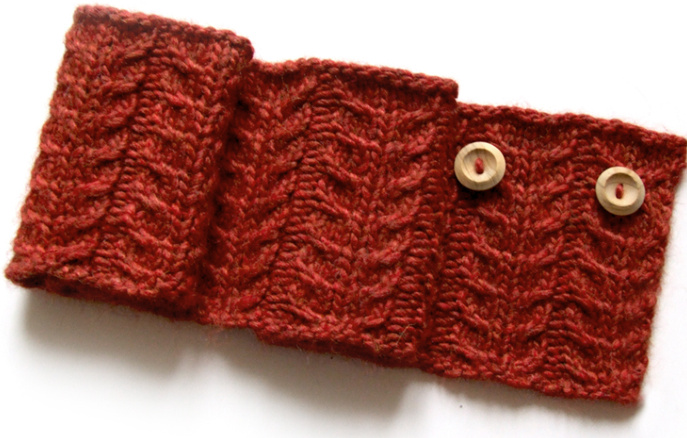
The promenade scarf if the perfect warm and snugly accessory for those cold and blustery days. It sits perfectly in your coat neckline and, best of all, it won't blow away in a sudden gust of wind!
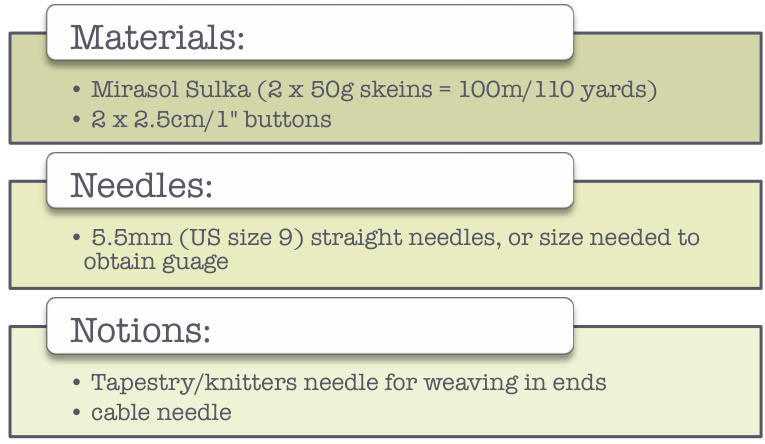
Notes:
·gauge $=$ 17sts over 4"/10cm of cable pattern. · knitting will gently curl vertically before blocking. Wet blocking will ensure that the knitting behaves itself! For this reson it is advised that you do not substitute the yarn for an acrylic yarn that will resist wet-blocking.
Abbreviations used:
$\mathrm{{sl1}=}$ slip one knitwise · $\mathrm{C}^{\flat}\boldsymbol{7}=$ cable stitch worked over a total of seven stitches like so: slip 2 stitches to cable needle and hold at back of knittin, knit one stitch from left needle, knit both stitches from cable needle, knit one stitch, slip one stitch to cable needle and hold at front of work, knit two stitched from left needle, knit one stitch from cable needle. ·k1tbl $=$ knit the next stitch through the back loop.
Instructions:
· c/0 97 stitches · start cable pattern as follows: · [cable row 1] sll, k7, 0 $^{\ast}\mathrm{p}1$ , k7), repeat from \* until one stitch remains, kltbl. · [cable row 2] sll, p7, $^{\ast}\mathbf{k}\mathbf{1}$ , p7), repeat from $^*$ until one stitch remains, kltbl. ·[cable row 3] sll, C7, $^{\ast}\mathrm{p}1$ , C7), repeat from \* until one stitch remains, kltbl. ·[cable row 4] sll, p7, ( $^{\ast}\mathbf{k}\mathbf{1}$ , p7), repeat from \* until one stitch remains, kltbl. ·[Row 5] repeat cable row 1. ·[Row 6] repeat cable row 2. · [Row 7] repeat cable row 3 until 8 stitches remain, bind off 5 stitches, k2, kltbl. · [Row 8] sll, p2, c/o 5 using backwards loop method, $\mathbf{\tau}^{*}\mathbf{k}\mathbf{1}$ p7), repeat from \* until one stitch remains, kltbl. · [Rows 9-20] repeat cable rows 1-4 three times. · [Row 2l] repeat cable row 1. · [Row 22] repeat cable row 2. ·[Row 23] repeat row 7. ·[Row 24] repeat row 8. ·[Rows 25-28] repeat cable rows 1-4 once more. $\cdot$ Bind off loosely. $\cdot$ Weave in loose ends before wet blocking flat. · Once dry, arrange scarf as in the picture, with one end overlapping the other at right angles. Note where the bottonholes lay using a dressmakers pin and attach buttons using spare yarn left over from the project. Put on and admire yourself in the mirror!
Ifyouhave anyquestions/queries about this paten please feelfreetodropme aline on mimi@eskimimicom andIwil endeavourto get backtoyouas soonasl am able. $\circledcirc$ MimiHi.eaefeefretolnktthspatortotellthswheretindit bt dntdistributeopiof th pattyurf eithrlrnicallyi physical form. Items made using this pattern arenot tobe sold for profit, though private use (making theitems foryourself or asa gift is permitted and encouraged, and Mmi would love to hear from you if you enjoyed the pattern. Making iems from this pattern for charityand fundraisingare permite and wholeheartely encouraged.


