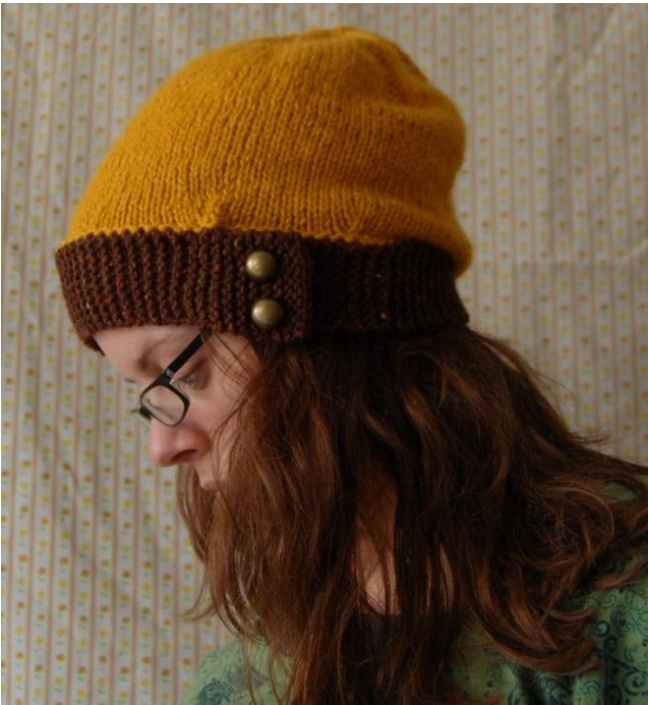
Knockin' Me Sideways
by Angie Ward multicrafty@gmail.com http://multicrafty.wordpress.com One thing I love about knitting is its adaptability. Sweaters, socks, mittens, hats, and scarves can be knit bottoms up, top down, sideways, upside down, this way and that way. It is beautiful that knitting permits us to have options for how we want to work our projects. Usually when I begin a hat, I begin with the ribbing followed by the body then work decreases. Always bottoms up, while I daydream about taking it in a new direction. That is where this hat comes in; begins at the top on double pointed needles, increase out, work the body, decrease for some shaping, and add on the sideways garter stitch border. I had first learned of the sideways garter stitch border via the infamous Elizabeth Zimmermann and have been anxious to try it out myself. I shall warn you that it is addicting andvery easy! This hat is also named after the Citizen Cope song Sideways which my man says reminds him of me....aawwwe
Materials:
\*MC 1 skein Lion Brand Wool Ease in Gold (197 yds) 8o% acrylic 20% wool \*CC Roughly half a skein of Patons Classic Wool Tweed in Chestnut Tweed (223 yds. 90% wool 7% acrylic 3% rayon) \*Size 7 DPNs \*16"circulars in Us sizes 6 and 7 \*1 size 6 DPN (for sideways garter stitch border) \*2buttons \*Stitch markers \*yarn Needle for seaming \*2 point protectors.
Gauge: 4.5 sts = 1" in stockinette on size 7 needles.
Disclaimer: The small print that nobody wants to read but you really should because there is valuable information. DO NOT!! Sell this pattern, it is my pattern and will bring you bad karma if you do sell this pattern (besides, not cool to pass off someone else's work as your own). However, and this is where the fun is, you have my blessing to sell items made from this pattern. As a “thank you" for taking time to enjoy my pattern, and for your hard work.
Abbreviations Used:
k-knit MC - main color CC - contrasting color BO - bind off k2tog - knit 2 sts together sts - stitches CO - cast on sl1 - slip1 stitch purlwise psso -pass slip stitch over kfb - knit into the front and back of sitch DPNs - double pointed needles
Begin pattern:
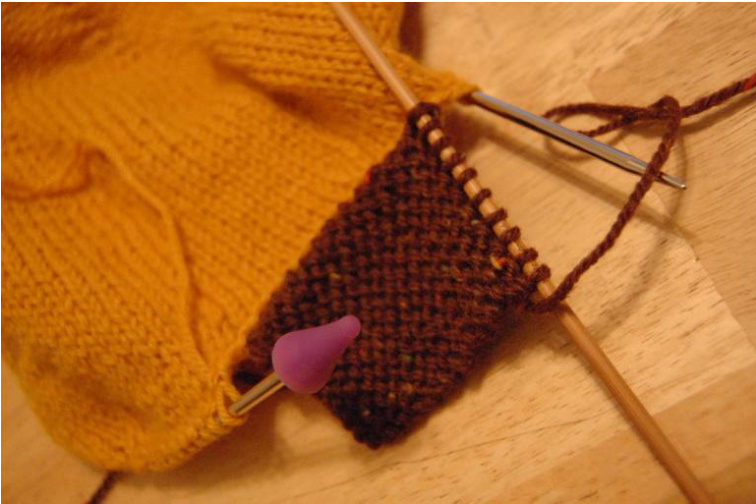
With size 7 DPNs CO 6 sts. Join for knitting in the round and mark beginning of round. When stitches become too much on the DPNs, switch to size 7 16" circular. Round 1: knit Round 2: kfb of every stitch (12 sts) Round 3: \*k1, kfb\* (18 sts) repeat from \*to\* until end of round. Round 4: \*k2, kfb\* (24 sts) repeat from \*to\* until end of round. Round 5: \*k3, kfb\* (30 sts) repeat from \*to\* until end of round. Round 6: \*k4, kfb\* (36 sts) repeat from \*to\* until end of round. Round 7: \*k5, kfb\* (42 sts) repeat from \*to\* until end of round. Round 8: knit Round 9: \*k6, kfb\* (48 sts) repeat from \*to\* until end of round. Round 10: knit Round 11: \*k7, kfb\* (54 sts) repeat from \*to\* until end of round. Round 12: knit Round 13: \*k8, kfb\* (60 sts) repeat from \*to\* until end of round. Round 14: knit Round 15: \*k9, kfb\* (66 sts) repeat from \*to\* until end of round. Round 16: knit Round 17: \*k10, kfb\* (72 sts) repeat from \*to\* until end of round. Round 18: knit Round 19: \*k11, kfb\* (78 sts) repeat from \*to\* until end of round. Round 20: knit Round 21: \*k12, kfb\* (84 sts) repeat from \*to\* until end of round. Round 22: knit Round 23: \*k13, kfb\* (90 sts) repeat from \*to\* until end of round. Round 24: knit Round 25: \*k14, kfb\* (96 sts) repeat from \*to\* until end of round. Round 26: knit \*\*Continue knitting until piece measures 8" from cast on edge.\*\* Switch to size 6 circular needles and work two decrease rounds as follows: Round 1: \*k10, k2tog\* (88sts) repeat from \*to\* until end of round. Round 2: knit Round 3: \*k9, k2tog\* (80sts) repeat from \*to \* until end of round. Round 4:knit Finish body of hat with 1 purl round then prepare for sideways garter stitch border. (l promise it is really easy!) When completing the purl round, place 1 point protector on your right hand needle. Turn work (so that technically the wrong side is facing you) and with CC yarn and using long tail cast on method, CO 10 stitches. Turn work around and with the 1 size 6 DPN, place a point protector on one end so it becomes a "straight" knitting needle and begin working sideways garter stitch border. (So eventually your work will look like the following)
Row 1: knit 9 stitches, sl 1 st, knit 1 live stitch from the hat, psso (you just attached the CC yarn with a decrease, you can also use a k2tog if you choose) Turn work and knit 10 sts Complete these last two steps until all live stitches from the hat have been worked. Continue knitting for 14 rows (or 7 garter ridges) for button flap. Bind off and leave a tail rough 10" - 12" for seaming button placket and sewing on buttons. Weave in ends, sew on buttons and yourhat iscomplete! If you have any questions, you may contact me via email or Ravelry. Thank you!


