Basic Double Knitting learn to double knit with this simple soap sack
Jolie A. Elder North Georgia Knitting Guild Beat the Heat Retreat Saturday 21 July 2012
Bibliography
M'Lou Baber Double Knitting: Reversible Two-Color Designs Pittsville Wl: Schoolhouse Press 2008. Suzanne Bryan "Double-Knitting Lesson" Cast On No. 87 May-June 2012, pp.9-11 Alasdair Post-Quinn Extreme Double-Knitting Cleveland OH: Cooperative Press 2011. Toshiyuki Shimada ldeas for Double-sided Knitted Scarves Japan: Bunka Publishing Bureau 2010 (ISBN 978-4-579-11321-7). Diane Zangl "Double Your Knitting Pleasure: How to Work Two Layers at Once" Cast On Spring 2004, pp. 10-11. For magic cast-on see: Judy Becker "Magic Cast-On for Toe-Up Sock" Knitty spring 2006, http://knitty.com/ISSUEspring06/FEATmagiccaston.html. For finger cords see: Charles D. Gandy The Embellished Sock: Knitted Art for the Foot Clayton GA: Acorn Creek Press 2012, p. 23. If you would like to reproduce this booklet or use a portion of it, please contact me: Jolie A. Elder 4898 O'Flaherty Ct Sw Mableton GA 30126-1617 770-745-5572 jolieae@yahoo.com Ravelry: Jolie http://jolieaelder.blogspot.com This booklet copyright 2012 Jolie A. Elder. All rights reserved.
Basic Double Knitting
Double knitting is one of those techniques that looks much harder than it is. Do you already know how to make 1xl ribbing? If yes, then you are one step away from being able to double knit. You can use double kniffing fo make double-sided ifems, buf you can also create pockets and pillows. And with double knitting, you can knit nearly any color pattern you like, without worrying about trapping long floats of yarn. In this class, you will learn the very beginning of double knitting 一 just how to make two layers. There's a lot more to explore including how to make reversible patterns and how to make reversible textures. I hope this introduction will give you a foundation for further exploration.
Techniques you already know: knit purl grafting (Kitchener stitch) Magic cast on or a provisional cast on Materials you should have in class: two colors kitchen cotton, about 15 yards each needles a size smaller than you usually choose for working that yarn double-pointed needles the size you usually choose for working that yarn
What is double knitting; and why would I want to do it?
Double knitting is a technique for producing a double-sided (reversible) fabric by working both sides of the fabric simultaneously. Traditionally, this fabric appears as stockinette stitch on both sides, but either the purl side or the knit side can be public. Yarn that is DK (double knitting) weight usually knits at about 5%2 stitches per inch on a size 5 or 6 needle. It is a little thinner than worsted weight but thicker than sport weight. You can double knit with any size yarn, but you will probably want to drop down one or two needle sizes from what is suggested for that yarn. The finished fabric is double thickness, so it is warm and wears well. This makes double knitting a nice choice for blankets, mittens, scarves, socks, and hot pads. It could also be incorporated into elbows and knees for longer wear. Because there are two layers, double-knitted stockinette fabric lies flat unlike plain stockinette. Double-knitted cuffs and cardigan bands do not curl, but they will look like stockinette on the public side of the work and can incorporate Fair Isle color patterns. Double-knitted fabric is also reversible — i.e. it has no wrong side. This makes it a good technique for items that show both sides, such as blankets and scarves, and also for trim areas on garments such as cuffs and collars. A traditional corrugated rib cuff on a Fair Isle sweater, sock, or mitten can not be turned back because it has a wrong side, but the same cuff worked in double knitting could be turned back. A hood is warmer in double knit and shows both sides. An ambitious knitter could make a reversible sweater. Typically, double knitting is worked with two different colors of yarn so that the main color on one side is the contrast color on the other side and vice-versa. Fair Isle patterns are usually written for two-color stranding as well. Thus, most Fair Isle patterns easily adapt to double knitting. The downside? Double knitting takes more time and more yarn. Since you are essentially knitting the item twice, if you are knitting in only two colors you will need enough yarn of each color alone to knit the item. For example, if a scarf normally takes two skeins of yarn, then to double knit that scarf you will need two skeins of one color and two skeins of another color for four skeins total. On sample, cords were made by plying: Twisting so that it tightens, twist a 4-5 foot/125-150 cm length o1 coffon using a drop spindle. Fold cotton in center and allow it to twist back on itself.\* Twisting again so that it tightens, twist the two-ply cord again until it twists up on itself. Fold again and allow it to twist back on itself. Thread a needle with one of the cut ends and thread it through the loop at that end of the cord.\*\* Cabled cord created. Repeat for other cord up until \*. Thread cord through the folded end (not the knotted end) of the previous cabled cord. Continue as before to create cabled cord up through \*\* Thread the cord up one side and down the other of the soap sack casing. Weave the four raw ends of the cable cord plies and tie them in a tidy knot.
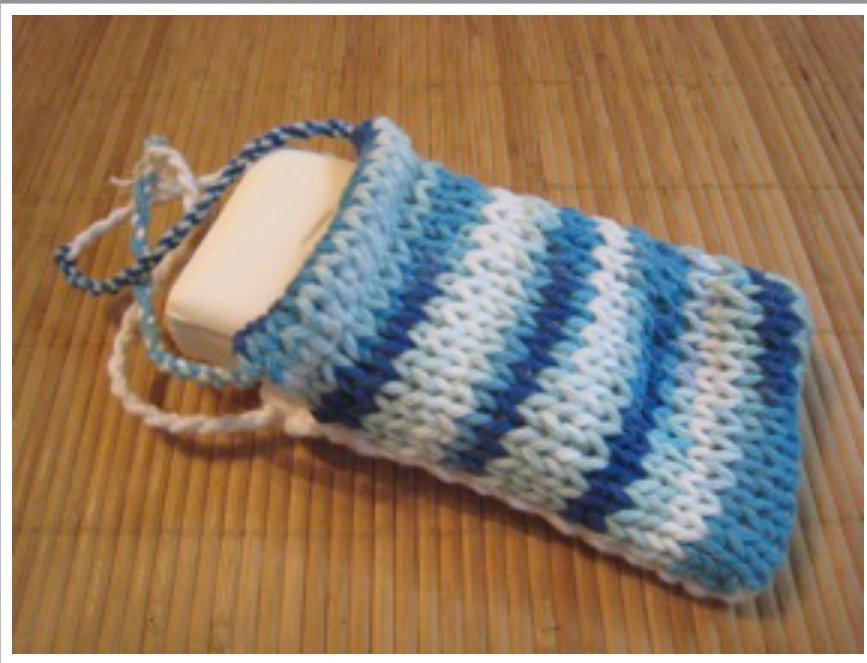
Soap Sack
Finished size about 3 x 5 inches (7.5 x 13 cm). Materials&Needles: 2 contrasting partial skeins kitchen cotton about 12 yards/meters each; approximately 7 grams each US size 7 (4.5mm) double-pointed needles for casting on US size 6 (4mm) circular or double-pointed needles for project Using larger needle and both colors of yarn, cast 12 stitches each needle on to two double pointed needles using magic cast on. (24 sts total.) If you are not familiar with magic cast-on, you can cast on 12 sts provisionally with one color, then cast on 12 stitches going in the opposite direction. Slip stitches onto project needle alternating knit stitch off the near needle, purl stitch off the far needle. when the row is complete, you have 24 stitches alternating knit or purl in two colors on one needle. Being certain to twist yarns at the end of the rows, work double knitting to desired height. Model was worked for 26 rows. Work 5 rows not twisting edge stitches. Graft each top to its respective side. You will need to grafft 2 stitches as if they are one at the beginning or end of the row in order to bring your stitch count down to 11. Weave in edges. You may wish to split the plies of the kitchen cotton and weave the plies in different directions. Make cord. You can do this by: Plying kitchen cotton. Making finger cords. Making i-cord. Making Kumihimo braids. Making Chinese crown macrame braids. Making plain braids.
Magic Cast-on
The magic cast-on is a perfect way to start a double-knitting project. If you use this cast-on, and a grafted (Kitchener) bind off, both ends of your project will match. Things to remember about magic cast-on: The yarn always goes over the needle like a yarn over — that is, the yarn comes from the bottom of the needle, up in front c the needle, over the top of the needle, and down behind the back of the needle. If you find you are making a figure-eight with the yarn, you aren't doing magic cast-on. Yarn goes opposite where you expect. The top yarn creates stitches on the bottom needle, and the bottom yarn creates stitches on the top needle. Cast-on bottom then top. Most directions will have you do it the other way, but then when you rotate, you would be knitting into the last stitch cast on. If you cast on bottom then top, when you rotate you will be working into the next to last stitch cast on. Cast on the first two stitches, then tighten. Cast on the remainder of the stitches in pairs. There are other ways to get started besides magic cast-on: Easy way #1: Choose one color and cast on all the stitches needed for both sides of the fabric. This produces a plain edge that is all one color; it is the same color on either side. Easy way #2: Start with half as many stitches as needed. Increase to double that number by knitting each stitch with both colors of yarn on the next row. This technique is most useful if starting from a pre-existing garment — e.g. working a plain sleeve from the top down and only working the cuffs in double knitting. Fancy way #1: Cast on half as many stitches needed using a provisional cast on. Pick up from the cast on edge and knit the other half of the stitches needed in the other color. This creates an edgeless piece of fabric. (This is the same arrangement as magic cast-on.) Fancy way #2: Using both colors of yarn, cast on all the stitches needed but alternate between colors. This produces a candystriped edge.
Basic Double Knitting
For the soap sack, cast on 24 stitches total, (12 pairs). They are positioned on the needle so they are interlaced in two colors. One color is all knits. The other color is all purls. Imagine numbering the stitches, from #1 through #24. All the odd-numbered stitches are knits. All the even-numbered stitches are purls. Twisting to close the edge: Begin the row by bringing the color on the back needle (the purl color) underneath and to the right of the front (knit) color. Then drop it back and over the knit color. Be sure the front yarn will wrap around and trap the back yarn as you work the first stitch. Double-knit: With both strands at the back, \*Using only the front color, knit stitch #1. Bring both strands to the front. Using only the back color, purl stitch #2. Take both strands to the back. Repeat from \*, knitting the odd stitches and purling the even. When you get to the end of the row, turn. Be certain to twist to close the edge. Work back across, as before. Notice that the previously knit stitches are now purled and the previously purled stitches are now knit. That's it! After you work several of these rows, check your work. You should be able to pull it apart like a little pillow. If you make a mistake, you may end up with a strand cutting across the inside of your work and disrupting the pocket. If you are using two colors, this should be easy to spot if you remember to check your work every row or two.
Grafting
Grafting the top edges down to create a casing for the draw string on your soap sack is not difficult, but you can make it easier than you think. On the purl side of the work, there are both mountain bumps and valley bumps. You will be grafting into the valley bumps. mountain bump valley bump From the stitches on the needle, count down six rows of valley bumps. Using brightly-contrasting slippery waste yarn, run a basting stitch just underneath this row of valley bumps. You now have a visual guideline to help you graft. Cut your working yarn, leaving about a yard/meter. Thread a needle. Fold the live edge down and graft the live stitches by coming up in the live stitch, copying the valley bump (akin to duplicate stitch), then going back down in the live stitch. You'll have 12 live stitches but only 11 valley bumps, so you need to "graft 2 together." For the first stitch, overlap two live stitches and treat them as one. After grafting one side, graft the other. On the other side, graft 10 stitches and graft the last two stitches together. When completed, remove the slippery waste yarn.


