Fuzzy Buzzy Bee Costume by Hattie B. Holtapp
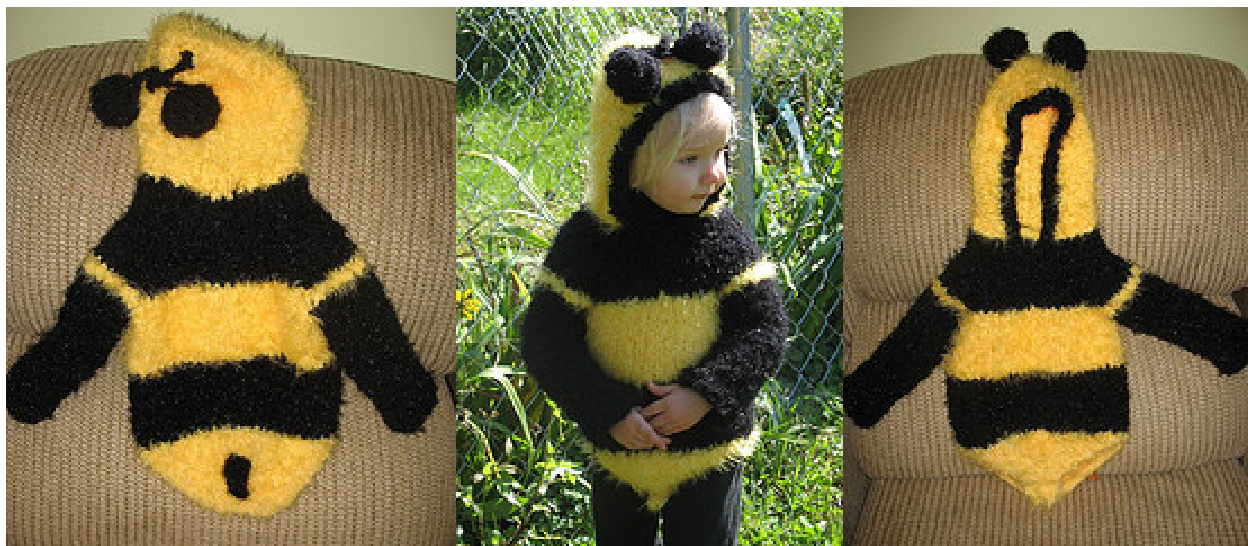
Does a 2 year old really need a bag of candy? Obviously, no, but I'm looking forward to it. Here in Illinois, trick or treating can be a chilly business, so this suit is meant to be warm and cozy. It's also quick, knit in the round with a gauge of 1 stitch per centimeter and very little finishing. Your gauge swatch is used to form the antennae bobbles. If it's the eleventh hour, you can omit the sleeves and bottom shaping. I should mention that the nifty hood shaping comes from Diana Foss' "Three-in-One" baby pattern. Size: 2T, a finished chest of 50 centimeters. Materials: 2 balls Yarn Bee "Airy" in Black, 2 balls Yarn Bee "Luscious" in Lemondrop (used double stranded throughout). \*Please note, these yarns were on clearance at Hobby Lobby for $^{\Phi2}$ I'm not well versed in novelty yarn, so there may be substitutes that work,like Lion Brand Homespun. If you can do it allin "Airy" or "Luscious" just make sure you have the gauge. Size 11 circular needle 4 size 10.5 dpns Old onesie for snaps 4 stitch markers stitch holders or waste yarn for holding stitches. Abbreviations: SK2P: Slip one, knit to together, pass slipped stitch over. PM: place stitch marker. Gauge swatch: With larger needles, CO 20 stitches and knit 4 inches in stockinette. You should end up with an $8\times4$ inch square, which you will use later, if you want, to make the googly antennae. Gauge is 10 sts per 4 inches/10cm. (If you can measure the child in question, you should have a direct correlation between their chest measurements (in cm) and stitch count.) With Black, CO 44 sts. Work 1" in K1,P1 rib. Switch to Yellow (using 2 strands) and knit 18 centimeters in stockinette. Ending with a wrong side row. Begin hood shaping: Work 23, K2 tog, turn, P3, P2 tog, turn. Continue working back and forth over the 3 middle stitches, reducing one stitch on every side until you have 4 stitches left on the needle. K2 tog twice. Bind off. To begin the neck, using black, pick up 34 stitches around the bottom of the hood and work in K1,P1 rib for 4 cm, ending with a wrong side row. Knit 5 (front), pm, knit 7 (arm), pm, k 10 (back), pm, K7 (arm), pm, K5 (front). Next row and all wrong side rows: Purl. Next row and all following right side rows: Knit, increasing one stitch on each side of each marker. Work flat until you have about 7 cm from the collar, then join to work in the round, continuing to make the 8 increases every other row. AT THE SAME TIME: (I hate it when instructions do that...) work your stripes. I knew I wanted the "bottom" yellow, and sort of planned accordingly. My stripes are roughly 10-11 cm, but with yarn like this, precision isn't really possible.) When you have 24 stitches in your front and back sections, work your next round and place the arm stitches on holders, casting on 2 stitches at each underarm. Continue to work in the round until you get to "the hip." From armpit to hip, my suit measures $24\;\mathsf{c m}$ Now, if trick or treating is literally in a couple of hours, you can probably finish the costume, but without the arms. Or, if you'd rather, just continue to work the costume straight (like a dress) and don't bother shaping the bottom, just do some ribbing.
Bottom shaping:
Once you've reached the hip, you'll be working front and back separately, reducing stitches at both the center and the side.
Front, row by row:
K 11 stitches, SK2P, K to end. 2 stitches decreased. P2 tog, P to last 2 sts, P2 tog. 2 stitches decreased. K 9 sts, SK2P, K to end. P2 tog, P to last 2 sts, P2 tog. K 7 sts, SK2P, K to end. P2 tog, P to last 2 sts, P2 tog. K 5 sts, SK2P, K to end. P2 tog, P to last 2 sts, P2 tog. etc... Continue like this until you have 5 stitches left. Work 3 rows and BO.
Back, row by row:
Work straight in stockinette for 4 cm and then begin your reducing with the next right side row. K 11 stitches, SK2P, K to end. Purl. K 10 sts, SK2P, K to end. Purl. K 9 sts, SK2P, K to end. Purl. K8 sts, SK2P, K to end. P 2tog, p to last 2 sts, p 2tog. K6 sts, SK2P, K to end. P2 tog, p to last 2 sts, p 2tog. K4 sts, SK2P, K to end. P 2 tog, p to last 2 sts, p 2 tog. When you have 5 sts left, work 3 rows and bind off. Harvest the snaps from the old onesie and sew into place as nicely or as sloppily as you desire.
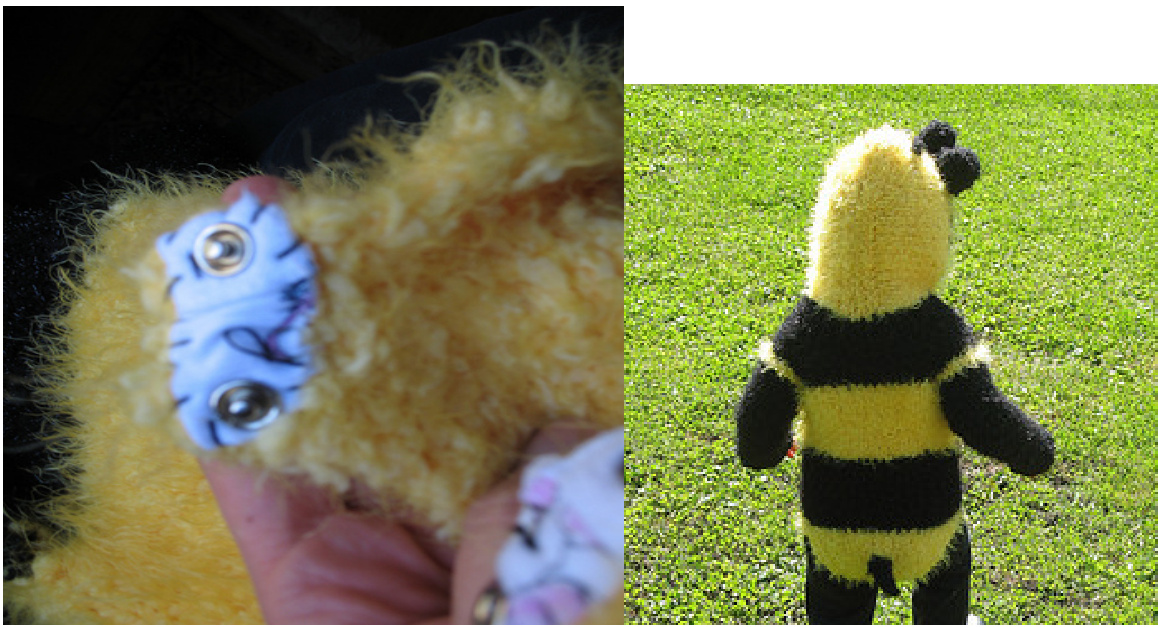
Stinger:
This is probably the most annoying component of the whole project. Use your dpns and locate, roughly, the center of the bee's bottom. Pull up a small circle (1.5-2 cm diameter) of 7 sts. Oh, no, the ball of yarn is on the inside of the suit and the stinger is on the outside! Well, as it happens, you can pull your working strand through the relatively loose stitching and use it to knit the stinger. Using your sanity as a gauge of how long you want the stinger to be, work about 2 cm in. the round, then decrease one stitch on the next round. Decrease stitches every round do acheive a nice pointy little stinger and bind off. Throw project across the room.
For those of us in colder climes, where it is usually nippy.
Using your DPNs, knit the stitches off the holder in either black or yellow, whichever color you want the arms to be, and pick up 2 stitches across the armpit stitches which you cast on in the previous section. Work in the round to the desired length, $24~\mathsf{c m}$ in my case, but my 2T is tall and long-limbed.
Antennae:
There has to be a better way, but this is what I did. Take your gauge swatch and cut it in half. Wad the two sides into rough balls and cinch them together with the black yarn, then join them to the top of the hood.
Wings:
I plan to use black tulle-- $\Phi1$ per yard, incidentally--layered double and cut into two teardrops which will hang from the back and not interfere with a ride in the car seat to visit rural friends. (I've justified this 3 other ways, too.) Much cooler would be to get some wire and shape wings that look way better. Remember, though, you've just made your child a bee costume, which they sell for about 20 at the drug store. Give yourself a break. Weave in ends and enjoy. Images and text copyright 2008, Hattie B. Holtapp


