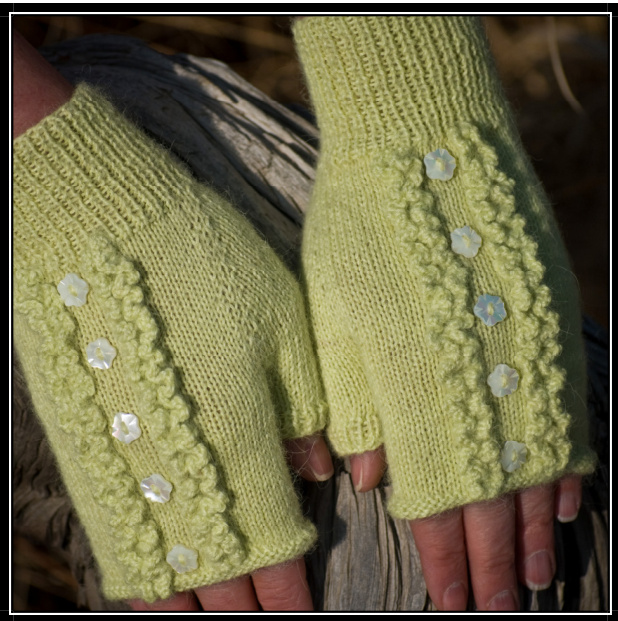
Old Man Winter lingers on with a bit of nip in the air. Spring teases with sunny days, crocus blossoms, and song bird serenades; giggly. Flirty girl! These mitts are perfect for this kind of day.


Suggested Yarn:
Frog Tree 100% Alpaca Wool-Type 2310-Fingerling Weight (1.75 ozs/215 yds) Or any fingering weight yarn that meets gauge. Finished Size: 6.25 inches in circumference and 7 inches in length to fit hands measuring up to 7.5 inches around. Note: This mittfits like a second skin. Size can be modified by adjusting needle size. However, additional yarn may be needed. 190 yards. Gauge: 36 sts and 48 rows = 4 inches in stockinette stitch Needles: Size 1 US (2.25mm) double pointed needles (DPNs) or size to obtain correct gauge Size 1 US (2.25mm) straight needles - 9 inch or size to obtain correct gauge Size7Crochet Hook Buttons: Misc. Materials e between right and left mitt instructions. Please read through the entire pattern before you start to knit
Left-hand Mitt:
Setup:
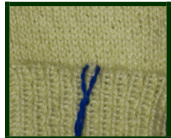
CO 54 sts and divide over 3 DPNs in multiples of 2 sts. Join to begin working in the round by moving the first stitch cast on Needle 1 to Needle 3. Pass the last stitch cast on Needle 3 over this stitch and onto Needle 1. The first and last stitches have been switched. Prepare to begin to work in the round working the cuff as follows: R1: [k1, p1 ] repeat for entire round. Repeat this rnd until cuff measures 2.25 inches. Reorganize the stitches so that there are 27 sts on Needle 1, 14 sts on Needle 2, and 13 sts on Needle 3.
| k = knit | s1 = slip 1 | yo=yarnover |
| μnd = d | psso=passslipstitchover | k(p)2tog-knit(purl)2togetheras one |
| m1=make 1 | PM=placemarker st(s)=stitch(es) SSK= s1kw,s1kw,thenknit those 2 sts tog tbl | |
Copyright ? 2011 Kathleen Cox. Pattern and garments made from pattern are for personal use only and not be used to produce items for resale.
Flirty Girl !
Begin hand and thumb gusset shaping:
Next rnd (inc rnd) On Needle 1,knit 14 sts, slip marker over 14th st, knit remain 13 sts; knit across Needle 2; on Needle 3, k6, PM, m1, k5, m1, PM, k2. [7 thumb sts between markers ] he position of the thumb gusset has been established. Continue increasing every 4 rounds as follows:

R1, R2, R3: Knit across all needles. R4 (inc rnd): Knit across Needles 1 and 2; on Needle 3, k6, slip marker, m1, knit to next marker, m1, slip marker, k2. [9 thumb stsbetweenmarkers ]. Repeat these four rnds 8 times more. Knit one more row. [74 sts total; 25 thumb sts ] Next rnd: Knit across Needles 1 and 2; on Needle 3, k6, slip 25 thumb sts to a piece of scrap yarn or stitch holder, CO 5 sts using the backward loop method, k2. [ 54 sts total; thumb sts are held aside to be worked later ] Next rnd: Knit entire round. Repeat until mitt measures approximately 2.5 inches from thumb opening (or to desired length, minus 0.25 inches). On last rnd, on Needle 1, slip marker over 14th st.
Top Edge:
Next rnd: Purl entire round. Repeat this rnd for a total of 4 rows. Bind off neatly using Sewn Bind C
Thumb:
Place 25 sts from yarn hold onto needles as follows: Place the first and last stitch from holder onto Needle 1, so that the “gap" is between them; dividing the remaining sts onto Needles 2 and 3. ext rnd: On Needle 1, k1, pick up and knit 7 sts in the “gap", k1; knit the remaining sts around. [32 s1 Next rnd: On Needle 1, SSK, k5, k2tog; knit the remaining sts around [30 sts ] Next rnd: Knit entire round. Next rnd: On Needle 1, SSK, k3, k2tog; knit the remaining sts around [28 sts ] Next rnd: Knit entire round. Next rnd: On Needle 1, SSK, k1, k2tog; knit the remaining sts around [26 sts ] Next rnd: Knit entire round. Next rnd: On Needle 1, s1, k2tog, psso; knit the remaining sts around [24 sts ] Knit 6 more rnds, or until 0.5 inches from desired length. Next rnd: [k1, p1] repeat for entire round. Repeat this rnd for atotal of4 rows. Bind off neatly in rib on next round.
| k =knit | s1 = slip 1 | yo=yarnover |
| μnd = d | psso=passslipstitchover | k(p)2tog-knit(purl)2togetherasone st(s)= stitch(es) |
| m1=make 1 | PM=placemarker | |
| SSK= s1kw,s1kw,thenknit those 2 sts tog tbl | ||
Ruffles:

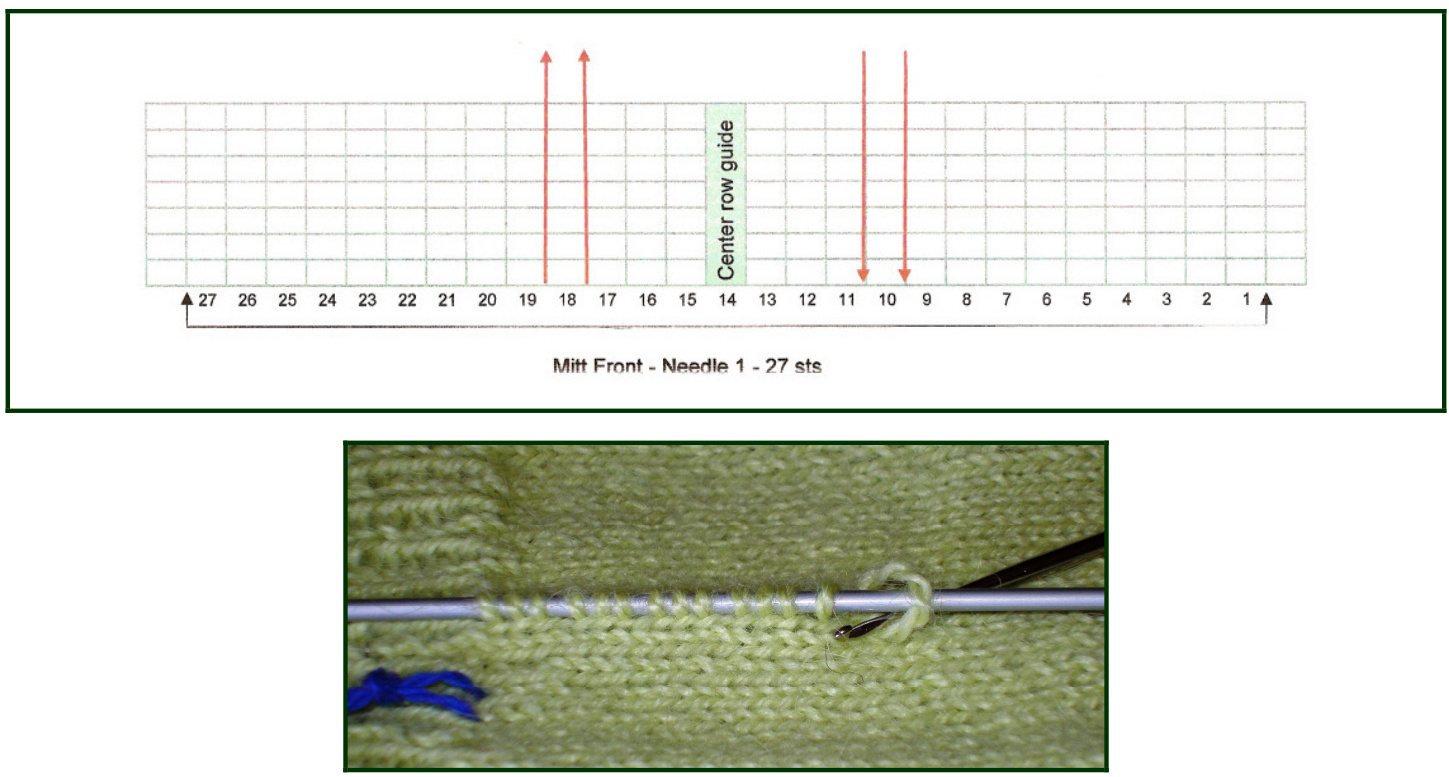
Cut 4 - 5 yard lengths of mitt yarn; one length for each ruffle. Using the center stitch marker as a guideline and following the ruffe placement chart, pick up 3 sts for every 4 rows knitted in the "valley"between stitch columns. Ruffles right of the center line should be picked up from the mitt top down to the cuff. Ruffles left of the center line should be picked up from the cuff up to the mitt top. Next Rnd: k1, Kfbf (knit into front, back, front of each stitch; 3 sts in one) to last stitch, k1. Next Rnd: Bind off in purl st.
Right-Hand Mitt:
Work the same as the left-hand mitt, adjusting the thumb gusset position and increases as follows: Reorganize the stitches so that there are 27 sts on Needle 1, 13 sts on Needle 2, and 14 sts on Needle 3. The gusset increases will then be worked on Needle 2 instead of Needle 3, and Needle 3 willbe worked straight. Next rnd (inc rnd) On Needle 1,knit 14 sts, slip marker over 14th st, knit remain 13 sts; on Needle 2, k2, PM, m1, k5, m1, PM, k6. [7 thumb sts between markers ]; knit across Needle 3. Continue as established; following directions for the left-hand mitt.
| k = knit | s1 = slip 1 | yo=yarnover |
| μnd = d | psso=passslipstitchover | k(p)2tog-knit(purl)2togetherasone |
| m1=make 1 | PM=placemarker | st(s) = stitch(es) |
| SSK= s1kw,s1kw,thenknit those 2 sts tog tbl |
Copyright ? 2011 Kathleen Cox. Pattern and garments made from pattern are for personal use only and not be used to produce items for resale.
Flirty Girl !
Finishing:
Weave in all loose ends on WS of fabric. Evenly place 5 buttons on each mitt along the center stitch guideline. Soak pieces in lukewarm water with wool soap. Squeeze out excess moisture and lay flat to dry without stretching.


