Owly Tertian
sarah-marie belcastro, modified from Lara Neel's Tertian December 5, 2011
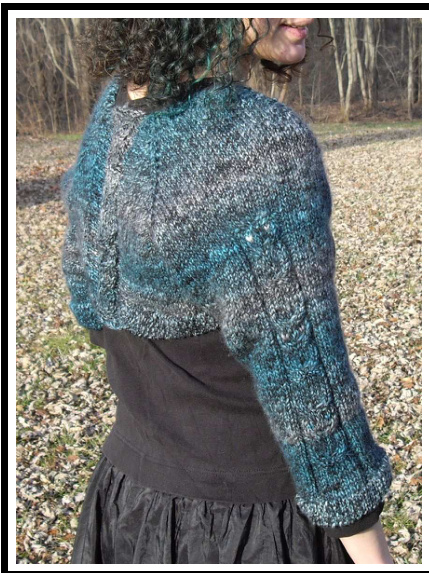
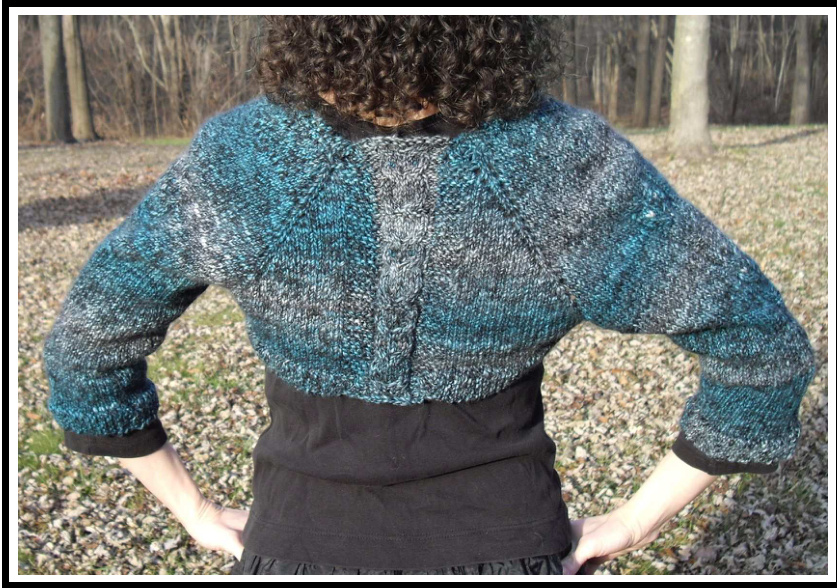
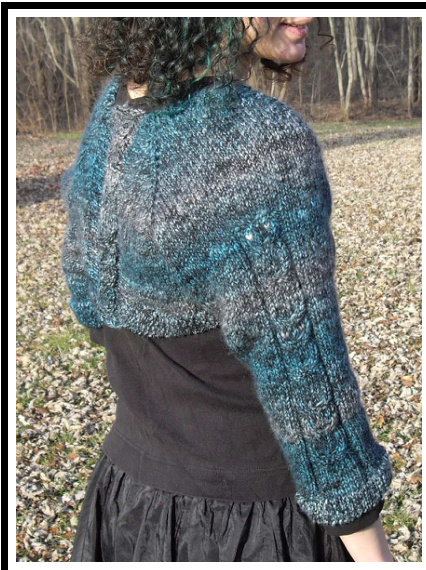
Lara Neel (math4knitters on Ravelry) released the pattern Tertian in May 2011. It's a recipe pattern, customizable to the knitter's body measurements and gauge. I wanted to make it immediately on seeing the pattern! But I'm always cold, and Tertian was knitted in a sport weight bamboo yarn, so I decided to use worstedweight wool. And Tertian has a beautiful ribbon up the back that I knew would let in air that would make my back cold. Then I decided that lace edging would also make me feel cold, and while I was knitting I decided to add some owls... and so I made my modifications, took notes, shared the results with Lara, and she agreed this should be a separate ravelry pattern. So here it is! Much of the text is Lara's original text; I've just edited it to account for the modifications I made.
Materials
Heavy worsted weight yarn; for a small frame, about 450 yds. / 410 m. or about 8.75 oz. / 250 g. The sample was knitted in di.Ve Autunno, color 48162, and used 4.5 balls or 225 g. You can use any yarn, any needles, and any gauge you like: but if you want to use a lighter yarn, you're probably better off looking at the instructions in the original Tertian. Size 8 needles, or other needles that suit your yarn. Three stitch markers, two in color A and one in color B. A bit of scrap yarn. Tapestry needle for weaving in ends.
Gauge
About 4 st./in. in stockinette, but instructions are given for altering the pattern for similar gauges. If you want to use a finer gauge (more than 5 st./in.), then you will do better with the original Tertian instructions.
Abbreviations
K (or k) means knit. P (or p) means purl. Yo (or yo) means yarn-over. K2tog (or k2tog) means to knit two together. SSK (or ssk) means slip, slip, knit, or slip two stitches to reverse their orientations and then knit them together. C 2/2 front means to create a cable on 4 stitches, where the first two stitches are passed in front of the third and fourth stitches. C 2/2 back means to create a cable on 4 stitches, where the first two stitches are passed behind the third and fourth stitches.
Notes
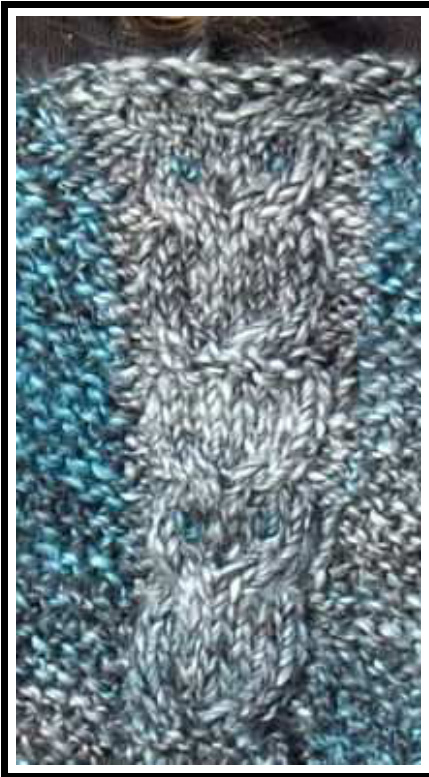
· Lara says, “They say, to knit a typical sweater, one third of the stitches are for the sleeves, one third are for the yoke, and one third are for the body of the sweater below the underarms... Tertian music is based on the interval of a third. In medicine, a tertian fever returns every three days. Let's hope this one-third of a sweater makes you fel like humming and chases chills away." · You will notice that the measurements given in the table below correspond to a full-length sleeve, but the photos show a 3/4-length sleeve. That's because I did calculations for a full-length sleeve and then decided later to make the sleeves shorter! · Instructions for a Short-Row Turn: Row 1: Yo, k2tog, knit 1 stitch, turn. Row 2: Knit 3 stitches, turn. Row 3: Yo, k2tog, turn. Row 4: Knit 2 stitches, turn. Row 5: Yo, k2tog, knit 2 stitches, turn. Row 6: Knit 4 stitches. ● Instructions for an Owl: Row 1: P2, C 2/2 front, C 2/2 back, p2. Row 2: K2, p8, k2. Row 3: P2, k8, p2. Work three more rows 2, 3, 2 (five rows in total). Work row 1. Work rows 2, 3, 2, 3, 2, 3, 2 (seven rows in total). Work row 1. Knit 10 stitches.
Measurements and Arithmetic
| Measurement | Label | smb's | Yours |
| Needle size | 8 | ||
| Stitch gauge, in stitches per inch | G | 4 | |
| Row gauge, in rows per inch | R | 5-5.5 | |
| Circumference of upper arm, with desired ease, in inches | A | 16.25 | |
| Circumference of arm at desired cuff of sleeve, with ease, in inches | C | 8 | |
| Distance from underarm to desired cuff of sleeve, in inches | L | 16 |
Instructions
Left Sleeve Using a provisional cast-on, cast on 4 stitches Knit one row. Work a short-row turn. Knit 16 rows. Work a short-row turn. Place a color A marker. Pick up and knit 14 stitches across the bottom of the 16 rows of garter stitch. Place your color B marker. Pick up and knit 1 more stitch. Place a second color A marker. Pick up and knit the 4 stitches from the original cast on edge.
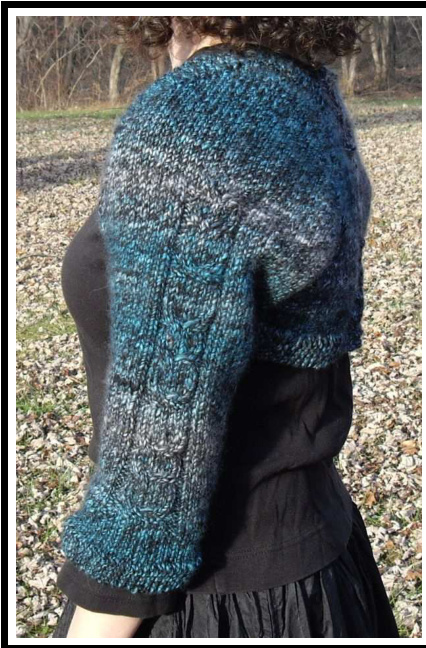
For the next and all other wrong-side rows: Knit to the first color A marker, purl to the second color A marker, knit to the end. Right-side rows: Knit to the first color A marker and slip it. Yarn over. Knit to color B marker. Yarn over, slip marker, knit 1 stitch, yarn over. Knit to second color A marker and slip it. Knit to the end. The stitches in-between your first color A marker and your color B marker are your sleeve stitches. When there are 47 sleeve stitches (not counting yarnovers), begin making owls on the sleeve stitches on a right-side row. That is, knit 18 sleeve stitches, work Row 1 of the frst owl, then knit the remaining stitches. Keep track of which owl row you are on while you continue increasing—a table for tracking rows for three owls is provided at the end of the instructions. You wil stop increasing and move onto adding the back edge border when you have x G = X = sleeve stitches. (This was 65 stitches for sarah-marie.) Work the next wrong-side row. With the right side of the work facing you, slip the stitches up to the first color A marker onto the right-hand needle. Then, slip all of the stitches from that point up to the color B marker onto a piece of waste yarn. Remove the color B marker. These are your sleeve stitches. Leave them alone for now. Slip those before-marker-A stitches back onto the left-hand needle. This means that the stitches on your needle are now the garter on the edge of the sleeve, then the back gusset stitches, then the garter on the other edge. The following instructions are intended to connect the garter on the edge of the sleeve to the bottom of the back stitches. lip the marker, k2tog, turn, knit 1, slip the marker, and knit to the end. Repeat unti (knit right up to it). Now turn the work, and work a short row turn. Do you have the same number of stitches before the marker as after it? Graft them together. If you do not have the same number of stitches, work one more row, increasing or decreasing as needed to make the two sides line up, then graft them together. Next is the knitting of the actual sleeve. First we will determine the rate of decreasing: ? × L = - × - = ; call this number T. (For sarah-marie, this was 5 × 16 = 8 UU. Total decreases needed = (A - C) x G = ( ; call this number D. (For sarah-marie, this was (16 - 8) × 4 = 32.) Total pairs of decreases needed = D/2 = -/2 = ; call this number P. (For sarah-marie, this was 32/2 = 16. She ended up only doing 11 pairs of decreases and ending each sleeve early.) )er pair of decreases = T/P = /- = —. (For sarah-marie, this was (80/16 = ! Go pick up the live stitches you left on a piece of waste yarn before. Place a marker to show the beginning of the round; you will work your decreases on the two stitches on each side of the marker, with a k2tog on one side and an ssk on the other. Knit in the round, continuing to track your owl progress and also tracking your decreases. (A table for tracking decreases is given at the end of the instructions. Make sure you add or cross out boxes so that you have P boxes in each column.) If your sleeves are significantly longer or shorter than in the sample, you may wish to add or subtract owls; if so, add or delete boxes to the tracking table. After you work all of your decreases, cast on 4 stitches onto the left-hand needle and attach edging with progressive k2togs just as you did for the back. Graft the beginning to the end.
Right Sleeve
Using a provisional cast-on, cast on 4 stitches. Knit one row. Work a short-row turn. Knit 16 rows. Work a short-row turn. Place a color A marker. Pick up and knit 1 stitch. Place your color B marker. Pick up and knit 14 stitches across the bottom of the remaining rows of garter stitch. Place a second color A marker. Pick up and knit the 4 stitches from the original cast on edge.
For the next and all other wrong-side rows: Knit to the frst color A marker, purl to the second color A marker, knit to the end. Right-side rows: Knit to the first color A marker and slip it. Knit to color B marker. Yarn over, slip marker, knit 1 stitch, yarn over. Knit to second color A marker, yarn over, and slip marker. Knit to the end. The stitches in-between your color B marker and your second color A marker are your sleeve stitches. When there are 47 sleeve stitches (not counting yarnovers), begin making owls on the sleeve stitches on a right-side row. That is, knit 18 sleeve stitches, work Row 1 of the frst owl, then knit the remaining stitches. Keep track of which owl row you are on while you continue increasing—a table for tracking rows for three owls is provided at the end of the instructions. Increase until you have the same number of sleeve stitches as you had for the left sleeve. Work the next wrong-side row. With the right side of the work facing you, move the first color A marker to after the 4th stitch. On those four stitches, work a short-row turn. Slip the marker, k2tog, turn, knit 1, slip the marker, and knit to the end. Knit to the marker, slip the marker, k2tog, turn, knit 1, slip the marker, and knit to the end. Repeat until you reach the color B marker (knit right up to it). When you reach the color B marker, graft the remaining stitches to the edge stitches after the second color A marker, making up any differences in stitches between them. Work the right sleeve with the same owls, shaping, and cuff as the left sleeve.
Back Owl Panel
Try on your sleeves and have someone measure the natural distance between them on your back. A single-owl panel corresponds to a distance of 2.5-3 inches. For measurements wider than this but narrower than 5-6 inches (the width of a double-owl panel), add more purl stitches to compensate. Also measure the length on your back from the top short-row turn to the bottom corner. If this is different from 10.5 inches, then add or subtract owls or distance between owls so that your finished panel will be the correct length. Cast on 12 stitches. Purl one row. P2, k8, p2. Row A: K2, p8, k2. Row B: P2, k8, p2. Work an owl. Work rows A, B three times for a total of six rows. Work a second owl. Work rows A, B three times for a total of six rows. Work a third owl. Work rows A, B once for a total of two rows. Bind off. Add eyes to each owl on panel and sleeves if desired, using duplicate stitch in a contrasting color or small buttons. Sew the back panel to the two sleeves; the sample was whip-stitched. (You may wish to block the sleeves and the panel first. The sample shown was not blocked.) The panel will spread at top and bottom to match the curve of the short row turns. Weave in ends. You're done! (Unless you like to block your work...)
Tracking Owls
| Left Sleeve step | marks | Right Sleeve step marks | Back Panel step | marks |
| Owl 1: five rows be- tween cables Owl 1: seven rows | Owl 1: five rows be- tween cables Owl 1: seven rows between cables | Owl 1: five rows be- tween cables Owl 1: seven rows | ||
| between cables Nine rows between owls 1 and 2 | Nine rows between owls 1 and 2 | between cables Six rows between owls 1 and 2 | ||
| Owl 2: five rows be- tween cables | Owl 2: five rows be- tween cables | Owl 2: five rows be- tween cables | ||
| Owl 2: seven rows between cables | Owl 2: seven rows between cables | Owl 2:seven rows between cables | ||
| Nine rows between owls 2 and 3 | Nine rows between owls 2 and 3 | Six rows between owls 2 and 3 | ||
| Owl 3: five rows be- tween cables | Owl 3: five rows be- tween cables | Owl 3: five rows be- tween cables | ||
| Owl 3: seven rows between cables | Owl 3: seven rows between cables | Owl 3:seven rows between cables | ||
| Two rows after owl3 | Two rows after owl3 | Two rows after owl3 |
Tracking Sleeve Decreases
| Left Sleeve | marks | Right Sleeve | marks |
| rows between decreases | rows between decreases | ||
| rows between decreases | rows between decreases | ||
| rows between decreases | rows between decreases | ||
| rows between decreases | rows between decreases | ||
| rows between decreases | rows between decreases | ||
| rows between decreases | rows between decreases | ||
| rows between decreases | rows between decreases | ||
| rows between decreases | rows between decreases | ||
| rows between decreases | rows between decreases | ||
| rows between decreases | rows between decreases | ||
| rows between decreases | rows between decreases |

sarah-marie is a free-range mathematician who almost compulsively generates knitting patterns. Sometimes she writes them down. Sometimes she actually knits them. You can learn more about her at http: //www.toroidalsnark.net.

Lara has a degree in physics and is a professional photographer. As of this writing, she has nearly 100 patterns posted on Ravelry. Check out Lara's knitting blog at http://wwwjournalgazette.net/craftyliving, or on Ravelry in the Math4Knitters group. On Facebook, search for JG Crafty Living.


