The Katniss Cowl, by Lauren McClain of LollyKnits Designs
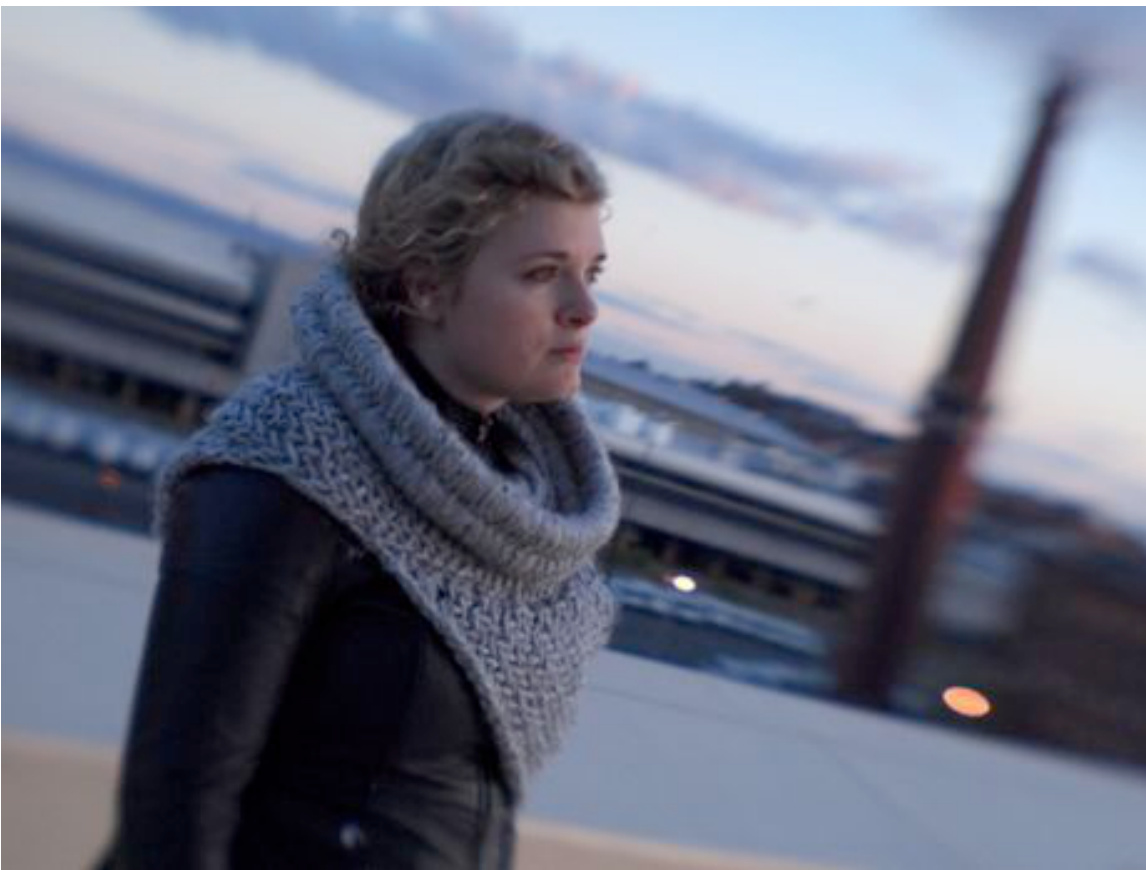
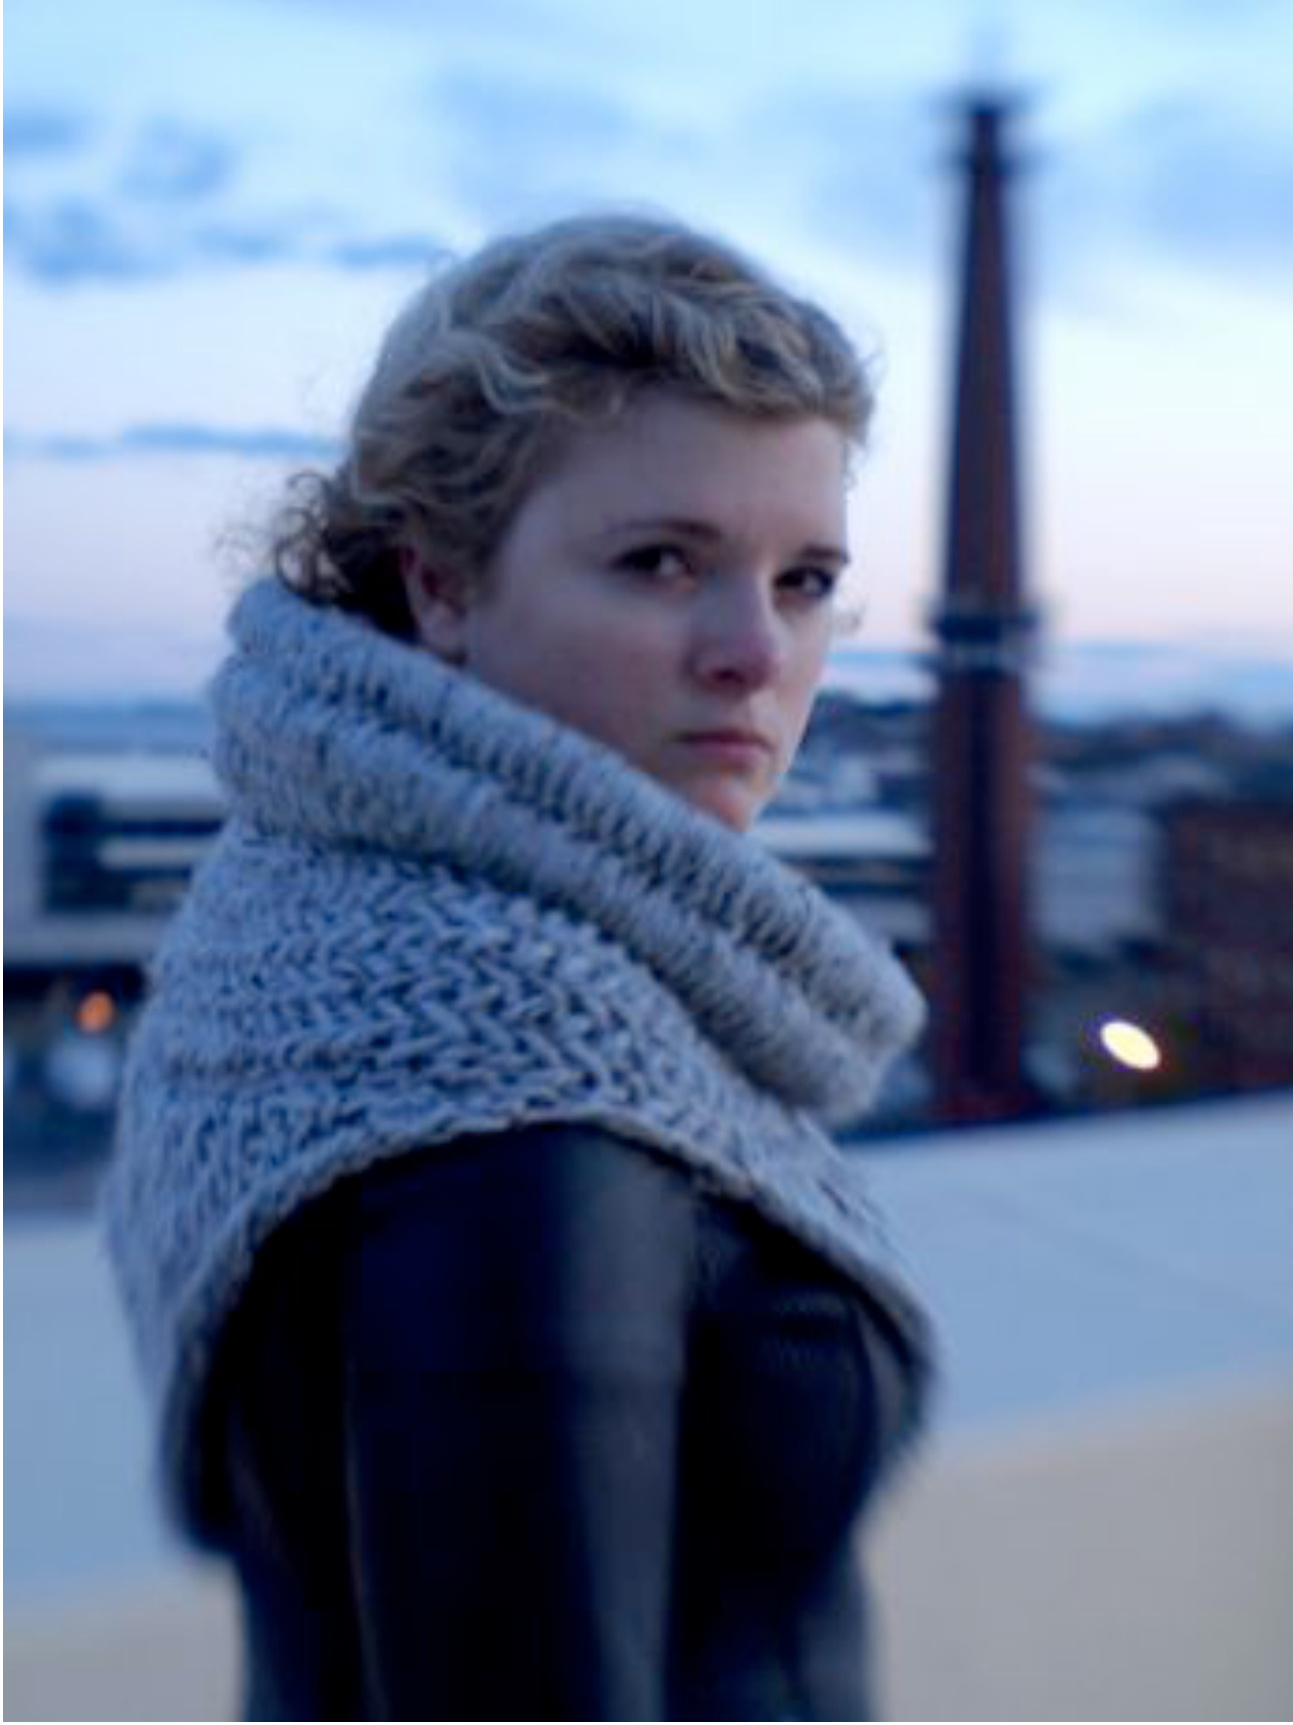
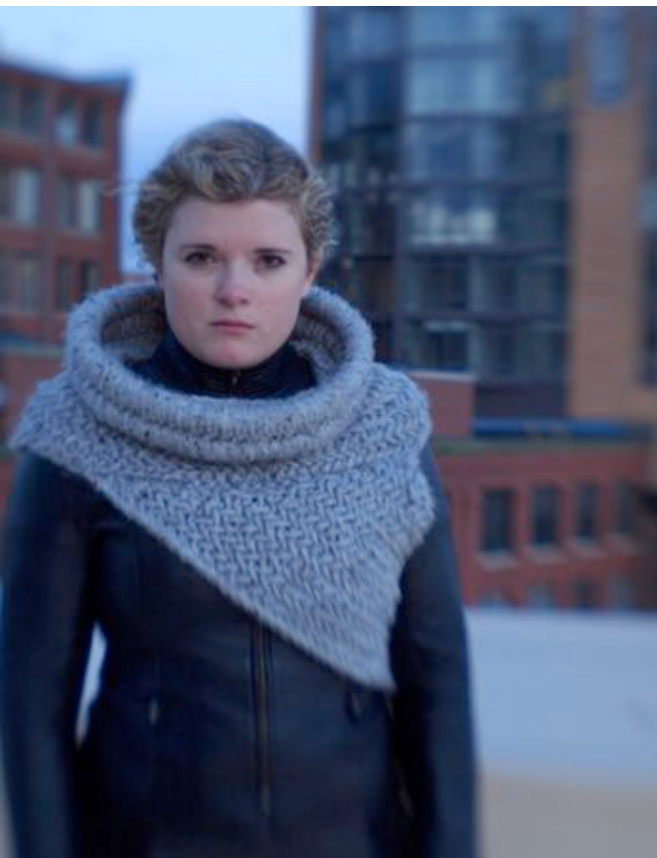
Who doesn't want to be Katniss Everdeen? She's tough, brave, and cool, and really inspiring. This cowl is inspired by a costume piece from the new Hunger Games movie, Catching Fire. The moment I saw it I knew that I just had to have it, and I believe many knitters felt the same way! It's absolutely what you want to be wearing as you start a revolution. Not only is it gorgeous, it's also really warm! I think it looks like a piece of modern armor.
Materials:
3 skeins of Lion Brand Wool Ease Thick and Quick yarn in Grey Marble, or whatever color pleases you. Any super bulky yarn will work, as long as you get about 9 stitches to 4 inches in stockinette on size 13 needles. Size 13 Circular needles. 36 inch length (or smaller if you want a smaller neckline to your cowl) Size 17 Circular needles, 36 inch length
Herringbone Stitch Flat:
All Right Side Rows: Knit 2 together through the back loops, but only move the first stitch off of the left needle. The second stitch will remain on the left needle. Knit it together (through the back loops) with the next stitch on the left needle, once again only moving the first stitch off of the needle. Continue until there is only one stitch left in the row, then knit 1 and turn. All Wrong Side Rows: Purl 2 together (through the front loops), only moving the first stitch off of the left needle. Purl the second stitch (the one remaining on the left hand needle) together with the third stitch, only moving the second stitch off of the needle. Continue until there is only one stitch left in the row, purl 1 and turn. Youtube video for Herringbone Stitch Flat: (used with permission from the creator!) http://www.youtube.com/watch?v=8MRGAavTZ0Q
Herringbone Stitch in the Round:
Row 1: (same as the pattern worked flat) Knit 2 together through the back loops, but only move the first stitch off of the left needle. The second stitch will remain on the left needle. Knit it together (through the back loops) with the next stitch on the left needle, once again only moving the first stitch off of the needle. Continue until there is only one stitch left in the row. This stitch will be the first stitch in the next round.
Row 2:
Take the last stitch from the last round, and knit it together with the first stitch in the next round, through the front loops this time. Only move the first stitch off of the left needle. Knit the next two stitches together (through the front loops), moving the first stitch off the needle and leaving the second on it. Continue in this manner until there is only one stitch left in the round, then use that stitch as the first stitch in the nextround. Repeat these two rows until you reach the desired length. Youtube video for Herringbone Stitch in the Round: http://www.youtube.com/watch?v=tFFLhpklrNY&list=PL4C66681782AACD59&in dex=31
Body (Make 2):
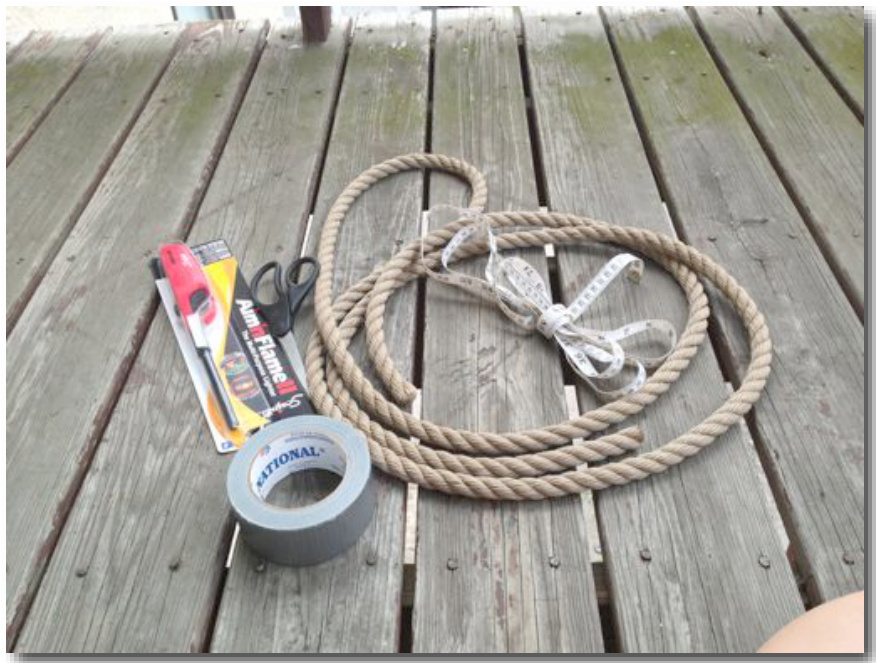
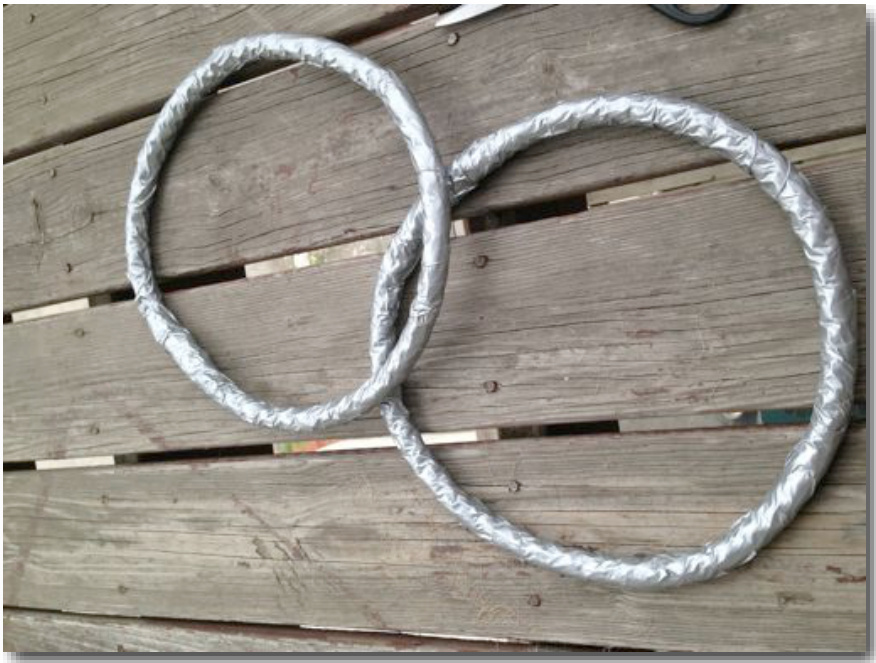
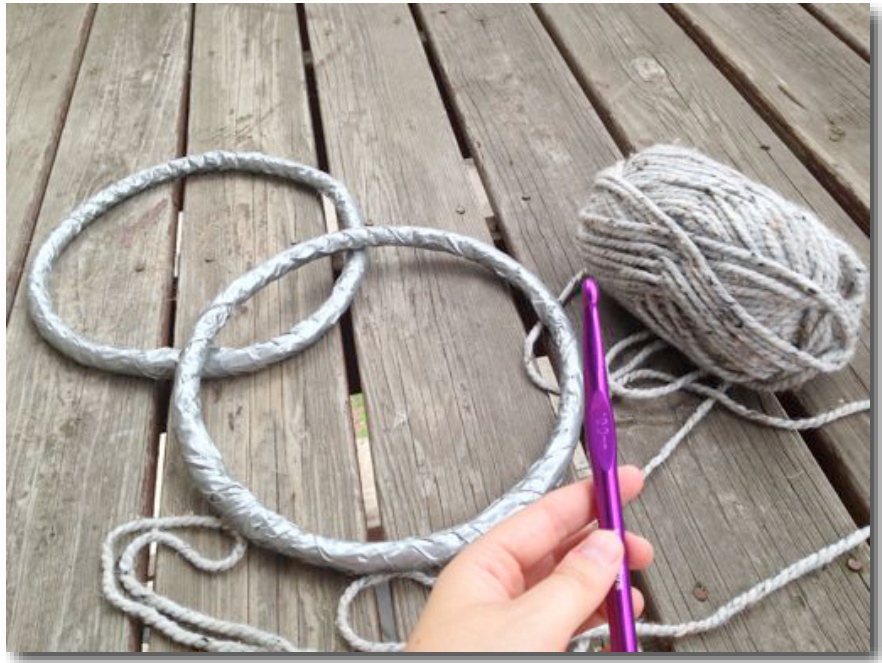
With Size 17 needles, cast on 44 stitches L00SELY. Work in Herringbone Stitch, beginning with a wrong side row. I personally prefer the way this looks with the cast on edge. On the first and last stitch of each row, work a decrease. For the right side rows, k2together through the back loops and then move both stitches off the needle, and on the wrong side rows, p2together and move both stitches off the needle. When you have only four stitches left, p2together twice, and turn. Knit the two stitches together so there is only one left, cut working yarn, and pull through the loop. This will produce two triangle shapes. (Isosceles triangles, for those who care about such niceties.) Wet block these two pieces ferociously. Their final measurements should be approximately 24x15x15. However, these are only guidelines. Gauge isn't terribly important in this project, and it is more important that both of your pieces are the SAME SIZE, rather than matching these exact measurements. You want to aggressively wet-block them in order to produce drape, rather than something stiff like body armor. Now, prepare for the slightly fiddly portion of this process. For the neckline of this cowl, you will need the following: 8 feet stiff 3 ply Polyester rope. (Don't get natural fibers, they will combust.) If you want a slightly floppier neckline, you can go with a floppier cord, but the one I used was extremely crisp, because I wanted a collar that would hold its shape. Lighter Duct Tape Measuring Tape Sharp Scissors A Pitcher of Water (for safety purposes) 10mm Crochet Hook Yarn
Step 1.
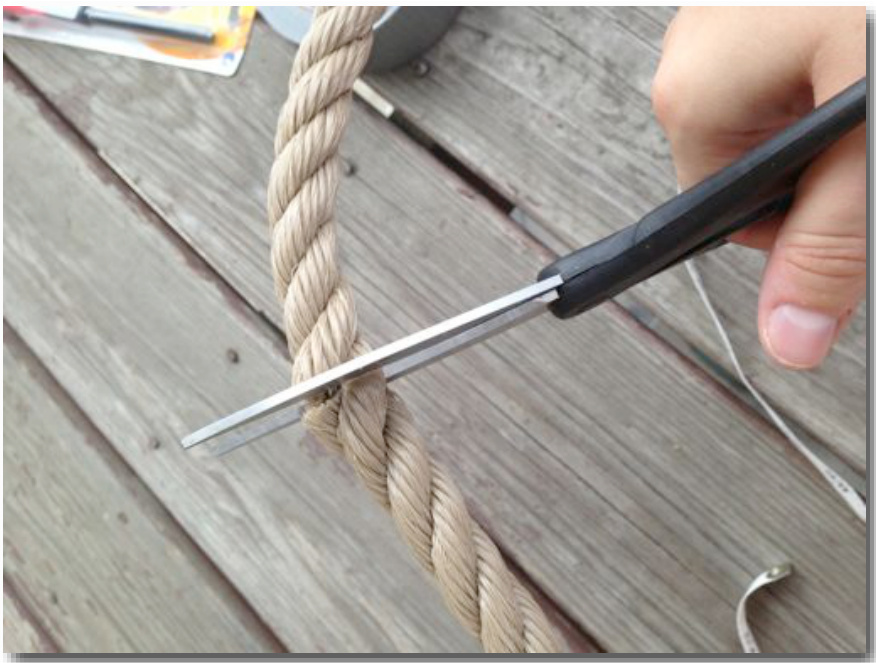
Decide exactly how large you want the neckline of your cowl to be. The one on mine is 36 inches around. If you want one precisely like the one Katniss wears in the posters, it looks to be more like 30 or 32 inches. Step 2. Add 2 inches to that length. 36+2=38. Measure that length of cord, and cut with the scissors. You will probably have to untwist the rope slightly, and cut each ply individually, like so. The resulting cord will look like this:
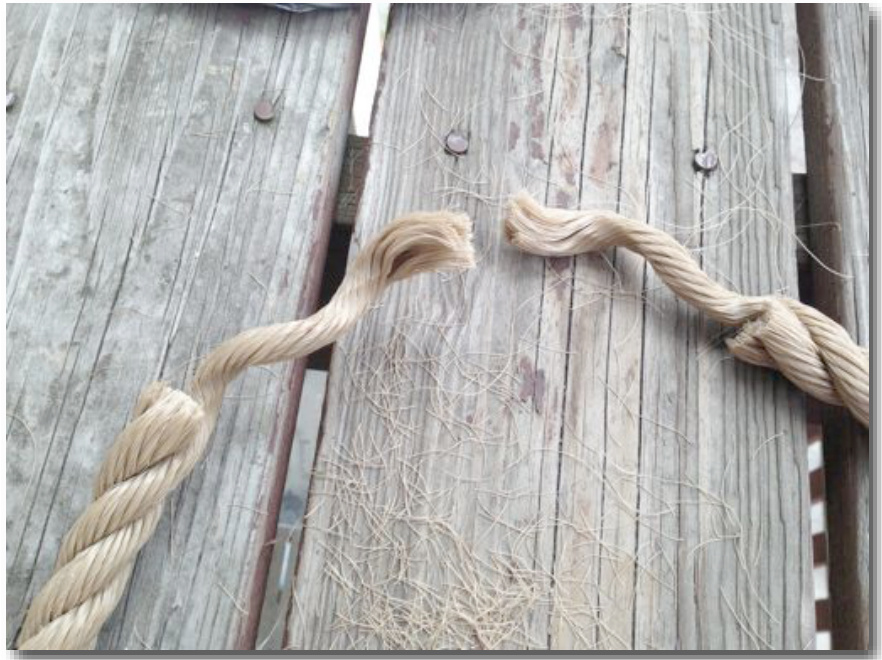
Step 4. Untwist the three strands that make up the rope. (Each strand is obviously made up of many smaller strands, but for our purposes, we are only paying attention to the three main strands.)

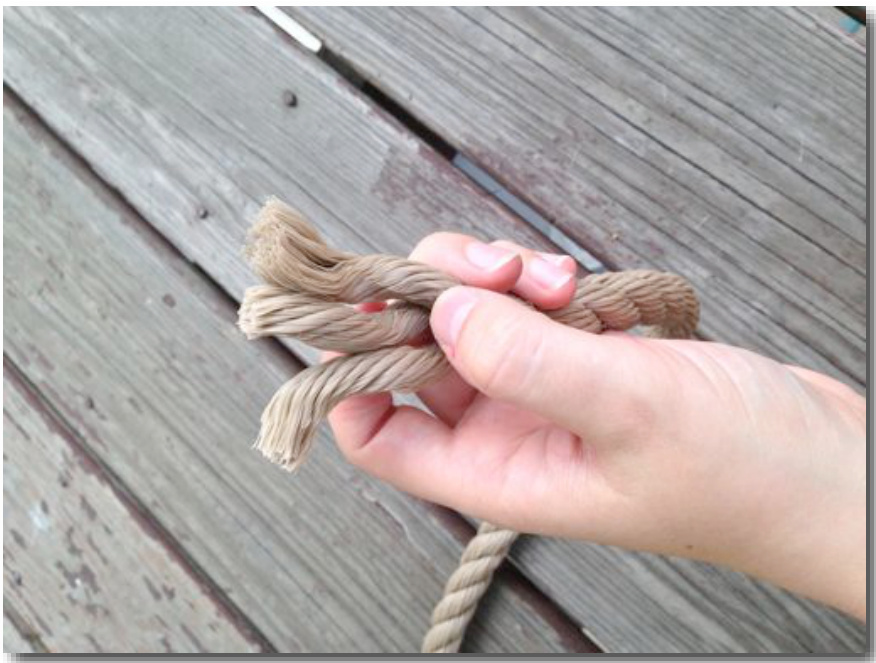
Step 5. Cut two of them so that they are two inches shorter than the third strand. Do this on both ends. You can change the length of the strand you leave long. provided that they are the same length on both sides.
Step 6:
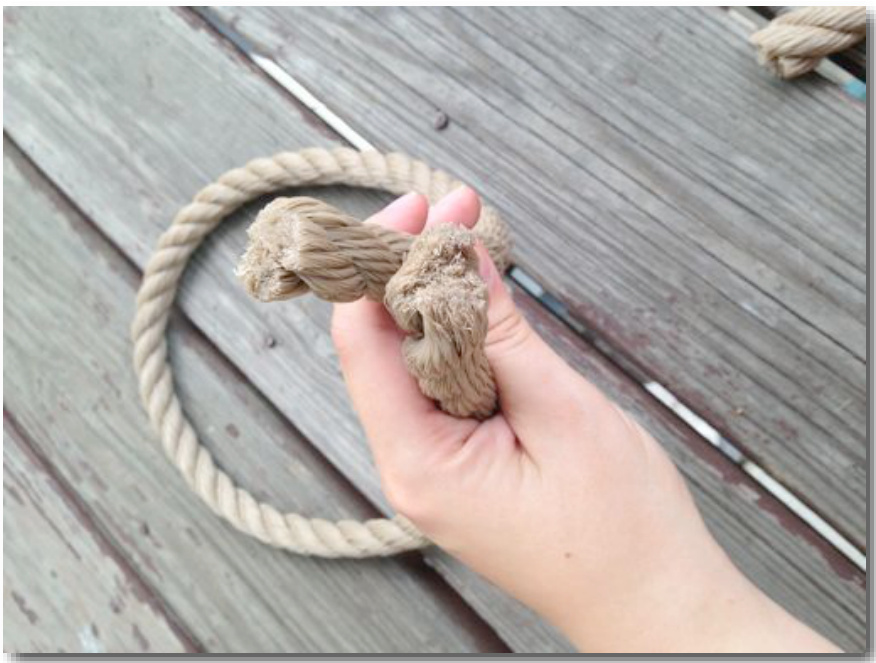
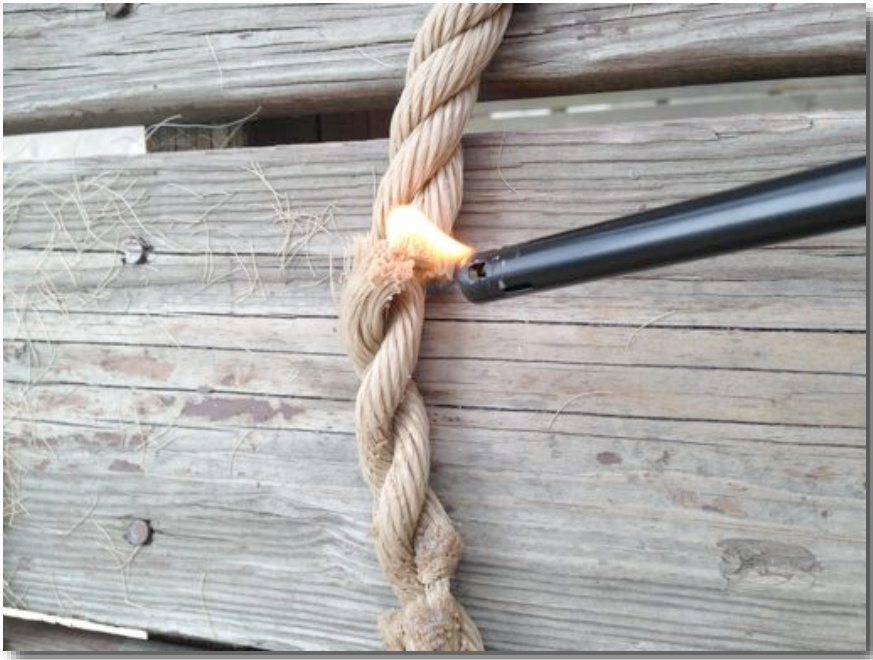
Twine the two long ends together, so that the long end on each side is touching the short ends on the opposite side of the cord, and begin to melt together with the lighter. This will possibly make the individual fibers curl up into little mushroom shapes, and may cause them to combust. If they do start to burn on their own, try blowing it out. If that doesn't work, use the water that you SHOULD have handy.
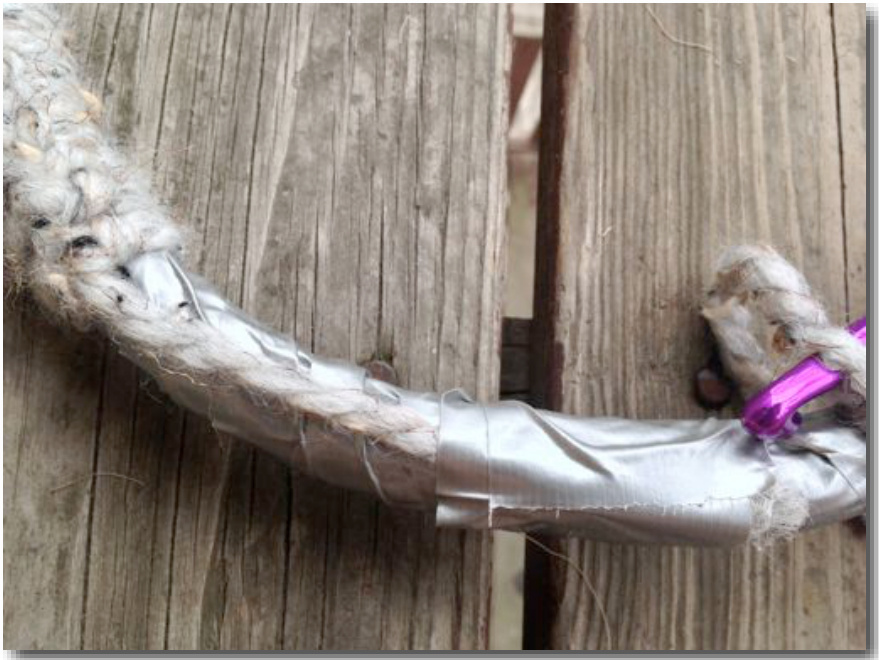
Step 8: Begin to wrap the loop of rope with duct tape.
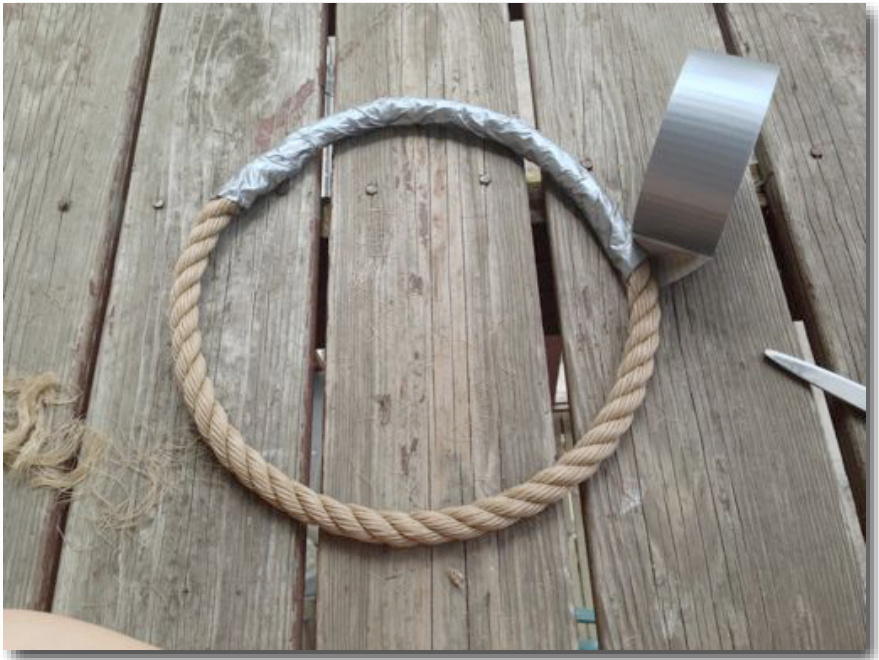
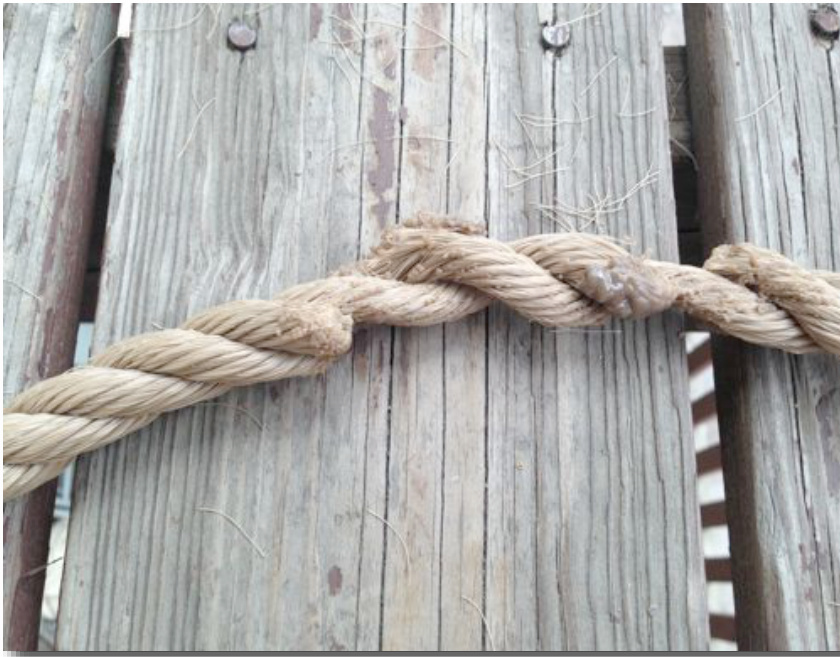
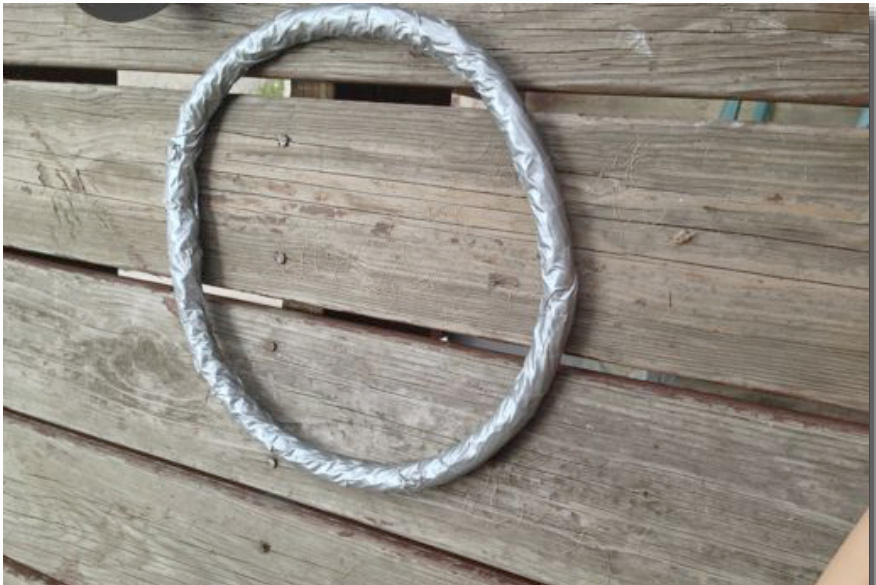
Step 7: Keep burning and melting the strands together until they adhere to each other, while pushing them into approximately the right shape. Melt them as smoothly as possible, but a little ugly lumpiness doesn't matter too terribly in light of our next step, so don't be alarmed if it isn't pretty. (See the picture to the right. Totally uggs.) Step 9: Continue until the rope is entirely covered. If any portions are problematically lumpy, give them an extra layer or two of tape. This does wonders for smoothing things out. Even if there's still a few lumps, it'll be virtually invisible once it's covered in yarn.
Step 10:
Make another identical loop, repeating steps 1-9. Pause to admire your work. Dance a bit if it pleases you. Now, gird your loins knitters. This next part involves something that distinctly resembles crochet. Do not be alarmed, it isn't terribly difficult, but for those of you who are crochet haters, you might be just a wee bit mad at me. However, it does produce an absolutely stunning effect, so I hope that you'll forgive me. Here are the materials you will need.

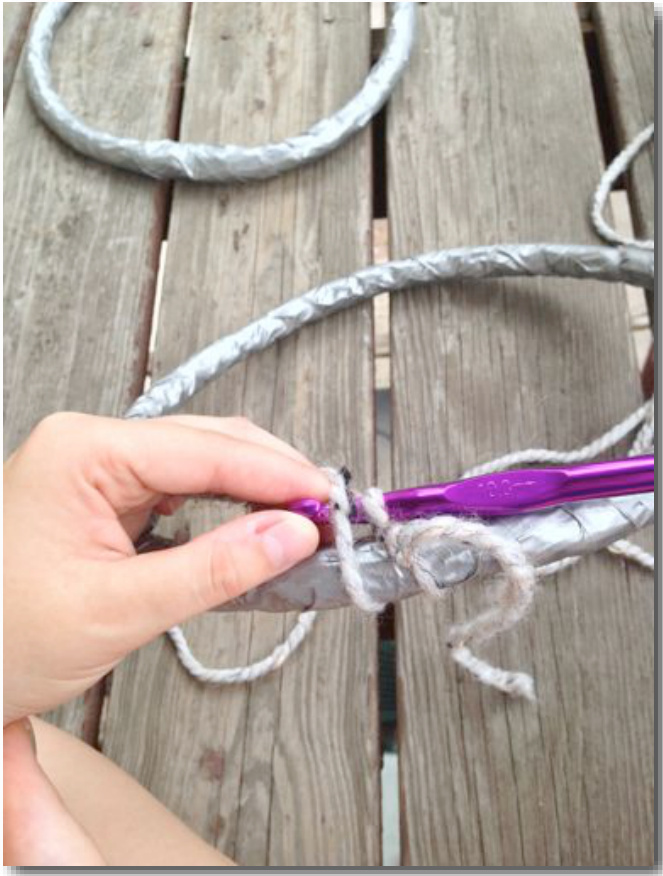
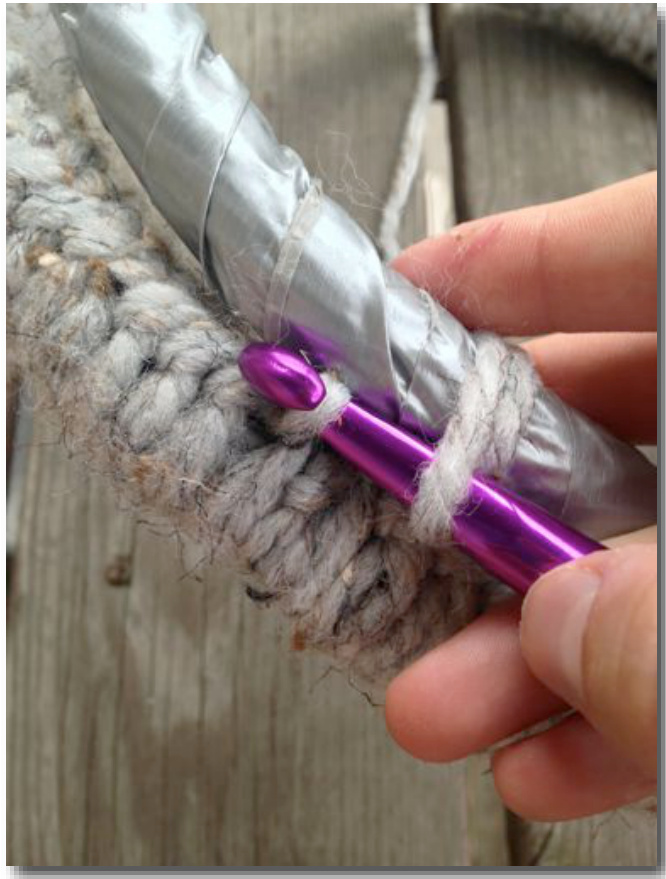
Step 2. Take the working yarn (the end connected to the ball) and wrap it around the circle, going from the outside edge, to the inside of the circle. (1056) Step3. Wrap the yarn around the crochet hook.
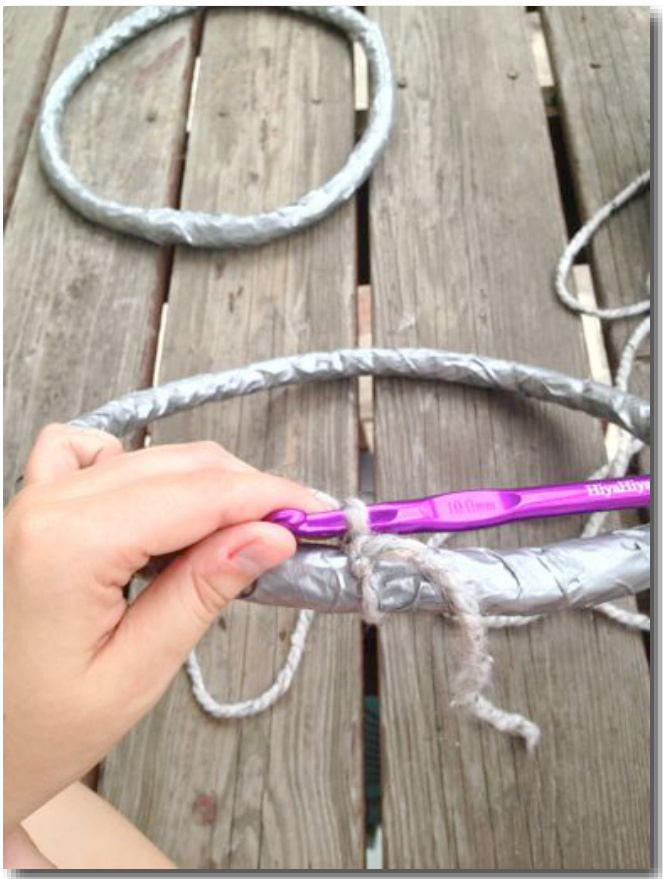
Step 1. Make a slipknot, and place it on your crochet hook. Hold the crochet hook at the top of the duct tape circle, with the yarn hanging down on the outer edge of the circle.
Pull the yarn that you've just wrapped around the crochet hook through the slip knot that was already on the hook, moving the slip knot off of the hook. Pull on the working end of the yarn to tighten it around your circle.
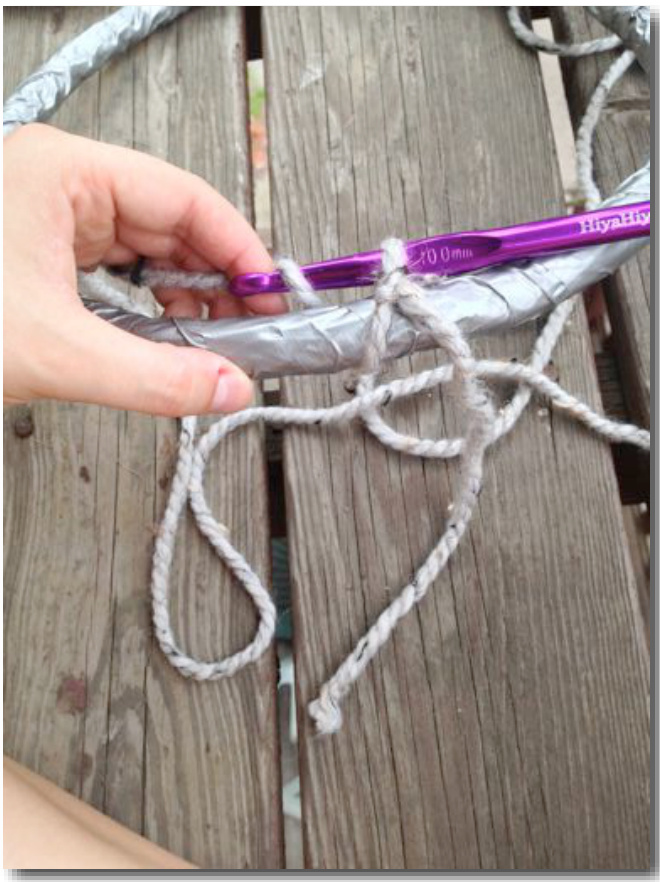
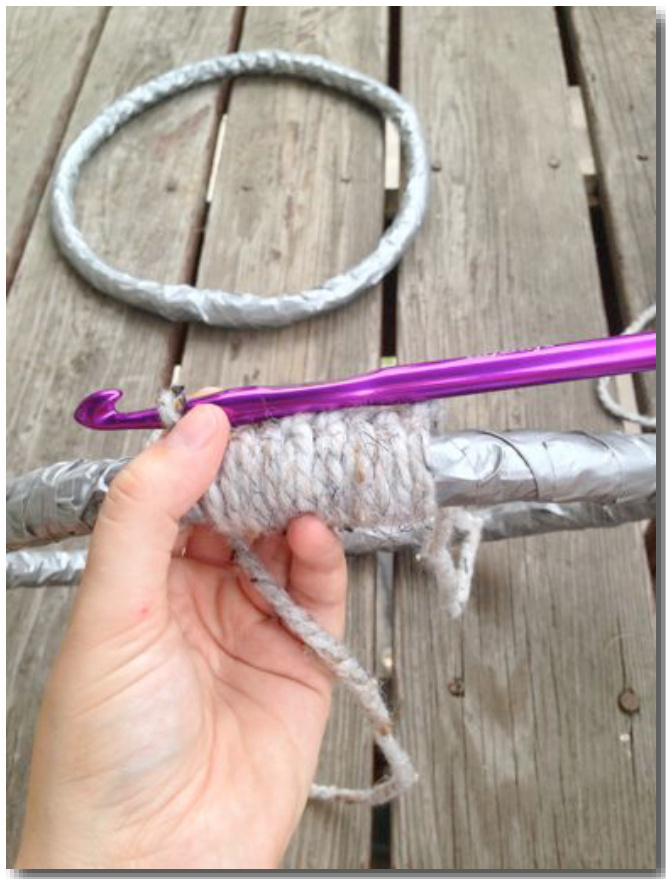
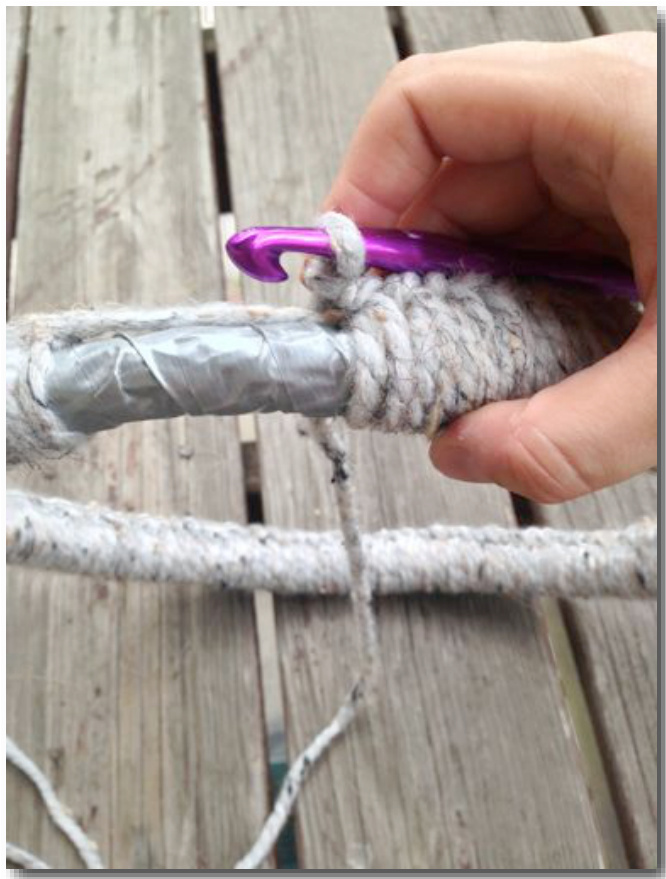
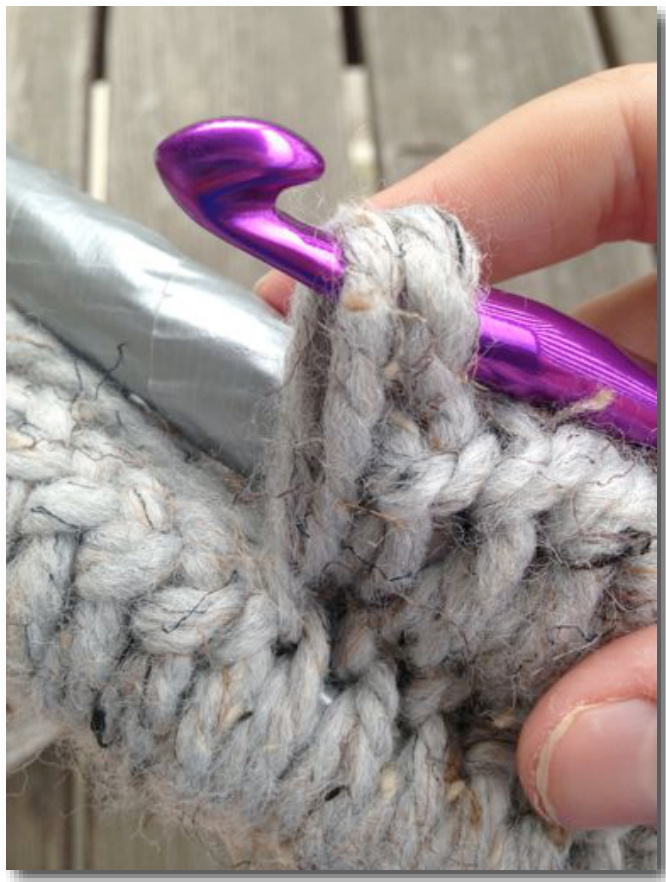
Now we are going to do the same thing, but in reverse. Step 5. Take the working yarn, and wrap it around the rope, going from the inside of the circle to the outside. Wrap the yarn around the crochet hook. Pull that yarn through the loop that is already on the hook. You should never have more than two loops on the crochet hook at a time, which is totally weird if you're used to knitting! You will always be looping yarn around the crochet hook and then immediately pulling it through the previous loop. After each stitch, you will want to pull on the working end to tighten it, and every few stitches, you should squish the stitches as tightly together as you can, so the duct tape on the rope doesn't show through. After a few inches, it will look like this!
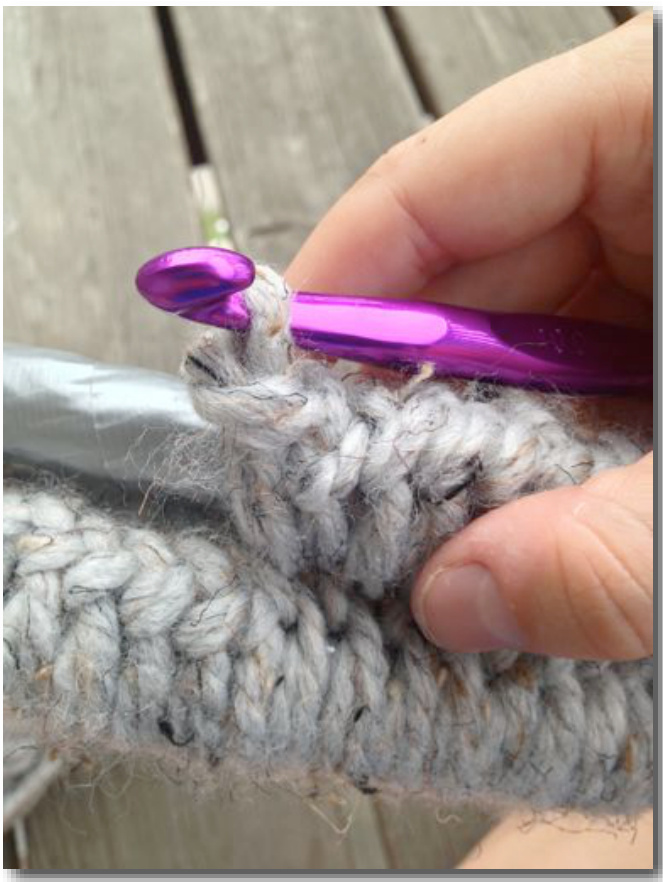
Continue in this manner until you've nearly covered all the way around the circle. Now we want to hide the other end of the yarn so there's no tail hanging off of the circle. Trim the tail down until it's just a few inches long, and place it along the top edge of the circle.
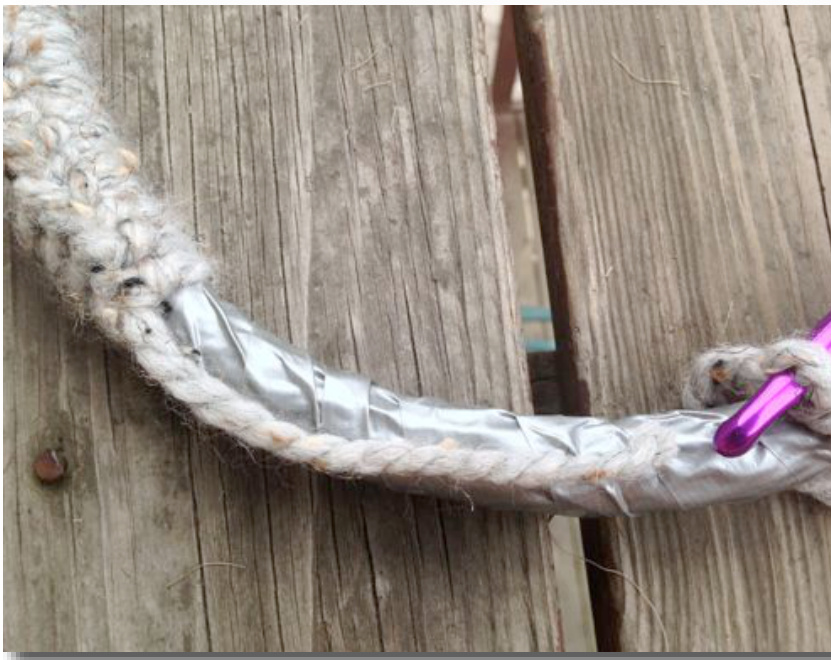
Wrap a piece of duct tape tightly around the end of the yarn, like so. Continue crocheting around it, effectively hiding any indication of the beginning of the round. Tricksy!

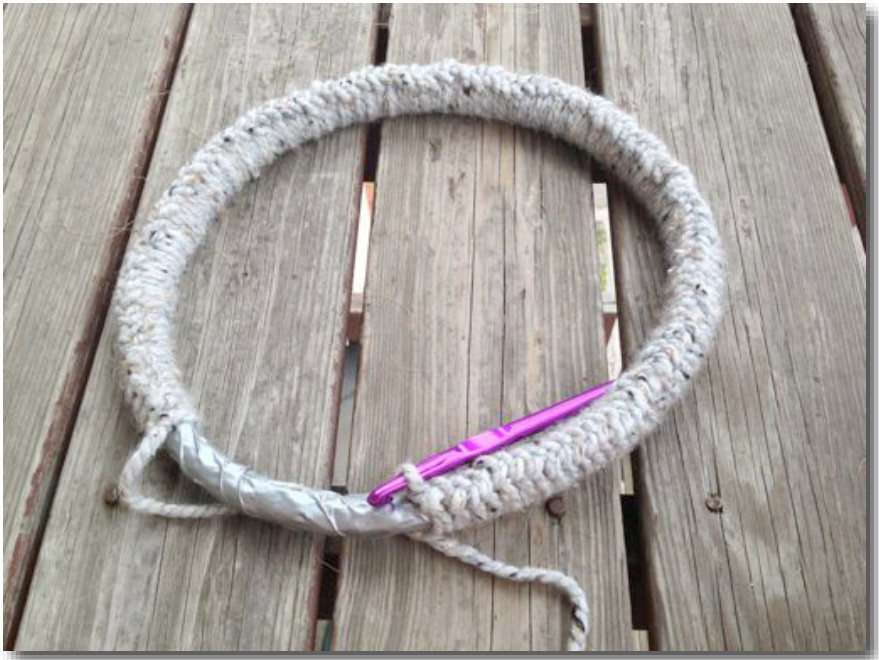
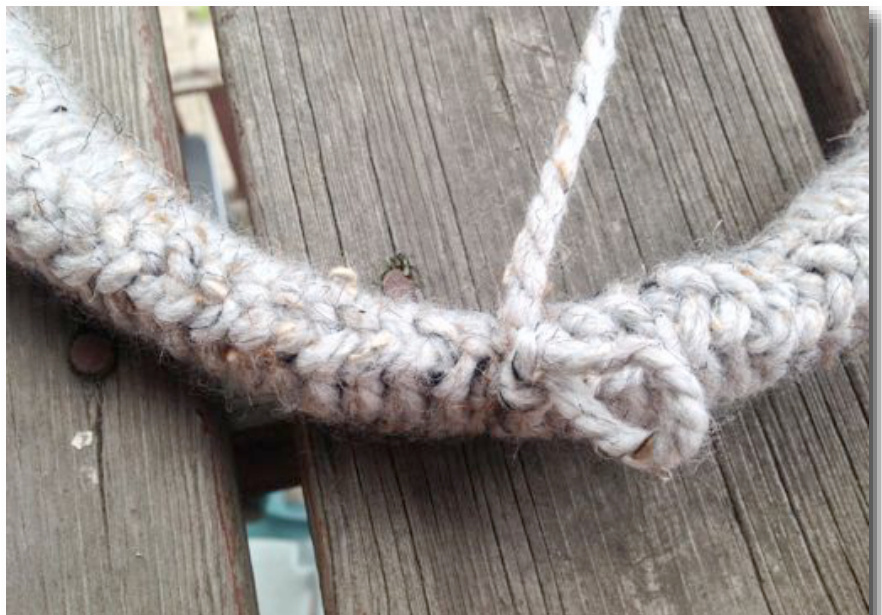
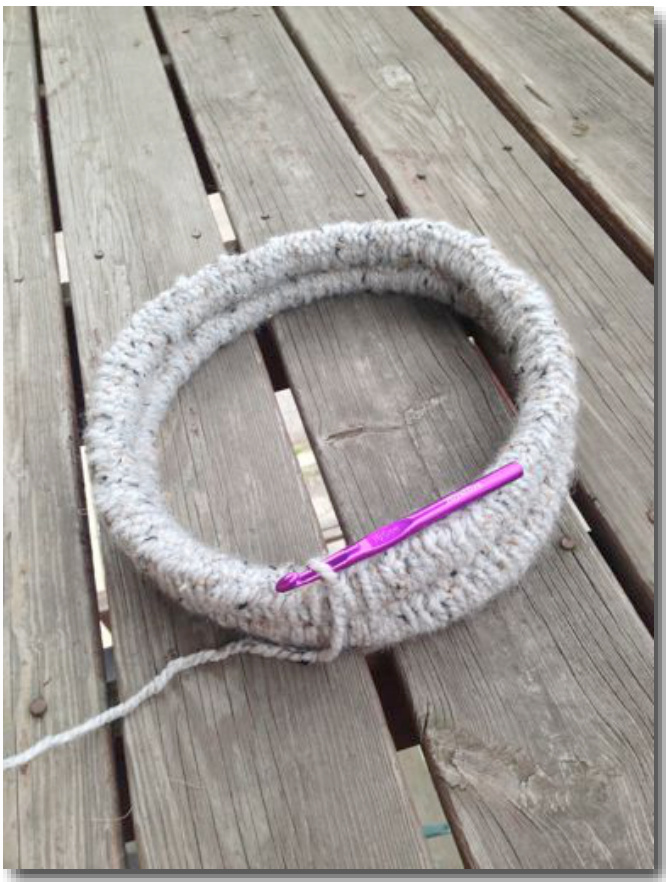
When you have gone all the way around, it will look like this. There will be a single loop of yarn remaining at the end of the round. We will use this to start the next round, attaching the second tape-wrapped loop of rope on top of the first.
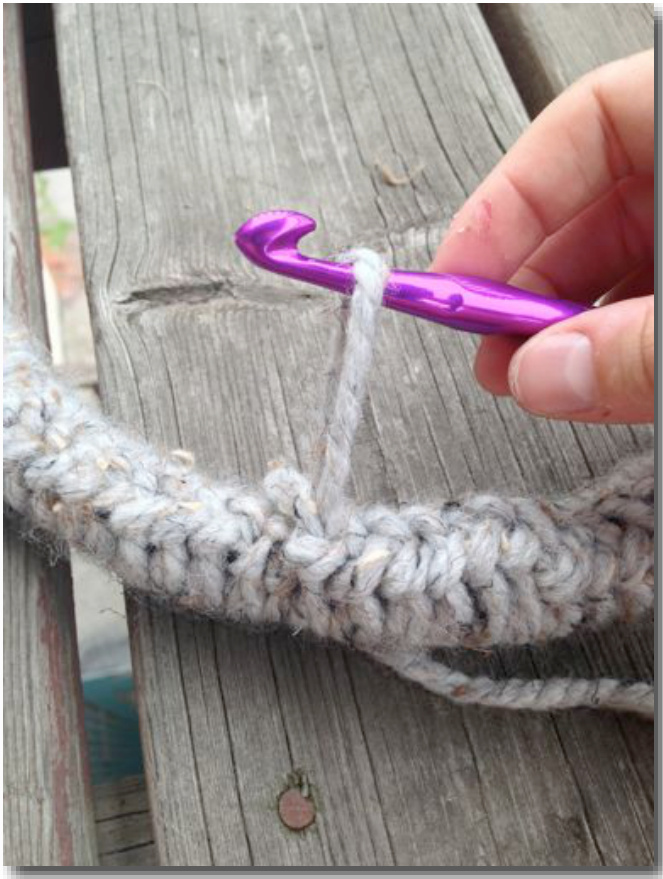
Place the crochet hook through this last loop, and stretch it out so that it is really big! Place the second loop of rope on top of the first one, in front of the yarn loop that is on the crochet hook. The crochet hook and the starting loop of yarn will be on the inside of the circle. The working yarn will always be hanging down on the inside of the circle, and it will remain in that position for the entire time. When we need it, we will push it between the two loops of rope and snag it with the crochet hook, but the ball will ALWAYS be on the inside of the circle See that there are a series of bumps on the top of the first loop of rope? We are going to use these to attach the second loop of rope to the first! Take the crochet hook, and hook it through the stitch top of the bottom loop. There are two sides of the stitch, one on the inside of the circle, and one on the outside. You want to hook it through the outside bump because it will give a neater finish, as well as being slightly easier.
Then, bring a loop of the working yarn in between the two loops of rope, from the inside of the circle to the outside of the circle. Wrap it around the crochet hook, and pull it through the stitch from the bottom loop. It will look like this. Pull it all the way to the top of the loop, and pull it through the last loop from the first round, so that there is only one stitch remaining on the crochet hook. Tug on the end of the working yarn to tighten the stitches around the loop.
We are going to alternate this "attaching" stitch, where we crochet through a stitch on the previous round, with a “"wrapping" stitch, that will not go through a stitch on the lower round, but will just cover the rope. It is actually identical to what we did on the first loop of rope, when we didn't have to worry about connecting the loops together.. With the crochet hook at the top of the second loop, as in the picture above, bring the working yarn from the inside of the circle, and wrap it around the crochet hook. Pull the yarn through the first loop on the hook. (See Steps 2-4 from the first loop. It's exactly the same!!)
Continue in this way until you have covered the entire circle. At this point, you may feel like you need a glass of wine. This is normal. What's more, this is really hard. You've earned it. Now, we are going to be getting back into familiar territory! It's back to the knitting needles, my friends. Grab your size 13 circulars!! Pick up 70 stitches around the top of the second loop. If you don't get exactly 70, pick up however many stitches you feel comfortable with, and you can increase or decrease on the next round so that you have 70. Place marker at the beginning of the round.
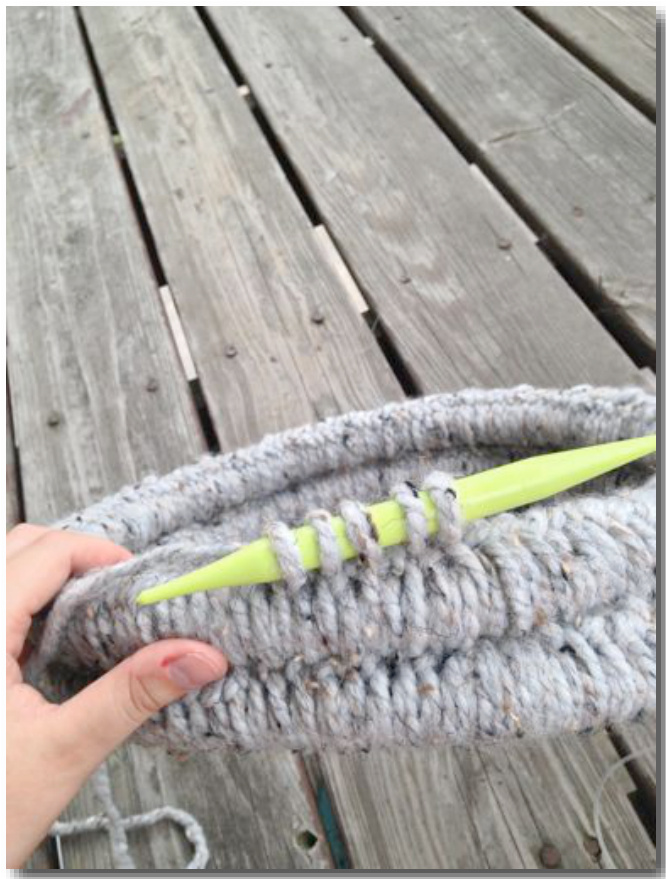
Knit one round. Work 11 rounds of Herringbone Stitch in the round, and bind off Now you want to attach the body triangles to the neck portion. Try on the neck portion of the cowl, and arrange the triangles where you want them to be. You want two legs of the triangle to overlap under your arm, where you will fasten them with a pin. Once you have arranged the triangles to your liking, pin them in place. Sew them onto the neck, and pin under your arm. Voila! You look just like Katniss Everdeen. Wear it with pride to the premiere of the film (or any other time you like!) Feel badass.
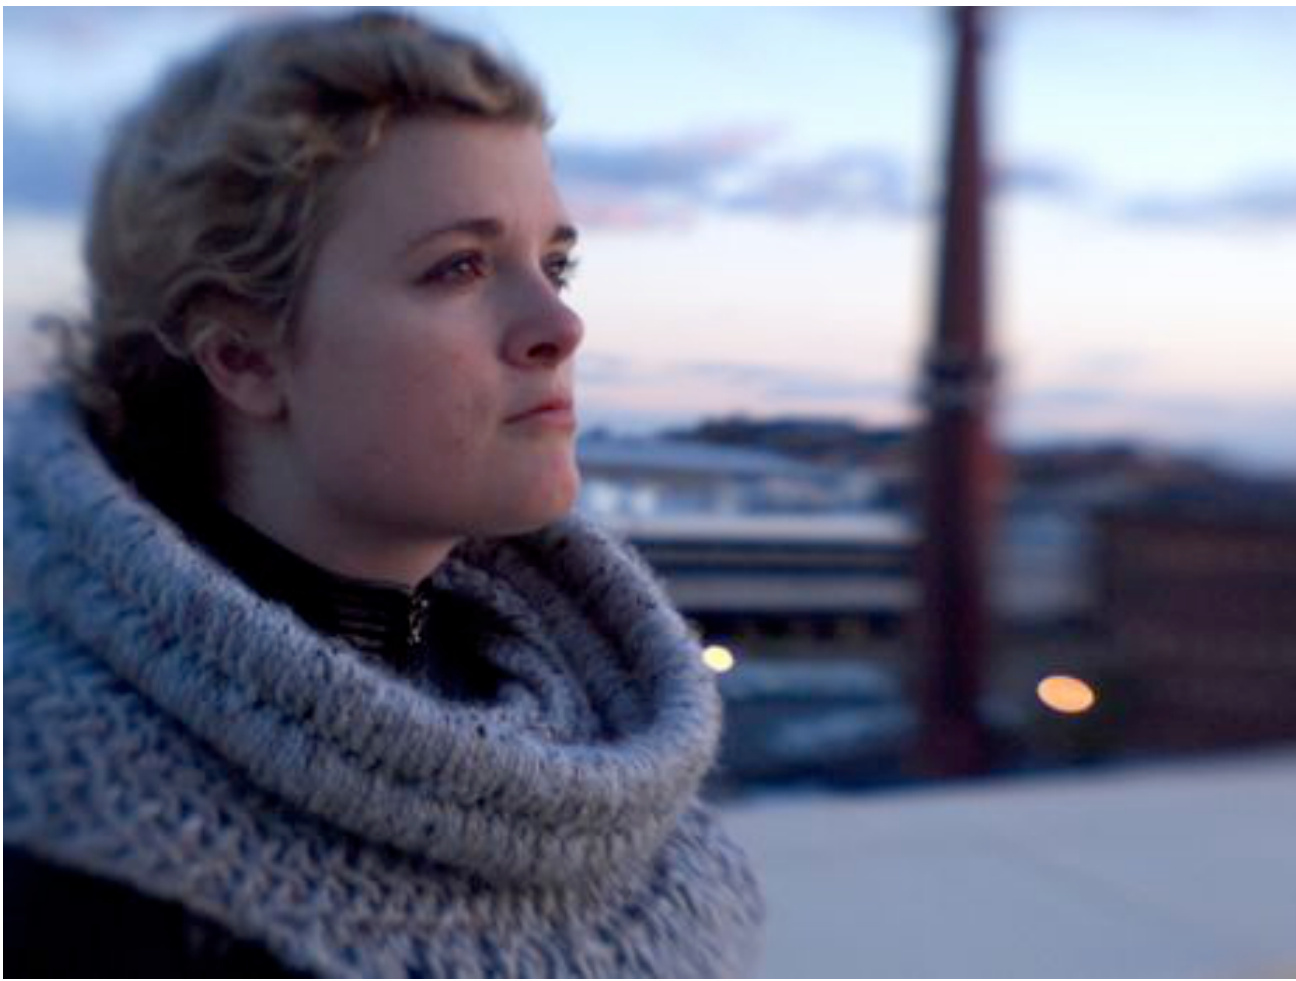
Photo credit goes to Greg Dracoulis, with my thanks for taking these phenomenal pictures. Thanks also to Rachel Folk, who gave me the idea to make this rather than coveting it from afar!


