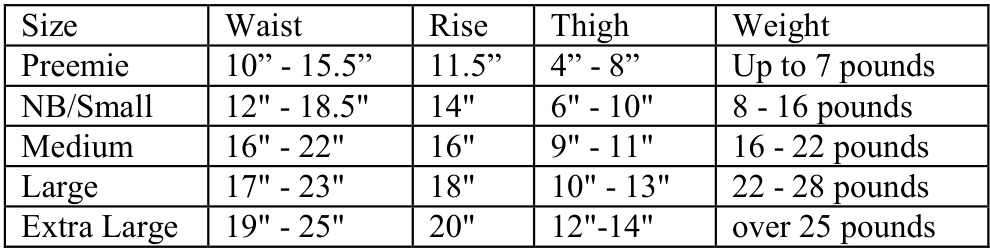
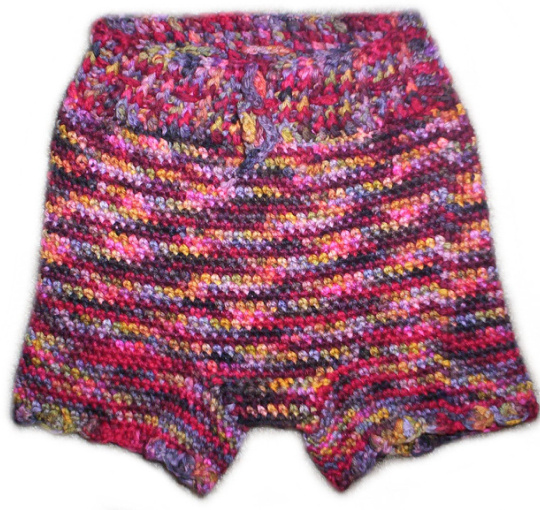
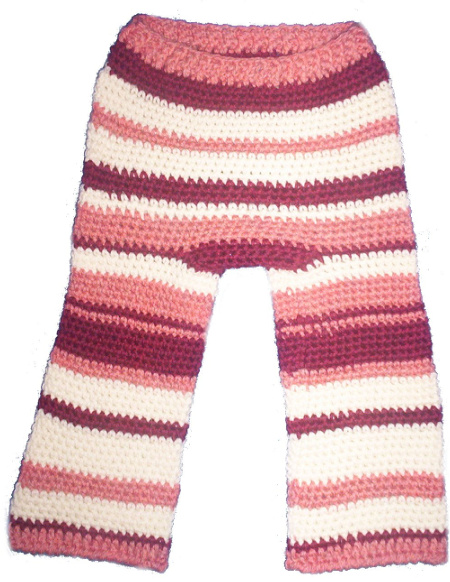
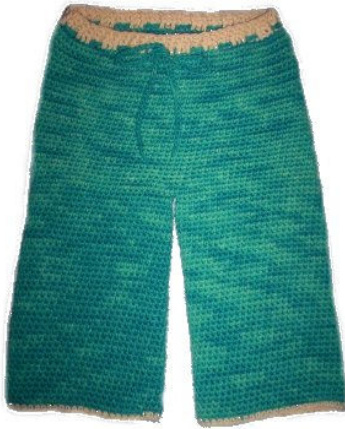
This pattern is for crocheted pull-on soaer shorts and pants The sizesrange frompreemieto x-large and there arealso directionsfor customizing thefit toyourbaby. It is crocheted inthe round with worstedweight,100%woolyarn andfeatures ribbinginthelegs and waistbandandadrastringwaist.Therearealsoinstructionsforfnising thesoakerwithout ribbinf that is prferredYoucanmake approximately 1-4 pairs of shorts or 1-3 pairs of pants with Fisherman's Wool, depending on the size you make.

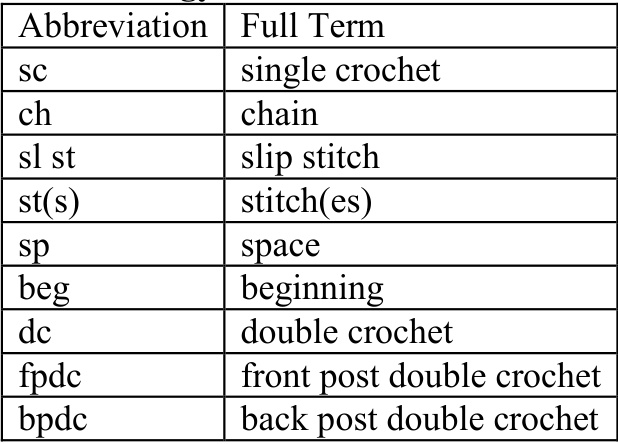
Dandelion Daydreamers Soaker Shorts and Pants Version D-2 January 6, 2007 This pattern was created using: - Lion Brand Fisherman's Wool - a worsted weight, $100\%$ wool yarn (depending on inseam. approx. 4 (5.7.8.9) oz) - G hook - H hook - I hook Please check your gauge before starting. Gauge: 8 rows and $8\;\mathbf{sc}=2^{\circ}$ (with H hook)
With H hook, ch. 60 (68, 80, 84, 92). Join with sl st in 1st ch - do not twist ch. Round 1: ch1, sc in the Ist ch (same as joining). Place marker on Ist sc made \* (sc in each ch around until you come to marked st. Remove marker, sc in that sc, place marker on sc just made). Round 2: Continue working from \* around until the soaker measures $4\,3/4^{"}\,(6",7",8",9")$ from the beg. Dividing for Legs: Round 1: With Ihook, sc in the next 29 (33, 39, 41, 45) sc (skip remaining sc on rnd) Round 2: now join by making a sc in the marked st - 1st leg opening made. Remove marker and sc in each sc around until you reach the desired length for your shorts/pants (remember to decrease the length of the legs bythe length of the optional cuffs you might want to add). Join with sl st in sc at the end of rnd. Finish off.
Opposite Leg:
Round 1: Stillusing the Ihook, join with sc in Ist skipped st on md 1 of Dividing for Legs.”'sc in the next 29 (33, 39, 41, 45) sc. Round 2: sc in the 1st sc made, sc in each sc around in the same manner as the first leg. Finish of.
Waistband:
With G hook and RS facing, join with sl st in any of the free loops of beg chain, ch 3. Round 1: dc in each free loop around. Join with sl st in third ch of ch 3. Round 2: ch 3, (fpdc in next dc, bpdc in next de) repeat around. Join with sl st in top of ch 3. Finish off. If you prefer to not have ribbing you can do round 1 of the waistband and finish off. Drawstring: With G hook, ch. 95 (120, 140, 155, 165) or to desired length. Finish off. Weave through round 1 of waistband.
Optional Leg Cuffs:
Ribbing:
With H hook, and RS facing, join with sl st in any st, ch 3.

Round 1: Dc in next sc and in each sc around. Join with sl st in top of ch 3. Round 2: ch 3, (fpdc in next dc, bpdc in next dc) repeat around. Join with sl st in top of ch 3. Finish off. Repeat for other leg.
Lace:
W iuI 1I nuoUn, auu Io 1avmng, JuI wiul si st ml ally st. Round 1: (ch 3. Skip next sc, sl st in next sc) repeat around. Join with sl st in $1^{\mathrm{st}}$ st Round 2: Sl st in $1^{\mathrm{{st}}}$ ch sp, (ch 3, sl st in next ch sp) repeat around. Repeat rnd 2 for the length desired. Join with sl st. Finish off.
Shells:
With H hook, and RS facing, join with sc to any sc. (Skip next sc, 3 dc in next sc, skip next sc, sc in next sc) repeat around. Join with sl st to $1^{\mathrm{{st}}}$ sC. Finish off.
Ridges:
With H hook, and RS facing, join with sc in the back loop of any sc. Round 1: Sc in the back loop of each sc around. Join with sl st in 1st sc. Round 2: Ch 1, turn. Sc in the back loop of each sc around. Join with sl st in the Ist sc. Repeat rnd 2 for the length desired. Finish off.
Plain:
With H hook, and RS facing, join with sl st in any st. Sl st in each sc around. Join to $1^{\mathrm{{st}}}$ sl st. Finish off.
Finishing:
Weave in any loose ends. There will be a very small crotch hole where the two legs meet. You can leave it be, but ifit bothers you turn the soaker inside out and with a G hook join with sl st one st to the right of the hole. Make 2 sl sts in the hole and 1 sl st just to the left of the hole. Finish off. Weave in any ends.
Customizing Options:
If you would like to customize the rise to your baby, please see the instructions below. If you would like any help with this, feel free to contact me at patti@dandeliondreamers.com.
To insert short rows:
You will need two balls of yarn: one for what you are already doing, and one to add the short rows. All I do is use the other end of the ball I'm already using. Just be careful not to get it tangled with the end you are using for the body. Decide which part of the soaker is the back half (the booty) ;) Put stitch markers on each side of that so you can put the short row in between the stitch markers. When you come to a row where you want to insert a short row, I usually place them as follows: (this is just counting the body - not counting the waistband since I add that last) peemie: at $2"$ and 3" nb/small: at 3", 4", and 5" med - x-large: at 3", 4", 5", and 6" For each short row added, it adds about a $1/4"$ to the rise. So make sure you add that to your total rise when measuring and figuring out how long you want the rise to be. So now that you've figured out where to put them, you drop the yarn you were working with for the body, and join your new yarn with a sc in the first st where you'd like the short row to be and just sc across until you come to the end of where you want it to be (between those stitch
markers). Now, don't remove those stitch markers. (I'll tell you why in a bit.) Then finish off. Now, you go back to the yarn you are using in the body and continue crocheting around, going into the new stitches you just made. Now, the reason you leave the stitch markers in is this: when working in the round with crochet, each stitch is slightly to the left than the one below it - so the beginning of the round is constantly moving a bit. If you were to keep moving your stitch markers up to the stitch above it, it would end up spiraling a bit further to the left than where you actually started your short row. So leave them where they are so when you get to another place where you'd like to add a short row, you just go directly up from where your stitch markers are placed and put them there. For a longer rise: Increase the amount of inches you crochet in round 2 of the body. For every inch you want to increase the rise, add $1/2"$ For a shorter rise: Decrease the amount of inches you crochet in round 2 of the body. For every inch you want to decrease the rise, subtract 1/2". Crotch Gusset: For those that would like to add more of a crotch to the pants: When I get to the part where I'd like to start the crotch I lay the pants down flat in front of me with the front facing me. Then I determine how wide I'd like the crotch to be at the top (the widest part) - I usually like this to be $2"-3"$ . So that's usually 8-12 sts. So let's say I want it to be $3"$ , that's 12 sts for the front of the crotch and 12 for the back - 24 sts total. So I subtract 24 sts from the total amount of stitches of the body. Say the body has 72 sts. That would be 48. If I divide that in half, that's 24 sts. I need 24 sts on either side of the crotch for the crotch to be directly in the middle. So I use stitch markers and try to guess where I think the middle 12 sts for each side should go, then I count the stitches on either side to make sure that's correct. I usually am, but sometimes need to move the stitch markers over a few stitches to make sure. So I join w/ a sc where I'm starting the crotch in the front and sc evenly across. Then, I ch 1, turn, and sc dec, sc across to the last 2 sc, and sc dec again. Ch 1, turn, work one row even sc, then do another decrease row. Repeat this until the crotch is about 1/2"-1" wide. I usually like the flap tobe about $1\ 1/2"$ long or so. Then I finish off and do the back flap the same way, but instead of finishing off that flap, turn your work inside out and sl st the flaps together. Then you'll turn your work right side out again, pick up your original yarn from the body and start the legs, crocheting into the sides of the crotch rows. Remember to shorten the length of the body of the pants because the crotch will add to the rise. If you need any help with this, please email me at patti $@$ dandeliondreamers.com and I would be happy to walk you through it or explain it to you in a different way.
Copyright $\copyright$ 2004 by Patti Gonsalves.


