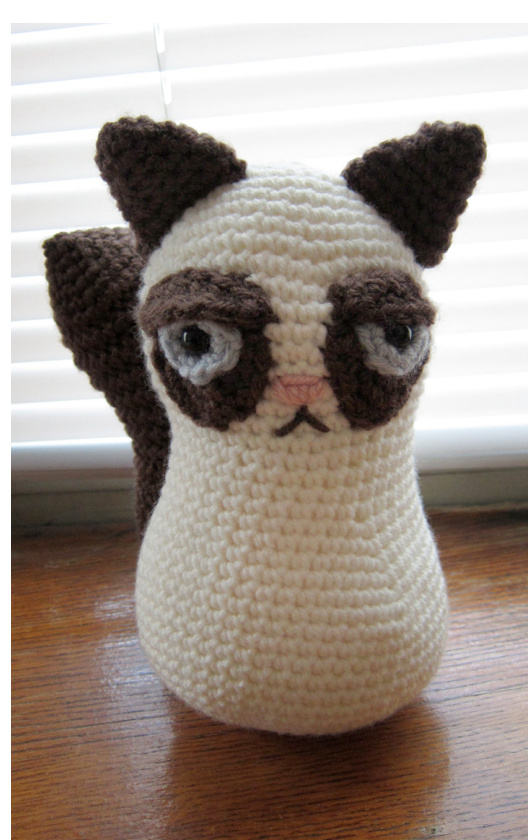
Grumpy Cat

Visit our blog CrochetIsForLovers.com for more project ideas and patterns!
Suggested Yarn:
Medium 4 such as Loops & ThreadsTM Impeccable TM or Vanna's Choice? Need white or off white, brown, and a little pink for nose and light blue for eyes
Suggested Hook:
US Size H/8 5.0 mm UK Size 6
Gauge:
8 st x 11 rows = 2"x 2.5" Finished size: 8.5" (sitting)
Abbreviations:
ch= chain sl = slip stitch sc= single crochet inc= increase - two in same st dec= decrease - two stitches together dc = double crochet
Other Material:
- Yarn needle -Bobby pins - Fiberfill stuffing - Stitch markers (we used bobby pins) - 6mm safety eyes - (optional) small bag of sand to weight the body and help doll sit up
PATTERN
1) Head and Body
Rnd 1: Work 6 sc into an adjustable magic ring, tighten ring (6 st) Rnd 2: inc around (12 st) Rnd 3: [sc, inc] repeat 6 times (18 st) Rnd 4: [2 sc, inc] repeat 6 times (24 st) Rnd 5: [7 sc, inc] repeat 3 times (27 st) Rnd 6: [8 sc, inc] repeat 3 times (30 st) Rnd 7: [9 sc, inc] repeat 3 times (33 st) Rnd 8: [10 sc, inc] repeat 3 times (36 st) Rnd 9: [5 sc, inc] repeat 6 times (42 st) Rnd 10: [6 sc, inc] repeat 6 times (48 st) Rnd 11-14: sc around (48 st) Rnd 15: [14 sc, dec] repeat 3 times (45) Rnd 16: [13 sc, dec] repeat 3 times (42) Rnd 17: [12 sc, dec] repeat 3 times (39) Rnd 18: [11 sc, dec] repeat 3 times (36) Rnd 19-22: sc around (36 st) You can start stuffing the head. Rnd 23: [11 sc, inc] repeat 3 times (39) Rnd 24: [12 sc, inc] repeat 3 times (42) Rnd 25: [13 sc, inc] repeat 3 times (45) Rnd 26: [14 sc, inc] repeat 3 times (48) Rnd 27: [15 sc, inc] repeat 3 times (51) Rnd 28: [16 sc, inc] repeat 3 times (54) Rnd 29-36: sc around (54) Rnd 37: [7 sc, dec] repeat 6 times (48) Rnd 38: [6 sc, dec] repeat 6 times (42) Rnd 39: [5 sc, dec] repeat 6 times (36) Rnd 40: [4 sc, dec] repeat 6 times (30) Finish stuffing. (Optional: you can weight the doll with a bag of sand to help it stand up) Rnd 41: [3 sc, dec] repeat 6 times (24) Rnd 42: [2 sc, dec] repeat 6 times (18) Rnd 43: [1 sc, dec] repeat 6 times (12) Rnd 44: dec around (6) Fasten off, and weave in tail. Finish off with a yarn needle. Weave tail in to the last round of stitches andsecure.
2) Ears (make 2)
Rnd 1: Work 4 sc into an adjustable magic ring, tighten ring (4 sts) Rnd 2: inc around (8 st) Rnd 3: sc around (8 st) Rnd 4: [3sc, inc] repeat 2 times (10 st) Rnd 5: [4sc, inc] repeat 2 times (12 st) Rnd 6: [5sc, inc] repeat 2 times (14 st) Rnd 7: [6sc, inc] repeat 2 times (16 st) Fasten off and leave a long tail Sew onto top of head.
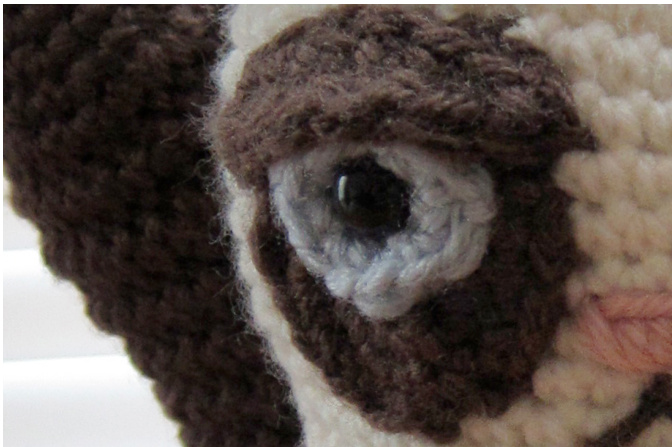
3) Eyes (make 2 of each)
Blue circle: Rnd 1: Work 6 sc into an adjustable magic ring, tighten ring (6 sts) Fasten off and leave long tail Brown patch: Rnd 1: Work 6 sc into an adjustable magic ring, tighten ring (6 st) Rnd 2: inc around (12 st) Rnd 3: \*3 sc, (sc, dc,sc) in the same st\* repeat between \* 3 times sl and fasten off Brown eye lid: Rnd 1: 6 ch Rnd 2: turn sc into second st from hook,3 sc, make 3 sc into last st and turn to the other side of the ch, 2 dc, sc, 2sc in the next st (this is the first ch from Rnd 1) Eyelid instructions. Sample eye lid is in grey for better view of stitches.
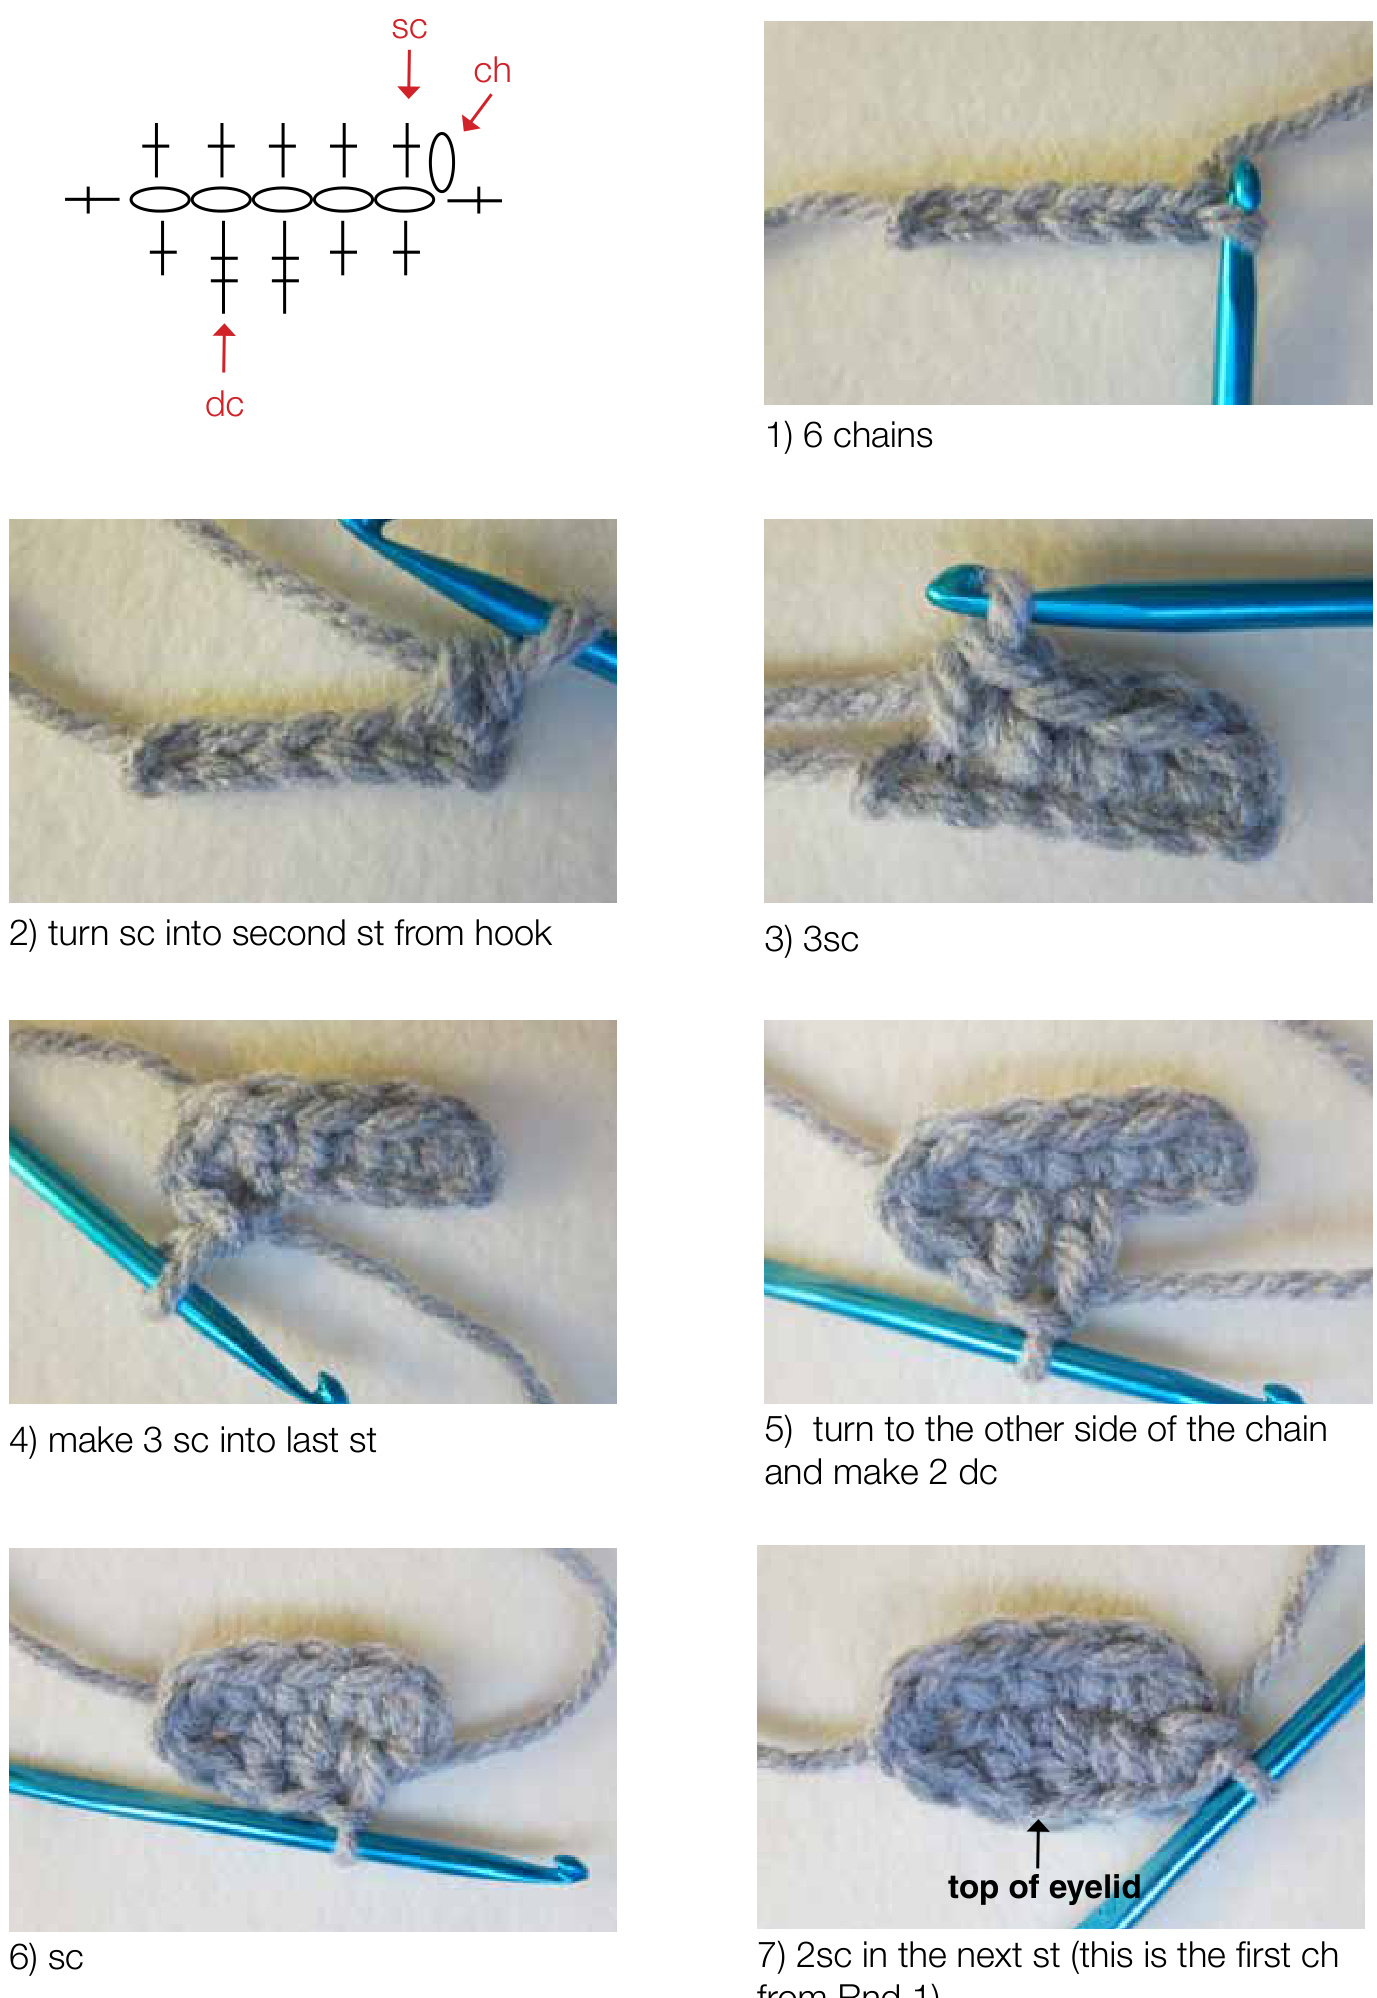
Eyes (continued)
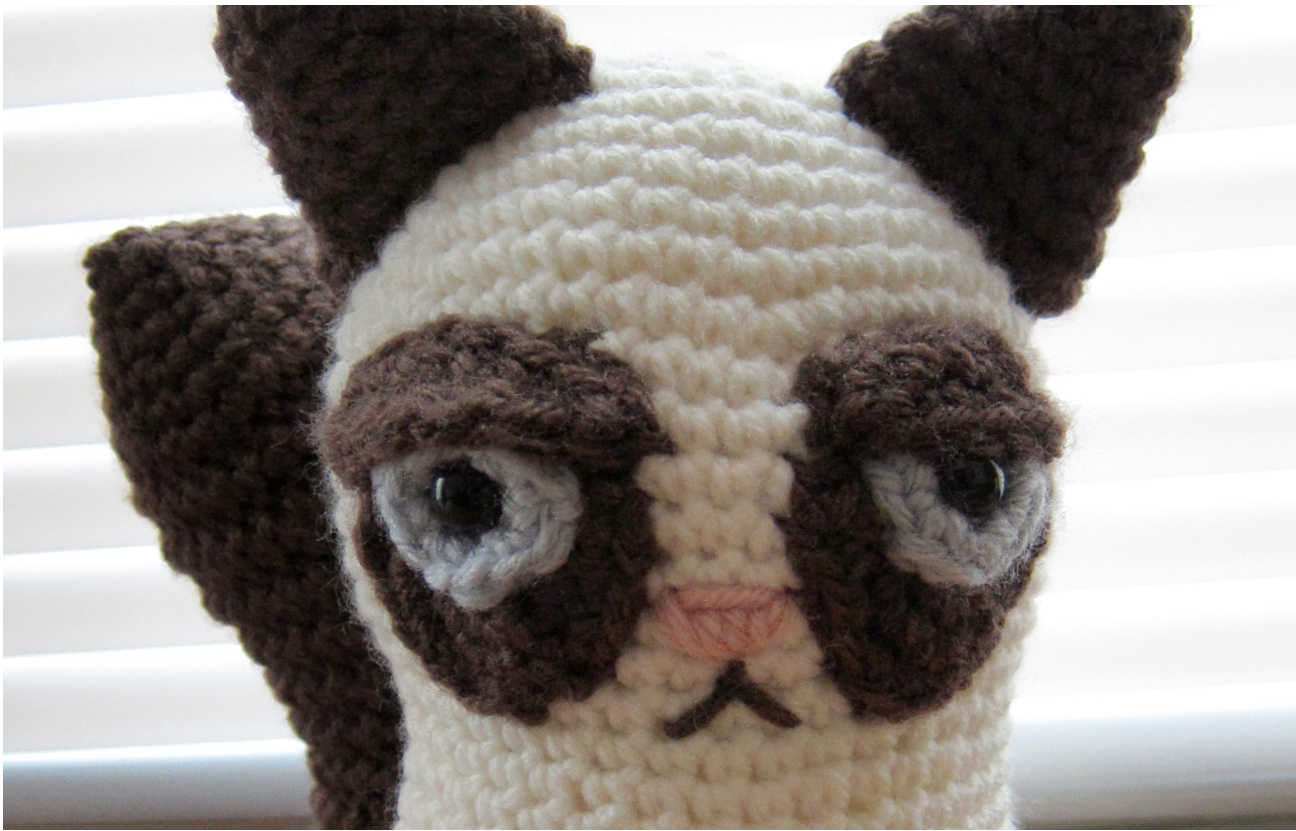
Before sewing eye parts on to face, position the blue circle on top of the brown patch and attach the safety eye. Make sure the positioning of the three parts look like this picture. Your brown patch and blue cirlcle will be stuck together by the saftly eye. Optionally, you may also sew them togther if you want them to be more secure. Sew this on to the face first. Once the brown patch, blue eye and safety eye has been sewn in place, sew the brown eyelid on top of the other eye parts as shown. You will only need to make stitches across the top of the eye lid. You may need to stretch and mold the eye lid a little to make it look right.
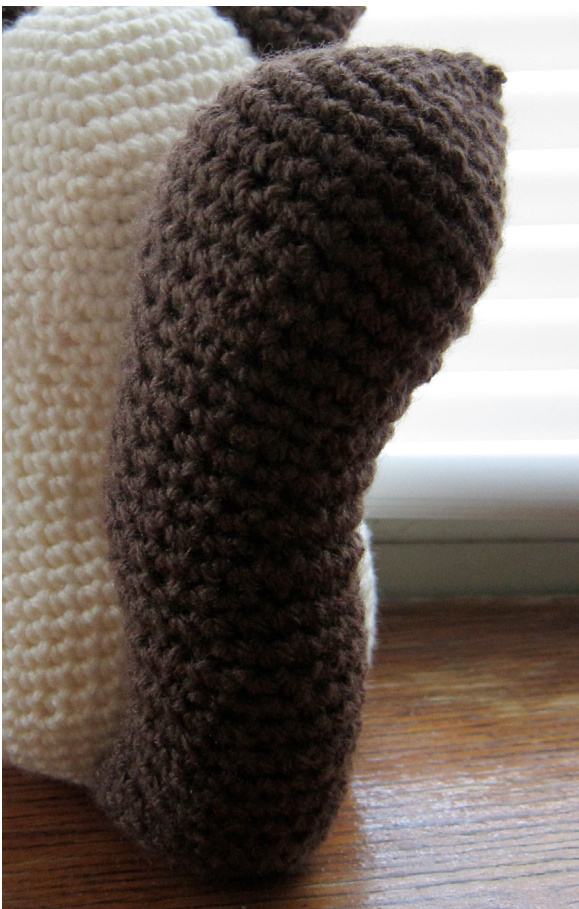
4) Tail
\*Note: To make the tail slightly zig-zag we make a single crochet over a slip stitch. For example, the first 10 sc of Rnd 9 is made over the sl of Rnd 8 so that the stitches are actually made in the same first 10 stitches from Rnd 7. Rnd 1: Work 4 sc into an adjustable magic ring, tighten ring (4 sts) Rnd 2: inc around (8 st) Rnd 3: [sc, inc] repeat 4 times (12 st) Rnd 4: [2 sc, inc] repeat 4 times (16 st) Rnd 5: [3 sc, inc] repeat 4 times (20 st) Rnd 6: [4 sc, inc] repeat 4 times (24 st) Rnd 7: [3 sc, inc] repeat 6 times (30 st) Rnd 8: 10 sl, 20 sc (30 st) Rnd 9: \*10 sc over sl in Rnd 8, 20 sc (30 st) Rnd 10: 10 sl, 20 sc (30 st) Rnd 11: \*10 sc over sl in Rnd 10, 20 sc (30 st) Rnd 12: 10 sl, 20 sc (30 st) Rnd 13: \*10 sc 0ver sl in Rnd 12, 20 sc (30 st) Rnd 14: 10 sl, [3 sc, dec] repeat 4 times (26 st) Rnd 15: \*10 st, [2 sc, dec] repeat 4 times (22 st) Rnd 16: 10 sl, 12 sc (22 st) Rnd 17: \*10 sc over sl in Rnd 16, 12 sc (22 st) Rnd 18: 10 sl, 12 sc (22 st) Rnd 19: \*10 sc over sl in Rnd 18, 12 sc (22 st) Rnd 20: 10 sl, 12 sc (22 st) Begin to stuff the end of the tail Rnd 21: \*10 sc over sl in Rnd 20, 12 sc (22 st) Rnd 22: 10 sl, 12 sc (22 st) Rnd 23: \*10 sc 0ver sl in Rnd 22, 12 sc (22 st) Rnd 24: 10 sl, 12 sc (22 st) Rnd 25: 12 sc, 10 sl (22st) Rnd 26: 12 sc, \*10 sc 0ver sl in Rnd 25 (22st) Rnd 27: 12 sc, 10 sl (22st) Rnd 28: 12 sc, \*10 sc 0ver sl in Rnd 27 (22st) Rnd 29: 12 sc, 10 sl (22st) Rnd 30: 12 sc, \*10 sc 0ver sl in Rnd 29 (22st) Rnd 31: 12 sc, 10 sl (22st) Rnd 32: 12 sc, \*10 sc 0ver sl in Rnd 31 (22st) Rnd 33: 12 sc, 10 sl (22st) Rnd 34: 12 sc, \*10 sc 0ver sl in Rnd 33 (22st) Rnd 35: 12 sc, 10 sl (22st) Rnd 36: 12 sc, \*10 sc 0ver sl in Rnd 35 (22st) Rnd 37-38: sc (22 st) Rnd 39: [9sc, dec] repeat 2 times (20 st) Rnd 40: [3 sc, dec] repeat 4 times Fasten off and leave a long tail. Finish stuffing the tail and mold tail into the cur This might take a bit of squeezing and stretchir onto bottom of the body.
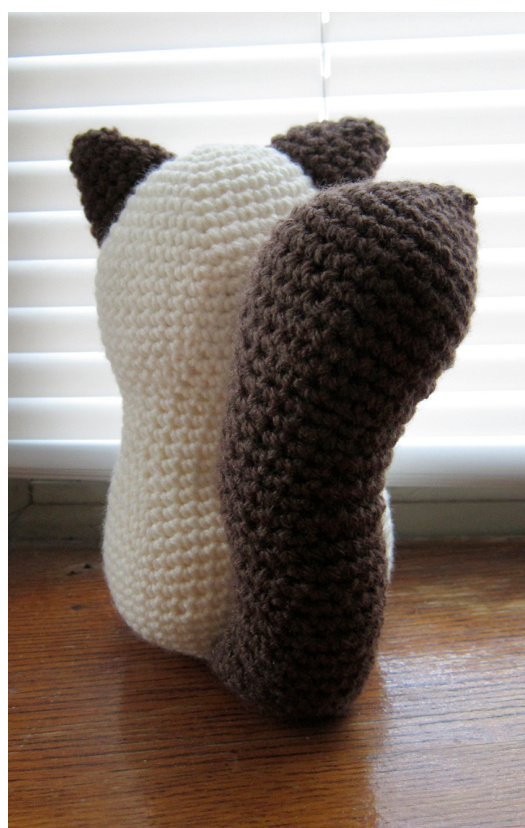
Tail
Mold the tail to form the slightly curvy shape
Face
Finish off the face by stitching the nose and mouth.