Everybody's Squooshy Mitts by Sara Galley
Fingerless mitts, constructed top-down with a gusseted thumb. A very flexible pattern which fits almost everybody.
Sizes
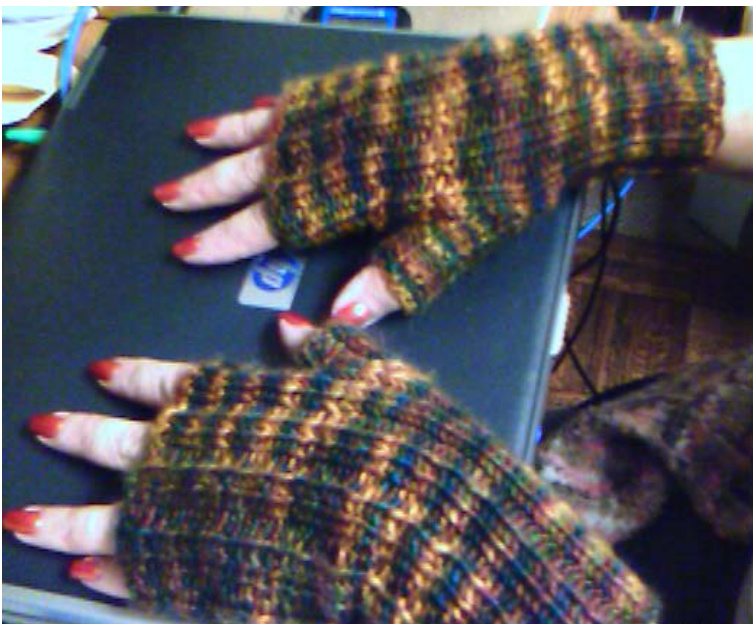
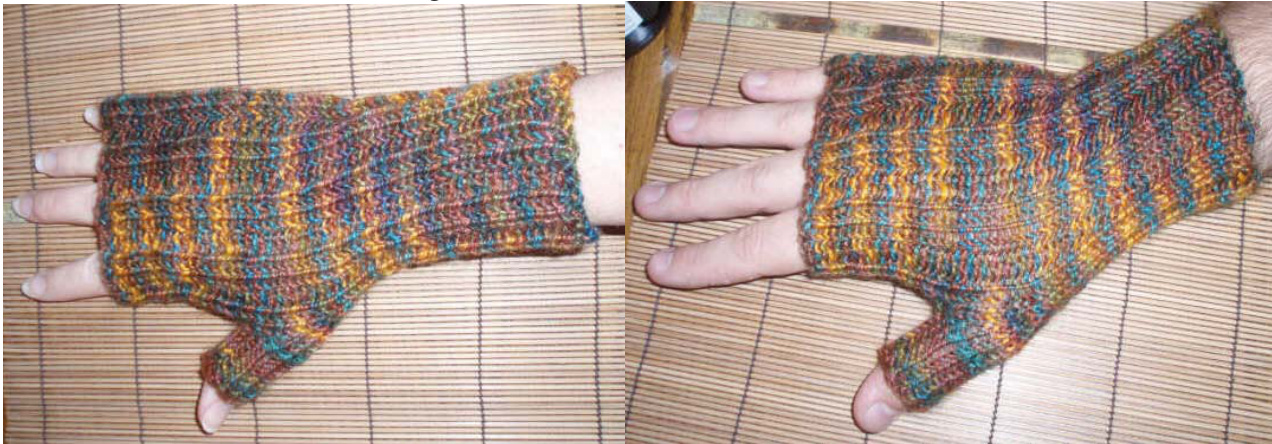
Medium[XL] - one size fits almost everybody, but I have included a larger size that provides more coverage for men's large and extra-large hands. The picture above shows the Medium mitts on women's large hands; the pictures below show the same mitt on women's small and men's large hands. Size XL is not shown.
Materials
Mountain Colors Mountain Goat (50% mohair, 50% wool) in color Tamarack Set of five US 7 (4.5mm) DPNs (or size required to obtain gauge) Waste yarn (to hold the thumb stitches while the finger section is worked) Two large safety pins (to serve as small stitch holders when the thumb is joined) Stitch markers (2) Tapestry needle
Gauge
5 st/in in stockinette
Notes
Other worsted-weight yarns may be substituted; wool or wool blends are recommended for the springy character of these yarns. Medium mitts require approximately 125 yards of yarn for the length shown. Although directions are given for 5 DPNs, these mitts may be knitted on two circulars, or one long circular using the “magic loop” method; stitches should be placed so that the first needle contains those stitches designated for Needle 1 and Needle 2, and the second contains those designated for Needle 3 and Needle 4. "Work the stitches as they appear′ means to knit those stitches which appear to be knits, and purl those stitches which appear to be purls. If this instruction is confusing to you, a more detailed explanation appears in the following blog entry: http://explaiknit.typepad.com/let me_explaiknit/2006/03/now_ you_see_it .html
Directions
When casting on for these mitts, a very stretchy method is recommended so that the top edge does not bind. One such method is to use the long-tail cast-on, while carefully maintaining spacing between each stitch; a space of 14" between stitches is recommended for this gauge. If you have difficulty maintaining this spacing, cut a drinking straw into 14"′ sections, and slide a section on your needle between each stitch and its neighbor, then remove the straw sections as you work the first round. Thumb: Using 3[4] needles to hold the stitches, cast on 12[16] stitches with 4 stitches per needle, and join the round. Work in 2x2 ribbing (knit 2, purl 2, repeat to end) for 10[12] rounds (or to desired length). 1, leaving a 12” tail to be used for grafting, and place all stitches on waste yar Fingers: Using 4 needles to hold the stitches, cast on 36[40] stitches, with 12 stitches on Needle 1[Needles 1 and 4] and 8 stitches on the other needles; join the round. Work in 2x2 ribbing for 20[25] rounds (or to desired length). Handandcuff: Place the last two stitches on Needle 2, which will be purl stitches, on one of the large safety pins. Place the first two[last two] stitches of the thumb, which will be knit[purl] stitches, on the other large safety pin. Place the next 6[8] stitches of the thumb on the left end of Needle 2; place the remaining stitches of the thumb on the right end of Needle 3. Your needles should now hold the following: Needle 1: 12 finger stitches Needle 2: 6 finger stitches followed by 6[8] thumb stitches; the group of thumb stitches begins with a purl[knit]. Needle 3: 4[6] thumb stitches followed by 8 finger stitches; the group of thumb stitches ends with a purl[knit]. Needle 4: 8[12] finger stitches. Joining round: Needle I: Work the stitches as they appear. Needle 2: K2, P2, place marker, k1, SSK, work the remaining stitches as they appear. Needle 3: Work the first 3[5] stitches as they appear, k2tog, k1, place marker, work the remaining stitches as they appear. Needle 4: Work the stitches as they appear. Needle 1: Work the stitches as they appear. Needle 2: Work stitches as they appear to the marker, k1, SSK, work the remaining stitches as they appear. Veedle 3: Work stitches as they appear until 3 stitches remain before the marke k2tog, k1, work the remaining stitches as they appear. Needle 4: Work the stitches as they appear. Continue in this manner, working 2 plain rounds followed by one decrease round, until Needle 2 has 4 stitches after the marker, and Needle 3 has 2 before the marker. You will now have 36[40] stitches, the same number you began the hand with. Work in 2x2 ribbing to the desired length; Medium mitts shown have 30 rounds following the last decrease round, while 35 to 40 rounds are desirable for the XL size. Bind off using a very stretchy method. One such method is Elizabeth Zimmerman's sewn bind off. To bind off with this method, break the yarn leaving at least a 24” tail, and thread it onto a tapestry needle. Take your tapestry needle purlwise through the first two stitches, and then take it knitwise through the first stitch, and remove that stitch from the needle. Repeat this on the following stitches until all stitches have been bound off, pulling the yarn so it is snug but not tight. Weave in this end. Return to the thumb join and place the reserved stitches onto two needles. Hold these needles so that the tail remaining from the thumb stitches is on the right. Thread the tail onto a tapestry needle. Run the needle through the stitches surrounding the gap on the right side of the thumb join, and pull this gap closed as with a drawstring. Graft the two hand stitches to the two thumb stitches; three-needle bind-off may be substituted if you do not mind the resulting small seam. Run the needle through the stitches surrounding the gap on the left side of the thumb join, and pull this gap closed as you did the other. Weave in this end. Weave in the ends from the cast-on edges of the fingers and thumb. Make a second mitt in exactly the same manner.


